ドップラー効果にて動体検知が出来るモジュールを購入したので、それらを使って呼吸やら鼓動を検知してみた。
用意したもの
-
IPM-165-A01(ドップラーモジュール)
- 出力はマイクロ波で24GHz、ミリ単位での動きが検知出来るらしい
- Raspberry Pi4
-
MCP3425(ADコンバータ)
- ドップラーモジュールはアナログ出力で返ってくるのでデジタルに変換する
概要
このドップラーモジュールは、入力された電圧をモジュールの反応にて変化させ出力、入力値と出力値の差動を計測する事で動態を検知する。
基本的な構成は以下を参考にした。
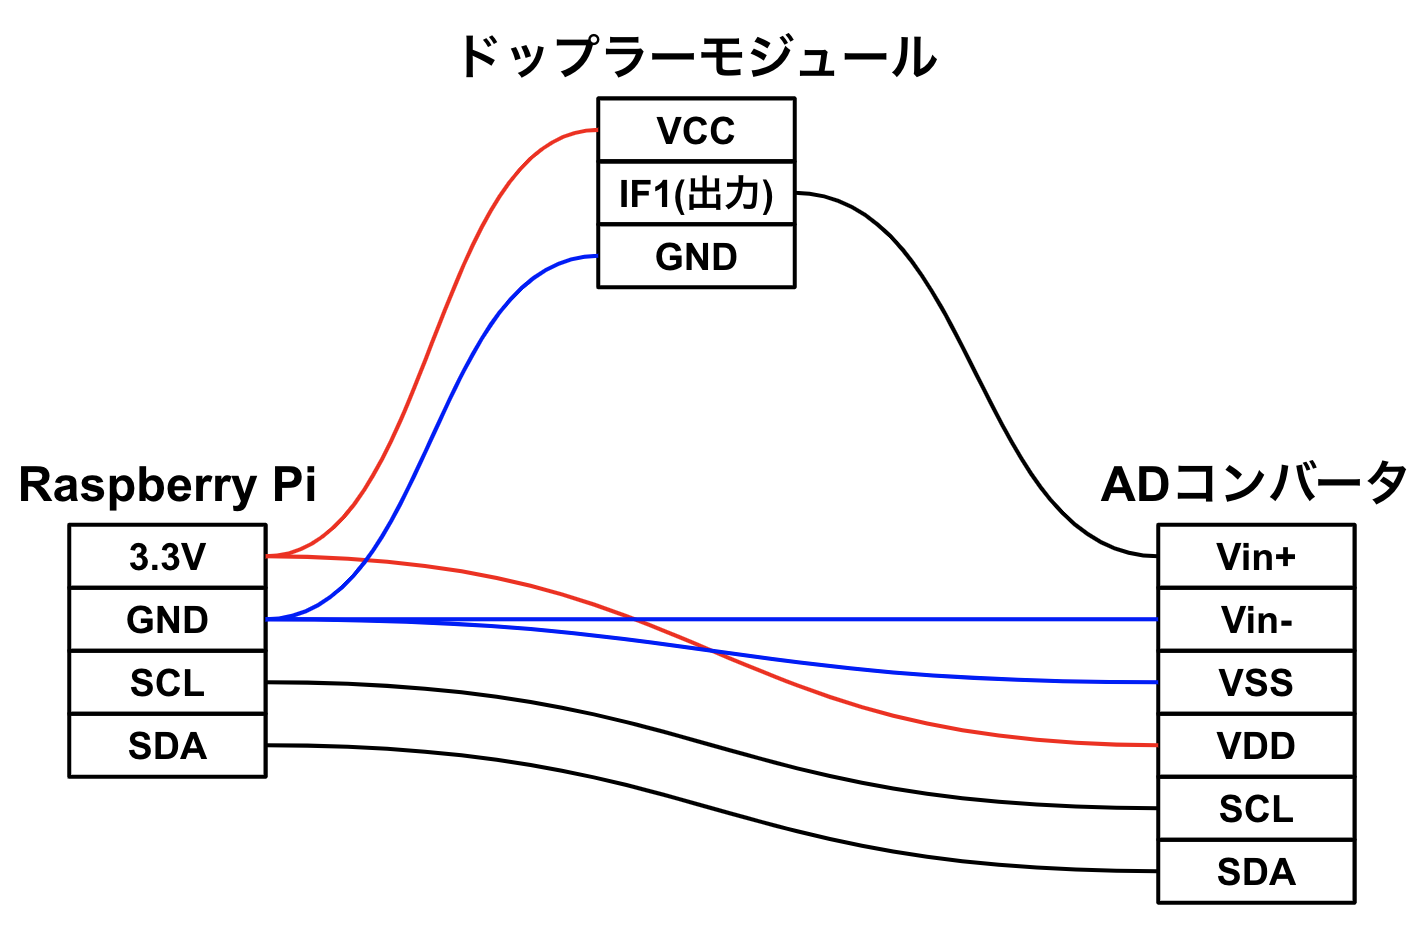
接続図
計測
計測に関しては前述のリンク先のものをほぼそのまま使用。
重要な点として、電圧観測にtime.sleep()を噛ませる事が挙げられる。これはsleepを噛ませないと検知が過敏すぎて判断しにくい結果が出てしまう為。
import smbus
import time
import pandas as pd
i2c = smbus.SMBus(1)

addr=0x68
Vref=3.3
config =0b10011000
i2c.write_byte(addr, config)
def swap16(x):
        return (((x << 8) & 0xFF00) |
                ((x >> 8) & 0x00FF))
def sign16(x):
        return ( -(x & 0b1000000000000000) |
                  (x & 0b0111111111111111) )
count = 0
li = []
try:
    while True:
            data =i2c.read_word_data(addr,config)
            raw = swap16(int(hex(data),16))
            raw_s = sign16(int(hex(raw),16))
            volts = round((Vref * raw_s / 32767),4)
            print(volts)

            li.append([count,volts])
            time.sleep(0.01)
            count += 1
except KeyboardInterrupt:
    df = pd.DataFrame(data=li,columns=["id","value"])
    df.to_csv("csv_name")
    print("fin")
ここでは最終的に記録された電圧をcsvにして出力している。
本当はリアルタイムにグラフ出力をしたかったが、処理能力的に厳しかったので別でやっていく。
出力の確認
ここでのポイントは、FuncAnimationで全フレームを律儀に描画しない事。
何フレーム毎に描画するなどスキップするフレームを設定し、そのフレーム数に達する毎に描画させる事で大量データでもアニメーション描画が可能となる。
import pandas as pd
import matplotlib.pyplot as plt
from matplotlib.animation import FuncAnimation
import time

def graph_anim(csv_name,margin,skip_frame,interv):
    df = pd.read_csv(csv_name)
    print(df)
    fig, ax = plt.subplots(1, 1)

    x = list(df["id"])
    y = list(df["value"])

    xll = [-1,len(x)+1]
    yll = [min(y)-margin,max(y)+margin] # 描画に際して若干マージンを設けておく

    ax.set_xlim(xll)
    ax.set_ylim(yll)
    xyl = {"x":[],"y":[]}

    def update(frame):
        if frame%skip_frame == 0: # 10フレーム毎に描画し
            start_time = time.perf_counter()
            ax.cla() # set_limや何やらも消えるので再定義
            ax.set_xlim(xll)
            ax.set_ylim(yll)
            xyl["x"].append(x[frame])
            xyl["y"].append(y[frame])
            ax.plot(xyl["x"], xyl["y"])
            endi = str(time.perf_counter() - start_time)
            print('\rtime= %s' % endi, end='')
        elif not frame == len(x)-1: # それ以外のフレームではデータのみを追記する
            xyl["x"].append(x[frame])
            xyl["y"].append(y[frame])
        else:
            plt.close()

    anim = FuncAnimation(fig, update, frames=range(len(x)), interval=interv)
    plt.show()

graph_anim("csv_name",0.01,10,1)

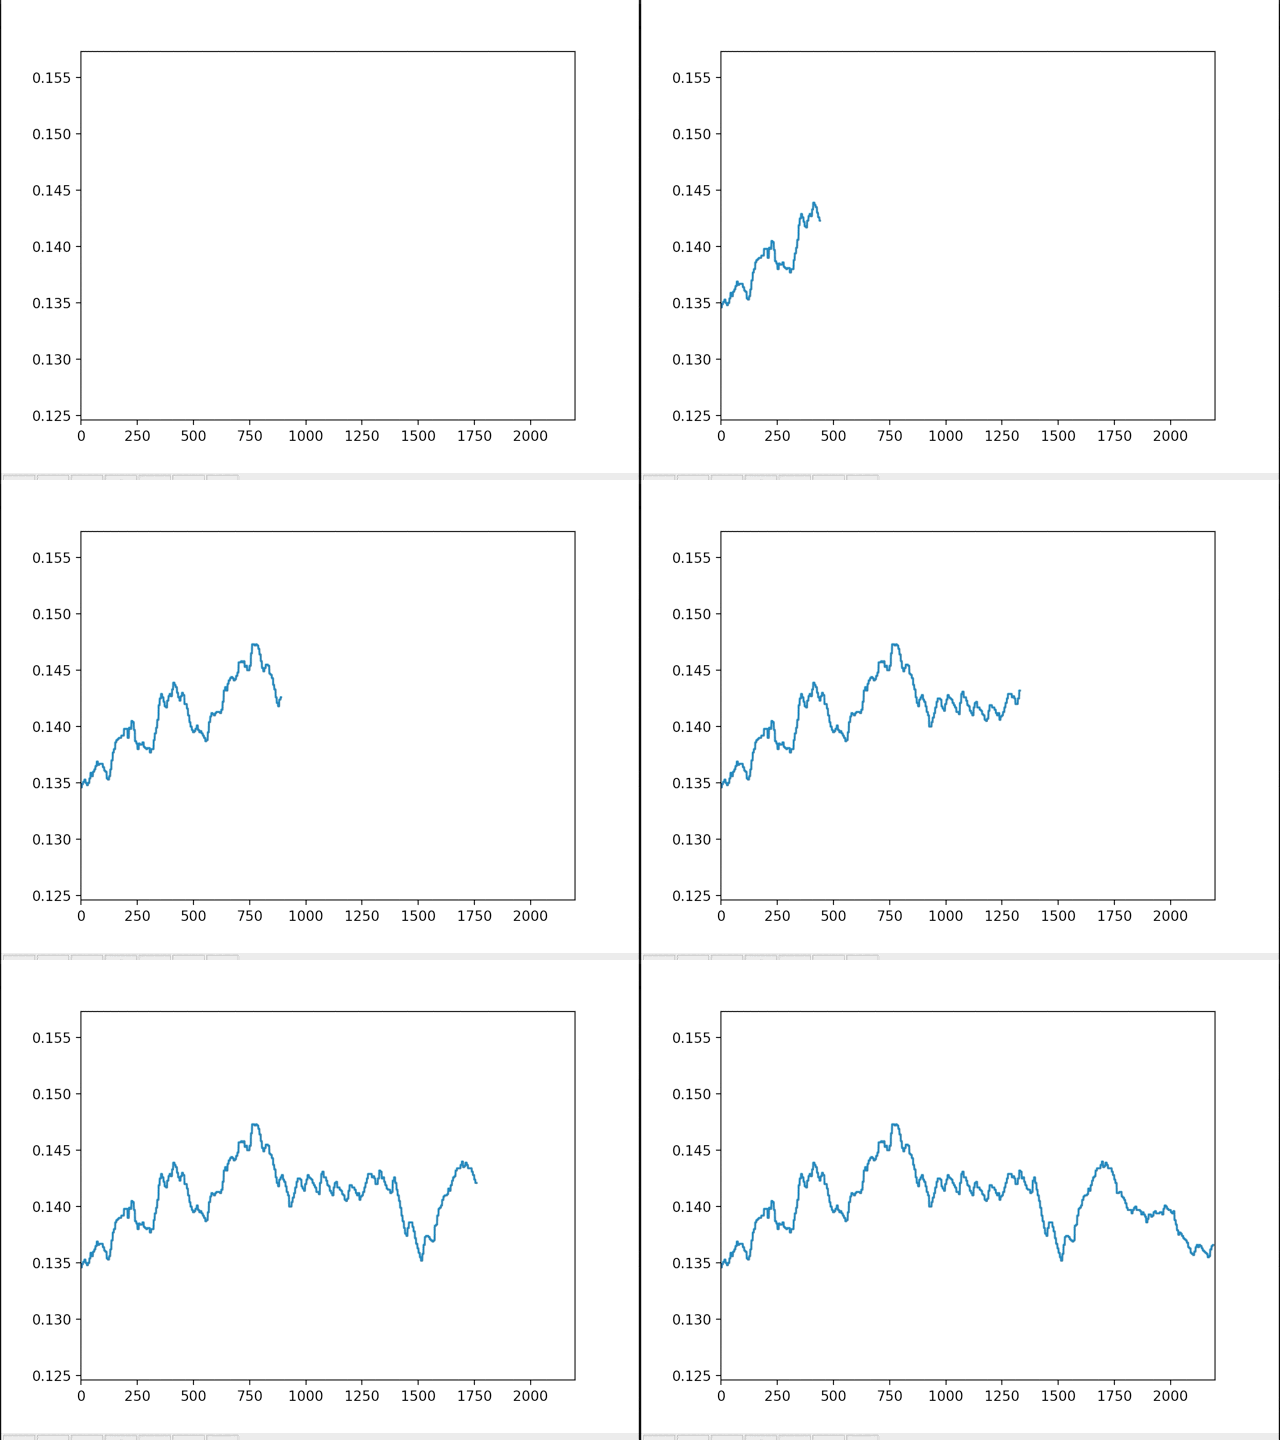
一応呼吸の大きな動きと、鼓動の定期的な小さな動きが取得出来ているのが分かる。
終わりに
今回使用したモジュールは動きの大きさまで検知出来る為、スピードガンや動作監視、急な動きの検知だったり色々出来そうだなといった感じ。
