はじめに
ブームにのって、Rasyberry Pi Picoを5個ほど購入してみました。
公式ドキュメントがよくできているので、本家のRaspberry Pi 4への開発環境構築は簡単にできたので、普段使いのWindows 10環境にGDBのデバッグ環境を含め構築しようとしたところ、はまりどころ満載だったのでメモとして残します。
各プラットフォーム別の構築難易度は以下のイメージです。(あくまで個人の感想です)
Raspberry Pi > Mac OS > Windows + WSL >> Windows
Toolchainのインストール
基本的に公式ガイド「getting-started-with-pico.pdf」の8.2節に従ってインストールできます。
なんでARM GCC compilerをインストールしたのに、Visual Studio 2019が必要なのという疑問はあとで理由がわかります。
- ARM GCC compiler
- CMake
- Build Tools for Visual Studio 2019
- Python 3.7
- Git
GDBのインストール
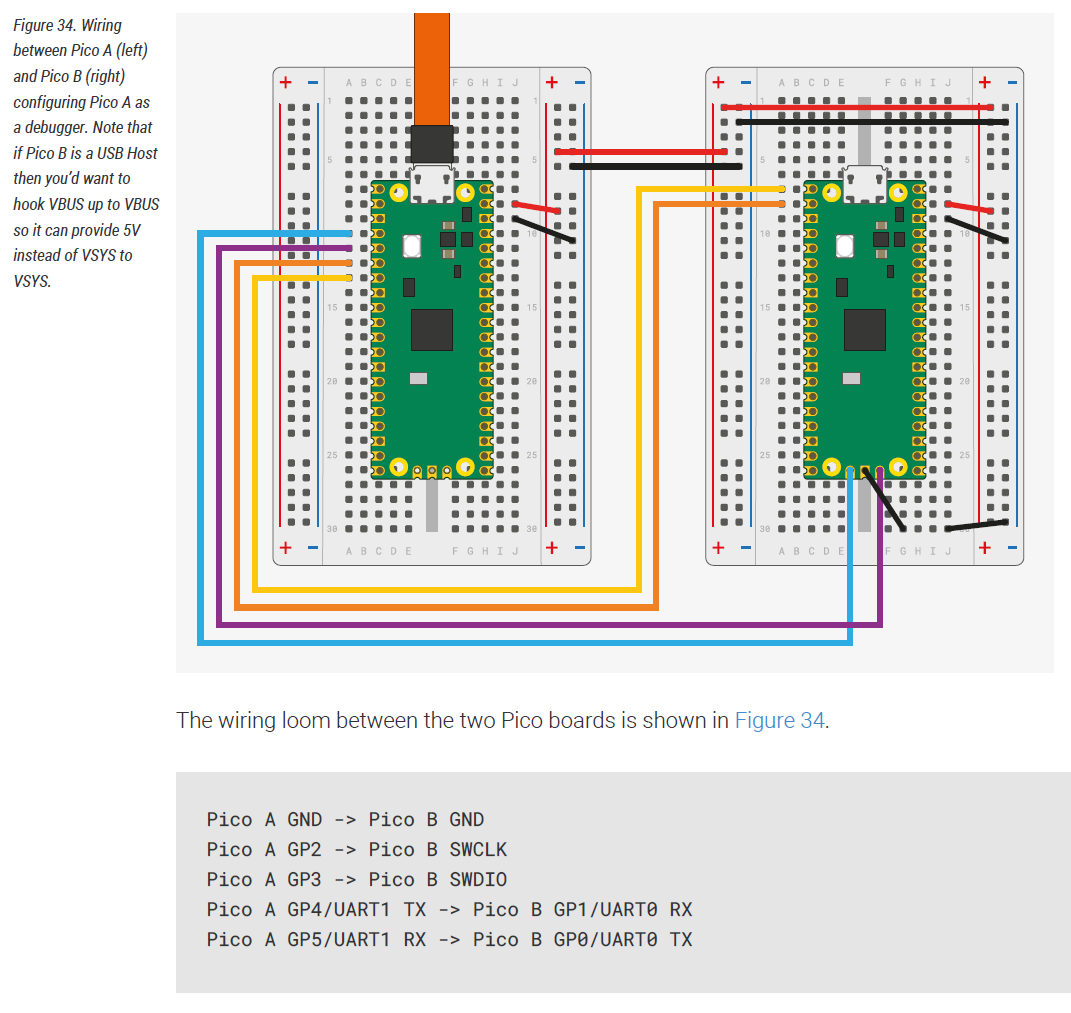
Raspberry Pi PicoをPicoprobe(USB → SWD and UART converter)とすることにより、2台のPicoを使用してGDBによるデバッグを行うことができます。これはぜひ使いたい!
基本的なインストール方法は、公式ガイド「getting-started-with-pico.pdf」のAppendix A.1.2に記載してありますが、これがすんないりとはいきません。
インストールが必要なツールは以下になります。
-
OpenOCD
OpenOCDをビルドする環境として、まずMSYS2をインストールしろと公式ガイドに記載してありますが、結論からすると現状(2月初旬)の公式GitHub をクローンしてビルドしても動作しません。(そのままでは。。。)
Liam Fraser氏が正常動作するOpenOCDを公開されていますので、こちらをダウンロードして使うのが手っ取り早いです。 -
Picoprobe driver
Picoprobe化されたPicoは、PCから見るとUSBの複合デバイスとして認識されます。1つはCDC UART、もう一つはデバッグ用のSWDインタフェースで、これはベンダユニーククラスです。
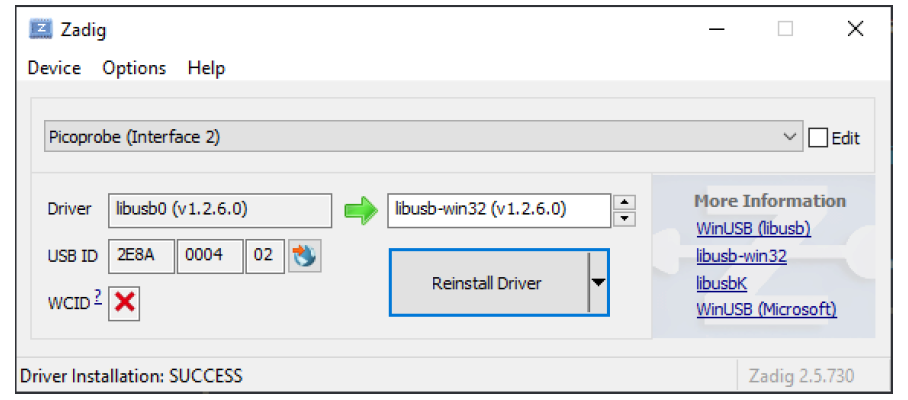
ベンダユニーククラス用のWindowsドライバとして、Zadigを使って設定することが想定されています。

Zadigで割り当てるUSBドライバですが、公式では、libusb-win32を使うことになっていますが、先のOpenOCDを自力でビルドした場合、この設定では動かないようです。(DriverにWinUSB (v6.1.7600.16385)を指定すれば動くという情報あり!)
Liam Fraser氏のOpenOCDビルド版では、公式ガイドの通りの設定でOKです。
VScodeの設定
- path設定
公式ガイドでは、VScodeの起動は、Visual Studio2019のDeveloper Command Prompt for VS 2019から起動するように記載してあります。
VS2019の環境を使うことが前提となっているように見えますが、真の目的はどうやらVC2019のnmake.exeを使いたいだけのようです。
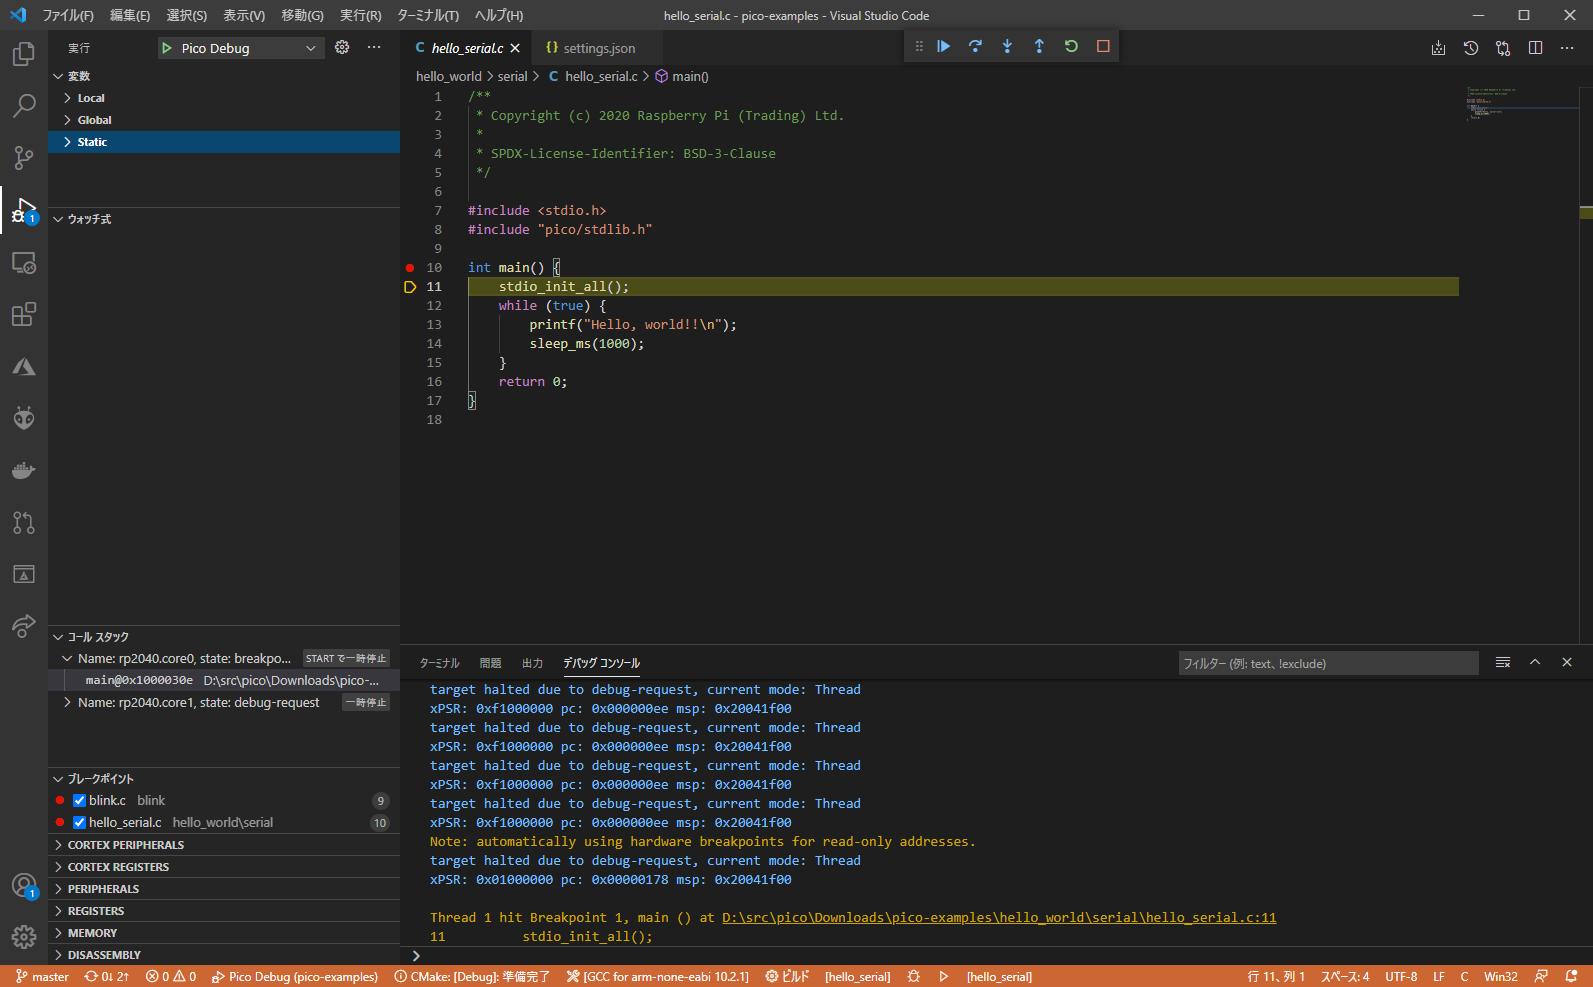
ということで、環境変数にnmake.exeのpathを設定しましょう。普通にVScodeを起動してもデバッグできるようになります。
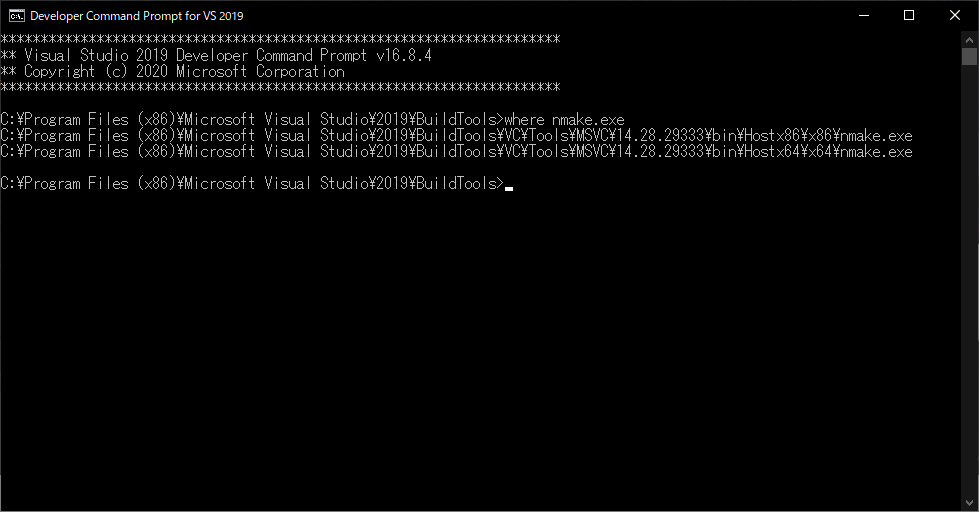
nmake.exeのpathは、Developer Command Prompt for VS 2019から、「where nmake.exe」をタイプすると教えてくれます。
- settings.json
setting.jsonに必要な記載を以下に示します。
どうもwindows版のパス名の指定がスラッシュだったり、バックスラッシュだったり一貫性がないですね。
# settings.json
    {
        "terminal.integrated.shell.windows": "C:\\Program Files\\Git\\bin\\bash.exe",
        "git.autofetch": true,
        "explorer.confirmDelete": false,
        "diffEditor.renderSideBySide": true,
        "cmake.configureOnOpen": true,
        "window.zoomLevel": 0,
        "git.enableSmartCommit": true,
        "cmake.configureEnvironment": {
            "PICO_SDK_PATH": "..\\..\\pico-sdk"
        },
        "cmake.generator": "NMake Makefiles",
        "cortex-debug.gdbPath": "arm-none-eabi-gdb",
        "cortex-debug.openocdPath": "D:/src/pico/Downloads/openocd_picoprobe/openocd.exe",
    }
- launch.json
launch.jsonに必要な記載を以下に示します。
絶対パスか相対パスかもポイントです。正解がよくわかりませんがとりあえず動いている例です。
# launch.json
    {
        "version": "0.2.0",
        "configurations": [
            {
                "name": "Pico Debug",
                "cwd": "${workspaceRoot}",
                "executable": "${command:cmake.launchTargetPath}",
                "request": "launch",
                "type": "cortex-debug",
                "servertype": "openocd",
                // This may need to be arm-none-eabi-gdb depending on your system
                "gdbPath" : "arm-none-eabi-gdb.exe",
                "device": "pico2040",
                "configFiles": [
                    "interface/picoprobe.cfg",
                    "target/rp2040.cfg"
                ],
                "searchDir": ["D:/src/pico/Downloads/openocd_picoprobe/tcl"],
                "svdFile": "D:/src/pico/Downloads/pico-sdk/src/rp2040/hardware_regs/rp2040.svd",
                "runToMain": true,
                // Work around for stopping at main on restart
                "postRestartCommands": [
                    "break main",
                    "continue"
                ],
            }
        ]
    }
参考サイト
参考になったのは以下のサイトの記事です。
https://www.element14.com/community/community/raspberry-pi/blog/2021/02/07/debugging-the-raspberry-pi-pico-on-windows-10


