10年ほど前に一つのwebアプリケーション内で複数のデータベースに接続する必要があって、
その当時はまだ何も分からず手動でゴリゴリとトランザクションの制御をしてたのですが、
ふと今あるフレームワークではどうするんだろうと思い試してみました。
構成
-
Eclipse 4.4
-
Spring 4.1.0.RELEASE
-
wildfly-9.0.0.CR1
の環境で、 -
Oracle 11g xe
-
Postgresql 9.2
の2つのデータベースを一つのトランザクションで管理するサンプルです。
データベースの構成
- Oracle側
- 接続文字列: jdbc:oracle:thin:@localhost:1521:XE
- user/pass: oratest/oratest
- Postgresql側
- 接続文字列: jdbc:postgresql://localhost/pgtest"
- user/pass: pgtest/pgtest
で接続できる環境ができているものとします。
Eclipseの設定
JBossツール(Luna)の設定が終わっており、サーバーとしてWildflyが使用可能な状態になっているものとします。

Wildfly側のデータソース設定
Spring側でDataSourceの設定からJTAの設定までしたかったんですが、どうもうまく行かなかったのでDataSourceの設定はコンテナ側で行うことにしました。この辺詳しい方がいたら教えて下さい。
Wildflyのインストールまでは終わっている状態でjdbcドライバの設定とDataSourceの設定から行います。今回初めてWildflyを使ったのでもっと良い方法があるのかもしれませんが、とりあえず今回試してみた方法です。
jdbcドライバの登録
Oracle、PosgresqlそれぞれのjdbcドライバをWildflyに登録します。
${JBOSS_HOME}をwildflyがインストールされたディレクトリとして、
それぞれのDBMSのjdbcドライバ(ojdbc6_g.jar, postgresql-9.2-1003-jdbc4.jar)を${JBOSS_HOME}/modules以下に
下記のように配置します。(それぞれにあるmodule.xmlは後述)
${JBOSS_HOME}/modules
     +- oracle
     |  +- jdbc
     |    +- main
     |      +- module.xml
     |      +- ojdbc6_g.jar
     |
     +- org
        +- postgresql
          +- main
            +- module.xml
             +- postgresql-9.2-1003-jdbc4.jar
module.xmlにはDBMS毎に
-
Oracle側のmodule.xml
<?xml version="1.0" encoding="UTF-8"?> <module xmlns="urn:jboss:module:1.0" name="oracle.jdbc"> <resources> <resource-root path="ojdbc6_g.jar"/> </resources> <dependencies> <module name="javax.api"/> <module name="javax.transaction.api"/> </dependencies> </module> -
Postgresq側のmodule.xml
<?xml version="1.0" encoding="UTF-8"?>
<module xmlns="urn:jboss:module:1.0" name="org.postgresql">
    <resources>
        <resource-root path="postgresql-9.2-1003-jdbc4.jar"/>
    </resources>
    <dependencies>
        <module name="javax.api"/>
        <module name="javax.transaction.api"/>
    </dependencies>
</module>
JBoss-CLI(${JBOSS_HOME}/bin/jboss-cli)からドライバを登録します。
CLIで接続
>jboss-cli.bat
You are disconnected at the moment. Type 'connect' to connect to the server or 'help' for the list of supported commands.
[disconnected /] connect
[standalone@localhost:9990 /]
OracleのJDBCドライバの登録
[standalone@localhost:9990 /]  /subsystem=datasources/jdbc-driver=oracle:add(driver-name=oracle,driver-module-name=oracle.jdbc,driver-xa-datasource-class-name=oracle.jdbc.xa.client.OracleXADataSource)
{"outcome" => "success"}
PostgresqlのJDBCドライバの登録
[standalone@localhost:9990 /]  /subsystem=datasources/jdbc-driver=postgresql:add(driver-name=postgresql,driver-module-name=org.postgresql,driver-xa-datasource-class-name=org.postgresql.xa.PGXADataSource)
{"outcome" => "success"}
DataSourceの接続
ここで色々ハマったんですが、なぜかWildflyの管理コンソールから登録すると接続できず。。仕方なくxmlを直接記述しました。
${JBOSS_HOME}/standalone/configuration/standalone.xmlのsubsystem/datasourcesの中、
<subsystem xmlns="urn:jboss:domain:datasources:3.0">
    <datasources>
        <!-- ここ  -->
    </datasources>
</subsystem>
の位置に下記の設定を行います。
<xa-datasource jndi-name="java:/jdbc/XAds1" pool-name="XAds1">
    <xa-datasource-property name="URL">
        jdbc:oracle:thin:@localhost:1521:XE
    </xa-datasource-property>
    <xa-datasource-property name="User">
        oratest
    </xa-datasource-property>
    <xa-datasource-property name="Password">
        oratest
    </xa-datasource-property>
    <driver>oracle</driver>
    <xa-pool>
        <min-pool-size>10</min-pool-size>
        <max-pool-size>20</max-pool-size>
        <prefill>true</prefill>
    </xa-pool>
</xa-datasource>
<xa-datasource jndi-name="java:/jdbc/XAds2" pool-name="XAds2">
    <xa-datasource-property name="DatabaseName">
        pgtest
    </xa-datasource-property>
    <xa-datasource-property name="PortNumber">
        5432
    </xa-datasource-property>
    <xa-datasource-property name="ServerName">
        localhost
    </xa-datasource-property>
    <driver>postgresql</driver>
    <xa-pool>
        <min-pool-size>10</min-pool-size>
        <max-pool-size>20</max-pool-size>
        <prefill>true</prefill>
    </xa-pool>
    <security>
        <user-name>pgtest</user-name>
        <password>pgtest</password>
    </security>
</xa-datasource>
ここ設定もいろいろハマりまして、oracleの方は<xa-datasource-property name="URL">で接続の設定を指定、Postgresqlの方は、<xa-datasource-property name="DatabaseName|PortNumber|ServerName">で接続の設定を指定するようでした。
次にこれらの接続設定の確認をします。再度JBoss-CLIのコンソールから下記コマンドでテスト接続してみます。
- Oracle
[standalone@localhost:9990 /] /subsystem=datasources/xa-data-source=XAds1:test-connection-in-pool
{
    "outcome" => "success",
    "result" => [true]
}
- Postgresql
[standalone@localhost:9990 /] /subsystem=datasources/xa-data-source=XAds2:test-connection-in-pool
{
    "outcome" => "success",
    "result" => [true]
}
"outcome" => "success"が返ってきていれば接続成功です。
以上でコンテナ側の設定は終了です。
アプリケーション側設定
mavenプロジェクトを新規作成します。
pom.xmlは以下です(今回は2phase commit確認用の最小限のものなので、テストやview用の設定は記載していません)
<project xmlns="http://maven.apache.org/POM/4.0.0" xmlns:xsi="http://www.w3.org/2001/XMLSchema-instance"
	xsi:schemaLocation="http://maven.apache.org/POM/4.0.0 http://maven.apache.org/xsd/maven-4.0.0.xsd">
	<modelVersion>4.0.0</modelVersion>
	<groupId>com.example</groupId>
	<artifactId>MultipleDatasourceTest</artifactId>
	<version>0.0.1-SNAPSHOT</version>
	<packaging>war</packaging>

	<dependencies>
		<dependency>
			<groupId>org.springframework</groupId>
			<artifactId>spring-webmvc</artifactId>
			<version>4.1.0.RELEASE</version>
		</dependency>
		<dependency>
			<groupId>org.springframework</groupId>
			<artifactId>spring-jdbc</artifactId>
			<version>4.1.0.RELEASE</version>
		</dependency>
		<dependency>
			<groupId>javax.servlet</groupId>
			<artifactId>javax.servlet-api</artifactId>
			<version>3.1.0</version>
			<scope>provided</scope>
		</dependency>
	</dependencies>

	<build>
		<plugins>
			<plugin>
				<groupId>org.apache.maven.plugins</groupId>
				<artifactId>maven-compiler-plugin</artifactId>
				<configuration>
					<encoding>utf-8</encoding>
					<source>1.8</source>
					<target>1.8</target>
				</configuration>
			</plugin>
		</plugins>
	</build>
</project>
ルートパッケージはcom.exampleとしています。
またせっかくSpring4なのでweb.xml、やbean設定用xmlは無しですべてJavaベースで設定します。
パッケージ構成としては、
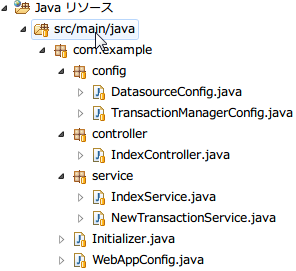
です。
Webアプリケーションの設定
web.xmlの替わりにInitializer.javaでWebアプリケーションの設定を行います。
package com.example;

import javax.servlet.Filter;

import org.springframework.web.filter.CharacterEncodingFilter;
import org.springframework.web.servlet.support.AbstractAnnotationConfigDispatcherServletInitializer;

public class Initializer extends AbstractAnnotationConfigDispatcherServletInitializer {

    @Override
    protected Class<?>[] getRootConfigClasses() {
        return new Class<?>[0];
    }

    @Override
    protected Class<?>[] getServletConfigClasses() {
        return new Class<?>[]{ WebAppConfig.class };
    }

    @Override
    protected String[] getServletMappings() {
        return new String[]{"/"};
    }

    @Override
    protected Filter[] getServletFilters() {
        return new Filter[] {createUTF8CharEncodingFilter()};
    }

    private static Filter createUTF8CharEncodingFilter() {
        CharacterEncodingFilter filter = new CharacterEncodingFilter();
        filter.setEncoding("UTF-8");
        filter.setForceEncoding(true);
        return filter;
    }
}
上記のgetServletConfigClassesでしているWebAppConfigでSpringMVCの設定を行います。
package com.example;

import org.springframework.context.annotation.ComponentScan;
import org.springframework.context.annotation.Configuration;
import org.springframework.transaction.annotation.EnableTransactionManagement;
import org.springframework.web.servlet.config.annotation.EnableWebMvc;

@Configuration
@EnableWebMvc
@EnableTransactionManagement
@ComponentScan("com.example")
public class WebAppConfig {
}
@EnableTransactionManagementで各Contoller,Serviceクラスでトランザクションを有効にする@Transactionアノテーションを効くようにします。
次にSpring側でWildfly側で定義したDataSourceを参照するための設定をcom.example.config.DatasourceConfigで行っていきます。
package com.example.config;

import javax.sql.DataSource;

import org.springframework.beans.factory.annotation.Qualifier;
import org.springframework.context.annotation.Bean;
import org.springframework.context.annotation.Configuration;
import org.springframework.jdbc.core.JdbcTemplate;
import org.springframework.jdbc.datasource.lookup.JndiDataSourceLookup;

@Configuration
public class DatasourceConfig {
    @Bean(name="ds1")
    public DataSource ds1() {
        DataSource dataSource = createJndiDataSourceBy("java:/jdbc/XAds1");
        return dataSource;
    }

    @Bean(name="ds2")
    public DataSource ds2() {
        DataSource dataSource = createJndiDataSourceBy("java:/jdbc/XAds2");
        return dataSource;
    }

    @Bean
    public JdbcTemplate jdbcTemplate(@Qualifier("ds1") DataSource dataSource) {
        return new JdbcTemplate(dataSource);
    }

    @Bean
    public JdbcTemplate jdbcTemplate2(@Qualifier("ds2") DataSource dataSource) {
        return new JdbcTemplate(dataSource);
    }

    private DataSource createJndiDataSourceBy(String jndiName) {
        JndiDataSourceLookup dataSourceLookup = new JndiDataSourceLookup();
        DataSource dataSource = dataSourceLookup.getDataSource(jndiName);
        return dataSource;
    }
}
このクラスでは、Wildfly側で設定したDataSourceのjndi名からOracle,PostgresqlそれぞれのDMBS用のデータソース用のBeanを作成していますが、その際それぞれのDataSourceを識別できるように@Bean(name=XXX)のようにして、Oracle側にds,Postgresq側にds2と名前をつけています。
上記でDataSource用のBeanにつけた名称から、それぞれのDBMSに対応するJdbcTemplateを作る際に、@QualifierでどのDataSourceを使うか指定してJdbcTemplateを取得できるようにします。
ここでは、
- Oracleに接続する
jdbcTemplate - Postgresqlに接続する
jdbcTemplate2
と定義しています。
TransactionManagerの設定
Jtaでトランザクション管理するために、TransactionManagerConfigクラスでTransactionManagerを指定します。
package com.example.config;

import org.springframework.context.annotation.Bean;
import org.springframework.context.annotation.Configuration;
import org.springframework.transaction.PlatformTransactionManager;
import org.springframework.transaction.jta.JtaTransactionManager;

@Configuration
public class TransactionManagerConfig {
    @Bean
    public PlatformTransactionManager transactionManager() {
        return new JtaTransactionManager();
    }
}
これでWebアプリケーションの設定は終了です。
WEBアプリケーションの作成
次に上記設定で作ったBean達を実際に使ってアプリケーションを作成します。
テーブル構成
まず前提となる各DBのテーブル情報です。
単純にするため、Oracle側、Postgres側ともにfというカラムだけを持つテーブルora_table,pg_tableを用意しました。
Oracle側
SQL> desc ora_table
 名前                                      NULL?    型
 ----------------------------------------- -------- ----------------------------

 F                                                  NUMBER

SQL> select * from ora_table;

         F
----------
        -1
        -2
        -3
Postgresql側
pgtest=> \d pg_table
テーブル "public.pg_table"
 列 |   型    | 修飾語
----+---------+--------
 f  | numeric |

pgtest=> select * from pg_table;
 f
---
 1
 2
 3
(3 行)
これらのテーブルに対して、
- Oracle,Postgresql両方を一つのトランザクションで扱い、両方に1レコード(Oracleには5、Postgresqlには20)insertするが例外が発生してロールバックする。
- これとは別に、上記とは別トランザクションでOracle側の
ora_tableに1レコードを追加(100を追加する)してcommitする。
という実験をしてみます。実業務での想定としては、
- 基本的にはOracle, Postgresqlとも更新が発生するが、1トランザクションのように扱いたい。
- が、Oracle側でsequenceでは出来ないような発番処理があり、かつそれは独立のトランザクションで行いたい。
というような場合を想定しています。結果として、下記のようになれば成功です。
Oracle側(5をinsertするがロールバックされて、(別トランザクションの)100はコミットされる)
SQL> select * from ora_table;

         F
----------
        -1
        -2
        -3
       100
Postgresql側(20をinsertするがロールバックされる(ので何も変わらない))
pgtest=> select * from pg_table;
 f
---
 1
 2
 3
(3 行)
Controllerの作成
今回はControllerのメソッドをトランザクション境界にします。
Controllerはひとつだけで、ルート(/)にアクセスされたときに文字列を返すだけのControllerです。
実際のDBアクセスはIndexControllerにでインジェクトされる、IndexServiceクラスで行います。
package com.example.controller;

import org.springframework.beans.factory.annotation.Autowired;
import org.springframework.stereotype.Controller;
import org.springframework.transaction.annotation.Transactional;
import org.springframework.web.bind.annotation.RequestMapping;
import org.springframework.web.bind.annotation.ResponseBody;

import com.example.service.IndexService;

@Controller
@Transactional(rollbackFor=Exception.class) //Exceptionが発生したらロールバック
public class IndexController {
    @Autowired
    private IndexService indexService;

    @RequestMapping("/")
    @ResponseBody
    public String index() throws Exception {
       return indexService.doService();
    }
}
Serviceの作成
次に実際にDBアクセスを行うServiceクラスを作成します。
java:IndexService.java
package com.example.service;
import java.util.List;
import java.util.Map;
import java.util.stream.Collectors;
import org.springframework.beans.factory.annotation.Autowired;
import org.springframework.jdbc.core.JdbcTemplate;
import org.springframework.stereotype.Service;
@Service
public class IndexService {
@Autowired
private JdbcTemplate jdbcTemplate; //Oracleへのアクセス用
@Autowired
private JdbcTemplate jdbcTemplate2; //Postgresqlへのアクセス用

@Autowired
private NewTransactionService newTransactionService; //別トランザクションでOracleにinsertするサービス

public String doService() throws Exception {
    List<Map<String, Object>> result = jdbcTemplate.queryForList("select * from ora_table");
    String val = result.stream().map(m -> m.get("f").toString()).collect(Collectors.joining(","));

    jdbcTemplate.update("insert into ora_table (f) values (?)", 5);
    jdbcTemplate2.update("insert into pg_table (f) values (?)", 20);

    newTransactionService.doService(); //下で例外が発生するがこのサービスの処理は別トランザクションなのでコミットされる。

    int a = 1;
    if (a == 1) {
        throw new Exception("exception occured"); //ここでわざとExceptionを発生させて、5,20のinsertをロールバックする。
    }

    List<Map<String, Object>> result2 = jdbcTemplate2.queryForList("select * from pg_table");
    String val2 = result2.stream().map(m -> m.get("f").toString()).collect(Collectors.joining(","));

    return String.format("Hello, World!! [%s], [%s]", val, val2);
    //        return String.format("Hello, World!!  [%s]", val2);
}
}
このサービスの中で呼ばれる別トランザクションで動くサービス(Oracle側に100をinsertするサービス)が`NewTransactionService`です。

```java:NewTransactionService.java
package com.example.service;

import org.springframework.beans.factory.annotation.Autowired;
import org.springframework.jdbc.core.JdbcTemplate;
import org.springframework.stereotype.Service;
import org.springframework.transaction.annotation.Propagation;
import org.springframework.transaction.annotation.Transactional;

@Service
public class NewTransactionService {
    @Autowired
    private JdbcTemplate jdbcTemplate;

    @Transactional(propagation=Propagation.REQUIRES_NEW) //このメッソドは特別に別トランザクションで実行するためREQUIRES_NEWで実行する
    public void doService() {
        jdbcTemplate.update("insert into ora_table (f) values (?)", 100);
    }
}
これでアプリケーションは完成です。
アプリケーション実行
Wildflyを実行して、http://localhost:18080/MultipleDatasourceTest/にアクセスします。
(port8080はよくかぶるので、ここではwildflyは18080で待つように設定を変更しています。)
実行結果
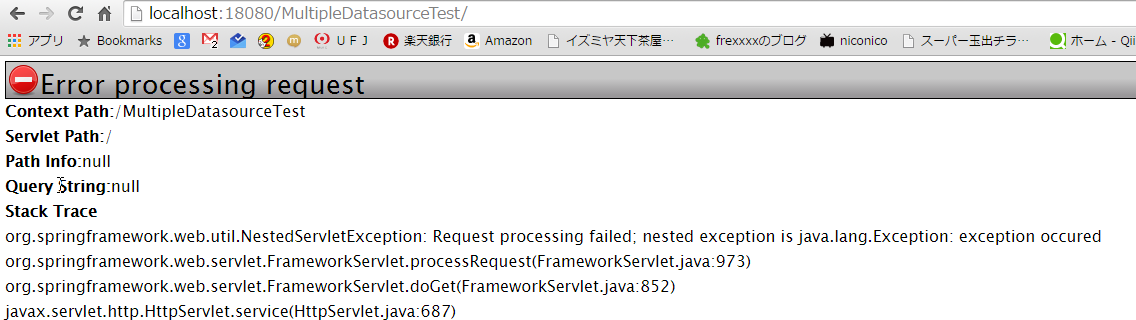
きちんと例外が発生しました。
さて、結果各データベースがどうなったか見てみましょう。
Oracle側
SQL> select * from ora_table;

         F
----------
        -1
        -2
        -3
       100
Postgresq側
pgtest=> select * from pg_table;
 f
---
 1
 2
 3
(3 行)
想定通り、別トランザクションでinsertしたOracle側の100はコミットされており、
5,20はロールバックされていますね。
次に、わざと例外を起こしていた箇所をコメントにして、正常終了するように、IndexServiceを変更して再実行します。
package com.example.service;

import java.util.List;
import java.util.Map;
import java.util.stream.Collectors;

import org.springframework.beans.factory.annotation.Autowired;
import org.springframework.jdbc.core.JdbcTemplate;
import org.springframework.stereotype.Service;

@Service
public class IndexService {
    @Autowired
    private JdbcTemplate jdbcTemplate;

    @Autowired
    private JdbcTemplate jdbcTemplate2;

    @Autowired
    private NewTransactionService newTransactionService;

    public String doService() throws Exception {
        List<Map<String, Object>> result = jdbcTemplate.queryForList("select * from ora_table");
        String val = result.stream().map(m -> m.get("f").toString()).collect(Collectors.joining(","));

        jdbcTemplate.update("insert into ora_table (f) values (?)", 5);
        jdbcTemplate2.update("insert into pg_table (f) values (?)", 20);

        newTransactionService.doService();

        int a = 1;
        if (a == 1) {
            //throw new Exception("exception occured"); //例外を発生しないように変更
        }

        List<Map<String, Object>> result2 = jdbcTemplate2.queryForList("select * from pg_table");
        String val2 = result2.stream().map(m -> m.get("f").toString()).collect(Collectors.joining(","));

        return String.format("Hello, World!! [%s], [%s]", val, val2);
        //        return String.format("Hello, World!!  [%s]", val2);
    }
}
再度http://localhost:18080/MultipleDatasourceTest/にアクセスします。

正常に終了しました。この状態でデータベースの確認を行うと
Oracle側
SQL> select * from ora_table;

         F
----------
        -1
        -2
        -3
         5
       100
       100
1回目(例外発生時)にinsertした100以外に、今回insertした5、100が反映されていますね。
Postgresql側
pgtest=> select * from pg_table;
 f
----
  1
  2
  3
 20
(4 行)
今回は正常終了したので、insertした20が反映されていますね。
これで2phase commitができていそうです。
最後に
APサーバ側の設定以外のアプリケーション部分はここにアップしています。
https://github.com/pocari/MultipleDatasourceTest