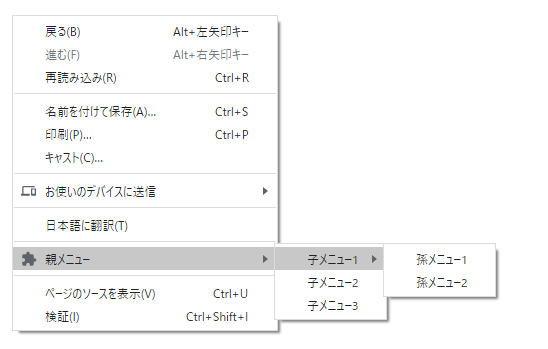
この記事では下記のメニュー作成のコードとクリック時のログ出力を載せています。
 |
|---|
フォルダ構造
フォルダ
 ├ manifest.json
 └ event.js
manifest.json
{
  "manifest_version": 2,
  "name": "context menus",
  "version": "1.0",

  "background": {
    "scripts": ["event.js"],
    "persistent": false
  },

  "permissions": [
    "activeTab",
    "contextMenus"
  ]
}
event.js
'use strict';

{
  chrome.runtime.onInstalled.addListener(() => {
    const parent = chrome.contextMenus.create({
      id: 'parent',
      title: '親メニュー'
    });
    chrome.contextMenus.create({
      id: 'child1',
      parentId: 'parent',
      title: '子メニュー1'
    });
    chrome.contextMenus.create({
      id: 'child2',
      parentId: 'parent',
      title: '子メニュー2'
    });
    chrome.contextMenus.create({
      id: 'child3',
      parentId: 'parent',
      title: '子メニュー3'
    });
    chrome.contextMenus.create({
      id: 'grandchild1',
      parentId: 'child1',
      title: '孫メニュー1'
    });
    chrome.contextMenus.create({
      id: 'grandchild2',
      parentId: 'child1',
      title: '孫メニュー2'
    });
  });

  // メニューをクリック時に実行
  chrome.contextMenus.onClicked.addListener(item => {
    console.log(item);
    console.log(item.menuItemId);
  });
}
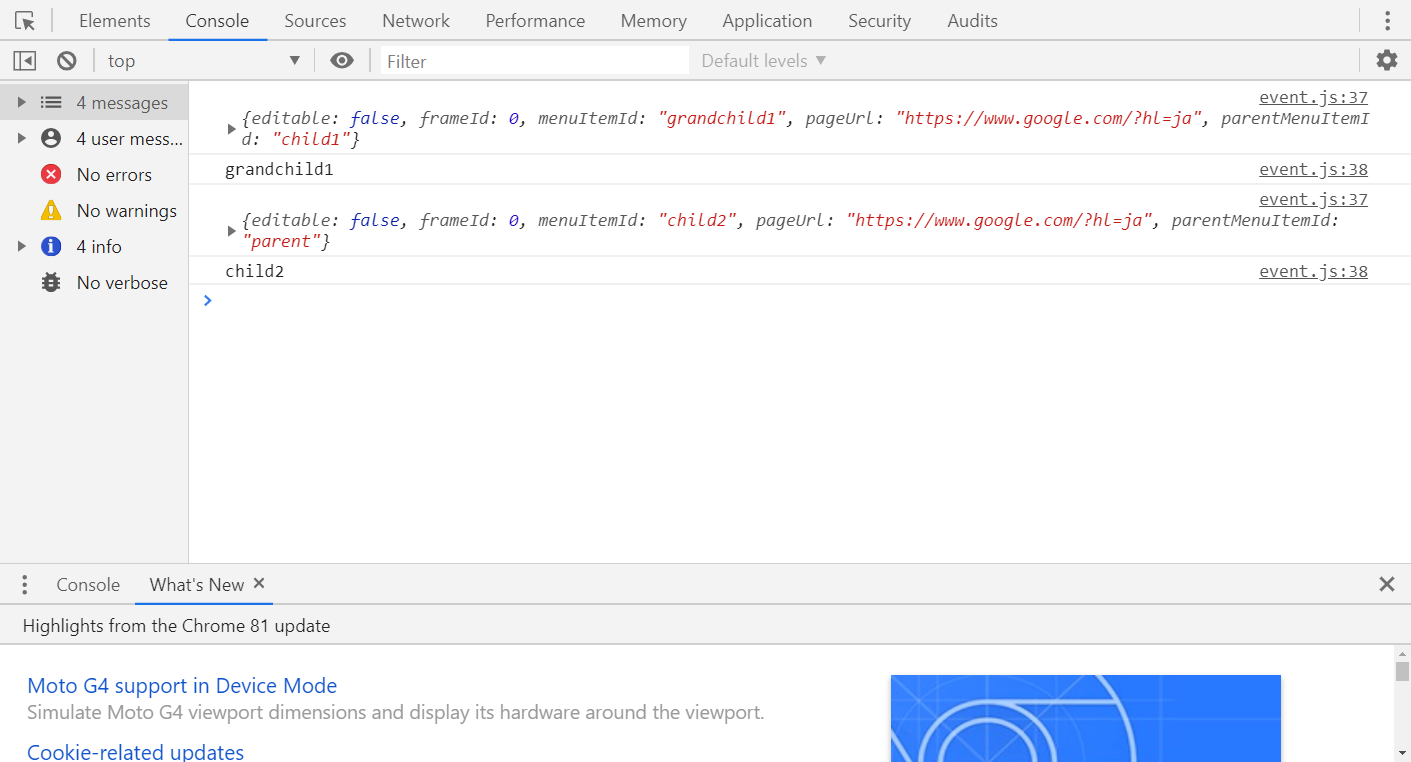
孫メニュー1、子メニュー2をクリックしたときのログ
 |
|---|
孫メニュー1のログ
{editable: false, frameId: 0, menuItemId: "grandchild1", pageUrl: "https://www.google.com/?hl=ja", parentMenuItemId: "child1"}
grandchild1
子メニュー2のログ
{editable: false, frameId: 0, menuItemId: "child2", pageUrl: "https://www.google.com/?hl=ja", parentMenuItemId: "parent"}
child2
この記事はChrome拡張機能の作り方の一部のコンテンツです。