ずっとやりたいと思って諦めていたのですが、やっと実現できたので再度0から作るときの迷わないように記載します。
基本的には下記のサイトの通りに実行していけばできるので、
詳細な手順は割愛して完成コードと変えるべき点のみ記載します。
https://bumbu.me/gapi-in-chrome-extension
用意するフォルダ
フォルダ
  ├ manifest.json
  ├ background.js
  ├ picture.png
  └ css(フォルダ)
manifest.json
{
  "name": "Extension with GAPI tutorial",
  "version": "1.0",
  "description": "Uses OAuth to connect to Google's Spreadsheet API",
  "manifest_version": 2,
  "key": "{Developer Dashboardに登録ときに作成されるPUBLIC KEY}",
  "content_security_policy": "script-src 'self' https://apis.google.com/; object-src 'self'",
  "browser_action": {
    "default_title": "GAPI Tutorial"
  },
  "background": {
    "page": "background.html",
    "persistent": false
  },
  "oauth2": {
    "client_id": "{GCPでOAuthを作成したときに発行されるID}",
    "scopes": ["https://www.googleapis.com/auth/spreadsheets"]
  },
  "permissions": [
    "identity"
  ]
}
keyについて
こちらは必須ではないですが、拡張機能の管理ツールに課金済みの場合は使った方が便利です。
理由はこのkeyの設定をするとフォルダ名を変更した場合にもアプリケーションIDが変更されないためです。
作成した場合は パッケージ > 公開鍵を表示 から確認可能です。
このkeyがない場合はアップデートするフォルダ名が変わるとIDが変わるので注意。
▼拡張機能の管理ツール
https://chrome.google.com/webstore/devconsole
oauth2について
client_idにはGCPで作成したOauthのIDを入力します。
作成時は
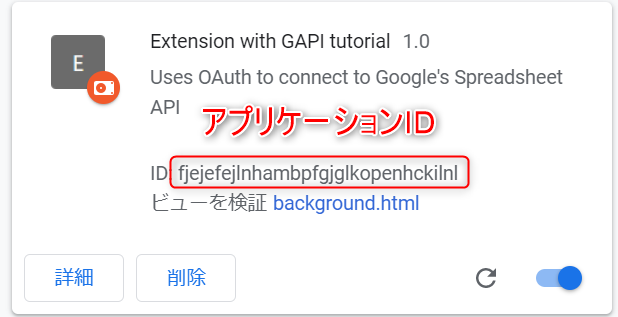
OAuthクライアントID > Chrome アプリを選択 > アプリケーションIDの入力
▼認証情報の管理
https://console.cloud.google.com/apis/credentials
"permissions": ["identity"] について
identityを使用許可。identityを使って認証を行っているので必須です。
background.html
<html>
 <head>
  <title></title>
  <script src="background.js"></script>
 </head>
 <body></body>
 <script src="https://apis.google.com/js/client.js?onload=onGAPILoad"></script>
</html>
https://apis.google.com/js/client.js?onload=onGAPILoad
こちらを読み込んでbackground.jsでgapiを使用できるようにしています。
background.js
const API_KEY = '{GCPで作成したAPI KEY}';
const DISCOVERY_DOCS = ["https://sheets.googleapis.com/$discovery/rest?version=v4"];
const SPREADSHEET_ID = '{スプレッドシートのID}';
const SPREADSHEET_TAB_NAME = '{シート名 or レンジ}';

function onGAPILoad() {
  gapi.client.init({
    // Don't pass client nor scope as these will init auth2, which we don't want
    apiKey: API_KEY,
    discoveryDocs: DISCOVERY_DOCS,
  }).then(function () {
    console.log('gapi initialized')
    chrome.identity.getAuthToken({interactive: true}, function(token) {
      gapi.auth.setToken({
        'access_token': token,
      });

      gapi.client.sheets.spreadsheets.values.get({
        spreadsheetId: SPREADSHEET_ID,
        range: SPREADSHEET_TAB_NAME,
      }).then(function(response) {
        console.log(`Got ${response.result.values.length} rows back`)

        // valuesをfor文を回すと1行ずつデータが取り出せます
        for(let a of response.result.values){
          console.log(a)
        }
      });
    })
  }, function(error) {
    console.log('error', error)
  });
}
API KEYについて
API KEYはOAuthを作成したのと同じ箇所から発行できます。
▼認証情報の管理
https://console.cloud.google.com/apis/credentials
SPREADSHEET_TAB_NAMEを指定するときの注意点
日本語は使用できません!
できる方法があれば教えてください!
指定はシート名でもレンジでもどちらでも大丈夫です。
シート名の指定:sheet1
レンジでの指定:sheet1!A1:D
ここまでが参考にした下記サイトで学べたことです。
https://bumbu.me/gapi-in-chrome-extension
gapiの使い方
基本的には下記のメソッドは使えそうです。
https://developers.google.com/sheets/api/reference/rest/v4/spreadsheets.values
ただ書き方を
gapi.client.sheets.spreadsheets.values.に続けて記載していけばよさそうです。
background.jsのgetをappendに変えて下記にしてみると追加できました。
下記のvalueInputOption は設定しないと追加されないみたいです。
      gapi.client.sheets.spreadsheets.values.append({
        spreadsheetId: SPREADSHEET_ID,
        range: SPREADSHEET_TAB_NAME,
        valueInputOption: 'USER_ENTERED',
        resource: {
          values: [
          [1, 'A', 'a'],
          [2, 'B', 'b']
          ]
        },
      }).then(function(response) {
        console.log(`Got ${response.result.values.length} rows back`)
        console.log(`Got ${response} rows back`)
      });
    })
  }, function(error) {
    console.log('error', error)
  });
}