はじめに
Google cloudでcronサービスがあるといいなーと思っていたらGoogle cloud schedulerのbetaが公開されたので早速試してみました。この記事のポイントは次の二点です。
- POSTするときはgcloudコマンドを使ってheaderのContent-Typeを明示して下さい
- ケースによってはGoogle apps scriptで十分な気もする
前準備
Schedulerのテスト用にFirebase FunctionsでAPIサーバーを立てて、Google Apps Scriptで動作確認しました。この辺りの詳しい方法はここでは書きませんので、ググって下さい。
APIサーバーの用意
Firebase Functionsで次のようなプログラムをdeployしました。単純にパスワードを確認して、合っていればFirestoreのechoTestにドキュメントを追加するだけです。
const functions = require('firebase-functions');

const admin = require("firebase-admin");
const serviceAccount = require("./.private/firabaseKey.json");
admin.initializeApp({
    credential: admin.credential.cert(serviceAccount)
});

exports.echoTest = functions.https.onRequest((request, response) => {
    const db = admin.firestore();

    if (!db) {
        response.status(500).end();
    }

    if (request.body.password !== 'iceageiscomingthisisreallyhappening') {
        response.status(401).end();
        return;
    }

    if (typeof request.body.message === 'undefined') {
        response.status(400).end();
        return;
    }

    const createSec = Math.round((new Date()).getTime() / 1000);
    const data = {
        message: request.body.message,
        createSec: createSec
    }

    db.collection('echoTest').add(data).then(ref =>{
        response.send(request.body.message);
    }).catch(err=>{
        response.status(500).end();
    });
});
APIサーバーの確認
多くの方イケてるツールを使うのでしょうが、私はいつもGoogle Apps Scriptを使って確認しています。GAPのプログラムはこんな感じになります。
function echoTest() {
  const params = {
    'password': 'iceageiscomingthisisreallyhappening',
    'message': '200 OK!'
  }
  const options = {
    'method' : 'post',
    'payload' : params
  };
  const res = UrlFetchApp.fetch('https://YOUR-CLOUD-FUNCTION/echoTest', options);
  Logger.log(res);
}
これでFirestoreにデータが追加される事を確認しました。
Scheduler GUI設定
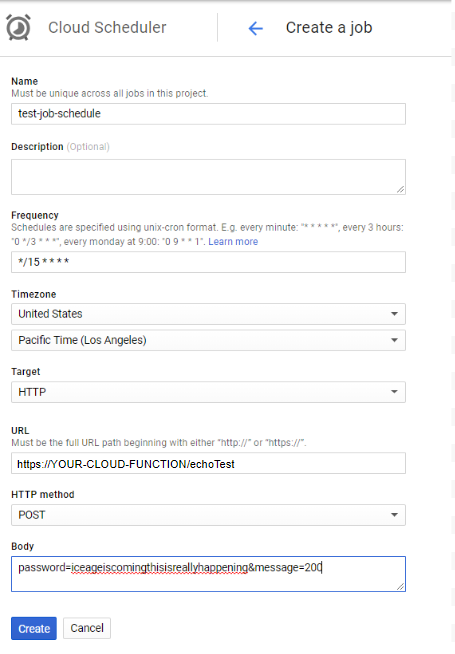
Google cloud consoleに Cloud Schedulerというメニューが出来ているので、それをクリックしてcronを新規作成します。まず始めは次のような設定を試しました。
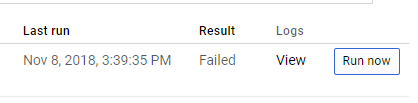
設定したCRONは"Run Now"をクリックすれば実行出来ます。

ただし、これは残念ながらエラーになってしまいました。
Scheduler側のエラーを見ても良く分からなないので、Firebase Functionsのログを見るとauthentificationでエラーになっていました。
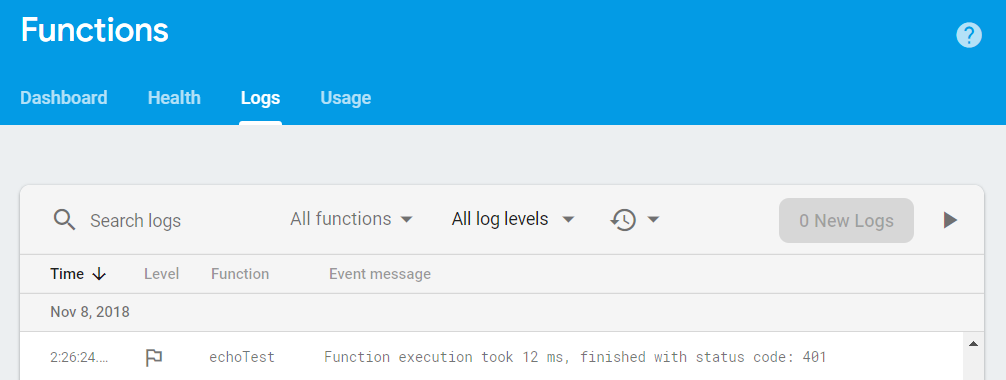
どうやらFunctionsの次の行で401エラーになっているみたいです。
    if (request.body.password !== 'iceageiscomingthisisreallyhappening') {
        response.status(401).end();
        return;
    }
多分bodyが正しく送られていないのだなーと思い、試しにrequest.bodyでのチェックを全てやめて、GETでurlを取得したら正しく動きました。やはりpostのbodyが正しく設定されていないようです。ここでbodyをjson形式にしたり色々試したのですが、結局GUIでは動きませんでした。誰かやり方分かった方は教えてくれると嬉しいです。
CUIでのScheduler設定
仕方がないのでCUIでgcloudコマンドを使いました。私はgcloudのインストールが面倒なのでGCPのCloud Shellを使っています。コマンドは次の通りです。
gcloud beta scheduler jobs create http gcp-sche-api \
--schedule="*/3 * * * *" --uri="https://your-cloud-function/echoTest" \
--headers Content-Type=application/x-www-form-urlencoded \
--message-body="message=hoge&password=iceageiscomingthisisreallyhappening"
ポイントは3行目でbodyのcontent-typeを明示的に指定しています。ヘッダの設定はMDNのマニュアルを参考にしました。
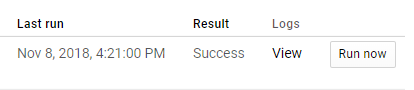
これでFunctionがFailしなくなりました。
GAPのTriggerとの違い
Google Apps Scriptの下りで気づいた方もいらっしゃると思いますが、GAPでもTriggerを使えばcronのような事が出来ます。従ってちょっとしたcronはこっちの方が簡単だと思います。私は個人開発で作ったサービスで15分に一回動くTriggerを設定して運用していますが、もう半年以上問題は起きていません。ただ、一回や二回失敗しても問題ない処理内容なので、たまに動作してなくても分からないですが。
ただしジョブの失敗が致命的なシステムの場合はそうはいきません。Schedulerの方はジョブが失敗した時のretryを--max-attemptsオプションなどで細かく設定できますので、そういう場合はSchedulerを使う事になると思います。