■Navigation Controllerの画面遷移
オレンジの画面にNavigation Controllerを使用すると上部にbarが出る。
オレンジの画面にButtonを置く

Buttonを押すと緑の画面に遷移する方法
1
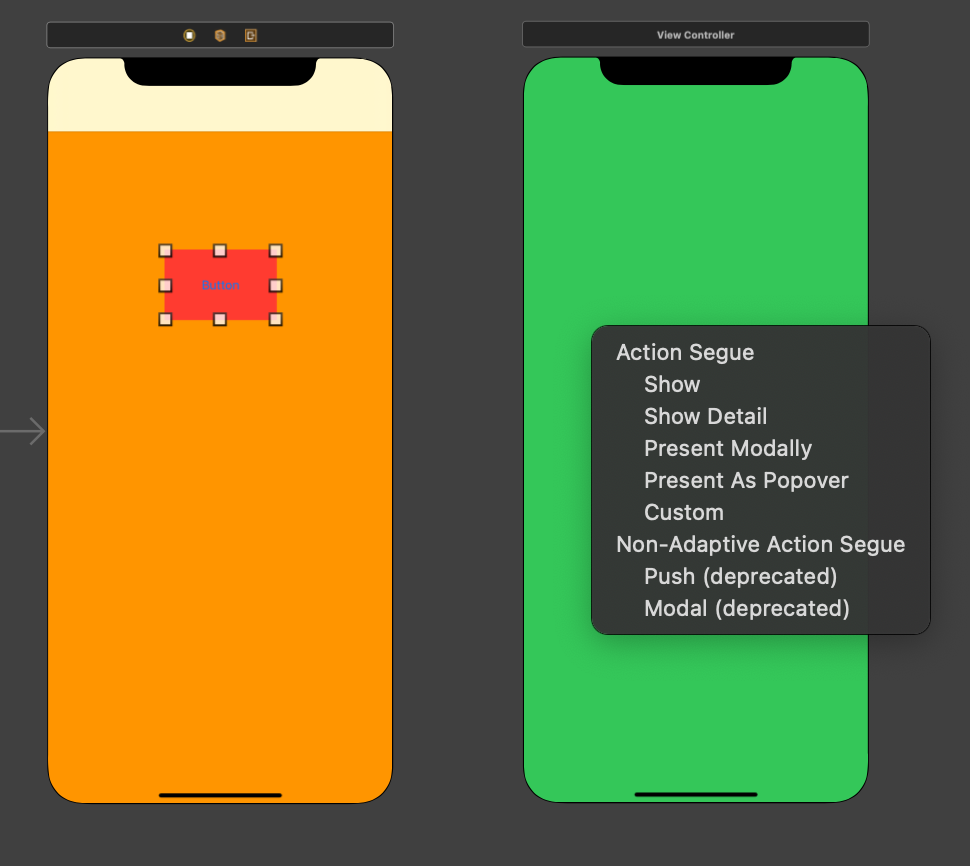
オレンジ画面のButtonを選択
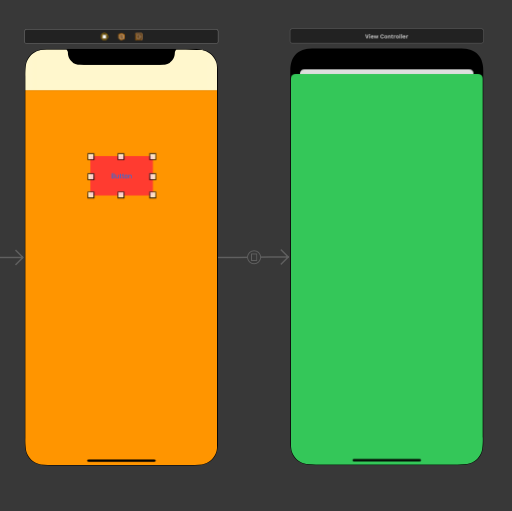
Controlを押しながら青い線を伸ばし緑の画面で離す。
Action Segue(画面の現れ方)を選択する。
Show(左からスライドで遷移)
Present Modally(下からニョキっと遷移)
この二つが一般的
■show選択時
左から画面がスライドで遷移
緑の画面左上に<Backが現れる。(Navigation Controllerの画面遷移の時のみ)
<Backを押すと画面がオレンジに戻る。

■Present Modally
下からニョキっと遷移(画面が重なってるみたい)
<Back ボタンはついてこない作るしかない

前の画面が微かに見えるのでこれを見えないようにできる。
オレンジの画面と緑の画面の真ん中の矢印を選択
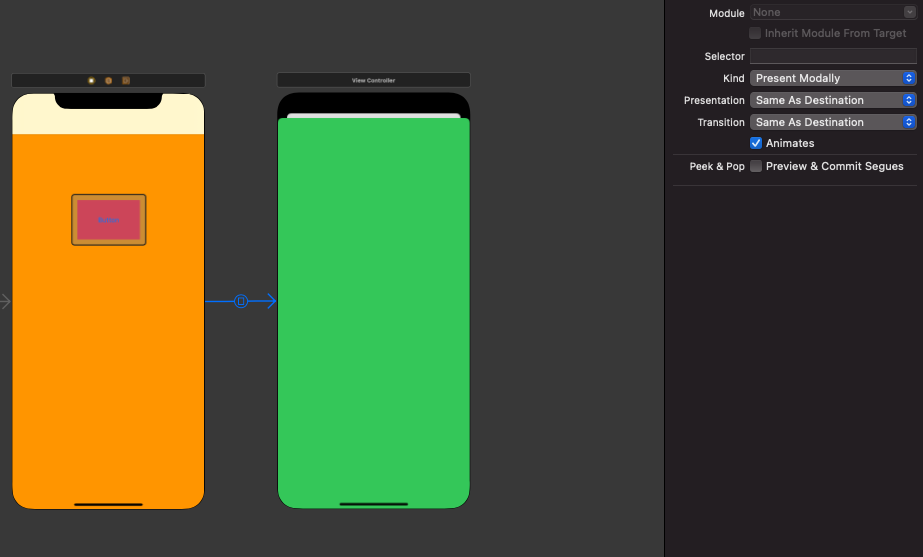
右メニューの
Presentationを
Full Screenにする。

じゃあ見えなりフルスクリーンで画面遷移する。

2Present Modallyの画面の戻り方
■showではBACKボタンがデフォルトで出る。
■Present ModallyBACKボタンがない。
Present Modallyでの画面の戻り方を紹介します。
戻り方(コードを使う)
準備
緑の画面のViewControllerを作り紐づける。
仮にNextViewControllerとする。
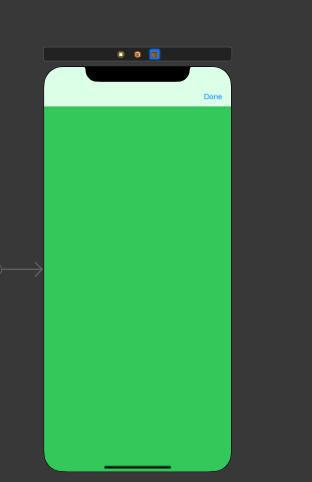
緑の画面にもNavigation Controllerを使用し右上にBarItemをつける。(Done)
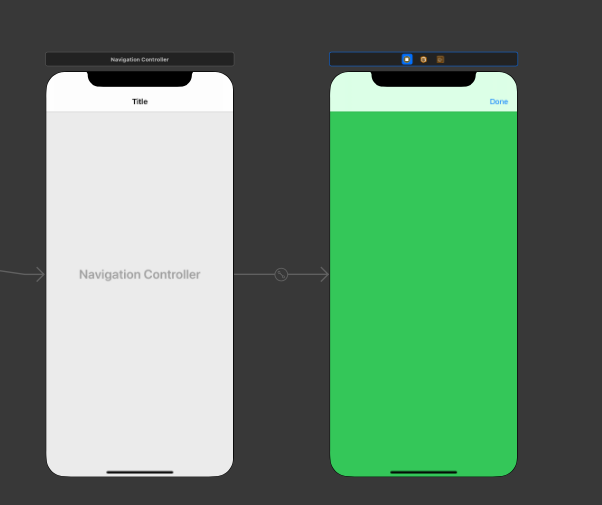
Doneボタンを押して戻る。
①
dismissを使う
NextViewControllerに
DoneボタンをActionボタンとして紐づける。
その中に
dismiss(animated: true, completion: nil)

これで戻れるが
どっちかっていうと緑の画面を閉じてる動きです。
3任意のタイミングで画面遷移したい
コードを使う
1ではButtonを選択してControlを押してひっぱていた
今回は引っ張る場所が違う
オレンジ画面の上部青い場所(ViewControllerからControlを押して引っ張る)
緑の画面で離し同様にshowかpresent Modallyを選択

違うのはこの時点では何をしたら画面遷移するか決めていない。
■準備
間の青い矢印を選択(segue)
右メニューのidentifier
の名前を決める今回はsegueとする。

■コード準備
オレンジの画面と紐づいているViewControlleを開く
ButtonをOutletでViewController.swiftと紐づける。
Buttonを押すと画面遷移ようにコードに書く
performSegue(withIdentifier:"さっきつけたIdentifierの名前", sender:nil)

これでButtonを押すと画面遷移する。
4UnwindSegueを使用した画面遷移
■こんな時に使える
2つ以上前の画面に戻る。
画面遷移した時に何かしたい値を渡して表示したり
オレンジ画面と紐づいている
viewController.swiftに下記のコードを書く
@IBAction func メソッド名(segue:UIStoryboardSegue){
}
メソッド名を例えばexitとする。

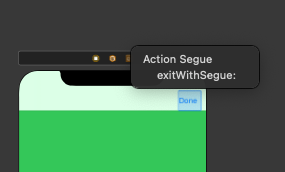
緑の画面のDoneを選択Controlを押しながら青い線を引っ張り
緑画面上部右のExitに持っていく
さっき作ったexitメソッドに繋がっている。
exitWithSegueを選択
これでとりあえず画面が戻る。
Next View Controllerに
Unwind segue to "exitWithSegue"
と出ていれば成功。

5UnwindSegueの応用 値を渡して画面遷移
■やりたいこと
緑画面のtextFieldに書いたtextを
緑画面のButtonを押したら
オレンジ画面のLabelに表示する。
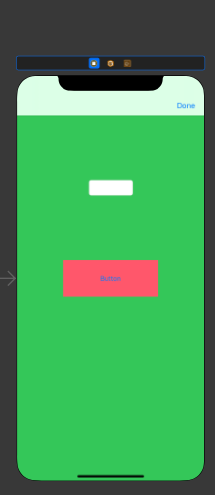
■準備
下記のようにItemを画面に準備する。

■オレンジ画面のViewController.swiftに下記のコードを足す
class ViewController: UIViewController {

    @IBOutlet var label: UILabel!

    @IBAction func aaa(segue: UIStoryboardSegue) {
    }
}

■緑画面上部左を選択 2つ右のExitまでControlを押しながら青い線を引っ張って離す。
先ほど作ったaaaメソッドを選択
■UnwindSegue aaaWithSegueの右メニューidentifierに名前をつける。
仮名(back)
これで3で使用した下記コードを使用すれば
好きなタイミング場所で画面遷移できる。
performSegue(withIdentifier:"back", sender:nil)
■Buttonを押すと
変数ContentにtextFieldに書いてあった文字を入れ込んで
画面遷移する。

■オレンジ画面ののコード
 @IBAction func aaa(segue:UIStoryboardSegue){
      //画面先をオプショナルバインディングをして定数に
        if  let nextVC = segue.source as? NextViewController {
     //nextVCの変数Contentをラベルに表示
            label.text = nextVC.content
        }
    }

■これで一連の流れができます。
緑画面のtextFieldに文字書く

オレンジ画面のラベルに表示

6 画面遷移時に値を渡す方法 その他
■AppDelegate.swift
に変数を保存できる。
変数を他classで使う
コンピューテッドプロパティで変数に入れ込む
あとはオプショナルバインディングをして変数を呼び出せる。
 private var appDelegate: AppDelegate? {
        UIApplication.shared.delegate as? AppDelegate
    }
■segueが実行される前に勝手に発動するメソッド
 override func prepare(for segue: UIStoryboardSegue, sender: Any?) {
    //segueのidentifierが"segue"なら実行
  if segue.identifier == "segue" {

            // 遷移先ViewCntrollerの取得
            let nextVC = segue.destination as! NextViewController

            // nextVCの変数に現在の画面のlabelのtextを入れ込む等
            nextVC.Content = label.text!
        }
}
7 UITabBarController
どんな時に使える?
画面同士が並列に並ぶ時
親子関係ではない画面遷移
例:音楽アプリでジャンル別で画面が存在する等
準備
始めのViewContorollerを消す
+マークから
TabBarControllerを選択して持ってくる。


■次に左のTabBarControllerを選択し右メニューの
is initial View Controllerにチェックマーク

一度右側縦に並んだ2つの画面を消し
+マークから新たなUIViewControllerで二つの画面を出す。
そこにTab BarControllerからControlで青い線を引っ張り画面遷移したい画面を選ぶ
今回はshowやPresentModallyではなく
Relationship Segueの中の
ViewControllersをお互い選択

あとは画面遷移したい画面に新たなClassのファイルを各々作りお互い紐づければ完成

ビルドすると初めの画面は緑の画面になり下のitemButtonで画面を切り替えれる。


以上まとめです。
何かあればまた更新します。