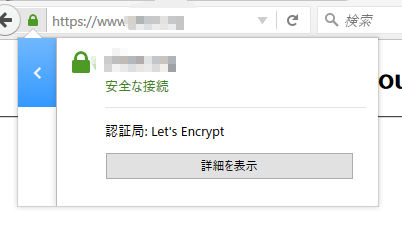
この記事はArch Linux Advent Calender 2015の4日目です。
概要
Let's EncryptがついにPublic Betaになりました。のでArchLinuxでさくっとためしてみました。(Arch関係ないじゃんとは言わないで)
Archでは、本記事執筆時の12/4時点でCommunityリポジトリにLet'sEncryptがありました。
https://www.archlinux.org/packages/community/any/letsencrypt/
[root@localhost ~]# pacman -Ss letsencrypt
community/letsencrypt 0.1.0-1
    A tool to automatically receive and install X.509 certificates to enable TLS on servers. The client will interoperate with the Let・スE・スfs
    Encrypt CA which will be issuing browser-trusted certificates for free.
community/letsencrypt-apache 0.1.0-1
    Apache plugin for Let's Encrypt client
community/letsencrypt-nginx 0.1.0-1
    Nginx plugin for Let's Encrypt client
community/letshelp-letsencrypt 0.1.0-1
    Let's help Let's Encrypt client
今回はさくっとつかえそうな、letsencrypt-nginxをインストールして使ってみます。
事前準備
let's encryptを実行するサーバをドメイン名で引けるようにしておきます。
あとはnginxもインストールしておきます。
インストール
[root@localhost ~]# pacman -S letsencrypt-nginx
依存関係を解決しています...
衝突するパッケージがないか確認しています...

パッケージ (36) dialog-1:1.2_20150920-1  letsencrypt-0.1.0-1  python2-acme-0.1.0-1  python2-cffi-1.3.1-1  python2-chardet-2.3.0-2
                python2-configargparse-0.10.0-1  python2-configobj-5.0.6-2  python2-cryptography-1.1.1-1  python2-enum34-1.0.4-1
                python2-funcsigs-0.4-1  python2-idna-2.0-2  python2-ipaddress-1.0.15-1  python2-mock-1.3.0-3
                python2-ndg-httpsclient-0.4.0-2  python2-packaging-15.3-2  python2-parsedatetime-1.5.20151107-1  python2-pbr-1.8.1-1
                python2-pip-7.1.2-2  python2-ply-3.8-1  python2-psutil-3.2.2-1  python2-pyasn1-0.1.9-1  python2-pycparser-2.14-2
                python2-pyopenssl-0.15.1-2  python2-pyparsing-2.0.5-1  python2-pyrfc3339-1.0-1  python2-pythondialog-3.3.0-1
                python2-pytz-2015.7-1  python2-requests-2.8.1-1  python2-setuptools-1:18.7.1-1  python2-six-1.10.0-1  python2-urllib3-1.12-3
                python2-werkzeug-0.11.2-1  python2-zope-component-4.2.2-1  python2-zope-event-4.1.0-1  python2-zope-interface-4.1.3-2
                letsencrypt-nginx-0.1.0-1

合計ダウンロード容量:   4.66 MiB
合計インストール容量:  30.71 MiB
:: インストールを行いますか? [Y/n] y
数秒待てばインストールが完了します。
[root@localhost ~]# letsencrypt --help

  letsencrypt [SUBCOMMAND] [options] [-d domain] [-d domain] ...

The Let's Encrypt agent can obtain and install HTTPS/TLS/SSL certificates.  By
default, it will attempt to use a webserver both for obtaining and installing
the cert. Major SUBCOMMANDS are:

  (default) run        Obtain & install a cert in your current webserver
  certonly             Obtain cert, but do not install it (aka "auth")
  install              Install a previously obtained cert in a server
  revoke               Revoke a previously obtained certificate
  rollback             Rollback server configuration changes made during install
  config_changes       Show changes made to server config during installation
  plugins              Display information about installed plugins

Choice of server plugins for obtaining and installing cert:

  (the apache plugin is not installed)
  --standalone      Run a standalone webserver for authentication
  --nginx           Use the Nginx plugin for authentication & installation
  --webroot         Place files in a server's webroot folder for authentication

OR use different plugins to obtain (authenticate) the cert and then install it:

  --authenticator standalone --installer apache

More detailed help:

  -h, --help [topic]    print this message, or detailed help on a topic;
                        the available topics are:

   all, automation, paths, security, testing, or any of the subcommands or
   plugins (certonly, install, nginx, apache, standalone, webroot, etc)
実行
さくっと実行します。
[root@localhost ~]# letsencrypt --nginx -d www.example.com
実行すると、「Easy」か「Secure」が選べますが、とりあえず「Secure」を選んでおきます。
これで完了です。(本当にこれだけ!)
テスト
まとめ
こんな簡単にHTTPS化ができるなんて、本当にすごい時代になったものです。
ArchLinuxだとすでに公式リポジトリ(Communityですが、AURではない)にあがっているのでさらに簡単でした。
こうやって最新のツールをさくっとためしたり、新しいバージョンをすぐにつかってみたりできるのが、Archの魅力だと思います。みんなもArchをつかってみよう!(雑なまとめ)
