はじめに
NuxtでStorybookを導入してみたかったので、導入手順と躓いたところをまとめました。
そもそもStorybookって?
フロント開発中にローカルサーバでアプリケーションを立ち上げずに、コンポーネントの見た目をカタログ感覚で確認できるツールです。
アトミックデザインでフロントを開発している時には特に使いやすいかもしれません。
やってみる
前提
- Nuxtプロジェクトを作成済み(create-nuxt-appしてある)
- WSL上で作成
今回はcomponentsディレクトリ内に、以下のような構成でファイルを作成しています。
- components
    - Atom
        - MyButton.vue
    - stories
        - MyButton.stories.js
表示するコンポーネントとして、ボタンコンポーネントを作成しました。
<template>
  <div class="button-style" :class="colorSelector()">
    <div class="button">{{ text }}</div>
  </div>
</template>

<script>
import { defineComponent } from 'vue'

export default defineComponent({
  name: 'MyButton',
  props: {
    text: {
      type: String,
      default: 'button',
    },
    color: {
      type: String,
      default: '',
    },
  },
  setup(props) {
    const colorSelector = () => {
      if (props.color === 'red') {
        return 'button-color--red'
      } else if (props.color === 'blue') {
        return 'button-color--blue'
      } else {
        return 'button-color'
      }
    }
    return {
      props,
      colorSelector,
    }
  },
})
</script>

<style>
.button {
  color: #fff;
  width: auto;
  text-align: center;
  vertical-align: baseline;
}
.button-style {
  padding: 10px 20px;
  border-radius: 6px;
  width: fit-content;
}
.button-color {
  background-color: #f08700;
}
.button-color--blue {
  background-color: #23c9ff;
}
.button-color--red {
  background-color: #de3c4b;
}
</style>
1. Storybookをセットアップする
こちらの記事を参考にStorybookをインストールしました。
1. プロジェクトを作成したディレクトリに移動し、下記を実行します。
yarn add --dev @nuxtjs/storybook postcss@latest ts-node
2. nuxt.config.jsのexport default内に以下を追記します。(オプションなので、必要に応じて省いてください)
  storybook: {
    addons: [],
    stories: ['~/components/stories/**/*.stories.js'],
    port: 5555,
    parameters: {
      backgrounds: {
        default: 'light', // light or dark
      },
      controls: {
        expanded: true,
      },
      layout: 'centered',
    },
  },
3. 以下のコマンドを実行します。
export NODE_OPTIONS=--openssl-legacy-provider
yarn nuxt
export~の部分を実行する理由については後ほど説明します。
4. 何もないStorybookの画面が表示されたらOKです!
2. ストーリーを追加してコンポーネントを表示させる
~components/stories/MyButton.stories.jsに以下のコードを記載します。
import MyButton from '~/components/Atom/MyButton.vue'

export default {
  title: 'Atom/MyButton',
  component: MyButton,
  argTypes: {
    color: {
      control: {
        type: 'radio',
        options: ['default', 'red', 'blue'],
        labels: {
          // ここでラベルを指定する
          default: 'default',
          red: 'red',
          blue: 'blue',
        },
      },
    },
  },
}

// exportすることでコンポーネントを登録
const Template = (args) => ({
  components: { MyButton },
  setup() {
    return { args }
  },
  template: '<MyButton v-bind="args"/>',
})

export const Default = Template.bind({})
Default.args = {
  color: 'default',
}
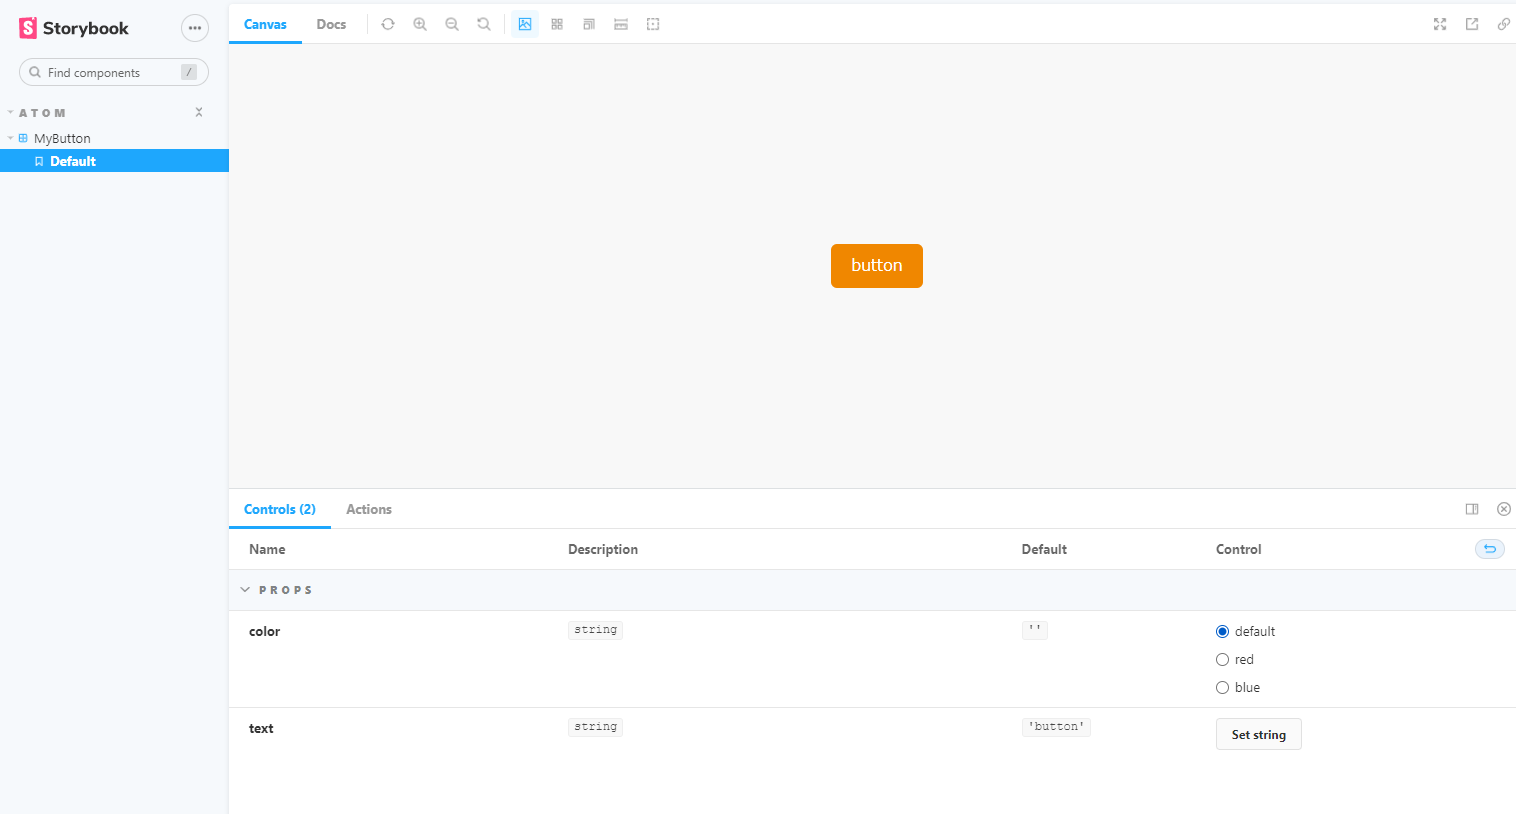
argTypesの部分で、ボタンの色をラジオボタンで切り替えられるようにしています!
argTypesの詳しい設定方法はこちらの記事がわかりやすかったです!
画面にボタンが表示され、ラジオボタンで色が切り替えられるようになりました!
躓いたところまとめ
RpcIpcMessagePortClosedError: Cannot send the message - the message port has been closed for the process 9800.が表示される
Storybookのビルド時に、上記のエラーが出てビルドできませんでした、、
解決方法
export NODE_OPTIONS=--openssl-legacy-providerを実行して環境変数を設定しました。
nodeのバージョンの問題のようです、、
なのでyarn nuxt storybookの実行前にこのコマンドを実行しています。
プロジェクトを閉じると環境変数の設定がなくなってしまうので、プロジェクトを開いたら毎回実行する又は環境変数が永続化されるように~/.profileにexport~コマンドを記載する方法があるそうです(永続化は未検証です><)
ERROR in ./generated-stories-entry.js Module not found: Error: Can't resolve './stories'~ が表示される
1つ目のエラーが解消された後に上記エラーが表示されてしまいました、、、
解決方法
nuxt.config.jsのstoriesの設定が下記のように間違っていました^^;
stories: ['~/stories/**/*.stories.js'],
本来はcomponents下にあるのに、componentsが抜けていますね、、
なので下記のように修正しました。(先に提示したnuxt.config.jsのコードは修正済みのものです!)
stories: ['~/components/stories/**/*.stories.js'],
まとめ
NuxtにStorybookを導入してみました!
たくさん躓きましたが、快適なフロント開発ライフになってほしいです!
