やること
Amazon ESにCloudTrailのログを流し、test_user1のログイン成功を検知したらアラートを飛ばします
これをOpenDistroのAlartingを使ってやる
事前準備
Amazon ESはv6.5でセットアップし、CloudTrailのログを流し込んでいます。
Slackを用意してWebhook URLを控えておく
- Amazon ES: v6.5
画面はKibanaで「eventType: AwsConsoleSignIn AND userIdentity.userName: test_user1 AND responseElements.ConsoleLogin: Success」でフィルタをして"test_user1"というIAMユーザーでログインに成功したデータを検索しています。

OpenDistro Alarmの設定
Destination
Kibanaの左側メニューで"Alerting"をクリックし、[Add Destination]をクリックします。

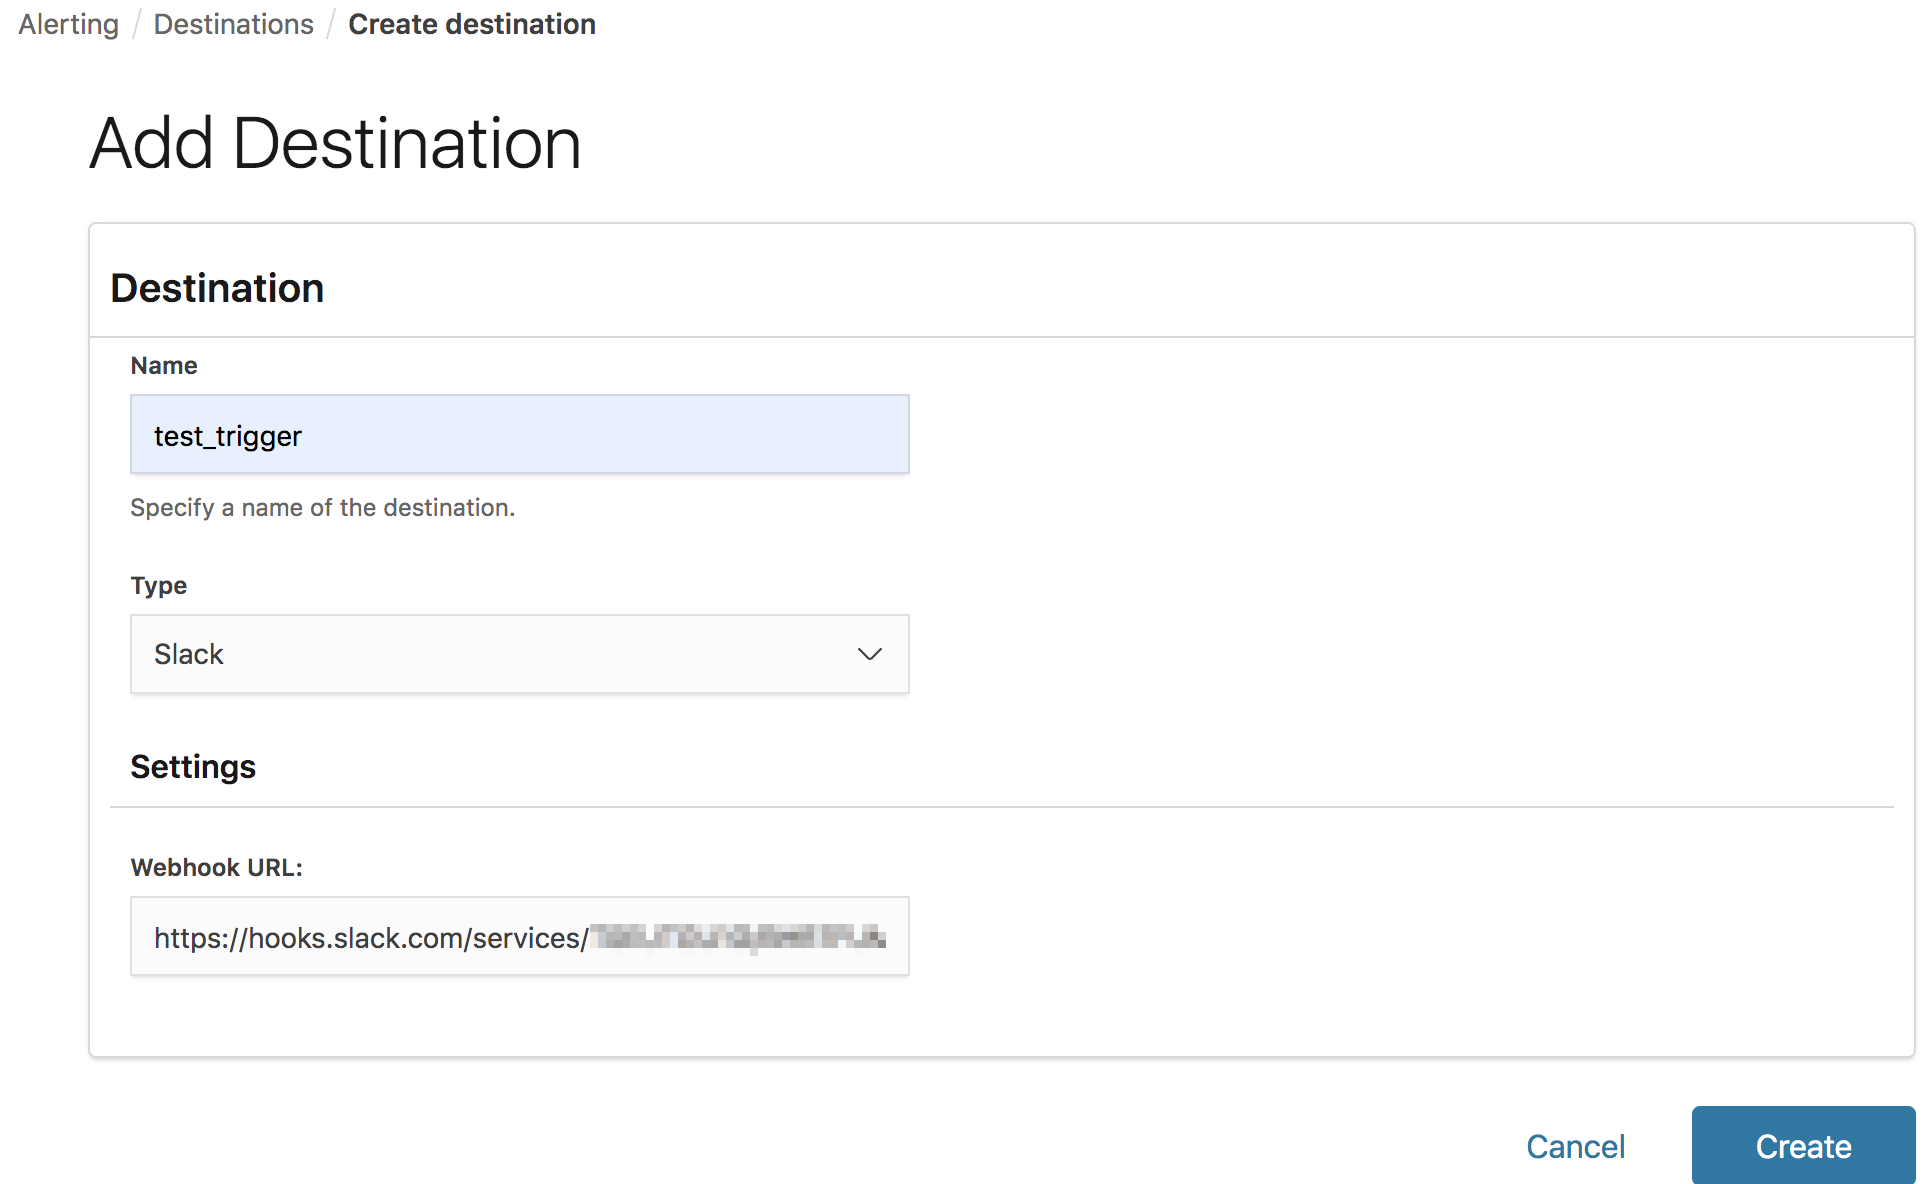
今回は通知先をSlackとします。以下の情報いれて[Create]をクリック
- Name: test_trigger
- Type: Slack
- Webhook URL: 自身のSlackのやつ
カスタムWebhook含め送り先は選べます

これでDestinationは完成
Monitor
"Monitor"をクリックし[Create monitor]をクリック

以下を入力
- Monitor name: test_monitor
- Every: 5

以下を入力し、右下の[Create]をクリックする
- How do you want to define the monitor?: Define using extraction query
- Index: cwl-2019.05.14
- Define extraction query: 以下のクエリを入力
{
    "size": 0,
    "query": {
        "bool": {
            "must": [
                {
                    "match": {
                        "eventType": {
                            "query": "AwsConsoleSignIn",
                            "operator": "AND",
                            "prefix_length": 0,
                            "max_expansions": 50,
                            "fuzzy_transpositions": true,
                            "lenient": false,
                            "zero_terms_query": "NONE",
                            "auto_generate_synonyms_phrase_query": true,
                            "boost": 1
                        }
                    }
                },
                {
                    "match": {
                        "userIdentity.userName": {
                            "query": "test_user1",
                            "operator": "AND",
                            "prefix_length": 0,
                            "max_expansions": 50,
                            "fuzzy_transpositions": true,
                            "lenient": false,
                            "zero_terms_query": "NONE",
                            "auto_generate_synonyms_phrase_query": true,
                            "boost": 1
                        }
                    }
                },
                {
                    "match": {
                        "responseElements.ConsoleLogin": {
                            "query": "Success",
                            "operator": "AND",
                            "prefix_length": 0,
                            "max_expansions": 50,
                            "fuzzy_transpositions": true,
                            "lenient": false,
                            "zero_terms_query": "NONE",
                            "auto_generate_synonyms_phrase_query": true,
                            "boost": 1
                        }
                    }
                }
            ],
            "filter": [
                {
                    "range": {
                        "@timestamp": {
                            "from": "now-10m",
                            "to": null,
                            "include_lower": true,
                            "include_upper": true,
                            "boost": 1
                        }
                    }
                }
            ],
            "adjust_pure_negative": true,
            "boost": 1
        }
    },
    "aggregations": {}
}

Trigger
Create Trigger の画面になるので、以下の値を入力する
- Trigger name: test_trigger1

Trigger conditionがhit件数>0となっている。右下の[Run]をクリックしfalseであることを確認(今は10分以内のログインがなく0件なのでfalse)

Action
以下を入力し、[Add action]をクリックする
- Action name: test_action1
- Destination name: test_general - (Slack)
- Message subject: login success! test_user1
※入力が終わったら、右下の"Send test message"でWebhookの確認をしてもよい

右下の"Send test message"でWebhookの確認をした結果のSlack画面

アクションができたら右下の[Create]をクリックする

作成した"test_monitor1"

テスト
test_user1でAWSに2回ほどログイン/ログアウトを行いしばらく待つ
test_monitor1の画面でアラートが発生したことがわかる

Slackにも飛んできた

KibanaのDiscoverでも確認できる

今回だとDefine extraction queryを直近10分でクエリしているので、10分経つとAlertのStateはCompletedとなる
Dashboardの画面

Monitor側の画面
