camo とは ?
camo は軽量な HTTPS 画像プロキシで、皆さんがご存じの GitHub でも使われています。
camo を使うと、HTTP プロトコルで提供されている画像を HTTPS プロトコル経由で利用することができます。
なぜ camo が必要なのか ?
近年では、個人情報を多く含んだウェブサイトは、サイト全体を HTTPS プロトコルで提供するのが一般的です。Google や Facebook, GitHub がその代表的ですね。
HTTPS プロトコルで提供されるウェブサイトでは、そのウェブサイトで利用している 画像や CSS, JS などの コンテンツ全てを HTTPS プロトコルで提供する必要があります。
そうしないとこうなります…。
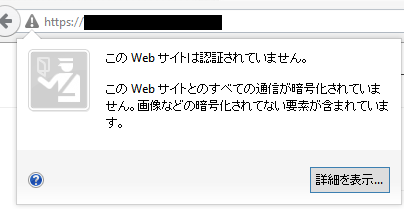

つまり、ウェブサイト内に画像などの外部 HTTP リソースを含む場合、HTTPS プロトコルに変換して提供しなければいけません。そんな時に、camo を使います。
nginx とは ?
高速、軽量なウェブサーバーです。
イベントドリブンなため、スレッドベースの Apache に比べ大量のアクセスを容易にさばけるという特徴があります。
インストール
GitHub から最新のコードを取得します。
$ git clone https://github.com/atmos/camo.git
$ cd camo
起動
起動するには Node.js もしくは io.js が必要です。標準では、8081 ポートで起動します。
$ node server.js
SSL-Proxy running on 8081 with pid:7588 version:2.2.0.
ポートを指定するには、
$ PORT=3000 node server.js
SSL-Proxy running on 3000 with pid:4916 version:2.2.0.
動作確認
camo は次のような URL でアクセスして利用します。
http://example.org/<digest>?url=<image-url>
http://example.org/<digest>/<image-url>
<digest> は hmac-sha1 で計算して求めます。
ここでは、テストで Vim のロゴ を表示してみます。
まず、<digest> を Node.js で計算します。
以下の変数 key は <digest> を生成する際の共通鍵の役割を持ちます。以下の値は、camo の初期値です (運用時は環境変数 CAMO_KEY で変更してください)。
$ node -v
v0.10.36

$ node
> var crypto = require('crypto');
> var key = '0x24FEEDFACEDEADBEEFCAFE';
> var hmac = crypto.createHmac('sha1', key);
> var url = 'http://www.vim.org/images/vim_header.gif';
> hmac.update(url);
> hmac.digest('hex')
'3155cafd81ea0acd624c325b9f6b3f67cb45db6b'
<digest> が求まったので、これを繋げて URL を生成します。
$ node
> var digest = '3155cafd81ea0acd624c325b9f6b3f67cb45db6b';
> var url = encodeURIComponent('http://www.vim.org/images/vim_header.gif');
> 'http://localhost:8081/' + digest + '?url=' + url
'http://localhost:8081/3155cafd81ea0acd624c325b9f6b3f67cb45db6b?url=http%3A%2F%2Fwww.vim.org%2Fimages%2Fvim_header.gif'
サーバーを起動して http://localhost:8081/3155cafd81ea0acd624c325b9f6b3f67cb45db6b?url=http%3A%2F%2Fwww.vim.org%2Fimages%2Fvim_header.gif にアクセスすると、無事に画像が表示されるはずです。
運用
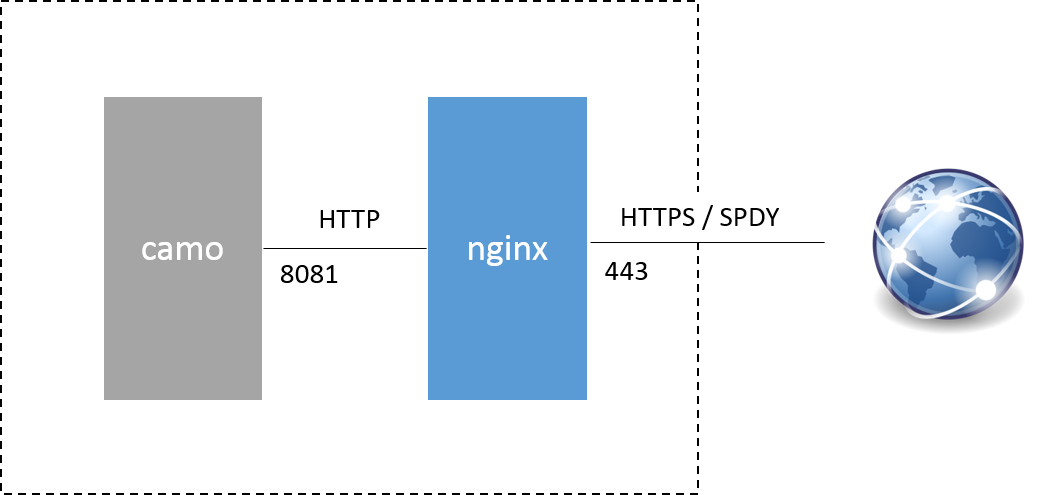
camo 自体は HTTP で動作するので、nginx をリバースプロキシとして動作させ HTTPS プロトコルとして利用できるようにします。ここでは、以下のような環境を構築します。
Node.js のバージョン管理には nodebrew を使います。
$ nodebrew install-binary v0.10.36

$ nodebrew use v0.10.x
use v0.10.36

$ nodebrew alias default v0.10.x
default -> v0.10.x

$ node -v
v0.10.36
アプリケーションのデーモン化には forever を使います。
以下のように forever を使って camo を 8081 ポートで起動しておきます。
$ npm i -g forever

$ forever start -a --uid camo server.js
warn:    --minUptime not set. Defaulting to: 1000ms
warn:    --spinSleepTime not set. Your script will exit if it does not stay up for at least 1000ms
info:    Forever processing file: server.js

$ forever list
info:    Forever processes running
data:        uid           command                                       script    forever pid   id logfile                                 uptime
data:    [0] camo          /home/deploy/.nodebrew/node/v0.10.36/bin/node server.js 9518    9520     /home/deploy/.forever/camo.log          0:2:5:37.310

$ forever logs 0
data:    server.js:9520 - SSL-Proxy running on 8081 with pid:9520 version:2.2.0.
nginx の設定ファイルを下記のように作成します。
https://camo.yourdomain.com へのアクセスを http://localhost:8081 へリバースプロキシをかけています。
nginx v1.4 以降を使っている場合、SPDY も利用できます。
$ sudo vim /etc/nginx/conf.d/camo.conf
server {
    listen      443 ssl spdy;
    server_name camo.yourdomain.com;

    ssl_certificate     ssl/camo.yourdomain.com.crt;
    ssl_certificate_key ssl/camo.yourdomain.com.key;

    location / {
        proxy_pass  http://localhost:8081;
    }
}
ホスト名 hostname と証明書 ssl_certificate、秘密鍵 ssl_certificate_key は実際に使うドメインに合わせてください。nginx の設定を再読み込みして、HTTPS でアクセスできれば成功です
以下は CentOS 7 の場合です。
$ sudo systemctl restart nginx
$ sudo systemctl status nginx
nginx.service - nginx - high performance web server
   Loaded: loaded (/usr/lib/systemd/system/nginx.service; enabled)
   Active: active (running) since Sun 2015-03-22 09:08:23 JST; 11s ago
...
まとめ
camo は単機能で非常に軽量な画像プロキシサーバーです。
camo を使うとサービスの HTTPS 化も非常に簡単に行えます。オススメです。
補足: GitHub で使われている形式 のURL について
GitHub では、以下の形式の URL で camo が使われています。
http://example.org/<digest>/<image-url>
こちらの形式では、<image-url> に直接 URL を指定するのではなく、URL を UTF-8 でエンコードし、データをバイトごと 16 進数にして 表現します。
たとえば、以下の URL の場合、
http://www.example.com/example.com
UTF-8 でエンコードされているとすると、以下のようになりますので、
68 74 74 70 3a 2f 2f 77 77 77 2e 65 78 61 6d 70 6c 65 2e 63 6f 6d 2f 65 78 61 6d 70 6c 65 2e 63 6f 6d
<image-url> は以下のようになります。
687474703a2f2f7777772e6578616d706c652e636f6d2f6578616d706c652e636f6d