前回 「ARKit+SceneKit+Metalで光学迷彩①」の続きで光学迷彩の調子が悪い感じを表現してみた

ノイズテクスチャの描画方法
①ブロックノイズテクスチャをコンピュートシェーダーで生成
②①をマテリアルとしたキャラクターの描画パスを追加
③前回作成した最終画像の生成処理に②を加える
・光学迷彩画像、または、②のブロックノイズ画像のどちらかを描画する
・描画のタイミングはランダム
アプリ実行時にXcodeで Capture GPU Frame すると次のようにレンダリングパスを確認できる(Xcode12で確認)。今回の追加したのは手書きの赤線部分。
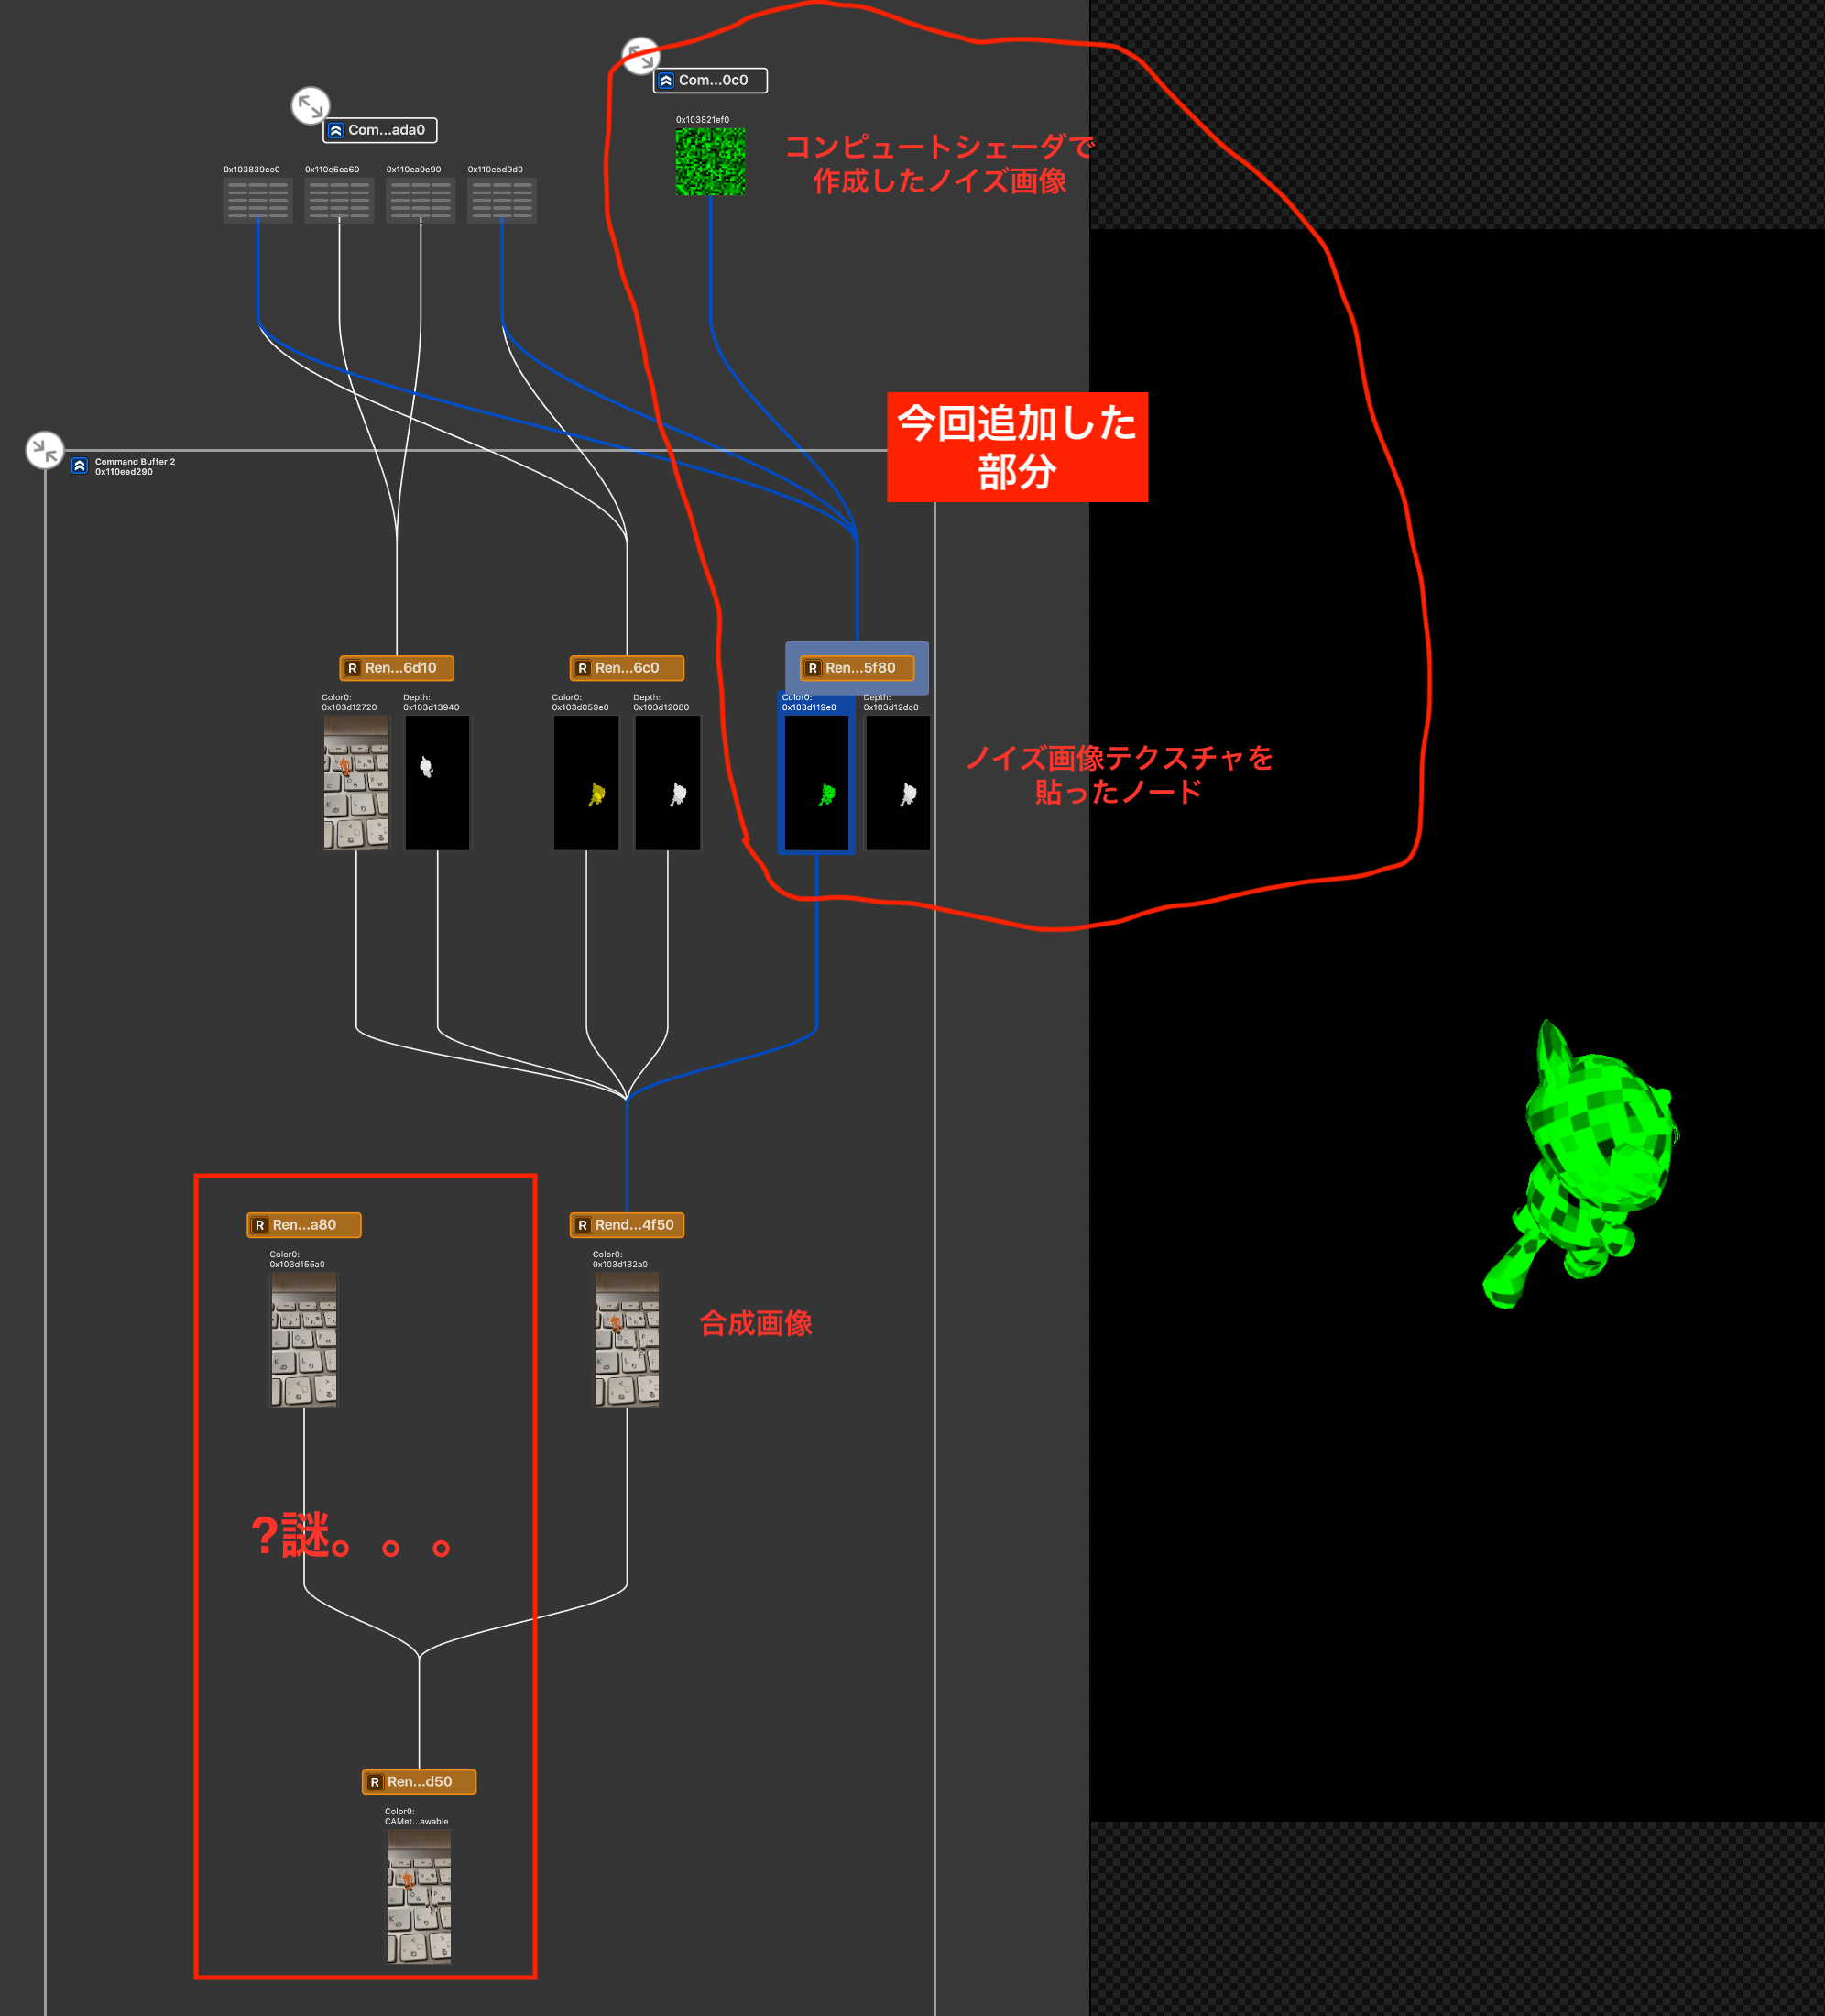
パス毎にどんな色・デプスが出力されているのか確認できるので便利。デバッグ実行中にカメラアイコンをタップするとCapture GPU Frame ができる。

コンピュートシェーダーによるブロックノイズ生成とSCNNodeへの設定
ノイズテクスチャの生成に必要なのは時間で変わる情報timeParam と xy座標。
描画の度にインクリメントされる timeParam の値をシェーダーに渡し、シェーダーはその情報とxy座標を元にノイズ色を決める。
ノイズ生成のタイミングは renderer(_ renderer: SCNSceneRenderer, updateAtTime time: TimeInterval) で動作している。
・シェーダー
// 乱数生成
float rand(float2 co) {
    return fract(sin(dot(co.xy, float2(12.9898, 78.233))) * 43758.5453);
}

// ブロックノイズ画像生成シェーダー
kernel void blockNoise(const device float& time [[buffer(0)]],
                       texture2d<float, access::write> out [[texture(0)]],
                       uint2 id [[thread_position_in_grid]]) {
    // 8pxのブロック
    float2 uv = float2(id.x / 8, id.y / 8);
    float noise = fract(rand(rand(float2(float(uv.x * 50 + time), float(uv.y * 50 + time) + time))));
    float4 color = float4(0.0, noise, 0.0, 1.0);

    out.write(color, id);
}
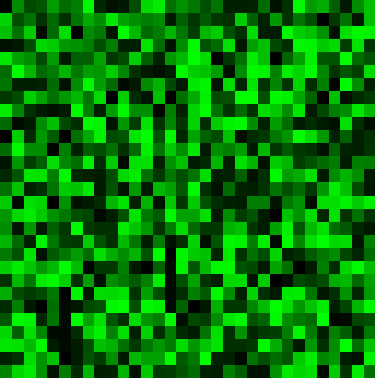
※このシェーダーで次のような画像が出力される。
・swift(シェーダー呼び出し部分)
private func setupMetal() {
(略)
    // ノイズ作成用コンピュートシェーダー
    let noiseShader = library.makeFunction(name: "blockNoise")!
    self.computeState = try! self.device.makeComputePipelineState(function: noiseShader)
    // シェーダーに渡す時間情報のバッファ
    self.timeParamBuffer = self.device.makeBuffer(length: MemoryLayout<Float>.size, options: .cpuCacheModeWriteCombined)
    self.timeParamPointer = UnsafeMutableRawPointer(self.timeParamBuffer.contents()).bindMemory(to: Float.self, capacity: 1)
    // スレッドグループ・グリッド
    self.threadgroupSize = MTLSizeMake(16, 16, 1)
    let threadCountW = (noiseTetureSize + self.threadgroupSize.width - 1) / self.threadgroupSize.width
    let threadCountH = (noiseTetureSize + self.threadgroupSize.height - 1) / self.threadgroupSize.height
    self.threadgroupCount = MTLSizeMake(threadCountW, threadCountH, 1)
}

func renderer(_ renderer: SCNSceneRenderer, updateAtTime time: TimeInterval) {
    // 描画毎にインクリメント
    self.timeParam += 1;
    self.timeParamPointer.pointee = self.timeParam

    let commandBuffer = self.commandQueue.makeCommandBuffer()!
    let computeEncoder = commandBuffer.makeComputeCommandEncoder()!

    computeEncoder.setComputePipelineState(computeState)
    computeEncoder.setBuffer(self.timeParamBuffer, offset: 0, index: 0)
    computeEncoder.setTexture(noiseTexture, index: 0)
    computeEncoder.dispatchThreadgroups(threadgroupCount, threadsPerThreadgroup: threadgroupSize)
    computeEncoder.endEncoding()
    commandBuffer.commit()
    commandBuffer.waitUntilCompleted()
}
シェーダーの出力は MTLTexture で受け取る。
ポイントになるのは、受け取ったテクスチャをキャラクターのマテリアルとしてどうやって渡すか。
// ノイズを書き込むテクスチャ
let textureDescriptor = MTLTextureDescriptor.texture2DDescriptor(pixelFormat: .rgba8Unorm,
                                                                 width: noiseTetureSize,
                                                                 height: noiseTetureSize,
                                                                 mipmapped: false)
textureDescriptor.usage = [.shaderWrite, .shaderRead]
self.noiseTexture = device.makeTexture(descriptor: textureDescriptor)!
// ノイズテクスチャを光学迷彩対象のNodeのマテリアルに設定
let node = self.rootNode.childNode(withName: "CamouflageNode", recursively: true)!
let material = SCNMaterial()
material.diffuse.contents = self.noiseTexture!
material.emission.contents = self.noiseTexture! // 影ができないようにする
node.geometry?.materials = [material]
これは生成したノイズ画像(テクスチャ)をSCNMaterial の diffuse.contents に設定して、それをキャラクターノードのジオメトリに設定するだけ。あとは SceneKit がやってくれる。SCNProgramを使う方向であれこれ試していたが、こちらの記事 にやり方が書いてあった。
マルチパスレンダリング
前回の記事で出力していた光学迷彩部分を、今回描画する部分(ノイズテクスチャが貼られたキャラクター)で置き換えたりする(ランダムなタイミングによって表示を切り替えてチラつきを表現)。
SCNTechnique に追加したパスは次の通り。
"pass_noise_node" : {
    "draw" : "DRAW_NODE",
    "includeCategoryMask" : 2,
    "outputs" : {
        "color" : "noise_color_node"
    }
},
ノイズテクスチャでキャラクターを描画するだけなので、これだけ。"color" : "noise_color_node" に色情報を出力している。
最終画像の生成シェーダーには次のように変更。上記パスで出力された noiseColorNode を引数に追加している。
// ノイズ発生タイミング生成
bool spike(float time) {
    float flickering = 0.3;     // チラつき具合。大きくするとチラつきやすくなる
    float piriod = -0.8;        // チラつく期間。小さくするとチラつく時間が長くなる
    if (rand(time * 0.1) > (1.0 - flickering) && sin(time) > piriod) {
        return true;
    } else {
        return false;
    }
}

// シーン全体とノード法線の合成用フラグメントシェーダー
fragment half4 mix_fragment(MixColorInOut vert [[stage_in]],
                            constant SCNSceneBuffer& scn_frame [[buffer(0)]],  // 描画フレームの情報
                            texture2d<float, access::sample> colorScene [[texture(0)]],
                            depth2d<float,   access::sample> depthScene [[texture(1)]],
                            texture2d<float, access::sample> colorNode [[texture(2)]],
                            depth2d<float,   access::sample> depthNode [[texture(3)]],
                            texture2d<float, access::sample> noiseColorNode [[texture(4)]])
{
    float ds = depthScene.sample(s, vert.uv);    // シーン全体描画時のデプス
    float dn = depthNode.sample(s, vert.uv);     // ノード描画時のデプス

    float4 fragment_color;
    if (dn > ds) {
        if (spike(scn_frame.time)) {
            // ノイズのタイミングではノイズテクスチャの色を採用
            fragment_color = noiseColorNode.sample(s, fract(vert.uv));

        } else {
            // 光学迷彩対象のオブジェクトがシーンで描画したオブジェクトの手前にあるので、光学迷彩効果を出す
(略)
        }
spike() でランダムな true/false 情報を作り、それでノイズのあるキャラクターか、光学迷彩のキャラクターか表示色を切り替えている。
ソースコード全体
・マルチパスレンダリング定義
{
    "targets" : {
        "color_scene" : { "type" : "color" },
        "depth_scene" : { "type" : "depth" },
        "color_node"  : { "type" : "color" },
        "depth_node"  : { "type" : "depth" },
        "noise_color_node"  : { "type" : "color" }
    },
    "passes" : {
        "pass_scene" : {
            "draw" : "DRAW_SCENE",
            "excludeCategoryMask" : 2,
            "outputs" : {
                "color" : "color_scene",
                "depth" : "depth_scene"
            },
            "colorStates" : {
                "clear" : true,
                "clearColor" : "sceneBackground"
            },
            "depthStates" : {
                "clear" : true,
                "func" : "less"
            }
        },
        "pass_node" : {
            "draw" : "DRAW_NODE",
            "includeCategoryMask" : 2,
            "metalVertexShader" : "node_vertex",
            "metalFragmentShader" : "node_fragment",
            "outputs" : {
                "color" : "color_node",
                "depth" : "depth_node"
            },
            "depthStates" : {
                "clear" : true,
                "func" : "less"
            }
        },
        "pass_noise_node" : {
            "draw" : "DRAW_NODE",
            "includeCategoryMask" : 2,
            "outputs" : {
                "color" : "noise_color_node"
            }
        },
        "pass_mix" : {
            "draw" : "DRAW_QUAD",
            "inputs" : {
                "colorScene" : "color_scene",
                "depthScene" : "depth_scene",
                "colorNode"  : "color_node",
                "depthNode"  : "depth_node",
                "noiseColorNode" : "noise_color_node"
            },
            "metalVertexShader" : "mix_vertex",
            "metalFragmentShader" : "mix_fragment",
            "outputs" : {
                "color" : "COLOR"
            },
            "colorStates" : {
                "clear" : "true"
            }
        }
    },
    "sequence" : [
        "pass_scene",
        "pass_node",
        "pass_noise_node",
        "pass_mix"
    ]
}
・シェーダー
# include <metal_stdlib>
using namespace metal;
# include <SceneKit/scn_metal>

// SceneKit -> Shader の受け渡し型
// 定義は https://developer.apple.com/documentation/scenekit/scnprogram 参照
struct VertexInput {
    float4 position [[attribute(SCNVertexSemanticPosition)]];   // 頂点座標
    float2 texCoords [[attribute(SCNVertexSemanticTexcoord0)]]; // テクスチャ座標
    float2 normal [[attribute(SCNVertexSemanticNormal)]];       // 法線
};

// SceneKit -> Shader の受け渡し型(ノード毎)
// 定義は https://developer.apple.com/documentation/scenekit/scnprogram 参照
struct PerNodeBuffer {
    float4x4 modelViewProjectionTransform;
};

struct NodeColorInOut {
    float4 position [[position]];
    float4 normal;
};

struct MixColorInOut {
    float4 position [[position]];
    float2 uv;
};

// 乱数生成
float rand(float2 co) {
    return fract(sin(dot(co.xy, float2(12.9898, 78.233))) * 43758.5453);
}

// ノイズ発生タイミング生成
bool spike(float time) {
    float flickering = 0.3;     // チラつき具合。大きくするとチラつきやすくなる
    float piriod = -0.8;        // チラつく期間。小さくするとチラつく時間が長くなる
    if (rand(time * 0.1) > (1.0 - flickering) && sin(time) > piriod) {
        return true;
    } else {
        return false;
    }
}

// ノード用頂点シェーダー
vertex NodeColorInOut node_vertex(VertexInput in [[stage_in]],
                                  constant SCNSceneBuffer& scn_frame [[buffer(0)]],  // 描画フレームの情報
                                  constant PerNodeBuffer& scn_node [[buffer(1)]])    // Node毎の情報
{
    NodeColorInOut out;
    out.position = scn_node.modelViewProjectionTransform * in.position;
    out.normal = scn_node.modelViewProjectionTransform * float4(in.normal, 1.0);
    return out;
}

// ノード用フラグメントシェーダー
fragment half4 node_fragment(NodeColorInOut vert [[stage_in]])
{
    // 使用する法線はx, yのみ。色情報として扱うので、-1.0 ~ 1.0 -> 0.0 ~ 1.0 に変換しておく
    float4 color =  float4((vert.normal.x + 1.0) * 0.5 , (vert.normal.y + 1.0) * 0.5, 0.0, 0.0);
    return half4(color);        // 法線を色情報として出力。この情報で光学迷彩対象の背景を歪める
}

// シーン全体とノード法線の合成用頂点シェーダー
vertex MixColorInOut mix_vertex(VertexInput in [[stage_in]],
                                        constant SCNSceneBuffer& scn_frame [[buffer(0)]])
{
    MixColorInOut out;
    out.position = in.position;
    // 座標系を -1.0 ~ 1.0 -> 0.0 ~ 1.0 に変換。y軸は反転。
    out.uv = float2((in.position.x + 1.0) * 0.5 , (in.position.y + 1.0) * -0.5);
    return out;
}

constexpr sampler s = sampler(coord::normalized,
                              address::repeat,    // clamp_to_edge/clamp_to_border(iOS14)はだめ。
                              filter::nearest);

// シーン全体とノード法線の合成用フラグメントシェーダー
fragment half4 mix_fragment(MixColorInOut vert [[stage_in]],
                            constant SCNSceneBuffer& scn_frame [[buffer(0)]],  // 描画フレームの情報
                            texture2d<float, access::sample> colorScene [[texture(0)]],
                            depth2d<float,   access::sample> depthScene [[texture(1)]],
                            texture2d<float, access::sample> colorNode [[texture(2)]],
                            depth2d<float,   access::sample> depthNode [[texture(3)]],
                            texture2d<float, access::sample> noiseColorNode [[texture(4)]])
{
    float ds = depthScene.sample(s, vert.uv);    // シーン全体描画時のデプス
    float dn = depthNode.sample(s, vert.uv);     // ノード描画時のデプス

    float4 fragment_color;
    if (dn > ds) {
        if (spike(scn_frame.time)) {
            // ノイズのタイミングではノイズテクスチャの色を採用
            fragment_color = noiseColorNode.sample(s, fract(vert.uv));

        } else {
            // 光学迷彩対象のオブジェクトがシーンで描画したオブジェクトの手前にあるので、光学迷彩効果を出す
            float3 normal_map = colorNode.sample(s, vert.uv).rgb;
            // 0.0 ~ 1.0 -> -1.0 ~ 1.0 に戻して座標として使えるようにする
            normal_map.xy = normal_map.xy * 2 - 1.0;
            // 採用する背景色の位置をノードの法線方向(xy平面)に少しずらして取得することを歪んだ背景にする
            float2 uv = vert.uv + normal_map.xy * 0.1;
            if (uv.x > 1.0 ||  uv.x < 0.0) {
                // 画面の外の色を採用しないようにする(samplerのaddressingで解決したかったがうまくいかなかった)
                fragment_color = colorScene.sample(s, fract(vert.uv));
            } else {
                fragment_color = colorScene.sample(s, fract(uv));
            }
        }
    } else {
        // 光学迷彩対象のオブジェクトがシーンで描画したオブジェクトの奥にあるので、シーン側の色をそのまま採用
        fragment_color = colorScene.sample(s, fract(vert.uv));
    }

    return half4(fragment_color);
}

// ブロックノイズ画像生成シェーダー
kernel void blockNoise(const device float& time [[buffer(0)]],
                       texture2d<float, access::write> out [[texture(0)]],
                       uint2 id [[thread_position_in_grid]]) {
    // 8pxのブロック
    float2 uv = float2(id.x / 8, id.y / 8);
    float noise = fract(rand(rand(float2(float(uv.x * 50 + time), float(uv.y * 50 + time) + time))));
    float4 color = float4(0.0, noise, 0.0, 1.0);

    out.write(color, id);
}
・swift
import ARKit
import SceneKit

class ViewController: UIViewController, ARSCNViewDelegate {

    @IBOutlet weak var scnView: ARSCNView!

    private var rootNode: SCNNode!

    private let device = MTLCreateSystemDefaultDevice()!
    private var commandQueue: MTLCommandQueue!

    private var computeState: MTLComputePipelineState! = nil
    private var noiseTexture: MTLTexture! = nil

    private let noiseTetureSize = 256
    private var threadgroupSize: MTLSize!
    private var threadgroupCount: MTLSize!
    private var timeParam: Float = 0
    private var timeParamBuffer: MTLBuffer!
    private var timeParamPointer: UnsafeMutablePointer<Float>!

    override func viewDidLoad() {
        super.viewDidLoad()
        // キャラクター読み込み。WWDC2017 SceneKit Demoを借用 https://developer.apple.com/videos/play/wwdc2017/604/
        guard let scene = SCNScene(named: "art.scnassets/max.scn"),
              let rootNode = scene.rootNode.childNode(withName: "root", recursively: true) else { return }
        self.rootNode = rootNode
        self.rootNode.isHidden = true

        // Metal セットアップ
        self.setupMetal()
        // Scene Technique セットアップ
        self.setupSCNTechnique()

        // AR Session 開始
        self.scnView.delegate = self
        let configuration = ARWorldTrackingConfiguration()
        configuration.planeDetection = [.horizontal]
        self.scnView.session.run(configuration, options: [.removeExistingAnchors, .resetTracking])
    }

    private func setupMetal() {
        self.commandQueue = self.device.makeCommandQueue()!
        let library = self.device.makeDefaultLibrary()!
        // ノイズを書き込むテクスチャ
        let textureDescriptor = MTLTextureDescriptor.texture2DDescriptor(pixelFormat: .rgba8Unorm,
                                                                         width: noiseTetureSize,
                                                                         height: noiseTetureSize,
                                                                         mipmapped: false)
        textureDescriptor.usage = [.shaderWrite, .shaderRead]
        self.noiseTexture = device.makeTexture(descriptor: textureDescriptor)!
        // ノイズテクスチャを光学迷彩対象のNodeのマテリアルに設定
        let node = self.rootNode.childNode(withName: "CamouflageNode", recursively: true)!
        let material = SCNMaterial()
        material.diffuse.contents = self.noiseTexture!
        material.emission.contents = self.noiseTexture! // 影ができないようにする
        node.geometry?.materials = [material]
        // ノイズ作成用コンピュートシェーダー
        let noiseShader = library.makeFunction(name: "blockNoise")!
        self.computeState = try! self.device.makeComputePipelineState(function: noiseShader)
        // シェーダーに渡す時間情報のバッファ
        self.timeParamBuffer = self.device.makeBuffer(length: MemoryLayout<Float>.size, options: .cpuCacheModeWriteCombined)
        self.timeParamPointer = UnsafeMutableRawPointer(self.timeParamBuffer.contents()).bindMemory(to: Float.self, capacity: 1)
        // スレッドグループ・グリッド
        self.threadgroupSize = MTLSizeMake(16, 16, 1)
        let threadCountW = (noiseTetureSize + self.threadgroupSize.width - 1) / self.threadgroupSize.width
        let threadCountH = (noiseTetureSize + self.threadgroupSize.height - 1) / self.threadgroupSize.height
        self.threadgroupCount = MTLSizeMake(threadCountW, threadCountH, 1)
    }

    private func setupSCNTechnique() {
        guard let path = Bundle.main.path(forResource: "technique", ofType: "json") else { return }
        let url = URL(fileURLWithPath: path)
        guard let techniqueData = try? Data(contentsOf: url),
              let dict = try? JSONSerialization.jsonObject(with: techniqueData) as? [String: AnyObject] else { return }
        // マルチパスレンダリングを有効にする
        let technique = SCNTechnique(dictionary: dict)
        scnView.technique = technique
    }

    func renderer(_ renderer: SCNSceneRenderer, updateAtTime time: TimeInterval) {
        // 描画毎にインクリメント
        self.timeParam += 1;
        self.timeParamPointer.pointee = self.timeParam

        let commandBuffer = self.commandQueue.makeCommandBuffer()!
        let computeEncoder = commandBuffer.makeComputeCommandEncoder()!

        computeEncoder.setComputePipelineState(computeState)
        computeEncoder.setBuffer(self.timeParamBuffer, offset: 0, index: 0)
        computeEncoder.setTexture(noiseTexture, index: 0)
        computeEncoder.dispatchThreadgroups(threadgroupCount, threadsPerThreadgroup: threadgroupSize)
        computeEncoder.endEncoding()
        commandBuffer.commit()
        commandBuffer.waitUntilCompleted()
    }

    func renderer(_: SCNSceneRenderer, didAdd node: SCNNode, for anchor: ARAnchor) {
        guard let planeAnchor = anchor as? ARPlaneAnchor, self.rootNode.isHidden else { return }
        self.rootNode.simdPosition = planeAnchor.center
        self.rootNode.isHidden = false
        DispatchQueue.main.async {
            // 検出した平面上にオブジェクトを表示
            node.addChildNode(self.rootNode)
        }
    }
}