9. Components & Props
クラス https://www.vuemastery.com/courses/intro-to-vue-3/components-and-props-vue3
VS Codeから該当フォルダを選択して、開きます。その後に、配下のgit部分をクリックして、ブランチをL9-startへ入れ替えてください。
ブランチ切り替え方法 https://qiita.com/phjg81/items/e6695eb2334d9297a318
今日のポイントはproduct componentを利用するように変更することです。
Components
WEBは色んなエレメントにて、階層をもって、下記のように構成されます。
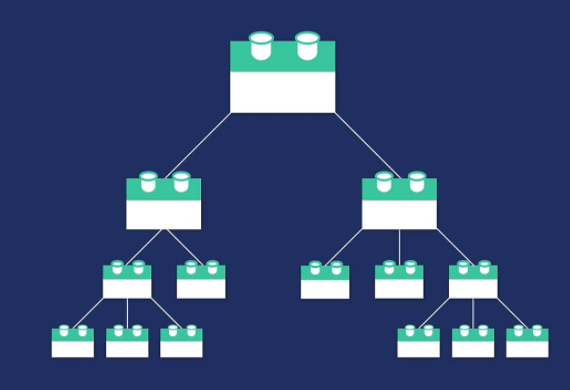
色んな子エレメントが重ねて、親エレメントになります。

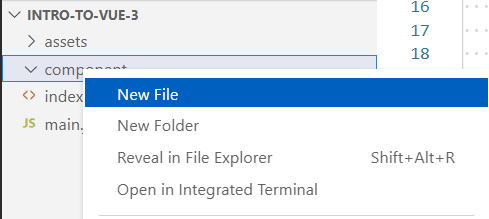
まずは、フォルダを作成して、componentsと言う名前にしてください。

componentsフォルダをマウスの右を押下して、「New File」を選択して、「ProductDisplay.js」にしてください。
その後に内容は下記のものを入れてください。
app.component('product-display', {
    template:
      /*index.htmlにある内容の中で、product-display以下をコピーして、貼り付けてください。*/
      `<div class="product-display">
        <div class="product-container">
          <div class="product-image">
            <img v-bind:src="image">
          </div>
          <div class="product-info">
            <h1>{{ title }}</h1>

            <p v-if="inStock">In Stock</p>
            <p v-else>Out of Stock</p>

            <div
              v-for="(variant, index) in variants"
              :key="variant.id"
              @mouseover="updateVariant(index)"
              class="color-circle"
              :style="{ backgroundColor: variant.color }">
            </div>

            <button
              class="button"
              :class="{ disabledButton: !inStock }"
              :disabled="!inStock"
              v-on:click="addToCart">
              Add to Cart
            </button>
          </div>
        </div>
      </div>`,
     /*main.jsにある内容の中で、createApp({...}) の配下にある内容をコピーして、貼り付けてください。*/
     /*cartはサイト全体に表示される内容なので、ここからは削除します。*/
    data() {
      return {
          product: 'Socks',
          brand: 'Vue Mastery',
          selectedVariant: 0,
          details: ['50% cotton', '30% wool', '20% polyester'],
          variants: [
            { id: 2234, color: 'green', image: './assets/images/socks_green.jpg', quantity: 50 },
            { id: 2235, color: 'blue', image: './assets/images/socks_blue.jpg', quantity: 0 },
          ]
      }
    },
    methods: {
        addToCart() {
            this.cart += 1
        },
        updateVariant(index) {
            this.selectedVariant = index
        }
    },
    computed: {
        title() {
            return this.brand + ' ' + this.product
        },
        image() {
            return this.variants[this.selectedVariant].image
        },
        inStock() {
            return this.variants[this.selectedVariant].quantity
        }
    }
  })
const app = Vue.createApp({
    data() {
      return {
        cart: 0
      }
    },
    methods: {}
})
<!DOCTYPE html>
<html lang="en">
  <head>
    <meta charset="UTF-8" />
    <title>Vue Mastery</title>
    <!-- Import Styles -->
    <link rel="stylesheet" href="./assets/styles.css" />
    <!-- Import Vue.js -->
    <script src="https://unpkg.com/vue@3.0.11/dist/vue.global.js"></script>
  </head>
  <body>
    <div id="app">
      <div class="nav-bar"></div>

      <div class="cart">Cart({{ cart }})</div>
      <product-display></product-display>
      <product-display></product-display>
      <product-display></product-display>
    </div>

    <!-- Import App -->
    <script src="./main.js"></script>

    <!-- Import Components -->
    <script src="./components/ProductDisplay.js"></script>

    <!-- Mount App -->
    <script>
      const mountedApp = app.mount('#app')
    </script>

  </body>
</html>
これによって、商品エレメントが複数表示されました。

Props
親エレメントから子エレメントとのやり取りする属性が必要な場合は、Propsを利用すれば、大丈夫です。
利用者がpremiumの場合には、送料が無料になる機能を追加して見ます。
const app = Vue.createApp({
    data() {
      return {
        cart: 0,
        premium: true
      }
    },
    methods: {}
})
app.component('product-display', {
    props: {
      premium: {
        type: Boolean,
        required: true
      }
    },
    template:
    `<div class="product-display">
      ...
      </div>`,
    data() {
      return {
          ...
      }
    },
    methods: {
        ...
    },
    computed: {
        ...
    }
  })
これで、premiumを利用するための準備が終わりましたので、使ってみます。
<product-display :premium="premium"></product-display>

app.component('product-display', {
    props: {
      premium: {
        type: Boolean,
        required: true
      }
    },
    template:
    `<div class="product-display">
      ...
          <p v-else>Out of Stock</p>
          <p>Shipping: {{ shipping }}</p>
      ...
      </div>`,
    data() {
      return {
          ...
      }
    },
    methods: {
        ...
    },
    computed: {
        ...,
        shipping() {
          if (this.premium) {
            return 'Free'
          }
            return 2.99
        }
    }
  })
一番上位ののみに:premiumを伝えた結果は以下になります。

ここまでやって見て、リストとして、繰り返されるものや小さなエレメントをComponentsにして、効率化することにより、実装量が減らせる効果があることに気づいてくれたと思います。
それ以外のものは単純にvueのアプリとして、マウントして効率化させましょう。
今回の課題はproduct-display Componentsからproduct-detailsと言うComponentsを作ってdetailsデータオブジェクトを渡してulタグ内のliとして、繰り返して表示して見ましょう。
課題確認
app.component('product-display', {
    props: {
      ...
    },
    template:
    /*html*/
    `...
        <div class="product-info">
          ...
          <p>Shipping: {{ shipping }}</p>
          <!-- solution -->
          <product-details :details="details"></product-details>
          ...
    </div>`,
    data() {
      return {
          ...
          details: ['50% cotton', '30% wool', '20% polyester'],
          ...
      }
    },
    methods: {
        ...
    },
    computed: {
        ...
    }
  })
app.component('product-details', {
    props: {
        details: {
        type: Array,
        required: true
      }
    },
    template:
    /*html*/
    `
    <ul>
        <li v-for="detail in details">{{ detail }}</li>
    </ul>
    `
  })
親componentsが先に来るようにしてください。
    <!-- Import Components -->
    <script src="./components/ProductDisplay.js"></script>
    <!-- solution -->
    <script src="./components/ProductDetails.js"></script>
