Ateam Group Manager & Specialist Advent Calendar 2020の23日目は
Increments株式会社の @phigasui が担当します。
近年よくみる、月額課金サービス。
単発購入の決済のシステム導入に比べて実装すべき決済にまつわる機能が多くて大変なイメージないですか?
月額課金のサービスでは下記機能が必要とされると思います。
- トライアル期間の設置
- 決済情報の登録、変更
- 決済の履行
- 決済できない場合のアカウント停止
- 領収書の送付
- 決済履歴の表示
- プランの変更
- 解約
- 返金
細かい要素はまだあるもののこれらがあれば十分です。
一見、機能が多く実現が大変そうですが、Stripe Billing とそのうちの機能の Stripe Customer Portal を活用すればほぼ実装なしに実現できます。
まず、Stripe Billingとは
よくある決済システムでは決済の手段と入金しかサポートしていません。
Stripe Billing では定期支払いであったり、プランの用意、顧客管理、決済履歴など決済にまつわるビジネスロジックを備えています。冒頭に説明した月額課金のサービスで必要な機能を全部サポートしてくれています。
また、APIが充実しており Stripe の管理画面での操作より API で操作可能な範囲が広いです。
ドキュメントやバックエンド、フロントエンド共にライブラリも充実しており開発容易性が高いです。
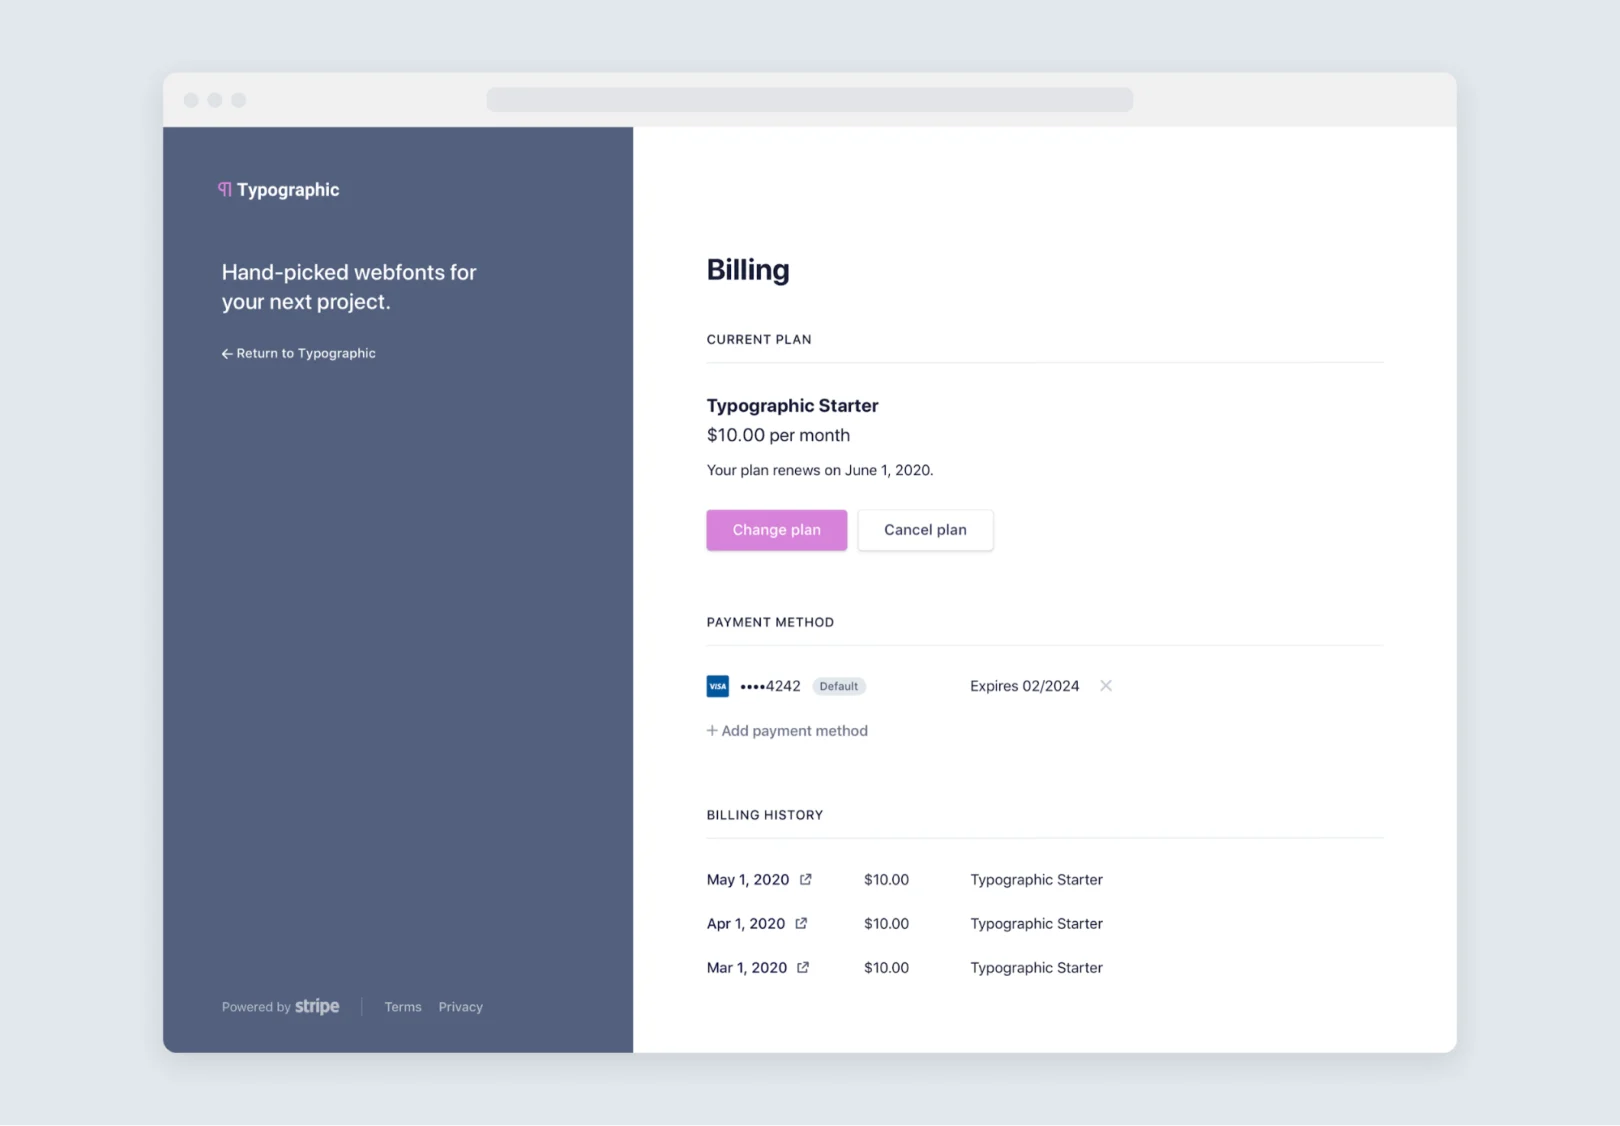
Stripe Customer Portal とは
サービス利用者向けに提供できる決済情報の変更、確認できるページです。
- プランの変更
- 定額課金のキャンセル
- 決済情報の変更
- 決済履歴の確認
などが行えます。

https://stripe.com/blog/billing-customer-portal
つまり必要な実装って...
- 顧客情報と定額課金の作成
- Stripe Customer Portal へ遷移
- 定額課金のステータスの受け取り
だけでほぼ実現でききるんです。
いってしまえば Stripe Customer Portal の導入をしてしまえば概ねできます。
なので公式のドキュメント Integrating the customer portal を読めば簡単に導入できますし、公式のリポジトリにあるサンプルを使えばかんたんに試せます。
developer-office-hours/2020-06-29-customer-portal at master · stripe-samples/developer-office-hours
Stripe API
まず Stripe の API Secret Key を取得して initializer で設定します。
Stripe.api_key = Setting.stripe_secret_api_key
Product と Plan の用意
Stripeでは商品と商品単位でのプランの用意が必要です。
これは管理画面からも作成できます。
product = Stripe::Product.create(name: 'product')

::Stripe::Plan.create(
  product: product.id
  unit_amount: 500,
  currency: 'jpy',
  interval: 'month',
  name: 'basic',
)
Stripe Customer、Subscription の作成と紐付け
ユーザーアカウントが作成された時に Stripe の Customer を作成し、その id をユーザーと紐づけて保存しおくだけです。
customer = ::Stripe::Customer.create
::Stripe::Subscription.create(
    customer: customer.id,
    items: [{
        plan: stripe_plan_id,
    }],
)
user.update(stripe_customer_id: cutomer.id)
必要に応じて #create に email や name, description をキーワード引数として渡せばユーザー情報を Stripe 上の顧客情報として保存できます。
Stripe Customer Portal への遷移
サービス上でプランの変更や、決済情報の変更の導線として Stripe Customer Portal を用意します。
リクエストが発生すれば Customer Portal へのURLを発行してリダイレクトさせます。
def create
  customer_portal_session = ::Stripe::BillingPortal::Session.create(
    customer: user.stripe_customer_id,
    return_url: RETURN_URL,
  )

  redirect_to customer_portal_session.url
end
定額課金のステータスの受け取り
定額課金のシステムではユーザーの決済状況に応じてステータスを変更し、サービスが利用できる状態か判断できる必要があります。
Stripe 上にそのステータスはあるのですが、都度 API で取得してステータスを確認するのは処理に負荷がかかるため、Stripe の Subscription に更新があるたびに、データベースを更新してサービス内で参照できる状態が望ましいです。
  def create
    event = ::Stripe::Webhook.construct_event(request_body_json, request.headers['Stripe-Signature'], Setting.stripe_webhook_secret)

    case event.type
    when 'customer.subscription.updated', 'customer.subscription.deleted'
      subscription = event.data.object
      user = User.find_by(stripe_customer_id: subscription.customer)
      user.update(
        stripe_subscription_status: subscription.status,
      )
    end
end
Stripe からのリクエストを確認するために署名の確認を行う必要があります。
これは管理画面で取得できる エンドポイントのシークレット を使って Stripe Event オブジェクトを作成すると確認できます。
Webhook の署名の確認
Stripe Subscription では
-
trialing: トライアル中 -
active: 課金中 -
past_due: 支払い期限超過 -
unpaid: 未払い -
canceled: 定額課金のキャンセル
のステータスを持っています。このステータスに応じてサービスの利用可否をチェックすればOKです。
Stripe は煩わしい決済周りの機能をサポートしてくれ、さらに開発者支援が充実しており好きです。
もうこれ抜きで決済が必要なサービスは考えられないですね。
参考文献
アドベントカレンダー明日の告知
Ateam Group Manager & Specialist Advent Calendar 2020の24日目、クリスマスイブは @kopug がお送りします!!