Introductions
Google Place Autocomplete is a service that return the place prediction according to the user's search queries.
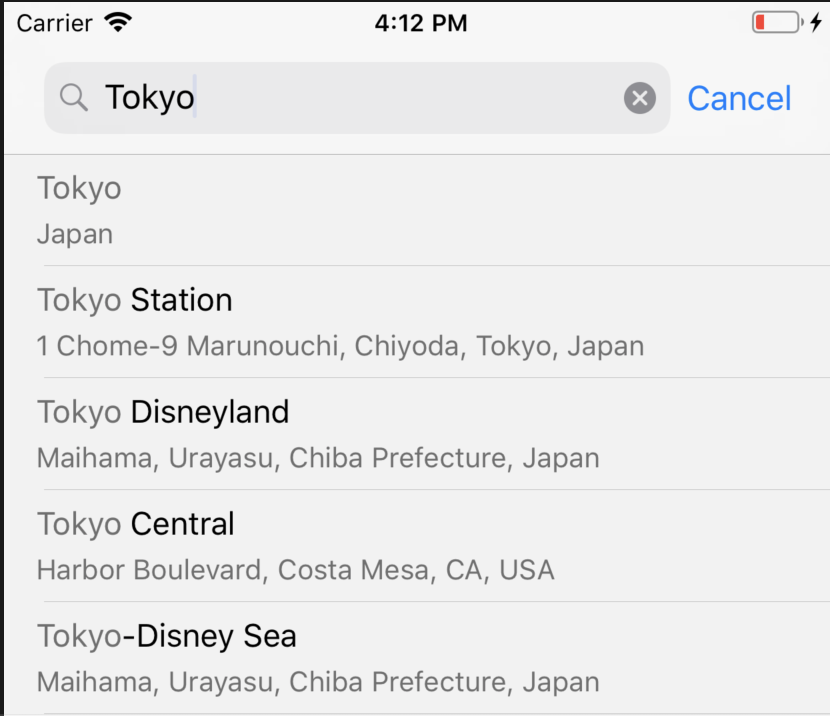
In this article, I will show on how we can implement this service in iOS
Tools and Libraries
- Xcode 9+
- Swift 4+
- APIKit
- Himotoki
- GooglePlaces
- RxSwift
Setup Environment
Now let's go ahead and create a blank single view application in Xcode and name it as what you want. After that install all the required libraries using CocoaPod. I assume you have CocoaPod install in you local machine. If you don't have, I recommend you to check out this website before move on to the next step.
In terminal, navigate to the project directory and run
pod init
pod install
Then, in your pod file, add these following libraries
  pod "GooglePlaces"
  pod "GooglePlacePicker"
  pod "GoogleMaps"
  pod "RxSwift"
  pod "APIKit"
  pod "Himotoki"
and run
pod install
Create project and enable API in Google Developer Console
Now that you have dev-environment setup. Let go and create a new project in google developer console.
After that go ahead and enable Map SDK for iOS and Time Zone API.
In you dashboard panel, click on credential and create new APIKey
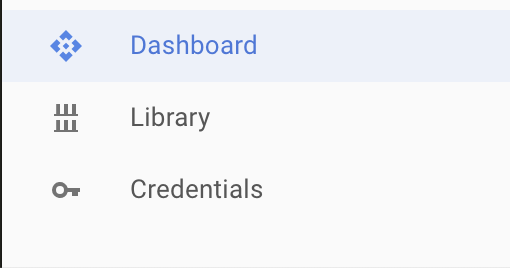
You will use this APIKey later in the project.
Coding part
As We already have environment setup and APIKey, It's time to get our hand dirty. Open the AppDelegate.swift and add
import GooglePlaces
After that in didFinishLaunchingWithOptions callback, add our Google APIKey that we have created in the previous step
GMSPlacesClient.provideAPIKey("< your-api-key-from-google-developer-console >")
In the project directory create new folder call Extensions and in that folder create a new file APIKit+Extension.swift and this following block of code
import APIKit
import RxSwift

extension Session {
    func sendRequest<T: Request>(request: T) -> Observable<T.Response> {
        return Observable.create { observer in
            let task = self.send(request) { result in
                switch result {
                case .success(let res):
                    observer.on(.next(res))
                    observer.on(.completed)
                case .failure(let err):
                    observer.onError(err)
                }
            }
            return Disposables.create {
                task?.cancel()
            }
        }
    }

    class func sendRequest<T: Request>(request: T) -> Observable<T.Response> {
        return shared.rx_sendRequest(request: request)
    }
}
We need to create some request type for APIKit. Now let's go ahead and create RequestType.swift and add this following code to it
import APIKit
import Himotoki

protocol RequestType: APIKit.Request {}

extension RequestType {


    var baseURL: URL {
        return URL(string: "https://maps.googleapis.com")!
    }

    var headerFields: [String: String] {
        return [
            "Accept": "application/json"
        ]
    }

}

// MARK: Decode
extension RequestType where Response: Himotoki.Decodable {
    func response(from object: Any, urlResponse: HTTPURLResponse) throws -> Self.Response {
        return try decodeValue(object)
    }
}
We use Himotoki decodable as the response type.
In your root directory of the project create a new file call APIClient.swift and add this block of code
import RxSwift
import APIKit
import Result

struct APIClient {

    struct Timezone {
        static func getTimezone(location: String, timestamp: Double) -> Observable<APIClient.Timezone.ResponseTimezone> {
            return Session.sendRequest(request: TimezoneRequest(location: location, timestamp: timestamp))
        }
    }

}
We passed TimezoneReqest as the parameter of Session.sendRequest but we didn't have it yet. Let's go and create new file call TimezoneRequest.swift and add this following code
import Foundation
import APIKit
import Himotoki

extension APIClient.Timezone {
    struct TimezoneRequest: RequestType {
        typealias Response = APIClient.Timezone.ResponseTimezone

        let location: String
        let timestamp: Double

        var path: String {
            return "/maps/api/timezone/json"
        }

        var method: HTTPMethod {
            return .get
        }

        var parameters: Any? {
            let params = [
                "location": self.location,
                "timestamp": self.timestamp,
                "key": "< your-google-api-key-from-google-developer-console >"
                ] as [String : Any] as [String : Any]
            return params
        }
    }

    struct ResponseTimezone: Himotoki.Decodable {
        let dstOffset: Int
        let rawOffset: Int
        let status: String
        let timeZoneId: String
        let timeZoneName: String

        static func decode(_ e: Extractor) throws -> APIClient.Timezone.ResponseTimezone{
            return try ResponseTimezone(
                dstOffset: e <| "dstOffset",
                rawOffset: e <| "rawOffset",
                status: e <| "status",
                timeZoneId: e <| "timeZoneId",
                timeZoneName:  e <| "timeZoneName"
            )
        }
    }
}
Now we've setup and prepare stuff for the Timezone http request. Let's create the Google Map Autocomplete. Open ViewController.swift and import GooglePlaces
import GooglePlaces
After that add this code to viewDidAppear() callback
let autocompleteController = GMSAutocompleteViewController()
autocompleteController.delegate = self
present(autocompleteController, animated: true, completion: nil)
Now that we have Map Autocomplete setup in the project but we need to do something else when the user select the result location. Now add this code to the end of ViewController.swift
extension ViewController: GMSAutocompleteViewControllerDelegate {

    // Handle the user's selection.
    func viewController(_ viewController: GMSAutocompleteViewController, didAutocompleteWith place: GMSPlace) {
        print("place name \(place.name)")
    }

    func viewController(_ viewController: GMSAutocompleteViewController, didFailAutocompleteWithError error: Error) {
        print("Error: ", error.localizedDescription)
    }

    // User canceled the operation.
    func wasCancelled(_ viewController: GMSAutocompleteViewController) {
        print("user cancel search")
    }

    // Turn the network activity indicator on and off again.
    func didRequestAutocompletePredictions(_ viewController: GMSAutocompleteViewController) {
        UIApplication.shared.isNetworkActivityIndicatorVisible = true
    }

    func didUpdateAutocompletePredictions(_ viewController: GMSAutocompleteViewController) {
        UIApplication.shared.isNetworkActivityIndicatorVisible = false
    }

}
GMSAutocompleteViewController has some callback function that we can use to keep track if the user select some location or cancel the search process etc. To have those methods, ViewController has to be conformed to GMSAutocompleteViewControllerDelegate as shown in the code snippet above.
Now, in didAutocompleteWith add this following code to show UIAlertDialog contain location detail including timezone.
let timestamp = NSDate().timeIntervalSince1970
APIClient.Timezone.getTimezone(location: "\(place.coordinate.latitude),\(place.coordinate.longitude)", timestamp: timestamp).subscribe { event in
   switch event {
     case .next(let resp):
          let timezoneValue = NSTimeZone(name: resp.timeZoneId)
          let info = "latitude: \(place.coordinate.latitude)\n longitude: \(place.coordinate.longitude)\ntimezoneId: \(resp.timeZoneId)\ntimezoneName: \(resp.timeZoneName)\ntimezoneValue: \(timezoneValue?.abbreviation ?? "")"
          let alert = UIAlertController(title: place.name, message: info, preferredStyle: .alert)

          alert.addAction(UIAlertAction(title: "Okay", style: .default, handler: nil))
          viewController.present(alert, animated: true)
     case .error(let error): print("error \(error)")
     case .completed: print("completed")
   }
}
We need to give two parameters (location and timestamp) for the timezone http request according to the official document. Now let run the application and see how it look.
That's all for this article, I also have sample code in Github where you can check it here