Using Quick and Nimble for Unit Testing in iOS project
As I was discussing in my previous article (IOS Test Frameworks and Unit Testing Brief Explanation) about the built-in XCTest framework, there are a lot more easier using XCTest but as a developer we always try to find ways that is easier and clean for us to write the code. That's why I am now introducing Quick and Nimble for Unit Testing. Quick and Nimble provide similar capability of doing the Unit Testing in iOS when compare to XCTest, but you will find it more useful as you go and play with it. I've been playing around with it for a while and I feel like I'm not gonna use the XCTest framework again :) Sound bad right!!!
Comparison between XCTest vs Quick and Nimble
XCTest is a testing framework provided by Apple. It is also pretty straightforward but you need to be aware of setup() and tearDown() functions. XCTAssertions are also pretty inconvenient to use. If you take a look at the naming of the test methods, it is also kind of complicated to descriptively capture the test case not having very long function names.
Quick is a testing framework which provides a convenient method to compose a unit test. It uses the single function spec() to define the whole test. The spec() function is composed of multiple sections. The sections are describe, context and it. I will explain the purpose and benefits of such a setup later in this article.
Nimble is a matching framework which provides plenty of options how to fulfill your test expectations. The keyword expect is very important, because it replaces XCTAssertion of XCTest.
How to use Quick and Nimble
First, you have to install Quick and Nimble. You can either use Cathage or Cocoa Pod, but as I am more familiar with Cocoa Pod, I will use it in this article.
pod "Quick"
pod "Nimble"
Now go ahead an navigate to the Build Phase and add Link Library as shown in the picture below: 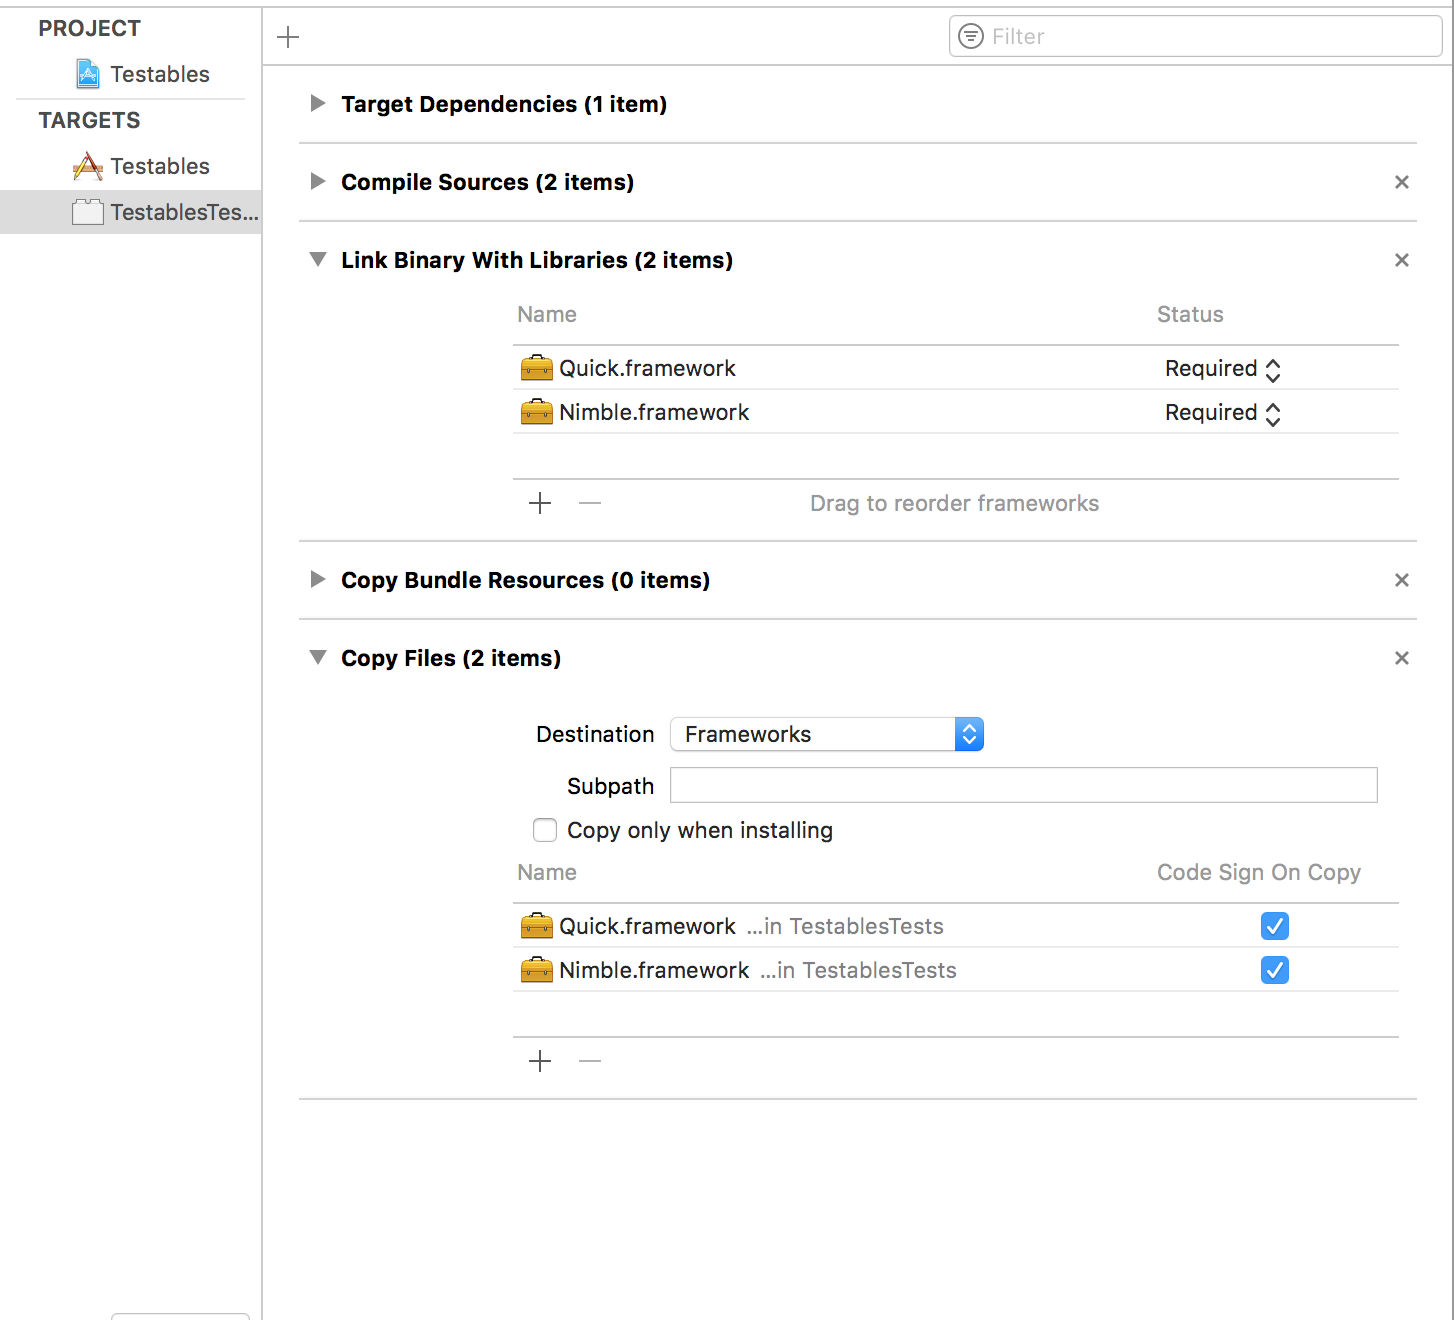
Now you are ready to create your own Unit Test. I'll be following with the same Sample Project ArithmeticUnitTest I used in my previous article.
So now let's go and create a new file in the Unit Test directory and name it as ArithmeticSpec.swift
import Foundation
import Quick
import Nimble

@testable import SimpleUnitTest

class ArithmeticSpec: QuickSpec {

    override func spec() {
        // we will perform the unit testing here
    }

}
As you can see in the above code, It's really similar to XCTest, but we only have to override spec() in order to go. Cool !!!!
Before adding the code, I would like to explain some of the important keywords as we will use in this test.
describe : exactly describes what component you are testing.
context : describes the purpose of the test or the current state of an object.
it : describes the expected result of the test.
And expect keyword is very important. It's descriptively express the expected result we want to happen.
import Foundation
import Quick
import Nimble

@testable import SimpleUnitTest

class ArithmeticSpec: QuickSpec {

    override func spec() {
        describe("Arithmetic Progression") {
            context("addition process should be performed") {
                let arithmetic: Arithmetic = Arithmetic(a: 10, b: 5)
                it("should add two int together") {
                    expect(arithmetic.addition()).to(equal(15))
                }
            }

            context("division process should be performed") {
                let arithmetic: Arithmetic = Arithmetic(a: 10, b: 5)
                it("should divide two int") {
                    expect(arithmetic.division()).to(equal(2))
                }
            }

            context("multiplication process should be performed") {
                let arithmetic: Arithmetic = Arithmetic(a: 10, b: 5)
                it("should multiply two int together") {
                    expect(arithmetic.multiplication()).to(equal(50))
                }
            }

            context("substraction process should be performed") {
                let arithmetic: Arithmetic = Arithmetic(a: 10, b: 5)
                it("should substract two int") {
                    expect(arithmetic.substraction()).to(equal(5))
                }
            }
        }

        describe("TableViewControllerSpec") {
            context("table view should display some row") {
                let viewController: ViewController = ViewController()
                it("should show three rows in the table view") {
                    expect(viewController.myTableView.numberOfRows(inSection: 0)).to(equal(3))
                }
            }
        }
    }

}
Now let go and run the test, You will see the result and how it is differ from XCTest.