Galaxyにツールを実装・公開するまでの流れ
- ツールの作成(Python, Perl, R, bash...)
2. ツールのテスト - Galaxyに組み込むインターフェィスの作成
3. XMLによるインターフェィスの記述
ツールを作成する
ツールの作成
ツールのテスト
Docker を利用してplanemo環境を構築
docker を利用して docker 内でdockerを利用可能なplanemo環境を構築する。
docker image にはmanabuishii/docker-planemo:0.55.0を利用する。
起動時にホストとコンテナとでdocker.sockを共有して--privileged=trueの指定をすることでDockerコンテナ内部からホスト側のDocker daemonにアクセスし、Dockerコンテナ内部から指定したDockerコンテナをホスト上で動作できるようにしている。
- 9090 portはplanemoのGalaxyへのアクセスポート番号となっている
- ホストのカレントディレクトリをコンテナ上の"/opt/galaxy/tools"にマウントして、ツールの編集をホスト上で実行できるようにしている
- エントリーポイントを直接指定して
/bin/bashでDocker コンテナのシェルを起動する
> docker run --entrypoint /bin/bash --rm --privileged=true -p 8010:80 -p 9090:9090 -v /var/run/docker.sock:/var/run/docker.sock -v `pwd`:/opt/galaxy/tools -i -t manabuishii/docker-planemo:0.55.0
上記のオプションで起動した上で、Dockerコンテナ内部からホスト上のDocker(sibling docker)が起動できるようにコンテナ内部にdockerを導入する。
# apt-get update -y
# apt-get install -y \
     apt-transport-https \
     ca-certificates \
     curl \
     gnupg2 \
     software-properties-common
# curl -fsSL https://download.docker.com/linux/debian/gpg | apt-key add -
# add-apt-repository \
   "deb [arch=amd64] https://download.docker.com/linux/debian \
   $(lsb_release -cs) \
   stable"
# apt-get update
# apt-get install -y docker-ce
上記で行っている Docker Community Edition を Debian-jessieに導入する部分については、https://docs.docker.com/install/linux/docker-ce/debian/#set-up-the-repository に記載の内容に基づいている。
Dockerの導入に成功したので、次にDocker内部でDockerを利用できる事を確認する。
# docker run hello-world
Unable to find image 'hello-world:latest' locally
latest: Pulling from library/hello-world
d1725b59e92d: Pull complete
Digest: sha256:0add3ace90ecb4adbf7777e9aacf18357296e799f81cabc9fde470971e499788
Status: Downloaded newer image for hello-world:latest

Hello from Docker!
This message shows that your installation appears to be working correctly.

To generate this message, Docker took the following steps:
 1. The Docker client contacted the Docker daemon.
 2. The Docker daemon pulled the "hello-world" image from the Docker Hub.
    (amd64)
 3. The Docker daemon created a new container from that image which runs the
    executable that produces the output you are currently reading.
 4. The Docker daemon streamed that output to the Docker client, which sent it
    to your terminal.

To try something more ambitious, you can run an Ubuntu container with:
 $ docker run -it ubuntu bash

Share images, automate workflows, and more with a free Docker ID:
 https://hub.docker.com/

For more examples and ideas, visit:
 https://docs.docker.com/get-started/
Dockerの動作状況をコンテナ内部で確認してみる。
# docker ps -a
CONTAINER ID        IMAGE                               COMMAND             CREATED             STATUS                         PORTS                                          NAMES
ef30e11f8cc4        hello-world                         "/hello"            About an hour ago   Exited (0) About an hour ago                                                  objective_hugle
7e8167ad25ef        manabuishii/docker-planemo:0.55.0   "/bin/bash"         About an hour ago   Up About an hour               0.0.0.0:9090->9090/tcp, 0.0.0.0:8010->80/tcp   jovial_poincare
ホストマシン上で動作している自身のDockerプロセスも表示されている。
試しに、ホストとなっているマシン上でも確認してみよう。ホスト上で別のTerminalを開いてdocker ps -aを実行する。
$ docker ps -a
CONTAINER ID IMAGE COMMAND CREATED STATUS PORTS NAMES
ef30e11f8cc4 hello-world "/hello" About an hour ago Exited (0) About an hour ago objective_hugle
7e8167ad25ef manabuishii/docker-planemo:0.55.0 "/bin/bash" About an hour ago Up About an hour 0.0.0.0:9090->9090/tcp, 0.0.0.0:8010->80/tcp jovial_poincare
同じ状態が表示されている事がわかる。
Dockerコンテナの内部で別のDockerコンテナを実行すると、コンテナがホスト上で作成されてホスト上で実行される事が確認できる。


## Planemoの実行

これで、最新のplanemoの利用環境が利用できるようになったので、実際にplanemoを利用してみる。

```terminal
# cd /opt/galaxy/tools/

# planemo project_init --template=demo mytools; cd mytools
# planemo test ./randomlines.xml
planemo testでは、galaxyのサーバーをダウンロードして実行するので、初回起動時にはかなり時間を要する。
All 2 test(s) executed passed.
random_lines1[0]: passed
random_lines1[1]: passed
簡単なテストであっても、GalaxyのServerプロセスを起動してテストを実行するため、テストにはかなり長い時間がかかる。
尚、二回目以降はGalaxyのインストールプロセスは不要なため、時間が短縮されるが、それでも30秒ほど必要となる。
> time planemo test randomlines.xml
...
All 2 test(s) executed passed.
random_lines1[0]: passed
random_lines1[1]: passed

real	0m35.000s
user	0m21.470s
sys	0m4.270s
テストが通る事を確認したら、インターフェィスをブラウザーで確認してみよう。
> planemo serve --host=0.0.0.0 ./randomlines.xml
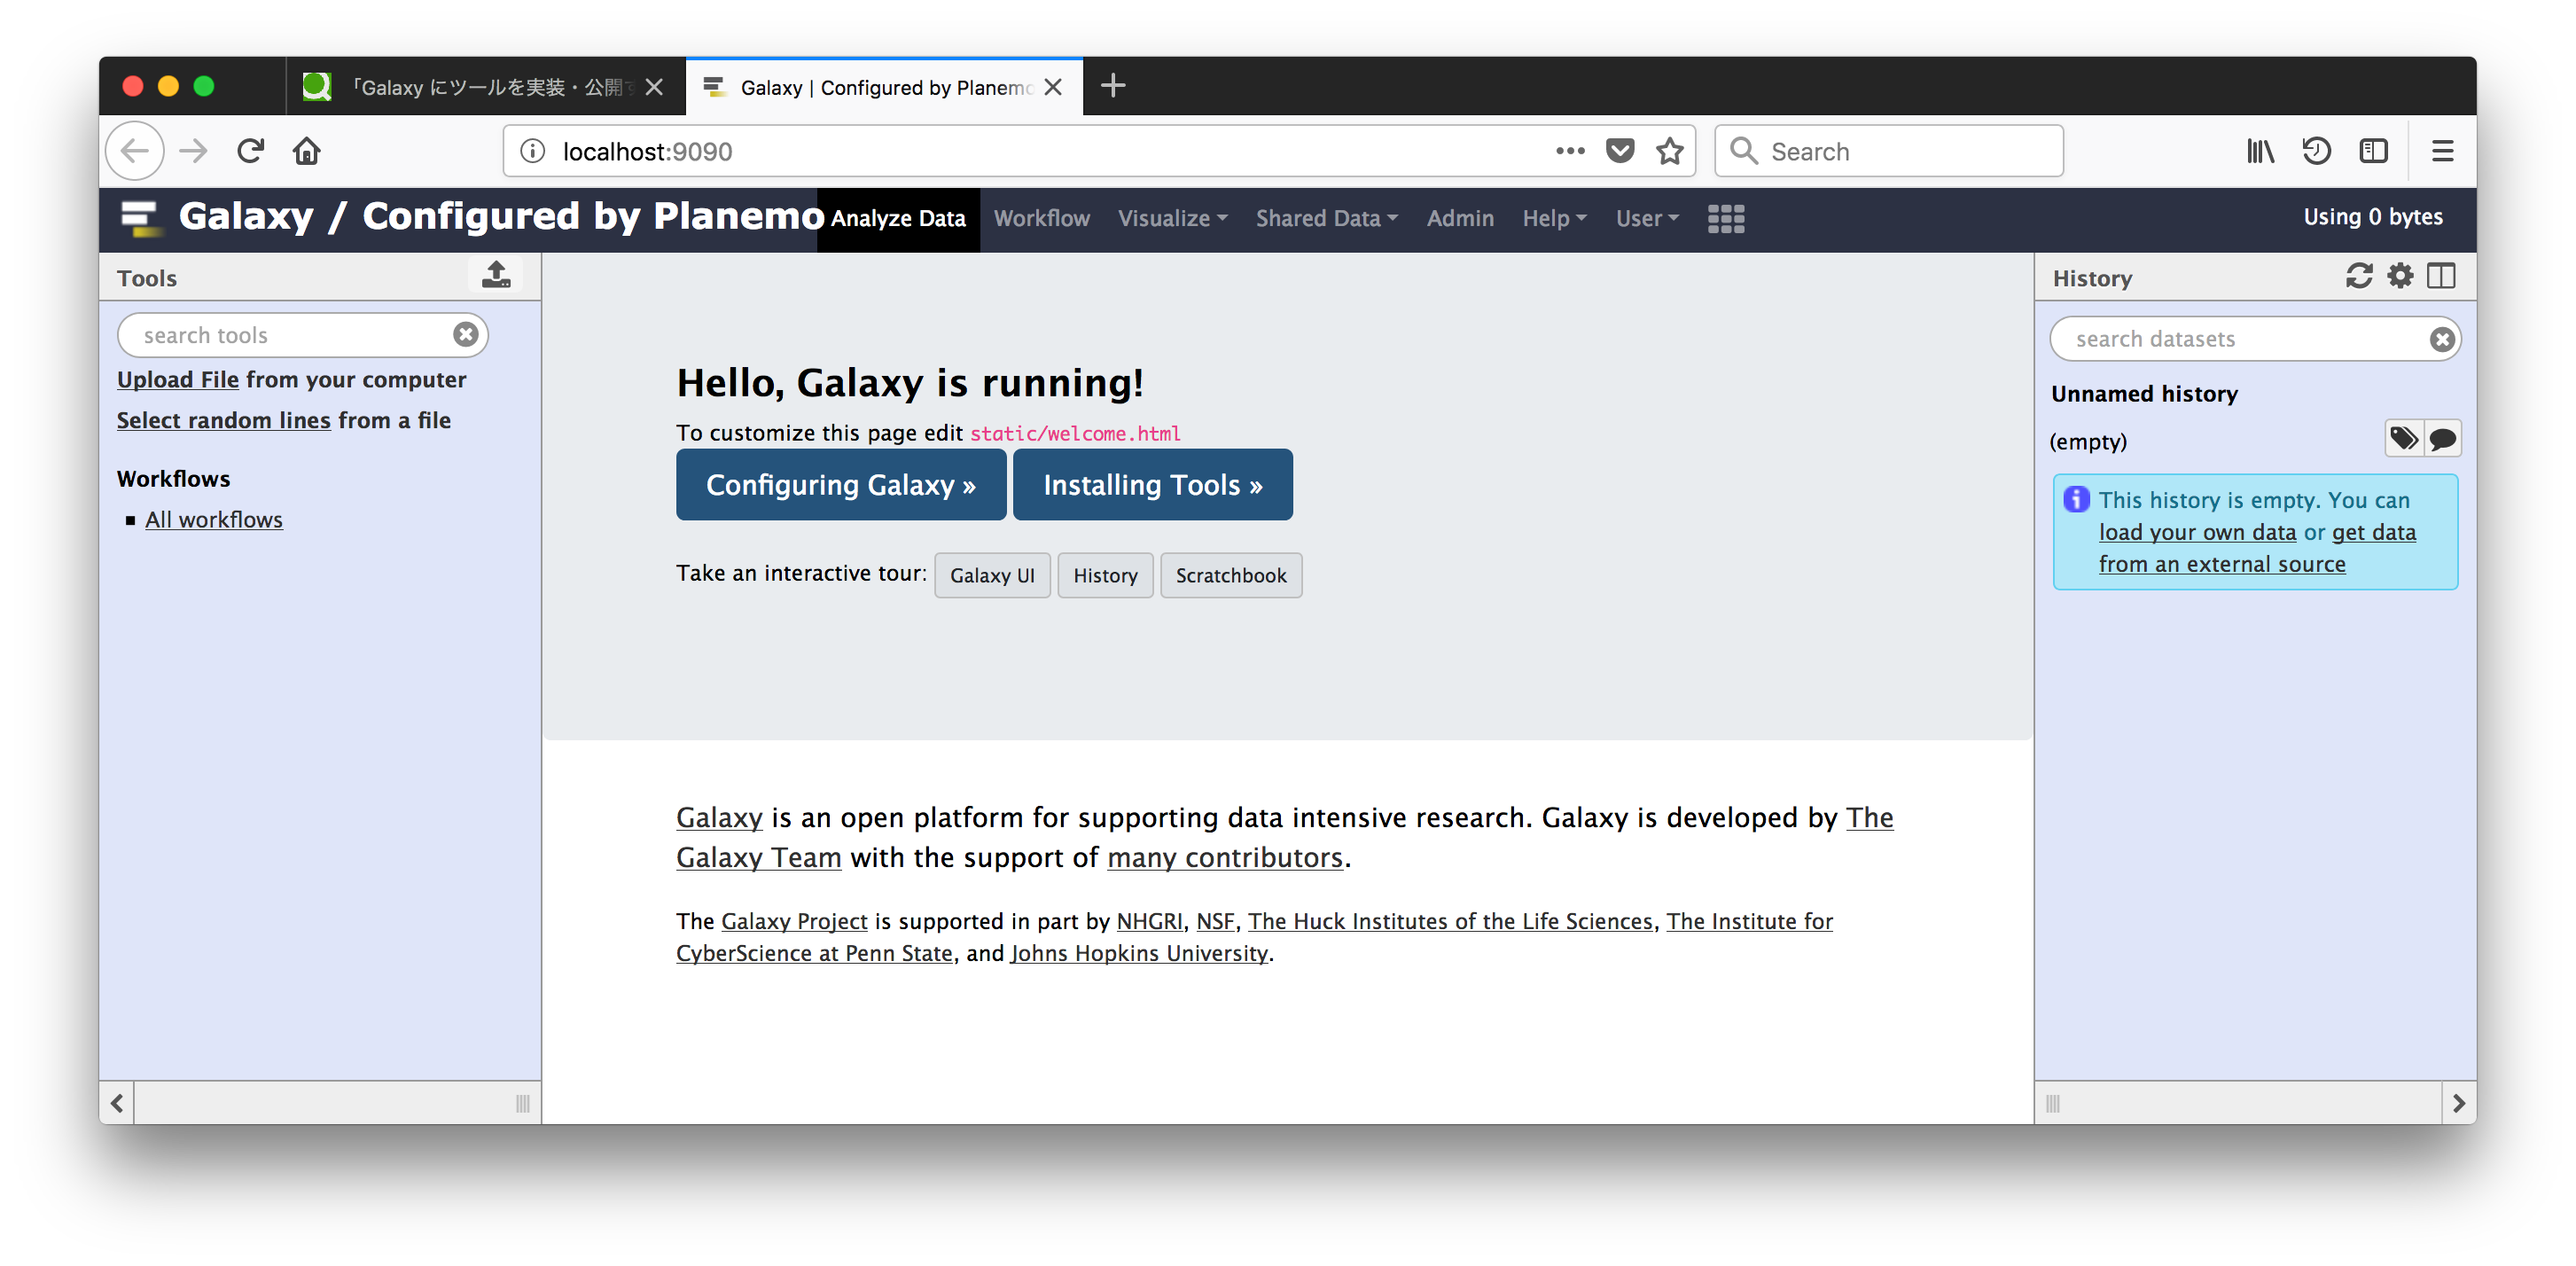
ブラウザーでlocalhost:9090にアクセスすと、Galaxy/Configured by PlanemoのGalaxyが起動している事がわかる。

左側のtoolにSelect random lines from a fileというToolが表示されているので、これをクリックしてみると、下のような画面が表示される。

これで、planemoの環境が正しく構築されている事が確認できた。
次回はこの状態でDockerコンテナを保存する方法について触れることにする。