はじめに
まずは以下のゲームをやってみていただきたいです。(音が出ます)
https://pentamania.github.io/find-shimauma-chan
注目してほしいのは画面遷移する際などの円形のエフェクトと、ゲーム中にスポットライトが当たったように周りが暗くなる演出の部分です。
これらはそれぞれclipとblendModeという機能を使って実現しています。
環境
phina.js v0.2.2
clip
clip()はcanvasAPIのclipと同じで、指定したパスの範囲内だけを描画するメソッドです。
phina.jsでclipを使うには以下のようにDisplayElement派生クラス(例えばSpriteクラス)にclipというメソッドを定義し、引数で渡されるCanvas(phina.graphics.Canvas)を使ってパスを設定します。
phina.define('ClippedImage', {
  superClass: 'phina.display.Sprite',

  init: function(src) {
    this.superInit(src);
    this.clipCenter = phina.geom.Vector2(0, 0);
    this.clipRadius = 160;
  },

  clip: function(c) {
    var cc = this.clipCenter;
    c.beginPath();
    c.arc(cc.x, cc.y, this.clipRadius, 0, Math.PI*2, false);
  }
});
するとスプライトは指定したパスの範囲内しか描画されなくなります。
さらにクリップ範囲を動的に変えることで(例えば円の半径など)、前出のようなエフェクトが実現できます。
ただ基本的に毎フレーム実行されるため、複雑な処理をさせたり、beginPathでのパスリセットなどを忘れると激重になることがあるので注意が必要です。
blendMode
blendModeはDisplayElement派生クラスのプロパティの一種で、指定した値に応じて「自分自身」と「自身より前に描画されたオブジェクト群」とを相互に影響させることが出来ます。(説明が難しい…)
使い方はDisplayElement系クラスのblendmodeプロパティに値を指定するだけです。
/* blendModeを指定したオブジェクト */
phina.define('SpotLight', {
superClass: 'phina.display.CircleShape',
init: function() {
this.superInit({
radius: 180,
});
this.blendMode = 'destination-in';
},
});
phina.define('MainScene', {
superClass: 'DisplayScene',
init: function(options) {
this.superInit(options);
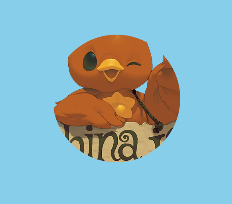
// サンプル用ロゴ
var logo = Sprite("logo")
.setPosition(this.width/2, this.height/2)
.addChildTo(this);
// blendModeを変えた描画オブジェクト
this.spotLight = SpotLight()
.setPosition(this.width/2, this.height/2)
.addChildTo(this);
// ※以下LabelクラスはspotLightより後にaddChildされるので影響を受けない
Label("phina.js blendMode sample")
.setPosition(this.width/2, this.height/2)
.addChildTo(this);
},
/* 省略 */
});
上の例では"destination-in"を指定することで、SpotLight自身より前に描画されたオブジェクト(logo)の、自身(円)の範囲と重なる部分だけが表示されるようになります。(phina.jsではaddChildした順に描画されます)
blendModeで指定できる値はcanvasAPIのglobalCompositeOperationプロパティと一緒です。
canvas全体に影響することに注意が必要ですが、photoshopなどいうところの「乗算」や「焼き込み」効果などが使え、clipと比べて応用できる範囲が広そうです。
clipとblendModeは上手く使えばいい感じのエフェクトやギミックが作れそうなのでがんばります。
おまけ
ゲームのリポジトリ
某夢の国風トランジションエフェクト

  clip: function(c) {
    var cc = this.clipCenter;
    var edgeLength = 40;
    var sr = this.spotRadius;

    c.beginPath();
    c.arc(cc.x, cc.y+edgeLength, sr, 0, Math.PI*2, false); // 中心
    c.closePath();
    c.arc(cc.x+edgeLength+sr, cc.y-edgeLength-sr, sr, 0, Math.PI*2, false); // 右耳
    c.closePath();
    c.arc(cc.x-edgeLength-sr, cc.y-edgeLength-sr, sr, 0, Math.PI*2, false); // 左耳
  },