はじめに
画像認識APIも色々ありますが、IBM Watsonの画像認識APIであるVisual Recognitionは、50枚程度学習させれば一応ある程度の判別ができて手軽だったので、ラズパイでカメラをつくって画像認識させてみようと思います。
最初はNode-REDを使ってWeb上で動かそうとしたのですが、追加したい機能の都合上、Pythonを使いたかったので、この形になりました。
watson-deveroper-cloudを入れる
- IBM CloudでVisal Rcognitionのサービスを作成して、APIキーを取得。
- カスタムモデルを作成してIDを控えておく
- pip installlでwatson-developer-cloudをインストールします。
$ pip install watson-developer-cloud
参考文献
PythonでIBM CloudのWatson API Visual Recognitionを使ってみる - Qiita
python-sdk/visual_recognition_v3.py at master · watson-developer-cloud/python-sdk · GitHub
Webカメラを接続・認識させる
usbカメラをラズパイに接続した状態でドライバを読み込む
$ sudo apt update
$ sudo apt upgrade
$ sudo nano /etc/modules
nanoエディタが開いたら、任意の場所に以下の1行を挿入
bcm2835-v4l2
raspi-configでCameraをEnableにして再起動。以下のコマンドを実行した時に、こんな感じの出力が出てくれば、正しくドライバを認識できています。
$ ls /dev/video*
/dev/video0
$ lsusb
Bus 001 Device 004: ID 0411:0260 BUFFALLO.INC
- - -
続いて、画像撮影のためのソフトウェアを導入して、試し撮りしてみましょう。
$ sudo apt install fswebcam
$ fswebcam test.jpg
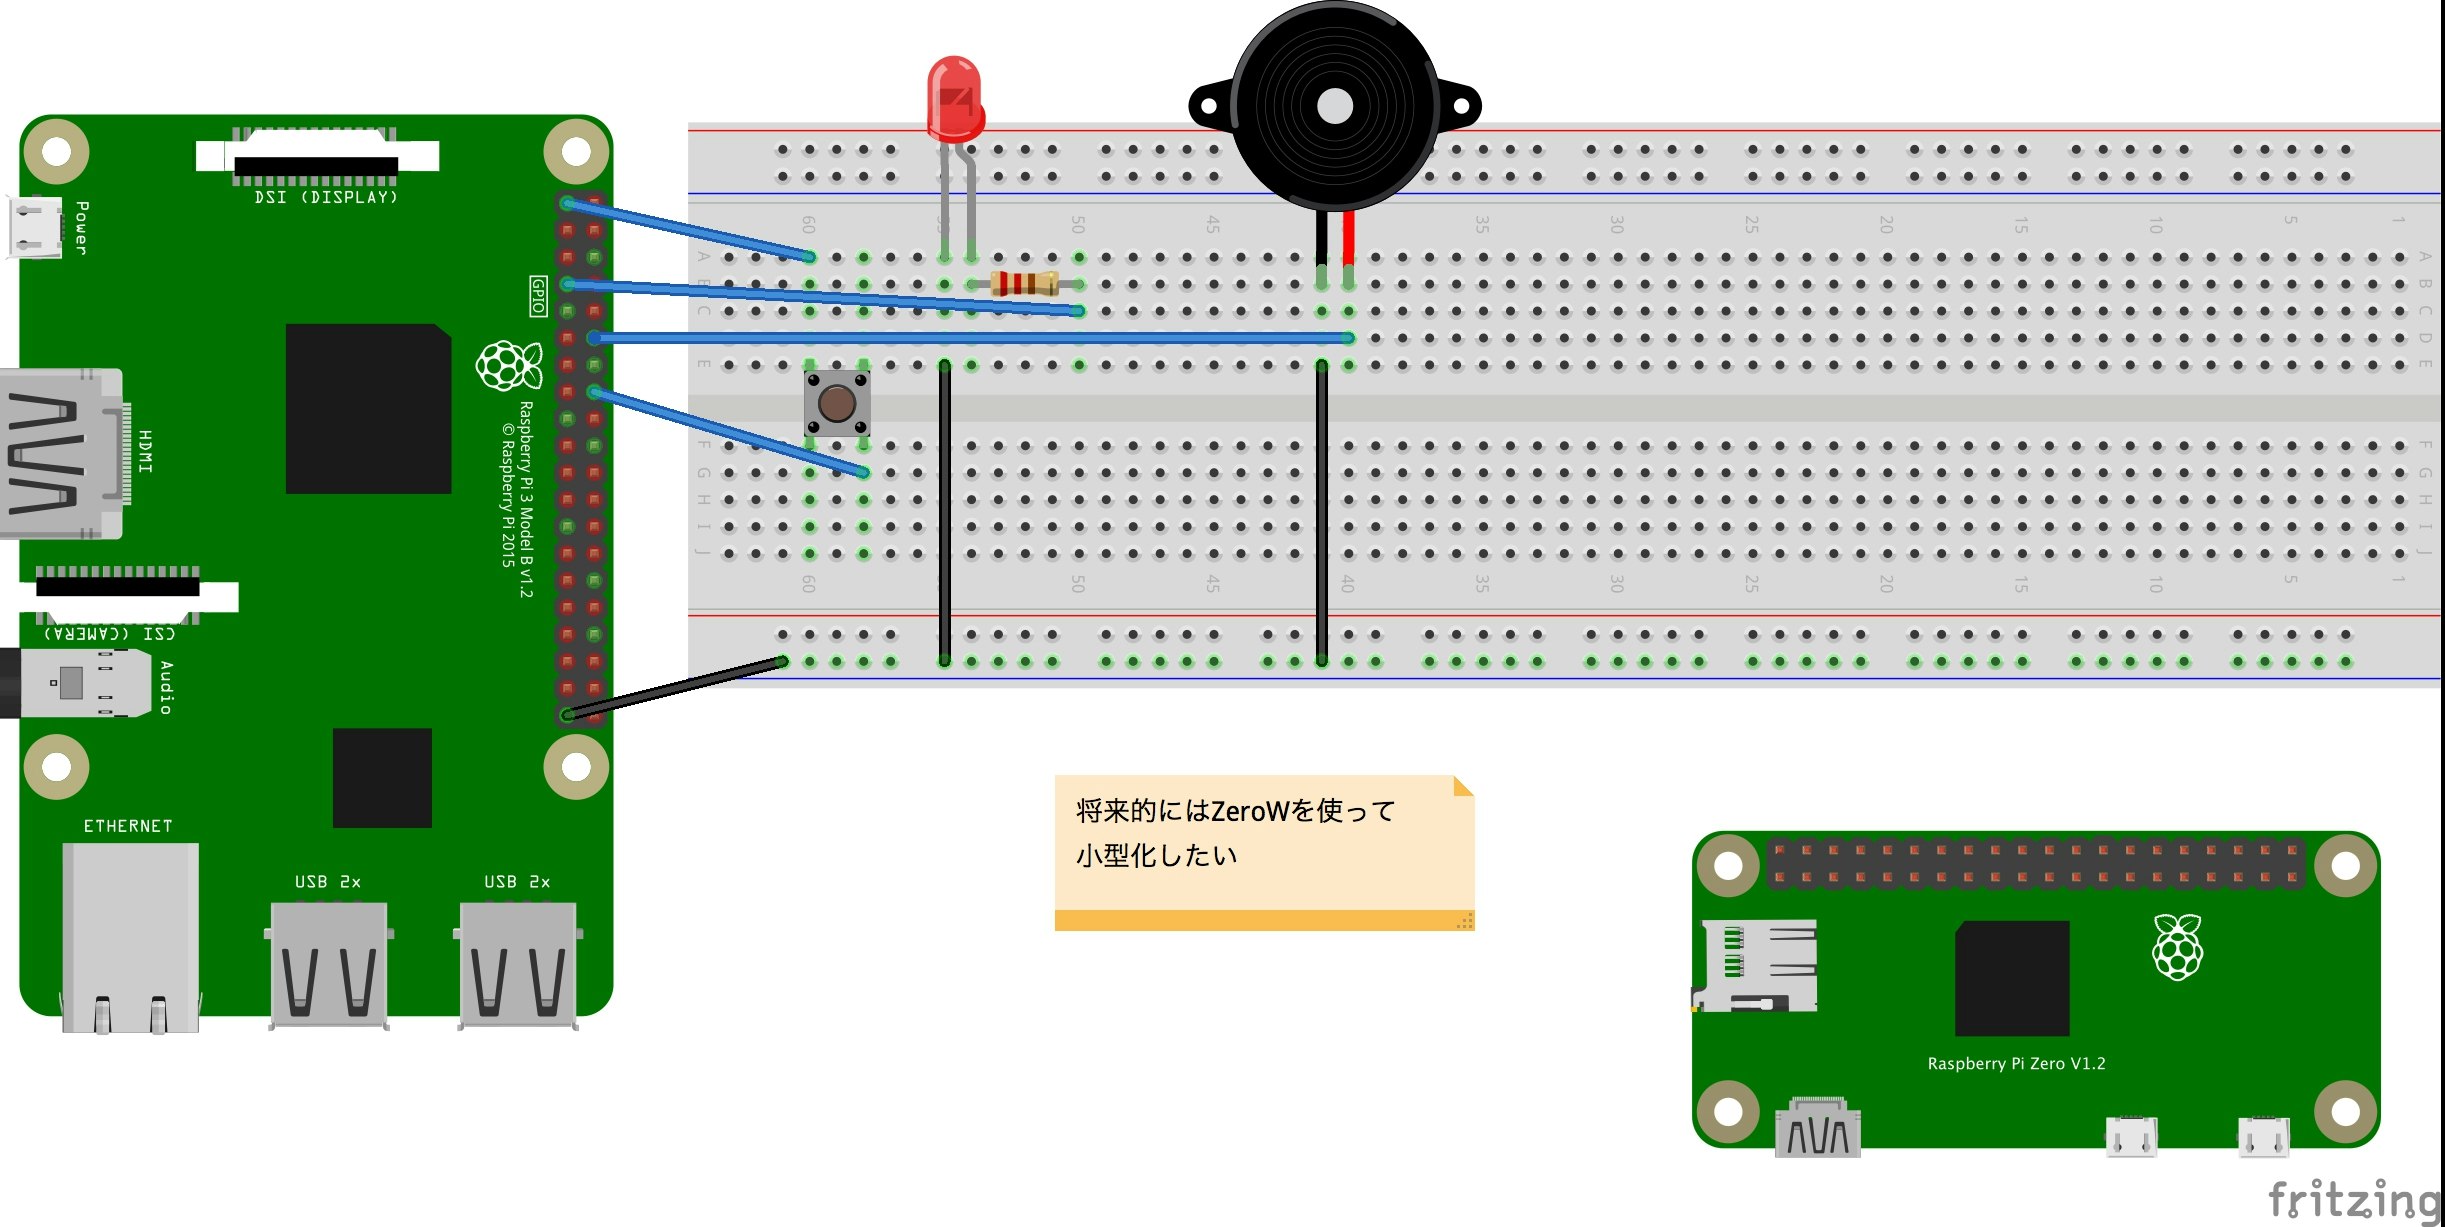
回路作成
スイッチがシャッター代わりになっていて、押すとブザーが鳴ってLEDが光ります。メモ書きは気にしないでください。
プログラム
シャッター押したら写真を撮って画像認識の結果を返す。
import RPi.GPIO as GPIO
from time import sleep, time
import json
from watson_developer_cloud import VisualRecognitionV3
from datetime import datetime
import subprocess


# GPIOポートの設定 --- (*1)
LED_PORT = 4
PE_PORT = 18
SWITCH_PORT = 23

GPIO.setmode(GPIO.BCM)
GPIO.setup(LED_PORT, GPIO.OUT)
GPIO.setup(PE_PORT, GPIO.OUT)
GPIO.setup(SWITCH_PORT, GPIO.IN, pull_up_down=GPIO.PUD_DOWN)

# APIの設定
visual_recognition = VisualRecognitionV3(
    #The release date of the version of the API you want to use.
    '2018-03-19',
    iam_apikey='apikey')


# 写真の撮影コマンドを実行
def take_photo():
    now = datetime.now()
    fname = now.strftime('%Y-%m-%d_%H-%M-%S') + ".jpg"
    cmd = "fswebcam -r 1260x720 " + fname
    #撮影コマンドを要求
    subprocess.check_output("fswebcam", shell=True)
    subprocess.check_output(cmd, shell=True)
    print("captured")
    # 画像認識
    with open(fname, 'rb') as images_file:
        classes = visual_recognition.classify(
        images_file,
        threshold='0.6',
        classifier_ids=["yourID"]).get_result()
        #unicodeで返ってくるので、utf-8に変換する。
        result = json.dumps(classes, indent=2).encode('utf-8').decode('unicode_escape')
        #jsonを辞書型にする
        result = json.loads(result)
        #認識結果のclass(=認識・特定した物体の名前)だけを抽出する。
        print(result['images'][0]['classifiers'][0]['classes'][0]['class'])

# ブザーを鳴らす --- (*4)
def beep():
    pwm = GPIO.PWM(PE_PORT, 330)
    pwm.start(50)
    sleep(0.1)
    pwm.ChangeFrequency(440)
    sleep(0.1)
    pwm.stop()


try:
    sw = 0
    while True:
        if GPIO.input(SWITCH_PORT) == GPIO.HIGH:
            sw = 1
            GPIO.output(LED_PORT, GPIO.HIGH)
            beep()
            # 写真撮影
            take_photo()
            if sw != 0: continue # 連続押し防止
            sw = 0
        else:
            sw = 0
            GPIO.output(LED_PORT, GPIO.LOW)
        sleep(0.1)

except KeyboardInterrupt:
    pass

GPIO.cleanup()
出力結果
今回は、動物園にいそうな動物を元にカスタムモデルを作成してみました。写真を撮ると、どの動物かを判定してくれます。このほかでは野菜の学習モデルでも、同様に動作を確認できました。
$ python3 vrtest.py
--- Opening /dev/video0...
Trying source module v4l2...
/dev/video0 opened.
No input was specified, using the first.
Adjusting resolution from 384x288 to 352x288.
--- Capturing frame...
Captured frame in 0.00 seconds.
--- Processing captured image...
There are unsaved changes to the image.
--- Opening /dev/video0...
Trying source module v4l2...
/dev/video0 opened.
No input was specified, using the first.
Adjusting resolution from 1260x720 to 1280x720.
--- Capturing frame...
Captured frame in 0.00 seconds.
--- Processing captured image...
Writing JPEG image to ‘2018-12-13_15-56-22.jpg’.
captured
コアラ
また、出力結果が長いため、このようにして、外部ファイルに結果を書き出してもいいかもしれません。
with open(image_path, 'rb') as images_file:
    classes = visual_recognition.classify(
    images_file,
    threshold='0.6',
    classifier_ids=['yourCustomModelID']).get_result()
    #出力結果が長いため、外部ファイルに結果を書き出しています
    f=open('result.json', 'w')
    f.write(json.dumps(classes, indent=2))
    f.close()
    print(json.dumps(classes, indent=2).encode('utf-8').decode('unicode_escape'))
ブロッコリーで試してみる
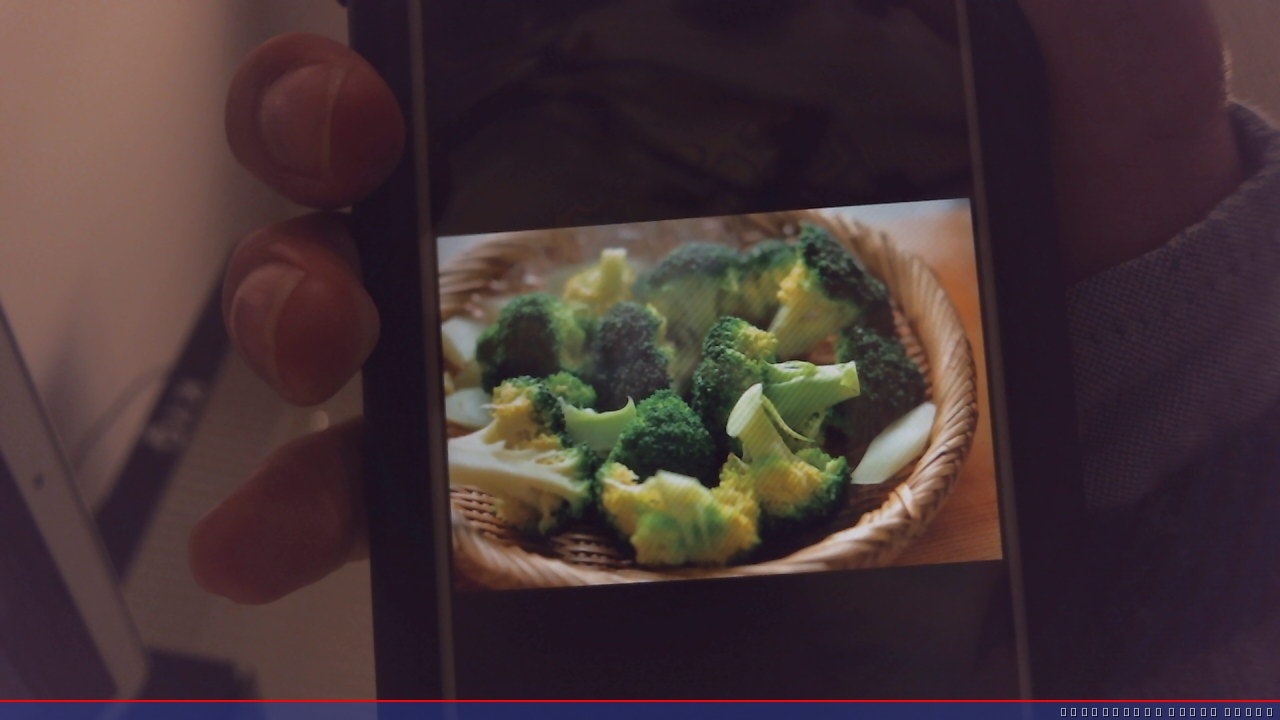
この写真の認識結果を外部ファイルからかくにんしたところ、次のようになりました。
{
 "custom_classes": 5,
 "images": [
   {
     "classifiers": [
       {
         "name": "Default Custom Model",
         "classifier_id": "DefaultCustomModel_49867514",
         "classes": [
           {
             "class": "ブロッコリー",
             "score": 0.718
           }
         ]
       }
     ],
     "image": "2018-12-12_17-36-53.jpg"
   }
 ],
 "images_processed": 1
}
ファイルで確認
まとめ
比較的少ない枚数でカスタムモデルを作成することができたこともあり、短時間でここまで作ることが出来ました。また、出力を工夫してそれっぽいシステムに仕上げていけたらと思いました。