とにかくAWS IoTとRaspberryPiをMQTT通信させたい。という方に作業内容だけをまとめました。
まず、全体の作業内容を説明します。大きく作業は3つです。
- AWS IoTにRaspberryPiを登録
- 証明書の取得
- ポリシーの追加
- RaspberryPiプログラムの作成
- 通信テスト
以上です。今回はAWS IoT側がデータの送信側です。RaspberryPiは受信側。
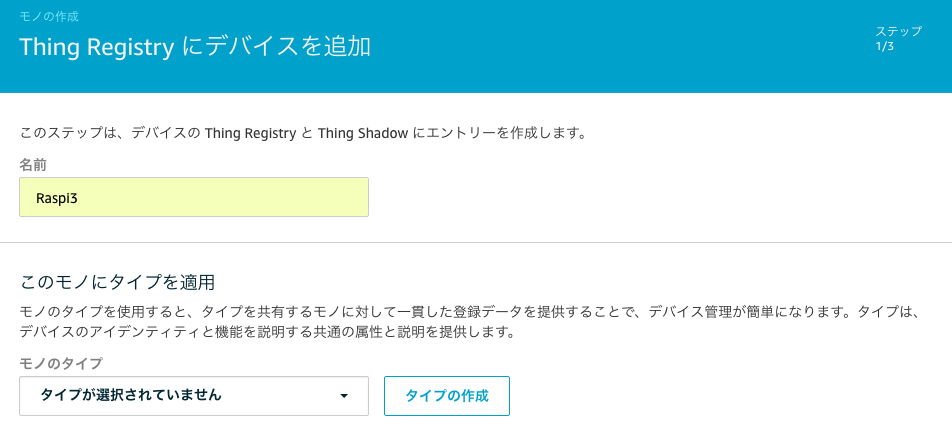
AWS IoTへRaspberryPiを登録
AWSのWebページ⇨コンソールへログイン⇨サービス⇨IoTCore
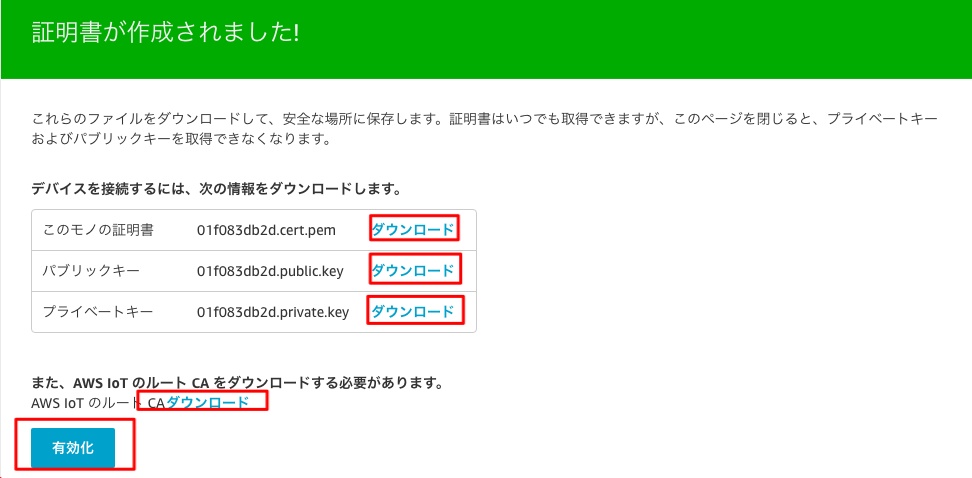
証明書を取得します

ダウンロード(モノの証明書、パブリックキー、プライベートキー、ルートCA)

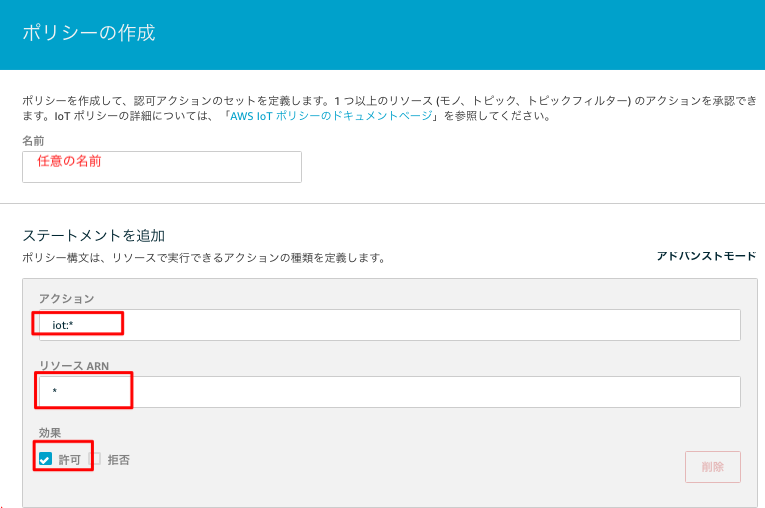
ポリシーを設定します
セキュリティ機能の一つ、ポリシーを設定します。ポリシーとは操作やAWS上のデータベースなどの他のリソースアクセスを決めるモノです。
下の写真のようにアクションとリソースを設定します。

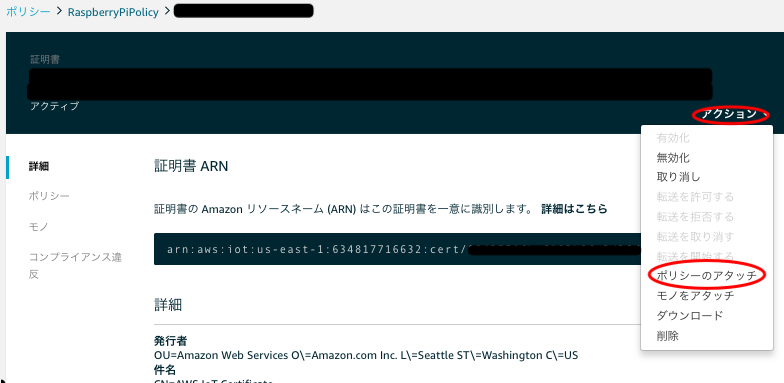
証明書のページから-ポリシーの
アタッチを行って、上で作成したポリシーをアタッチします。

RaspberryPiのプログラムを作成します。
MQTTのクライアントにはpaho mqttを利用します。
RaspberryPiに入って、pipを利用してpaho mqttを入れます。
sudo apt-get install python-pip

pip install paho-mqtt
ラズパイのプログラムです
下記コードを作成ください。XXXX.〜は各々のパラメータを入れてください。
作成後はscpモジュールなどでPC→MQTTに転送できます。証明書とプライベートキー、パブリックキーも転送します。同じ階層に入れてください。
import paho.mqtt.client
import ssl
import subprocess
import json

endpoint = "XXXX.amazonaws.com"#AWSのエンドポイント
port = 8883#AWSのポート
topic_to_aws ="Raspi3_to"
topic_from_aws = "Raspi3_from"
rootCA = "VeriSign.pem"#ルート証明書
cert = "XXXX-certificate.pem.crt"#デバイス証明書
key = "XXXX-private.pem.key"#keyを設定

def on_connect(client, userdata, flags, respons_code):
	print("Connected")
	client.subscribe(topic_to_aws)#サブスクライブする

def on_message(client, userdata, msg):
	print(msg.topic)

if __name__ == '__main__':
	#ここら辺はpahoのリファレンスを参照。
	#https://www.eclipse.org/paho/clients/python/docs/#connect-reconnect-disconnect
    client = paho.mqtt.client.Client()
    client.on_connect = on_connect
    client.on_message = on_message
    client.tls_set(ca_certs=rootCA, certfile=cert, keyfile=key, cert_reqs=ssl.CERT_REQUIRED, tls_version=ssl.PROTOCOL_TLSv1_2, ciphers=None)
    client.connect(endpoint, port=port, keepalive=60)
print("StartScript")
client.loop_forever()
通信テスト
テスト→発行のトピック名を記入して、"トピックスに発行"をクリック

成功していたら、RaspberryPiのコンソールへ(ソースコード)のon_message文字列出力される。


