はじめに
PythonでAWS IoT CoreにMQTTで接続するサンプルです。
今回はSTSにて動的な権限を発行して接続できるトピックを制限する部分の実装を含みます。
これにより、特定のユーザが特定のトピックのみ接続できるような権限を発行することができます。
STEP1: Roleを作成
STSでassume roleするために、元となるロールを作成します。
今回作成するロール名はsts-sample-roleとします。
設定する権限はAWSIoTFullAccessとしてください。
※今回assume_role側で権限を絞りますが、元となるsts-sample-roleの権限はassume_roleで発行する権限以上の権限が必要です。
また、作成したロールの信頼関係は適切に設定してください。
STEP2-1: 必要な情報の設定
今回のサンプルで必要になる設定値を確認します。
account_id = "xxxx"
target_endpoint = "xxxx.iot.ap-northeast-1.amazonaws.com"
region = "ap-northeast-1"
target_topic = "test"
ca_filepath = "AmazonRootCA1.pem"
- account_idはAWSのアカウントID(数字12桁)です
- target_endpointはIoT Coreのエンドポイントです(以下の図参照)
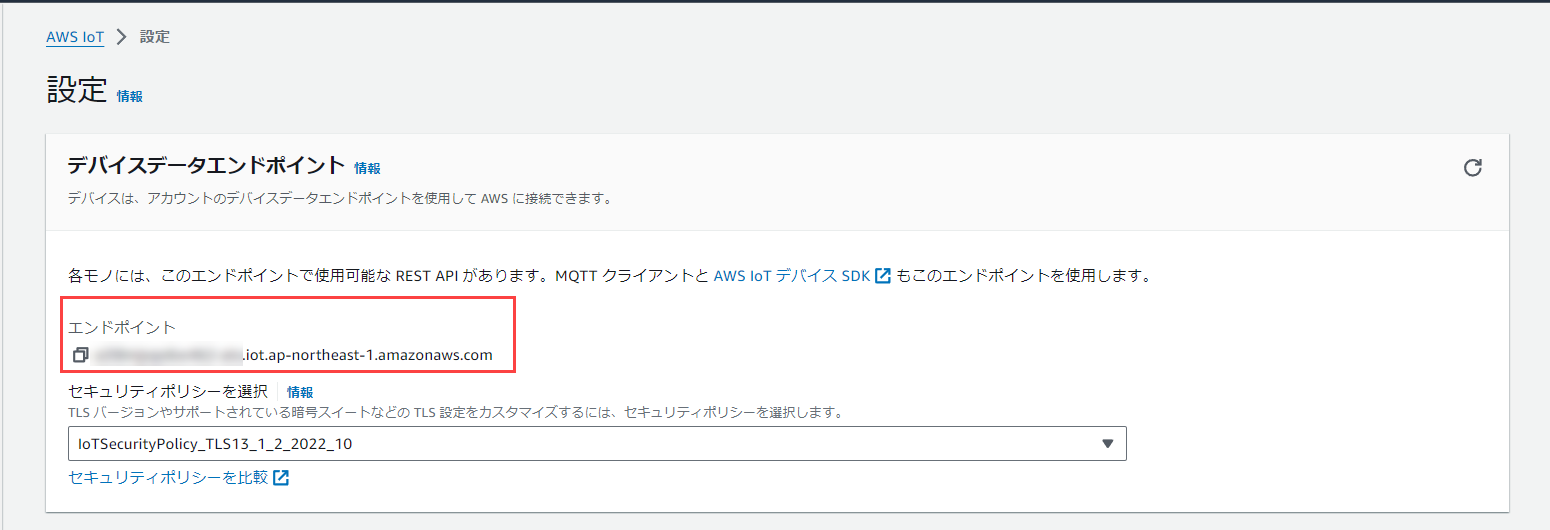
-
regionはAWSのリージョンです(今回は東京を選択)
-
target_topicは今回利用するトピック名です
STSで発行する権限ではtarget_topicの権限のみ許可します -
ca_filepathはRootCA証明書です
以下からダウンロードしてください
STEP2-2: 実際のコード実装(STS認証情報取得)
では、実際の実装内容を見てみましょう。
まずは、STS経由で認証情報を取得する部分です。
policy = json.dumps(
    {
        "Version": "2012-10-17",
        "Statement": [
            {"Action": "iot:Connect", "Effect": "Allow", "Resource": "*"},
            {
                "Action": ["iot:Publish", "iot:Receive"],
                "Effect": "Allow",
                "Resource": f"arn:aws:iot:*:*:topic/{target_topic}",
            },
            {
                "Action": ["iot:Subscribe"],
                "Effect": "Allow",
                "Resource": f"arn:aws:iot:*:*:topicfilter/{target_topic}",
            },
        ],
    }
)

client = boto3.client('sts')
response = client.assume_role(
    RoleArn=f'arn:aws:iam::{account_id}:role/sts-sample-role',
    RoleSessionName="test-" + str(uuid4()),
    Policy=policy,
)

credentials = response['Credentials']
上記コードで重要なのは以下のPolicy=policy,です。
response = client.assume_role(
    RoleArn=f'arn:aws:iam::{account_id}:role/sts-sample-role',
    RoleSessionName="test-" + str(uuid4()),
    Policy=policy,
)
sts-sample-roleでは、AWSIoTFullAccessの権限を付与していますが、上記コードでは権限を絞っています。
つまり、上記コードで発行された認証情報ではトピック名testにしか、パブリッシュやサブスクライブできません。
上記コードを利用することで、特定のユーザに特定のトピックにしか接続できないような権限を発行することができます。
STEP2-3: 実際のコード実装(STS認証情報取得)
実際のコードは以下です。
なお、以下のサンプルコードを参考にさせて頂いています。
https://github.com/aws/aws-iot-device-sdk-python-v2/blob/main/samples/pubsub.md
https://github.com/aws/aws-iot-device-sdk-python-v2/blob/main/samples/pubsub.py
実装自体はそこまで複雑ではないので、参考になるリファレンスを以下に提示します。
credentials_provider = auth.AwsCredentialsProvider.new_static(
    access_key_id=credentials['AccessKeyId'],
    secret_access_key=credentials['SecretAccessKey'],
    session_token=credentials['SessionToken'],
)


event_loop_group = io.EventLoopGroup(1)
host_resolver = io.DefaultHostResolver(event_loop_group)
client_bootstrap = io.ClientBootstrap(event_loop_group, host_resolver)

mqtt_connection = mqtt_connection_builder.websockets_with_default_aws_signing(
    client_id="id-" + str(uuid4()),
    endpoint=target_endpoint,
    client_bootstrap=client_bootstrap,
    ca_filepath=ca_filepath,
    region=region,
    clean_session=False,
    websocket_proxy_options=None,
    credentials_provider=credentials_provider,
    keep_alive_secs=6,
)


connect_future = mqtt_connection.connect()
connect_future.result()
print("Connected!")


received_all_event = threading.Event()


def on_message_received(topic, payload, dup, qos, retain, **kwargs):
    print("Received message from topic '{}': {}".format(topic, payload))


print("Subscribing to topic '{}'...".format(target_topic))
subscribe_future, packet_id = mqtt_connection.subscribe(
    topic=target_topic, qos=mqtt.QoS.AT_LEAST_ONCE, callback=on_message_received
)

subscribe_result = subscribe_future.result()
print("Subscribed with {}".format(str(subscribe_result['qos'])))

received_all_event.wait()
実際にコードを実行してMQTTパブリッシュしたときの実行は以下のようになります。
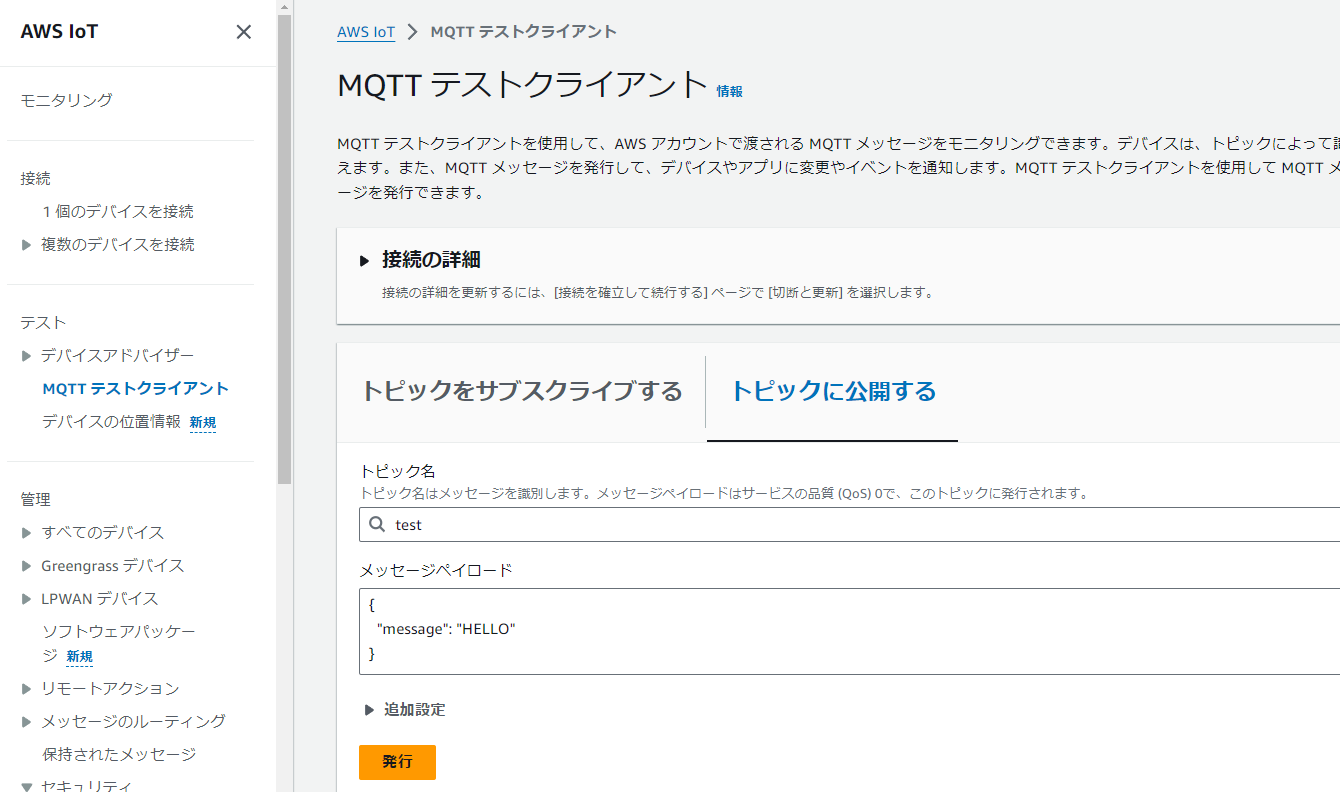
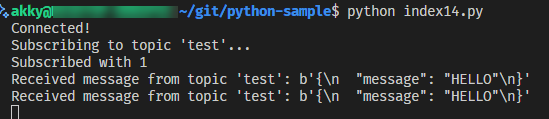
ちなみに、以下のコードのサブスクライブトピックを変えた場合は、データの受信ができません。
これはSTSで発行した権限としてトピック名testのみを許可しているためです。
subscribe_future, packet_id = mqtt_connection.subscribe(
    topic=target_topic, qos=mqtt.QoS.AT_LEAST_ONCE, callback=on_message_received
)
最後に
コード全文は以下に載せます。
import json
import threading
from uuid import uuid4

import boto3
from awscrt import auth, io, mqtt
from awsiot import mqtt_connection_builder

account_id = "123456"
target_endpoint = "xxxxx-ats.iot.ap-northeast-1.amazonaws.com"
region = "ap-northeast-1"
target_topic = "test"
ca_filepath = "AmazonRootCA1.pem"


# =====================
# 動的権限取得
# =====================
policy = json.dumps(
    {
        "Version": "2012-10-17",
        "Statement": [
            {"Action": "iot:Connect", "Effect": "Allow", "Resource": "*"},
            {
                "Action": ["iot:Publish", "iot:Receive"],
                "Effect": "Allow",
                "Resource": f"arn:aws:iot:*:*:topic/{target_topic}",
            },
            {
                "Action": ["iot:Subscribe"],
                "Effect": "Allow",
                "Resource": f"arn:aws:iot:*:*:topicfilter/{target_topic}",
            },
        ],
    }
)

client = boto3.client('sts')
response = client.assume_role(
    RoleArn=f'arn:aws:iam::{account_id}:role/sts-sample-role',
    RoleSessionName="test-" + str(uuid4()),
    Policy=policy,
)

credentials = response['Credentials']


# =====================
# MQTT接続処理
# =====================
credentials_provider = auth.AwsCredentialsProvider.new_static(
    access_key_id=credentials['AccessKeyId'],
    secret_access_key=credentials['SecretAccessKey'],
    session_token=credentials['SessionToken'],
)


event_loop_group = io.EventLoopGroup(1)
host_resolver = io.DefaultHostResolver(event_loop_group)
client_bootstrap = io.ClientBootstrap(event_loop_group, host_resolver)

mqtt_connection = mqtt_connection_builder.websockets_with_default_aws_signing(
    client_id="id-" + str(uuid4()),
    endpoint=target_endpoint,
    client_bootstrap=client_bootstrap,
    ca_filepath=ca_filepath,
    region=region,
    clean_session=False,
    websocket_proxy_options=None,
    credentials_provider=credentials_provider,
    keep_alive_secs=6,
)


connect_future = mqtt_connection.connect()
connect_future.result()
print("Connected!")


received_all_event = threading.Event()


def on_message_received(topic, payload, dup, qos, retain, **kwargs):
    print("Received message from topic '{}': {}".format(topic, payload))


print("Subscribing to topic '{}'...".format(target_topic))
subscribe_future, packet_id = mqtt_connection.subscribe(
    topic=target_topic, qos=mqtt.QoS.AT_LEAST_ONCE, callback=on_message_received
)

subscribe_result = subscribe_future.result()
print("Subscribed with {}".format(str(subscribe_result['qos'])))

received_all_event.wait()