0.完成した例
1.新たなカスタムクラスを作る
-1.Swift Fileを選択
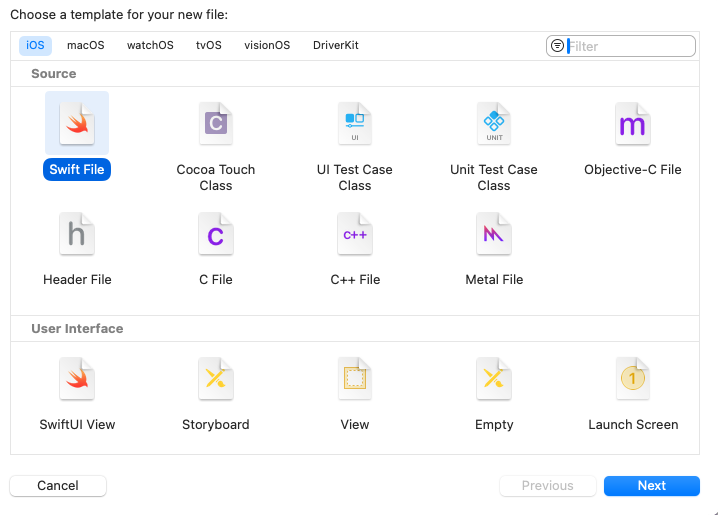
-2.ファイル名は今回「RadioBtn.swift」とします。

2.RadioBtn.swiftに下記コードを記述
import UIKit

@IBDesignable
class RadioBtn: UIButton {
    @IBInspectable var group: String?

    // ラジオボタンの初期化
    override init(frame: CGRect) {
        super.init(frame: frame)
        setupRadioButton()
    }

    required init?(coder aDecoder: NSCoder) {
        super.init(coder: aDecoder)
        setupRadioButton()
    }

    private func setupRadioButton() {
        self.setImage(UIImage(named: "RadioButton-Unselected"), for: .normal)
        self.setImage(UIImage(named: "RadioButton-Selected"), for: .selected)
        self.addTarget(self, action: #selector(radioButtonTapped), for: .touchUpInside)

    }

    @objc private func radioButtonTapped() {
        isSelected = true // タップされたラジオボタンを選択状態にする

        // 同じグループ内の他のラジオボタンを選択解除にする
        if let group = group {
            for view in superview?.subviews ?? [] {
                if let radioButton = view as? RadioBtn, radioButton.group == group && radioButton != self {
                    radioButton.isSelected = false
                }
            }
        }
    }

}
3.StoryBoard上でUIボタンを複数配置し、作ったクラスを継承させる。
-1.ボタンを複数配置する。

-2.グルーピングしたいラジオボタンを全選択する
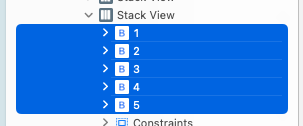
※storyboardの画面左側のツリーから選択するとやりやすいです。
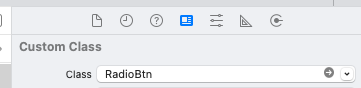
-3.その状態でXcode右側の[Identity Inspection]で先程作ったクラスを継承させる。
-4.[Attributes Inspector]タブに新たなプロパティが付与されている。
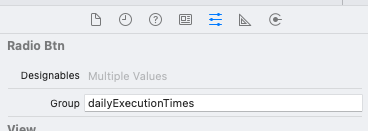
【Groupプロパティ】
グルーピングしたいラジオボタンに任意のグループ名をつけてください
※補足
@IBInspectable var プロパティ
→StoryBoard上で直接プロパティを変更できるようになる。
@IBDesignable MyClass {}
→StoryBoardのプロパティ上で変更した内容が、リアルタイムでStoryBoardに反映される。