ゴール
タイトル通り“最速でConoHaのCentOS7.4にnextcloud環境を作る”
ついでにLet’s EncryptでSSL化もしちゃうよ♪
インスタンスの作成
コントロールパネルからインスタンスを作成してください。
このあたりは、割愛します。
root
初期のSSH設定
rootで今後リモートログインできないようにsshd_configの修正
PermitRootLogin no
sshdの設定をリロードする
systemctl reload sshd.service
ユーザーの作成
useradd hoge
passwd hoge
usermod -aG wheel hoge
一般ユーザーでログイン
rootのターミナルを開いたまま、一般ユーザーでログインしてログインが出来ることを確認してください。
sudoも動作するか確認すること。
以下のコマンドで確認すると、システムのアップデートもできて尚良。
sudo yum -y update
正しく動作するようであれば、rootでログインできないことを確認後、ターミナルを閉じて、一般ユーザーで今後は、設定していきます。
一般ユーザー
firewallの設定
sudo firewall-cmd --add-service=http --permanent
sudo firewall-cmd --add-service=https --permanent
sudo firewall-cmd --reload
ConoHaのコントロールパネルで接続許可ポートを全てのポートからSSHとWebだけに限定するように下方が良い
各種リポジトリを追加
sudo yum install epel-release
sudo rpm --import http://rpms.famillecollet.com/RPM-GPG-KEY-remi
sudo rpm -ivh http://rpms.famillecollet.com/enterprise/remi-release-7.rpm
リポジトリが初期のyumとかぶるのは避けたいので、enableを0に設定する。
いろいろなパッケージのためにリポジトリを追加
nextcloudは、php7.2に対応していないため7.1を使用する
[epel]
name=Extra Packages for Enterprise Linux 7 - $basearch
#baseurl=http://download.fedoraproject.org/pub/epel/7/$basearch
mirrorlist=https://mirrors.fedoraproject.org/metalink?repo=epel-7&arch=$basearch
failovermethod=priority
enabled=0
gpgcheck=1
gpgkey=file:///etc/pki/rpm-gpg/RPM-GPG-KEY-EPEL-7

[epel-debuginfo]
name=Extra Packages for Enterprise Linux 7 - $basearch - Debug
#baseurl=http://download.fedoraproject.org/pub/epel/7/$basearch/debug
mirrorlist=https://mirrors.fedoraproject.org/metalink?repo=epel-debug-7&arch=$b$
failovermethod=priority
enabled=0
gpgkey=file:///etc/pki/rpm-gpg/RPM-GPG-KEY-EPEL-7
gpgcheck=1

[epel-source]
name=Extra Packages for Enterprise Linux 7 - $basearch - Source
#baseurl=http://download.fedoraproject.org/pub/epel/7/SRPMS
mirrorlist=https://mirrors.fedoraproject.org/metalink?repo=epel-source-7&arch=$$
failovermethod=priority
enable=0
gpgkey=file:///etc/pki/rpm-gpg/RPM-GPG-KEY-EPEL-7
gpgcheck=1
MariaDBのリポジトリを追加
[mariadb]
name = MariaDB
baseurl = http://yum.mariadb.org/10.2/centos7-amd64
gpgkey=https://yum.mariadb.org/RPM-GPG-KEY-MariaDB
gpgcheck=1
enable=0
ApacheとphpとMariaDBのインストール
nextcloudは、php7.2に対応していないため7.1を使用します。
今回は、OPcacheとmemcachedも使用するため、同時にインストールします。
sudo yum install -y --enablerepo=epel,remi,remi-php71,mariadb httpd mariadb mariadb-server mariadb-client php php-mbstring php-mysql php-xml php-gd php-xml php-zip php-opcache php-pecl-apcu php-process memcached memcached-devel php-pecl-memcache
各種バージョンをチェック
この項目はスキップしても問題ありません
2017/12/08現在
httpd -v
Server version: Apache/2.4.6 (CentOS)
Server built: Oct 19 2017 20:39:16
rpm -qa | grep -i mariadb
MariaDB-compat-10.2.11-1.el7.centos.x86_64
MariaDB-common-10.2.11-1.el7.centos.x86_64
MariaDB-server-10.2.11-1.el7.centos.x86_64
MariaDB-client-10.2.11-1.el7.centos.x86_64
php -v
PHP 7.1.12 (cli) (built: Dec 1 2017 13:53:12) ( NTS )
Copyright (c) 1997-2017 The PHP Group
Zend Engine v3.1.0, Copyright (c) 1998-2017 Zend Technologies
with Zend OPcache v7.1.12, Copyright (c) 1999-2017, by Zend Technologiesここでのポイントはwith Zend OPcache v7.1.12が入っていること
memcached -h
helpの1行目にバージョンが記載されています
memcached 1.5.3
nextcloudのソースコード配置
今回は、/var/wwwに設置します。
最新版のソースコードをこちらからダウンロードします。
2017/12/08現在は、12.0.4が最新版です。
cd /var/www
sudo wget https://download.nextcloud.com/server/releases/nextcloud-12.0.4.zip
sudo unzip nextcloud-12.0.4.zip
sudo rm nextcloud-12.0.4.zip
sudo chown -R apache:apache nextcloud
Apacheの設定
storage.example.comは、各自のドメインに置き換えてください。
<VirtualHost *:80>
    ServerAdmin administrator@example.com
    ServerName storage.example.com

    DirectoryIndex index.html index.htm index.php
    DocumentRoot "/var/www/nextcloud"

    <Directory "/var/www/nextcloud">
        Options FollowSymLinks
        AllowOverride All
        Require all granted
    </Directory>

    ErrorLog /var/log/httpd/nextcloud.error.log
    CustomLog /var/log/httpd/nextcloud.access.log combined
</VirtualHost>
ApacheのConfigテスト
sudo apachectl configtest
Syntax OK
OPcacheの設定
設定を以下のように書き換える
どうやら同じ設定にしないと正しく認識されない
コメントも残さないとどうやら正しく動かない。このあたりが謎
opcache.enable=1
opcache.enable_cli=1
opcache.interned_strings_buffer=8
opcache.max_accelerated_files=10000
opcache.memory_consumption=128
opcache.save_comments=1
opcache.revalidate_freq=1
各種デーモンの起動
sudo systemctl enable httpd.service
sudo systemctl enable mariadb.service
sudo systemctl enable memcached.service
sudo systemctl start httpd.service
sudo systemctl start mariadb.service
sudo systemctl start memcached.service
MariaDBの初期設定
sudo mysql_secure_installation
| 表示 | 説明 |
|---|---|
| Enter current password for root (enter for none): | MariaDBの現在のrootユーザパスワード入力(初期設定時は何も設定されていない) |
| Set root password? [Y/n] | rootユーザのパスワードを設定するかどうか |
| Remove anonymous users? [Y/n] | 初期設定で作成されている「anonymous」ユーザを削除するか |
| Disallow root login remotely? [Y/n] | MariaDBの「root」ユーザのリモートログインを禁止するか |
| Remove test database and access to it? [Y/n] | 初期設定で作成されている「test」データベースを削除するか |
| Reload privilege tables now? [Y/n] | 今設定したユーザ設定をすぐに反映させるか |
MariaDBにデータベースを作成
nextcloudとnextcloud_adminとpasswordは、おこに見に応じて変更してください。
passwordは確実に変更してください
mysql -u root -p
create database nextcloud;
grant all on nextcloud.* to 'nextcloud_admin'@'localhost' identified by 'password';
exit;
アクセステスト
http://storage.example.com/にアクセスしてみる。
“管理者アカウントを設定してください”と出ていれば、インストール成功
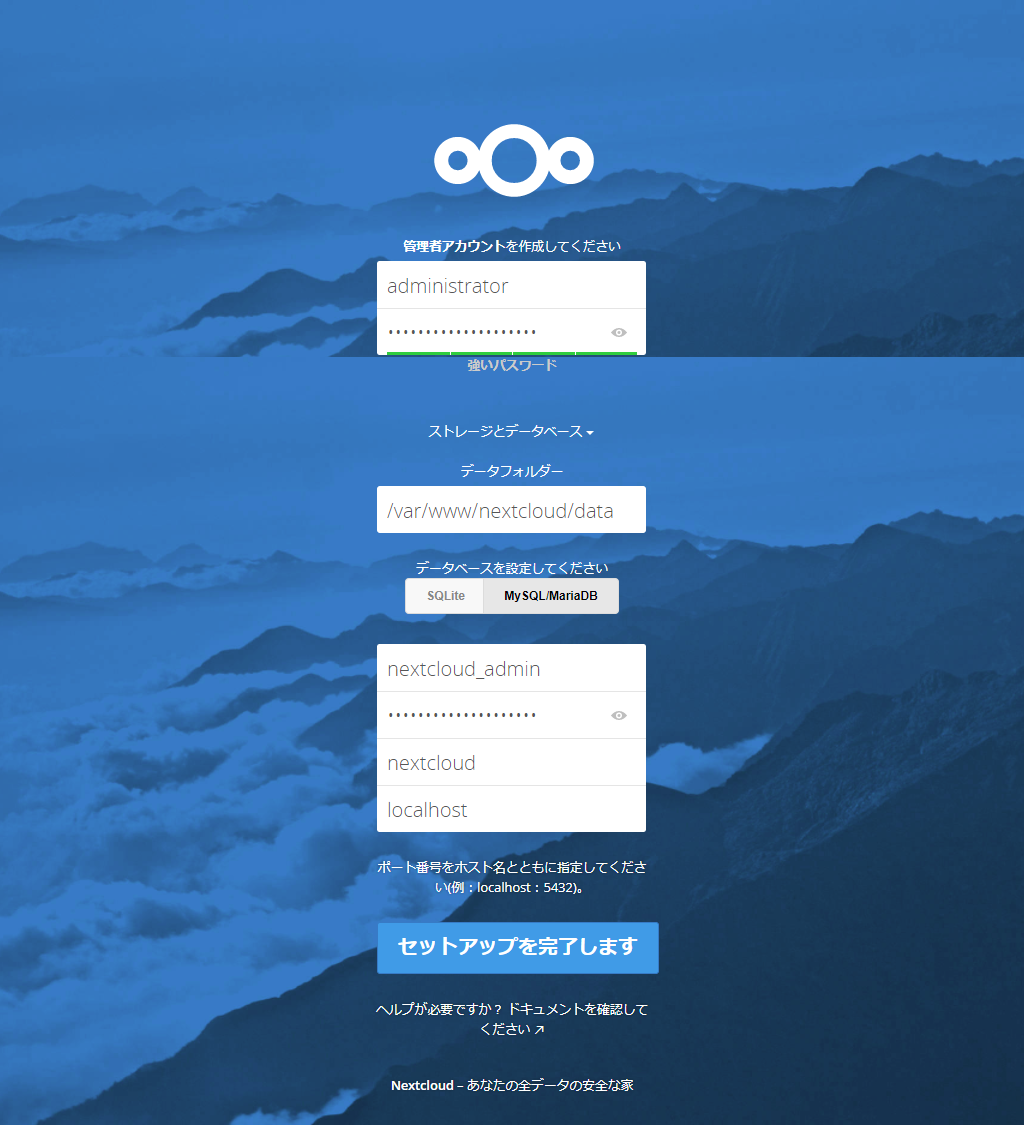
nextcloudの設定
初期設定
管理者アカウント名を程よく設定し、“データベースを設定してください”で“MariaDBにデータベースを作成”で作成したデータベースを指定してください。
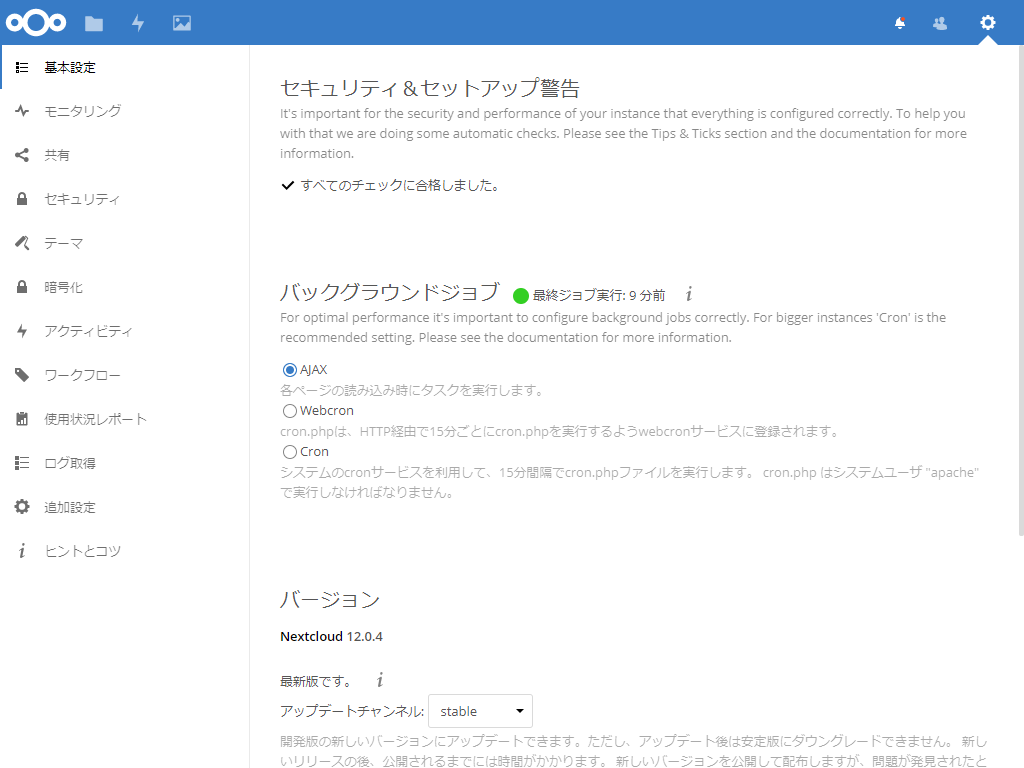
Memcache有効化とindex.phpを隠す設定
以下を追加する
  'memcache.local' => '\OC\Memcache\APCu',
  'htaccess.RewriteBase' => '/',
設定を反映させるために以下のコマンドを実行する。
sudo su -s /bin/bash apache -c "/var/www/nextcloud/occ maintenance:update:htaccess"
パーミッションの問題で実行できない場合は、以下のコマンドを実行する。
sudo sudo chmod +x /var/www/nextcloud/occ
SSL化
パッケージのインストール
sudo yum install -y --enablerepo=epel certbot certbot-apache mod_ssl
sudo certbot run --apache -d storage.example.com
途中で、以下のようにリダイレクトするかと聞かれるので“2”を選択してRedirectさせる。
1: No redirect - Make no further changes to the webserver configuration.
2: Redirect - Make all requests redirect to secure HTTPS access. Choose this for
ファイル名の変更
今まで任意の名前でconfを作っていたが、certbotがご丁寧にstorage.example.com.confという名前に書き直してくれているので、example.comの部分を元に戻す。
セキュリティー向上のため
ssl.confファイルの末尾に以下を追加します。
SSLProtocol all -SSLv2 -SSLv3
SSLCipherSuite DEFAULT:!EXP:!SSLv2:!DES:!IDEA:!SEED:+3DES:!RC4:!DH
SSLHonorCipherOrder On
Header set Strict-Transport-Security "max-age=315360000;"
Apacheの設定を反映
sudo systemctl reload httpd.service
Cronへ証明書の自動更新
0 0 * * * /bin/certbot renew && /bin/systemctl reload httpd.service
セキュリテイーチェック
SSL Server Test (Powered by Qualys SSL Labs)
Do not show the results on the boardsにチェックを入れるのを忘れるとランキングに掲載されますのでご注意ください
最後に
Apacheだとこうも簡単に設定できてしまう…
いつもNginxを使っていたので拍子抜けしてしまった。