はじめに
FOSS4G 2021 Japan Onlineのチュートリアルデイで「Charites + GitHub で完結、ベクトルタイルのスタイリングをしてみよう!」に参加してCharitesの便利さを実感したのでWindowsで動かしてみました。
Charitesはいいぞ
WindowsでCharitesを使うには
基本charitesレポジトリのREADME.mdを読めばインストールできます。
Charitesを使うにはNode.jsの環境が必要になります。
WindowsでNode.jsを動作させるにはWindows版Node.jsをインストールする方法と
WSL上にNode.jsをインストールする方法があります。
今回はどちらの方法も試してみました。
現時点ではWindowsでの利用は想定されていないようなので推奨はWSLでの実行だと感じました。
Linuxコマンドが判らない人はWindows版のNode.jsを使ってもいいでしょう。
殆どの場合は問題にならないかもしれませんが、Windows版のNode.jsで実行する場合は、諸々の不具合やリリース版以外のバージョンが使えない1問題があります。
■WSLのNode.jsでCharitesを実行
Linuxのコマンドに抵抗がない人はこちらが推奨かと思われます。
WSL上のファイルにアクセスするのにちょっとだけ変則的なPATH指定が必要ですが
それ以外はWindowsネイティブな感じで使用できます。
WSLにUbuntuをインストール
コマンドプロンプトを管理者として実行してWSLコマンドでインストール。
ディストリビューション指定をしない場合はubuntuが入るっぽい。
> wsl --install
インストールが完了したらWindowsを再起動。
再起動が完了するとUbuntuのコンソールが立ち上がってくる。
ユーザー名とパスワードを入力してアカウントを作成。(今後このアカウントでWSLを使うことになる)
最初に環境のアップデート
$ sudo apt update
$ sudo apt upgrade
Node.jsとnpmをインストール
$ sudo apt install nodejs npm
バージョンの確認
$ sudo node -v
v10.19.0
古いのでバージョンアップ
$ sudo npm install n -g
$ sudo n stable

$ sudo apt purge -y nodejs npm

$ exec $SHELL -l
再度バージョンの確認
$ sudo node -v
v16.13.1
最新版になった。
Charitesのインストール
リリース版のインストールは以下のコマンド
npm install -g @unvt/charites
普段はこれで問題ないと思いますが、
現時点でのリリース版にはバグがあるので
Charites最新版をダウンロードしてインストールする。
$ git clone https://github.com/unvt/charites.git
$ cd charites/
$ npm install
$ npm run build
$ sudo npm install -g .
helpを表示してみる
$ charites help
Usage: charites [options] [command]

Options:
  -v, --version                           output the version number
  -h, --help                              display help for command

Commands:
  init [options] <file>                   initialize a style JSON
  convert <source> [destination]          convert the style JSON to YAML
  build [options] <source> [destination]  build a style JSON from the YAML
  serve [options] <source>                serve your map locally
  help [command]                          display help for command
ちゃんとインストールできたっぽい。
Charitesを動かしてみる
style.jsonからYAMLに変換
試しに「Mapbox GL JSで地理院地図Vector風の地図を表示するサンプル」のstyle.jsonをYAMLに変換
$ cd ..
$ mkdir gsi
$ cd gsi
$ curl https://raw.githubusercontent.com/gsi-cyberjapan/gsivectortile-mapbox-gl-js/master/std.json | charites convert - style.yml
  % Total    % Received % Xferd  Average Speed   Time    Time     Time  Current
                                 Dload  Upload   Total   Spent    Left  Speed
100  740k  100  740k    0     0  2358k      0 --:--:-- --:--:-- --:--:-- 2366k

$ ls
layers  style.yml
できた。
生成されたYAMLを編集
WSLのファイルには\\wsl$でアクセスできるそうだ。
WindowsのExplorerで\\wsl$\Ubuntu\home\<アカウント名>\gsiを開く。

このサンプルスタイルは初期座標が指定されていないので
style.ymlをテキストエディタ開いて追記してみます。
version: 8
+ center:
+   - 135
+   - 35
+ zoom: 12
glyphs: https://maps.gsi.go.jp/xyz/noto-jp/{fontstack}/{range}.pbf
sources:
  gsibv-vectortile-source-1-4-16:
    type: vector
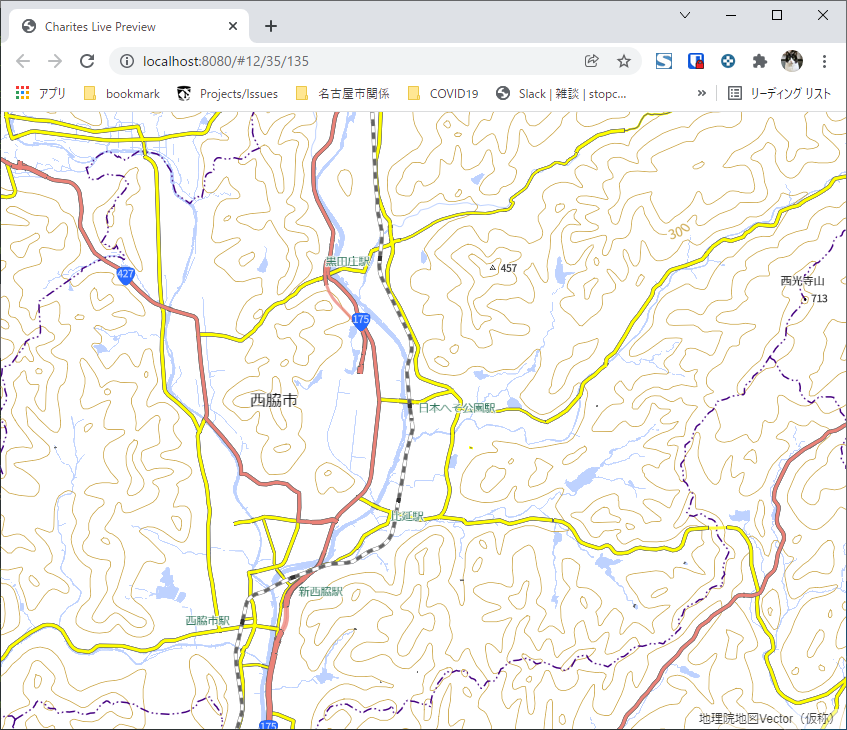
ライブプレビューを実行
そしたらライブプレビューを実行してみましょう
$ charites serve style.yml
ブラウザが開いて地図が表示されました
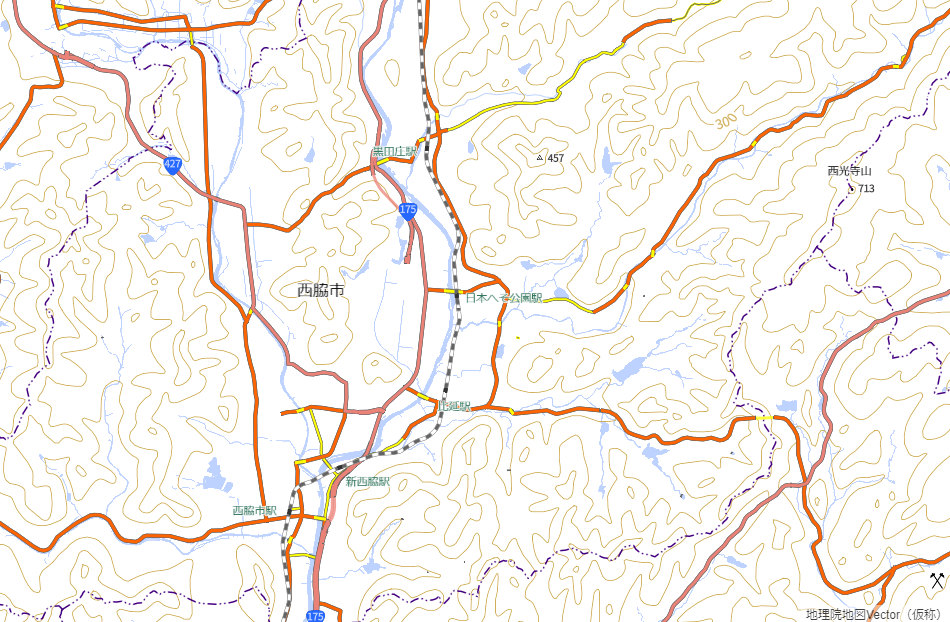
道路の色を変えてみる
layers\gsibv-vectortile-layer-1112.ymlを開いて
paint:
-   line-color: rgba(255,255,0,1)
+   line-color: rgba(255,100,0,1)
  line-width: 3
ブラウザ上の道路の色が変わった
serveを終わらせるにはコンソールで「Ctrl+c」
ブラウザは普通に閉じればOK
style.jsonを生成
編集したYMALからstyle.jsonを生成
$ charites build style.yml style.json
style.jsonが生成された。
バッチファイルから実行
DOSからwsl上のプログラムが実行できるのでよくやる操作はバッチファイルにしておけます。
例えば
REM ライブプレビューを実行 ymlをフルパス指定してね
wsl charites serve /home/<user>/gsi/style.yml
こんなバッチを作ってデスクトップにおいておけば、態々コマンドプロンプト開いてコマンドを実行する必要もなくライブプレビューを実行することができますね。
良い感じ。
■Windows版Node.jsでCharitesを実行
普通のCUIアプリケーションとして使うことができるのが利点です。
諸々の不具合はありますが、殆どの場合は問題にならないと思います。
Node.jsをインストール
Node.jsのサイトから最新版をダウンロード
ダウンロードしたインストーラーを実行
node-v16.13.1-x64.msi
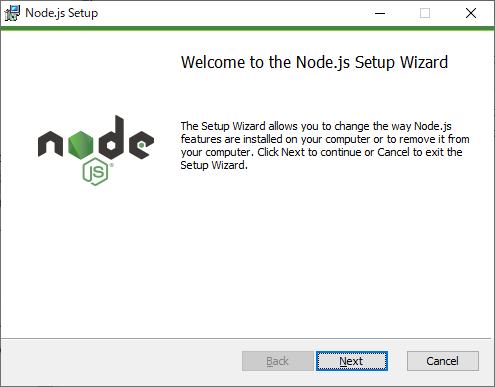
設定は全部初期状態で進めました。
Charitesをインストール
スタートメニューから「Node.js command prompt」を起動
(標準のコマンドプロンプトでも動くっぽい)
nmpコマンドでインストール
> npm install -g @unvt/charites
helpを表示してみる
>charites help
Usage: cli [options] [command]

Options:
  --provider [provider]                      your map service. e.g. `mapbox`, `geolonia`
  --mapbox-access-token [mapboxAccessToken]  Access Token for the Mapbox
  -h, --help                                 display help for command

Commands:
  init <file>                                initialize a style JSON
  convert <source> [destination]             convert the style JSON to YAML
  build [options] <source> [destination]     build a style JSON from the YAML
  serve <source>                             serve your map locally
  help [command]                             display help for command
インストールはできたっぽい。
HELPに表示される使い方は間違っているのでREADME.mdを参照しましょう。
Charitesを動かしてみる
style.jsonからYAMLに変換
試しに「Mapbox GL JSで地理院地図Vector風の地図を表示するサンプル」のstyle.jsonをYAMLに変換
> cd c:\work
> mkdir gsi
> cd gsi
> curl https://raw.githubusercontent.com/gsi-cyberjapan/gsivectortile-mapbox-gl-js/master/std.json | charites convert - style.yml
  % Total    % Received % Xferd  Average Speed   Time    Time     Time  Current
                                 Dload  Upload   Total   Spent    Left  Speed
100  740k  100  740k    0     0   740k      0  0:00:01 --:--:--  0:00:01  894k
ファイルは出来ましたが正しくできていませんので修正をかけます。
出力されたstyle.ymlをテキストエディタで開く。
version: 8
glyphs: https://maps.gsi.go.jp/xyz/noto-jp/{fontstack}/{range}.pbf
sources:
  gsibv-vectortile-source-1-4-16:
    type: vector
    tiles:
      - https://cyberjapandata.gsi.go.jp/xyz/experimental_bvmap/{z}/{x}/{y}.pbf
    minzoom: 4
    maxzoom: 16
    attribution: >-
      <a href="https://maps.gsi.go.jp/vector/"
      target="_blank">地理院地図Vector(仮称)</a>
layers:
  - '!!inc/file layers\gsibv-vectortile-layer-761.yml'
  - '!!inc/file layers\gsibv-vectortile-layer-762.yml'
  - '!!inc/file layers\gsibv-vectortile-layer-763.yml'
  - '!!inc/file layers\gsibv-vectortile-layer-764.yml'
  - '!!inc/file layers\gsibv-vectortile-layer-765.yml'
  - '!!inc/file layers\gsibv-vectortile-layer-766.yml'
  - '!!inc/file layers\gsibv-vectortile-layer-767.yml'
  - '!!inc/file layers\gsibv-vectortile-layer-768.yml'
  - '!!inc/file layers\gsibv-vectortile-layer-769.yml'
  - '!!inc/file layers\gsibv-vectortile-layer-770.yml'
layersのエントリーがシングルクォートで囲まれてしまっていますので置換で消してしまいましょう。
version: 8
glyphs: https://maps.gsi.go.jp/xyz/noto-jp/{fontstack}/{range}.pbf
sources:
  gsibv-vectortile-source-1-4-16:
    type: vector
    tiles:
      - https://cyberjapandata.gsi.go.jp/xyz/experimental_bvmap/{z}/{x}/{y}.pbf
    minzoom: 4
    maxzoom: 16
    attribution: >-
      <a href="https://maps.gsi.go.jp/vector/"
      target="_blank">地理院地図Vector(仮称)</a>
layers:
  - !!inc/file layers\gsibv-vectortile-layer-761.yml
  - !!inc/file layers\gsibv-vectortile-layer-762.yml
  - !!inc/file layers\gsibv-vectortile-layer-763.yml
  - !!inc/file layers\gsibv-vectortile-layer-764.yml
  - !!inc/file layers\gsibv-vectortile-layer-765.yml
  - !!inc/file layers\gsibv-vectortile-layer-766.yml
  - !!inc/file layers\gsibv-vectortile-layer-767.yml
  - !!inc/file layers\gsibv-vectortile-layer-768.yml
  - !!inc/file layers\gsibv-vectortile-layer-769.yml
  - !!inc/file layers\gsibv-vectortile-layer-770.yml
これでYAMLが出来上がりました。
生成されたYAMLを編集
このサンプルスタイルは初期座標が指定されていないので
再度style.ymlをテキストエディタ開いて追記してみます。
version: 8
+ center:
+   - 135
+   - 35
+ zoom: 12
glyphs: https://maps.gsi.go.jp/xyz/noto-jp/{fontstack}/{range}.pbf
sources:
  gsibv-vectortile-source-1-4-16:
    type: vector
ライブプレビューを実行
そしたらライブプレビューを実行してみましょう
> charites serve style.yml
ファイアウォール機能がアクセス許可を確認してきたら「アクセスを許可する」を選択する
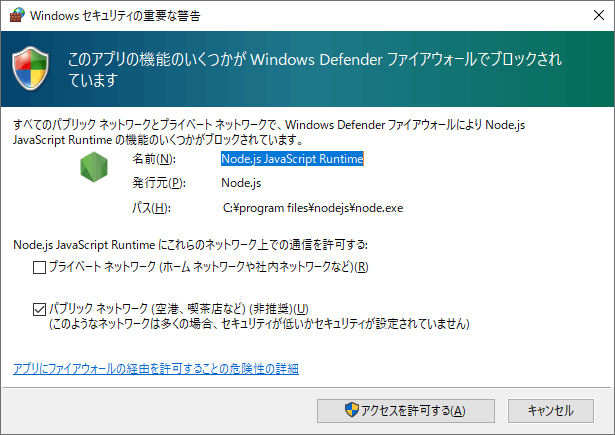
ブラウザが開いて地図が表示されました
道路の色を変えてみる
layers\gsibv-vectortile-layer-1112.ymlを開いて
paint:
-   line-color: rgba(255,255,0,1)
+   line-color: rgba(255,100,0,1)
  line-width: 3
ブラウザ上の道路の色が変わった
serveを終わらせるにはコンソールで「Ctrl+c」
ブラウザは普通に閉じればOK
style.jsonを生成
編集したYMALからstyle.jsonを生成
> charites build style.yml style.json
style.jsonが生成された。
バッチファイルから実行
DOSにPATHが通っているようなのでよくやる操作はバッチファイルにしておけます。
例えば
REM 作業フォルダに移動
cd c:\work\gsi

REM ライブプレビューを実行
charites serve style.yml
こんなバッチを作ってデスクトップにおいておけば、態々コマンドプロンプト開いてコマンドを実行する必要もなくライブプレビューを実行することができますね。
良い感じ。
さいごに
MapboxVectorTileは便利なのにスタイル(style.json)の管理が超絶煩雑になりがちです。
Charitesを使うことでスタイル管理に希望の光が差したような気がしています。
これがあったらといいのに、と感じた機能
Charitesを使ってみたら超便利なので便利ついでにこれもできたらいいのにという願望。
-
LivePreviewで地図をクリックしてlayersのどれかを識別できる機能(Maputnikみたいな)
現状だと地図見ながらこの地物の色を変えようと思ってもそれがどのレイヤなのか特定ができないです。 -
buildする際にtilesのURI指定オプション
TileServerGLを通した場合は公開style.jsonと生style.jsonはURI設定が異なるため指定できると嬉しい。
Developで困った事象
- Windowsでmapnikインストールできない = Charitesの開発できない
> npm install
npm WARN deprecated svgo@1.3.2: This SVGO version is no longer supported. Upgrade to v2.x.x.
npm ERR! code 1
npm ERR! path c:\work\charites\node_modules\mapnik
npm ERR! command failed
npm ERR! command C:\WINDOWS\system32\cmd.exe /d /s /c node-pre-gyp install --fallback-to-build
npm ERR! Failed to execute 'C:\Program Files\nodejs\node.exe C:\Program Files\nodejs\node_modules\npm\node_modules\node-gyp\bin\node-gyp.js configure --fallback-to-build --module=c:\work\charites\node_modules\mapnik\lib\binding\mapnik.node --module_name=mapnik --module_path=c:\work\charites\node_modules\mapnik\lib\binding --napi_version=8 --node_abi_napi=napi --napi_build_version=0 --node_napi_label=node-v93' (1)
npm ERR! node-pre-gyp info it worked if it ends with ok
npm ERR! node-pre-gyp info using node-pre-gyp@1.0.6
npm ERR! node-pre-gyp info using node@16.13.1 | win32 | x64
npm ERR! node-pre-gyp info check checked for "c:\work\charites\node_modules\mapnik\lib\binding\mapnik.node" (not found)
npm ERR! node-pre-gyp http GET https://mapbox-node-binary.s3.amazonaws.com/mapnik/v4.5.8/Release/win32-x64.tar.gz
npm ERR! node-pre-gyp ERR! install response status 403 Forbidden on https://mapbox-node-binary.s3.amazonaws.com/mapnik/v4.5.8/Release/win32-x64.tar.gz
npm ERR! node-pre-gyp WARN Pre-built binaries not installable for mapnik@4.5.8 and node@16.13.1 (node-v93 ABI, unknown) (falling back to source compile with node-gyp)
npm ERR! node-pre-gyp WARN Hit error response status 403 Forbidden on https://mapbox-node-binary.s3.amazonaws.com/mapnik/v4.5.8/Release/win32-x64.tar.gz
npm ERR! gyp info it worked if it ends with ok
解決方法知っていたら教えてください。
本記事のライセンス

この記事は クリエイティブ・コモンズ 表示 4.0 国際 ライセンスの下に提供されています。
-
Charitesの開発環境を整備する際にmapnikがエラーを吐いて失敗してしまいます。 ↩