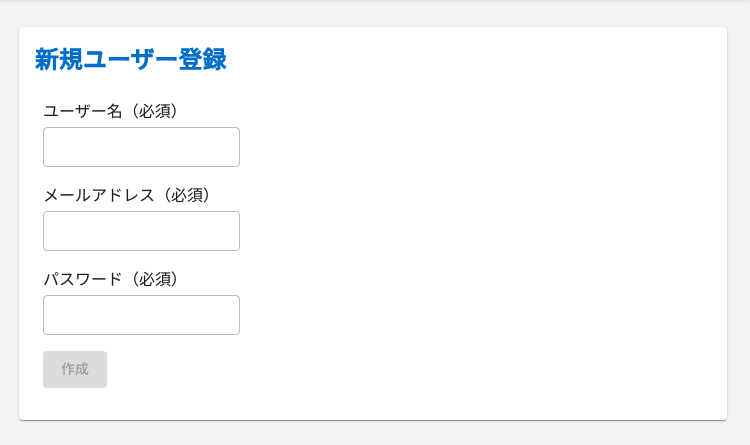
このような画面だとします。
作成の手順を以下に書いていきます。
1ファイルだけで作成可能です。POST.jsxとします。
React MUIを使用する
インストール
$ npm install @mui/material @emotion/react @emotion/styled
emotionは不要ですが、公式に準じます。
1. 見た目を作成
MUIによって簡単に作成できます。
POST.jsx
import * as React from 'react';
import Box from '@mui/material/Box';
import Typography from '@mui/material/Typography';
import TextField from '@mui/material/TextField';
import Button from '@mui/material/Button';
import FormControl from '@mui/material/FormControl';
import Select from '@mui/material/Select';
import MenuItem from '@mui/material/MenuItem';

export default function PostUser() {
return (
    <>
      <Box mb={2}>
        <Typography component='h2'>新規ユーザー登録</Typography>
      </Box>

      <Box
        component='form'
        noValidate
        autoComplete='off'
      >
        <Typography
            component='p'
            color='inherit'
            noWrap
            sx={{ marginBottom: 0.5 }}
        >
          ユーザー名(必須)
        </Typography>
        <TextField
            label=''
            variant='outlined'
            size='small'
            sx={{ marginBottom: 2 }}
        />

        <Typography
            component='p'
            color='inherit'
            noWrap sx={{ marginBottom: 0.5 }}
        >
          メールアドレス(必須)
        </Typography>
        <TextField
            label=''
            variant='outlined'
            size='small'
            sx={{ marginBottom: 2 }}
        />

        <Typography
            component='p'
            color='inherit'
            noWrap
            sx={{ marginBottom: 0.5 }}
        >
          パスワード(必須)
        </Typography>
        <TextField
            label=''
            variant='outlined'
            size='small'
            sx={{ marginBottom: 2 }}
        />

        <Button variant='contained'>
          作成
        </Button>
      </Box>
    </>
  );
}
2. データを状態として定義し、フォーム要素のvalueに設定する。
登録するデータを、以下の変数名だとします。
- ユーザー名
- username
- メールアドレス
- パスワード
- password
POST.jsx
...
export default function PostUser() {

  const [username, setUsername] = React.useState('');
  const [email, setEmail] = React.useState('');
  const [password, setPassword] = React.useState('');
  ...
フォームのvalueに設定し、changeすると更新関数(set~)が走るようにする。
POST.jsx
  return (
    <>
        ...

        <Typography
            component='p'
            color='inherit'
            noWrap
            sx={{ marginBottom: 0.5 }}
        >
          ユーザー名(必須)
        </Typography>
        <TextField
            label=''
            variant='outlined'
            size='small'
            sx={{ marginBottom: 2 }}
            value={username} //追加
            onChange={(e) => setUsername(e.target.value)} //追加
        />

        <Typography
            component='p'
            color='inherit'
            noWrap
            sx={{ marginBottom: 0.5 }}
        >
          メールアドレス(必須)
        </Typography>
        <TextField
            label=''
            variant='outlined'
            size='small'
            sx={{ marginBottom: 2 }}
            value={email} //追加
            onChange={(e) => setEmail(e.target.value)} //追加
        />

        <Typography
            component='p'
            color='inherit'
            noWrap
            sx={{ marginBottom: 0.5 }}
        >
          パスワード(必須)
        </Typography>
        <TextField
            label=''
            variant='outlined'
            size='small'
            sx={{ marginBottom: 2 }}
            value={password} //追加
            onChange={(e) => setPassword(e.target.value)} //追加
        />
        ...

    </>
  );
}
3. APIへのPOST関数を追加する
POST.jsx
export default function PostUser() {
 ...

 const postUser = async () => {
    const userData = {
      name: username,
      email: email,
      password: password,
    };

    const url = '*'; // *にAPIエンドポイントを入れる
    const response = await fetch(url, {
      method: 'POST',
      headers: {
        'Content-Type': 'application/json',
      },
      body: JSON.stringify(userData),
    });

    // レスポンスの確認
    if (!response.ok) {
      console.error("Error in user creation:", response);
      return;
    }
  };
  ...

export default function PostUser() {
    ...
    return (
        ...

        <Button variant='contained' onClick={postUser}>作成</Button>
        )
}
4. API通信の成否によって遷移先を変える。
react-router-domをインストール
$ npm install react-router-dom
useNavigateをインポートして使用します。
POST.jsx
...

import { useNavigate } from 'react-router-dom'; // 追加

export default function PostUser() {
  ...

  const navigate = useNavigate(); // 追加

  const postUser = async () => {
    const userData = {
      name: username,
      email: email,
      password: password,
    };

    const url = '*'; // *にAPIエンドポイントを入れる
    const response = await fetch(url, {
      method: 'POST',
      headers: {
        'Content-Type': 'application/json',
      },
      body: JSON.stringify(userData),
    });

    // レスポンスの確認
    if (!response.ok) {
      console.error("Error in user creation:", response);
      navigate('/PostUser/error'); // 追加: POSTが失敗したらエラーページへ
      return;
    }

    navigate('/PostUser/complete'); // 追加: POSTが成功したら完了ページへ遷移
  };
5. 必須項目が入力されるまで作成ボタンを非活性にする
これはReactの定型のようなものです。
disabledに条件を入れます。
POST.jsx
export default function PostUser() {
  return (
    <>
        ...

        <Button
            variant='contained'
            onClick={postUser}
            disabled={!username || !email || !password} // 追加
        >
          作成
        </Button>
    <>
   )
完成
APIエンドポイントさえ用意されていれば、上記のように比較的簡単に作成可能です。
POSTのエンドポイントへのアクセスは、認証を挟むなど、アタックを防ぐことが必要です。