やりたいこと
Djangoを勉強中なのでDjango REST frameworkを導入し、Google Maps JavaScript APIを使用してWebアプリを作ってみた。
環境
Windows 10
Python 3.6.5
Django 2.1.4
プロジェクトの作成
コマンドプロンプトでプロジェクトの作成とアプリケーションの作成を行う。
$ django-admin startproject mymapsite
$ cd mymapsite(作成したプロジェクトディレクトリに移動)
$ python manage.py startapp gmap
一度サーバーを立ち上げて確認を行う。
$ python manage.py runserver
Django version 2.1.4, using settings 'mymapsite.settings'
Starting development server at http://127.0.0.1:8000/
Quit the server with CTRL-BREAK.
になったら http://127.0.0.1:8000/ をブラウザで開いて確認する。ロケットが出てくればOK。
Modelの作成
Modelとして顧客モデルを作る。顧客モデルは名前、住所、緯度、経度を持つものとする。
from django.db import models


class Customer(models.Model):
    name = models.CharField('名前', max_length=20)
    address = models.CharField('住所', max_length=50)
    lat = models.DecimalField('緯度', max_digits=8, decimal_places=6)
    lng = models.DecimalField('経度', max_digits=9, decimal_places=6)

    def __str__(self):
        return str(self.name)
    class Meta:
        verbose_name = '顧客'
        verbose_name_plural = '顧客'
settings.pyにアプリケーションを含める。
INSTALLED_APPS = [
    ...
    'gmap.apps.GmapConfig', #追加
]
migrationコマンドを実行。
$ python manage.py makemigrations gmap
Migrations for 'gmap':
  gmap\migrations\0001_initial.py
    - Create model Customer
こうなったらmigrateも実行する。
$ python manage.py migrate
Operations to perform:
  Apply all migrations: admin, auth, contenttypes, gmap, sessions
Running migrations:
  Applying contenttypes.0001_initial... OK
  Applying auth.0001_initial... OK
  Applying admin.0001_initial... OK
  Applying admin.0002_logentry_remove_auto_add... OK
  Applying admin.0003_logentry_add_action_flag_choices... OK
  Applying contenttypes.0002_remove_content_type_name... OK
  Applying auth.0002_alter_permission_name_max_length... OK
  Applying auth.0003_alter_user_email_max_length... OK
  Applying auth.0004_alter_user_username_opts... OK
  Applying auth.0005_alter_user_last_login_null... OK
  Applying auth.0006_require_contenttypes_0002... OK
  Applying auth.0007_alter_validators_add_error_messages... OK
  Applying auth.0008_alter_user_username_max_length... OK
  Applying auth.0009_alter_user_last_name_max_length... OK
  Applying gmap.0001_initial... OK
  Applying sessions.0001_initial... OK
URLconfの設定
Djangoのプロジェクトルートのurls.pyにURL設定をする。
from django.contrib import admin
from django.urls import include, path #include追加

urlpatterns = [
    path('admin/', admin.site.urls),
    path('gmap/', include('gmap.urls')), #追加
]
gmap/urls.pyの設定
gmapアプリケーションのurls.pyを新規に作成する。
from django.urls import path

from . import views

app_name = 'gmap'
urlpatterns = [
    path('', views.index, name='index'),
]
gmap/views.pyにindexビューを追加する
from django.shortcuts import render
from django.http import HttpResponse
from django.template import loader


def index(request):
    template = loader.get_template('gmap/index.html')
    context = {}
    return HttpResponse(template.render(context, request))
gmap/templates/gmap/index.htmlを作成する
地図ページとなるindex.htmlを作成する。gmap/templates, gmap/templates/gmapの必要なディレクトリは作成する。
(index.htmlはGoogle Maps JavaScript APIのページから借りてきたものを少し修正した物です。YOUR_API_KEYの部分は書き換えてください。)
2019/10/22 追記
JavaScriptのforループに誤りがあったため修正しました。
<!DOCTYPE html>
<html>
  <head>
    <title>Simple Map</title>
    <meta name="viewport" content="initial-scale=1.0">
    <meta charset="utf-8">
    <style>
      /* Always set the map height explicitly to define the size of the div
       * element that contains the map. */
      #map {
        height: 100%;
      }
      /* Optional: Makes the sample page fill the window. */
      html, body {
        height: 100%;
        margin: 0;
        padding: 0;
      }
    </style>
  </head>
  <body>
    <div id="map"></div>
    <script>
      var map;

      /**
       * The CenterControl adds a control to the map that recenters the map on
       * Chicago.
       * This constructor takes the control DIV as an argument.
       * @constructor
       */
      function CenterControl(controlDiv, map) {

        // Set CSS for the control border.
        var controlUI = document.createElement('div');
        controlUI.style.backgroundColor = '#fff';
        controlUI.style.border = '2px solid #fff';
        controlUI.style.borderRadius = '3px';
        controlUI.style.boxShadow = '0 2px 6px rgba(0,0,0,.3)';
        controlUI.style.cursor = 'pointer';
        controlUI.style.marginBottom = '22px';
        controlUI.style.textAlign = 'center';
        controlUI.title = 'Click to recenter the map';
        controlDiv.appendChild(controlUI);

        // Set CSS for the control interior.
        var controlText = document.createElement('div');
        controlText.style.color = 'rgb(25,25,25)';
        controlText.style.fontFamily = 'Roboto,Arial,sans-serif';
        controlText.style.fontSize = '16px';
        controlText.style.lineHeight = '38px';
        controlText.style.paddingLeft = '5px';
        controlText.style.paddingRight = '5px';
        controlText.innerHTML = 'Customer Search';
        controlUI.appendChild(controlText);

        controlUI.addEventListener('click', function() {

          var xhttp = new XMLHttpRequest();
          xhttp.onreadystatechange = function() {
               if (this.readyState == 4 && this.status == 200) {
                 setMarker(JSON.parse(this.responseText));
               }
          };
          xhttp.open("GET", "api/customer/?format=json", true);
          xhttp.setRequestHeader("Content-type", "application/json");
          xhttp.send();

        });

      }

      function initMap() {
        map = new google.maps.Map(document.getElementById('map'), {
          center: {lat: 35.681236, lng: 139.767125},
          zoom: 8
        });

        var centerControlDiv = document.createElement('div');
        var centerControl = new CenterControl(centerControlDiv, map);

        centerControlDiv.index = 1;
        map.controls[google.maps.ControlPosition.TOP_CENTER].push(centerControlDiv);

      }

      function setMarker(customerJson) {

        for(var i = 0; i < customerJson.length; i++){

          var infowindow = new google.maps.InfoWindow({
            content: customerJson[i].name + ' ' + customerJson[i].address
          });

          var marker = new google.maps.Marker({
            position: {lat: Number(customerJson[i].lat), lng: Number(customerJson[i].lng)},
            map: map
          });

          bindInfoWindow(marker, map, infowindow);
        }
      }

      function bindInfoWindow(marker, map, infowindow) {
        marker.addListener('click', function() {
          infowindow.open(map, this);
        });
      }
    </script>
    <script src="https://maps.googleapis.com/maps/api/js?key=YOUR_API_KEY&callback=initMap"
    async defer></script>
  </body>
</html>
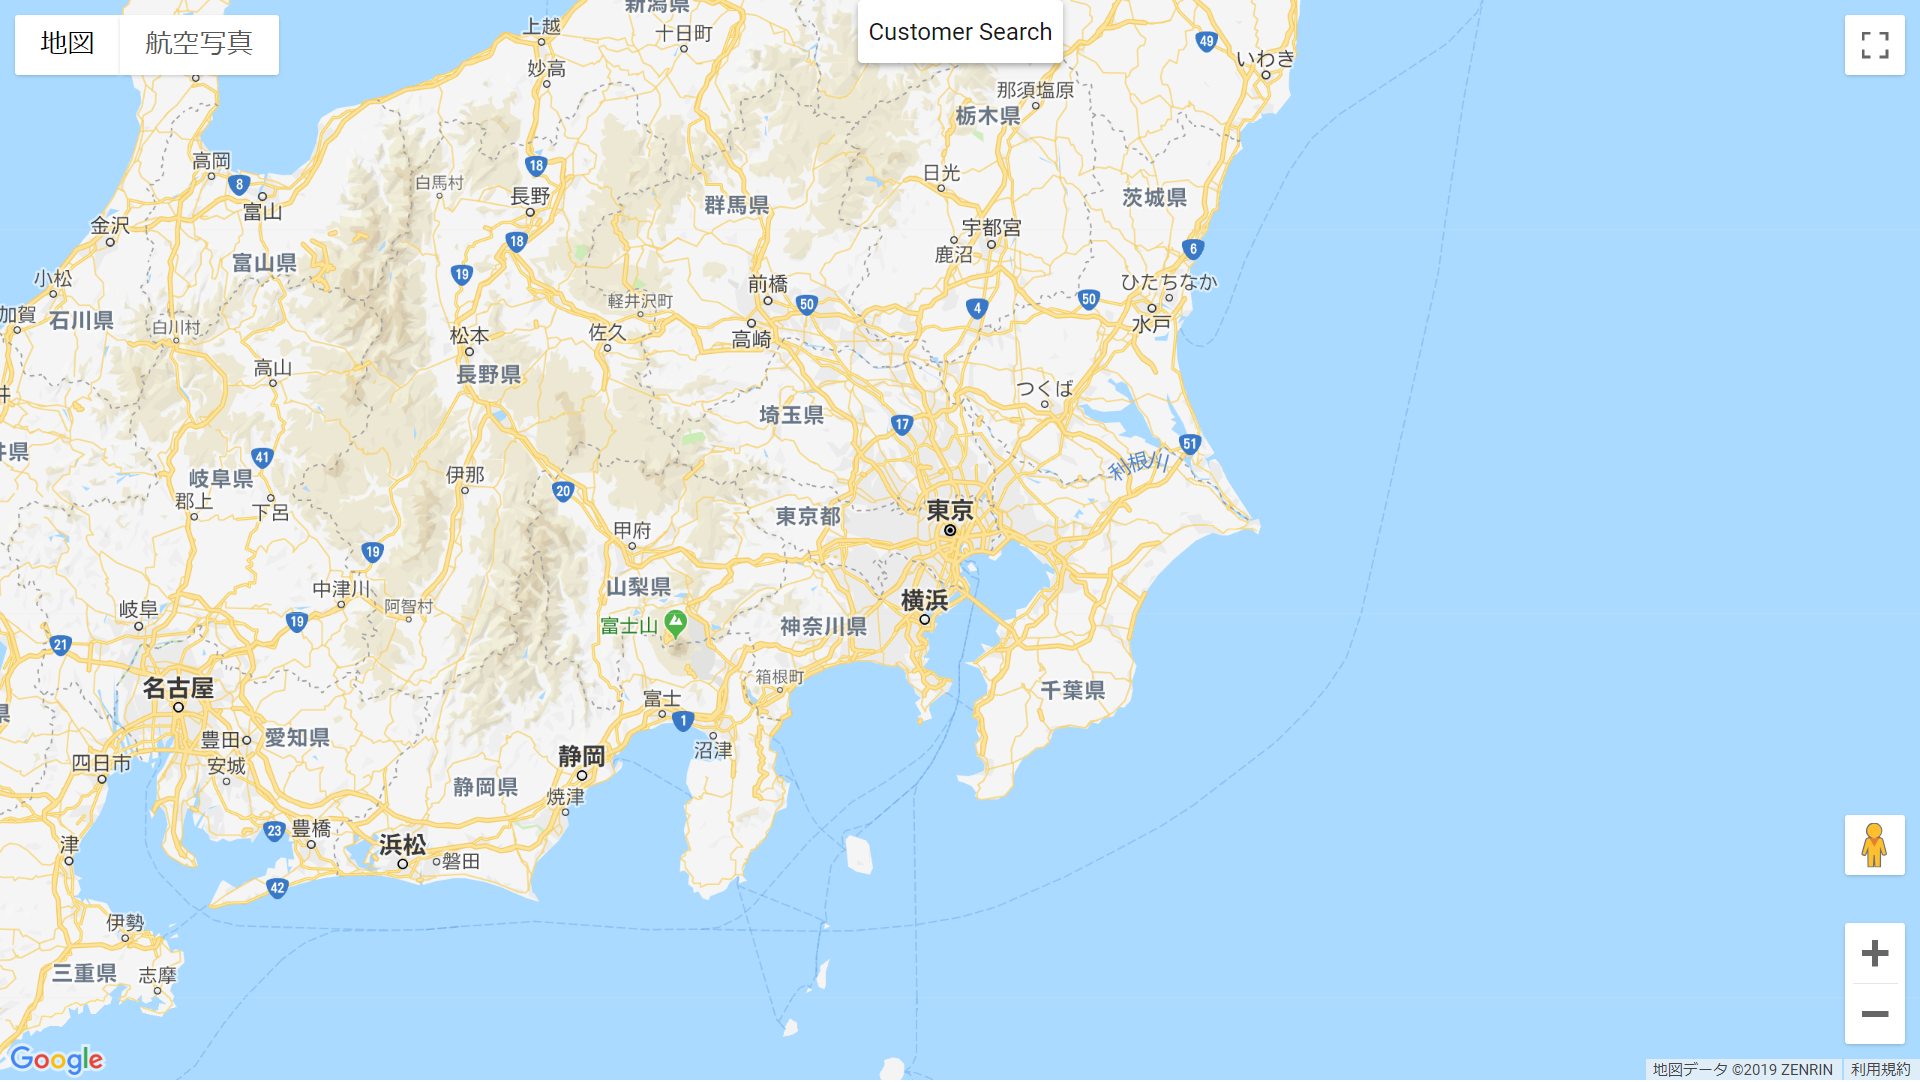
動作確認
ここまでの状態で一度動作確認しておく。python manage.py runserverして、http://127.0.0.1:8000/gmap/ にアクセスする。(画面上部のボタンは後で使用します。現在は動作しません。)
Django REST frameworkのインストールと使用
index.htmlでjsonデータを受け取りたいのでDjango REST frameworkを使用する。
公式ページ
https://www.django-rest-framework.org/
インストール
コマンドプロンプトでインストールする。
pip install djangorestframework
pip install markdown
pip install django-filter
settings.pyに追記
settings.pyのINSTALLED_APPSに追記する。
INSTALLED_APPS = (
    ...
    'rest_framework', #追記
)
また、どこでも良いのでsettings.pyにREST_FRAMEWORKを追記する。
REST_FRAMEWORK = {
    # Use Django's standard `django.contrib.auth` permissions,
    # or allow read-only access for unauthenticated users.
    'DEFAULT_PERMISSION_CLASSES': [
        'rest_framework.permissions.DjangoModelPermissionsOrAnonReadOnly'
    ]
}
また、このあと使用するログイン後のリダイレクトを設定する。
LOGIN_REDIRECT_URL = '/gmap/api/' #追記
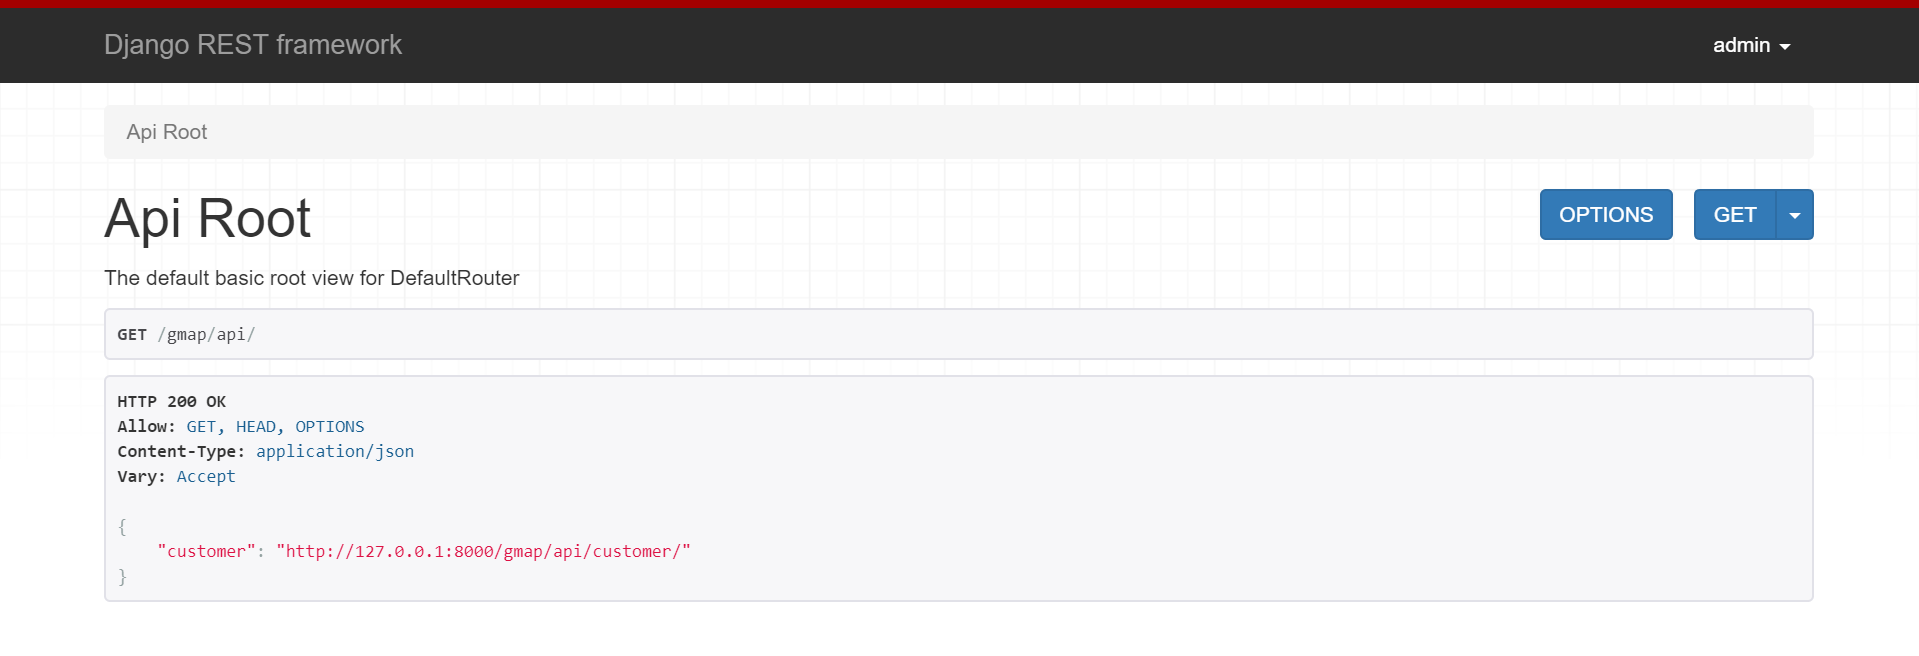
URLconfの修正
プロジェクトルートのURLconfにRESTの設定など追記する。(丸ごと載せます)
from django.contrib import admin
from gmap.models import Customer
from django.urls import path
from django.conf.urls import url, include
from rest_framework import routers, serializers, viewsets

class CustomerSerializer(serializers.HyperlinkedModelSerializer):
    class Meta:
        model = Customer
        fields = ('name', 'address', 'lat', 'lng')

class CustomerViewSet(viewsets.ModelViewSet):
    queryset = Customer.objects.all()
    serializer_class = CustomerSerializer

router = routers.DefaultRouter()
router.register(r'customer', CustomerViewSet)

urlpatterns = [
    path('admin/', admin.site.urls),
    path('gmap/', include('gmap.urls')),
    path('accounts/', include('django.contrib.auth.urls')),
    path('gmap/api/', include(router.urls)),
    path('api-auth/', include('rest_framework.urls', namespace='rest_framework'))
]
superuserの作成
ログインしてモデル登録するためcreatesuperuserコマンドでユーザを作成する。(Usernameはadminにしました)
$ python manage.py createsuperuser
Username (leave blank to use 'あなたの名前'): admin
Email address: あなたのメールアドレス
Password:
Password (again):
Superuser created successfully.
ログインする
http://127.0.0.1:8000/api-auth/login/ にアクセスしてcreatesuperuserで作成したユーザでログインする。
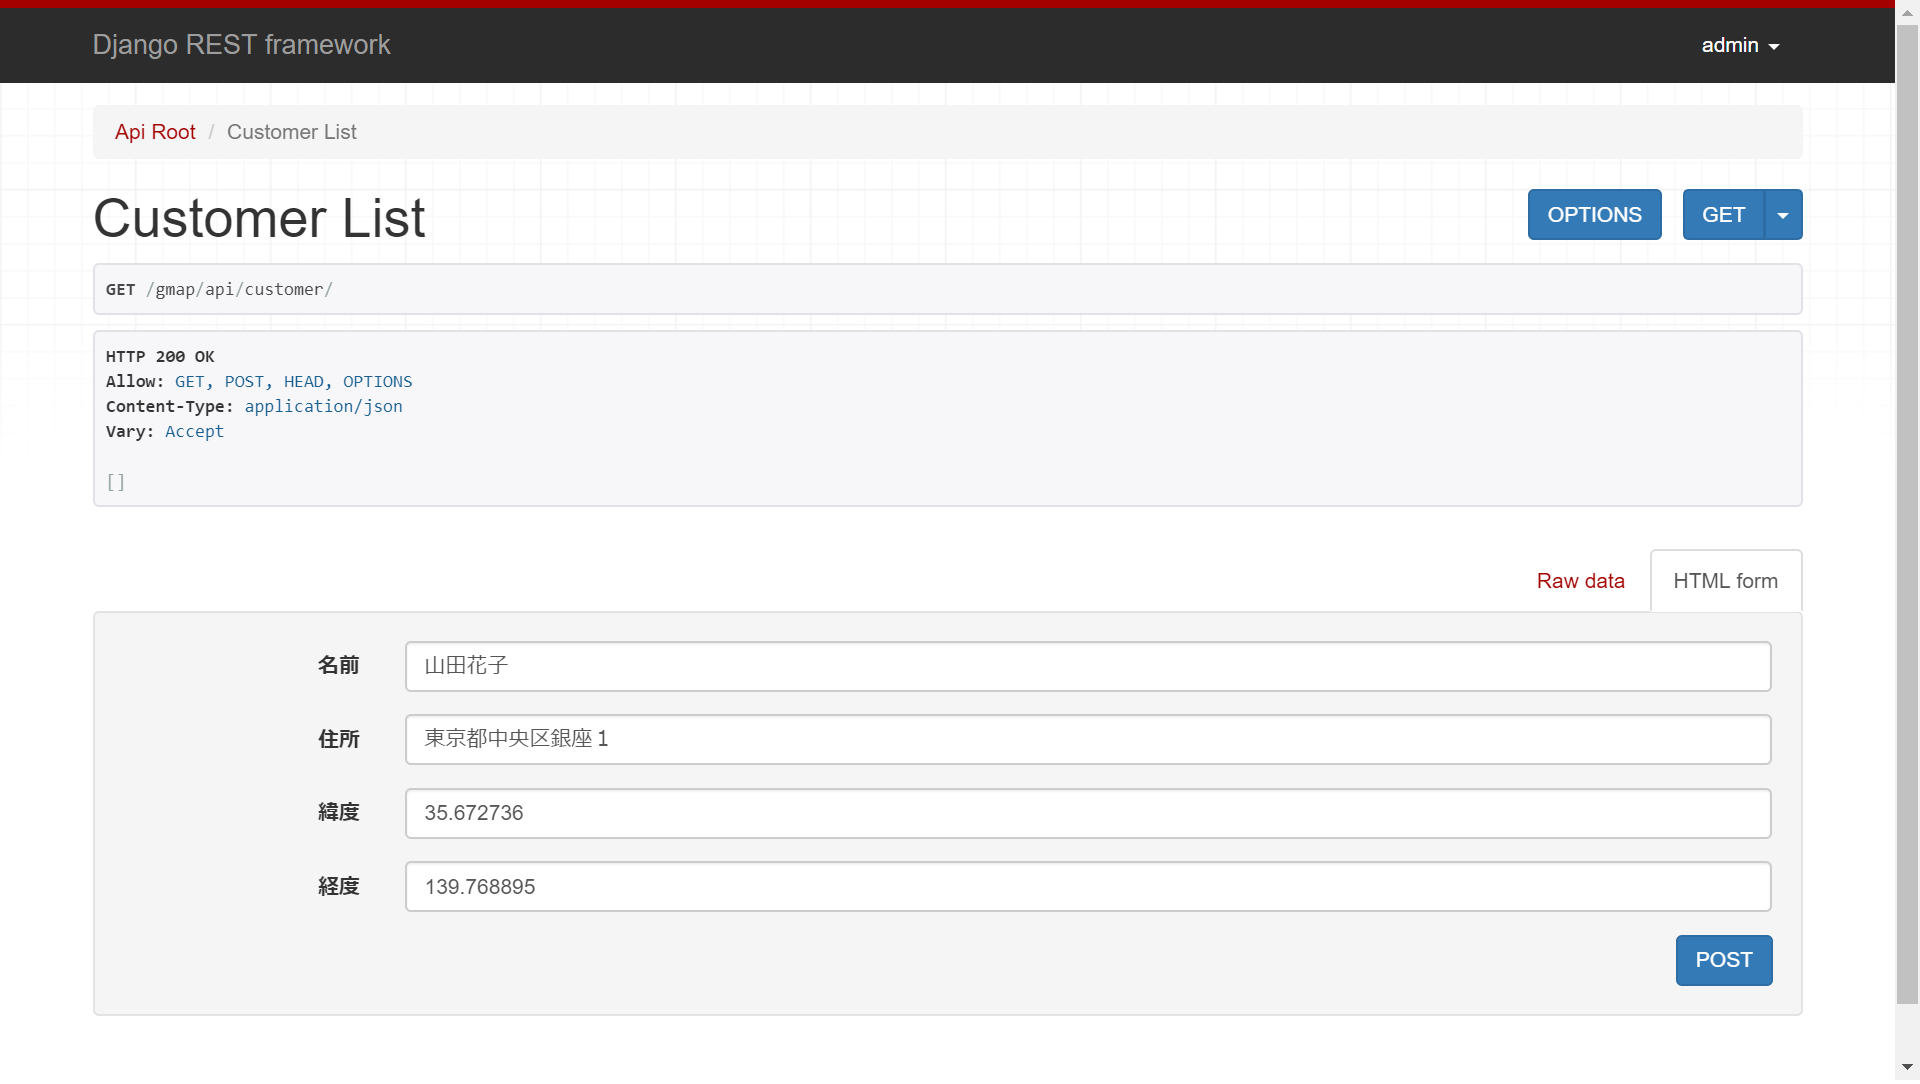
データの登録
http://127.0.0.1:8000/gmap/api/customer/ にアクセスしてデータの登録を行う。画面右下のPOSTで登録する。(緯度経度は適当に入手してください)
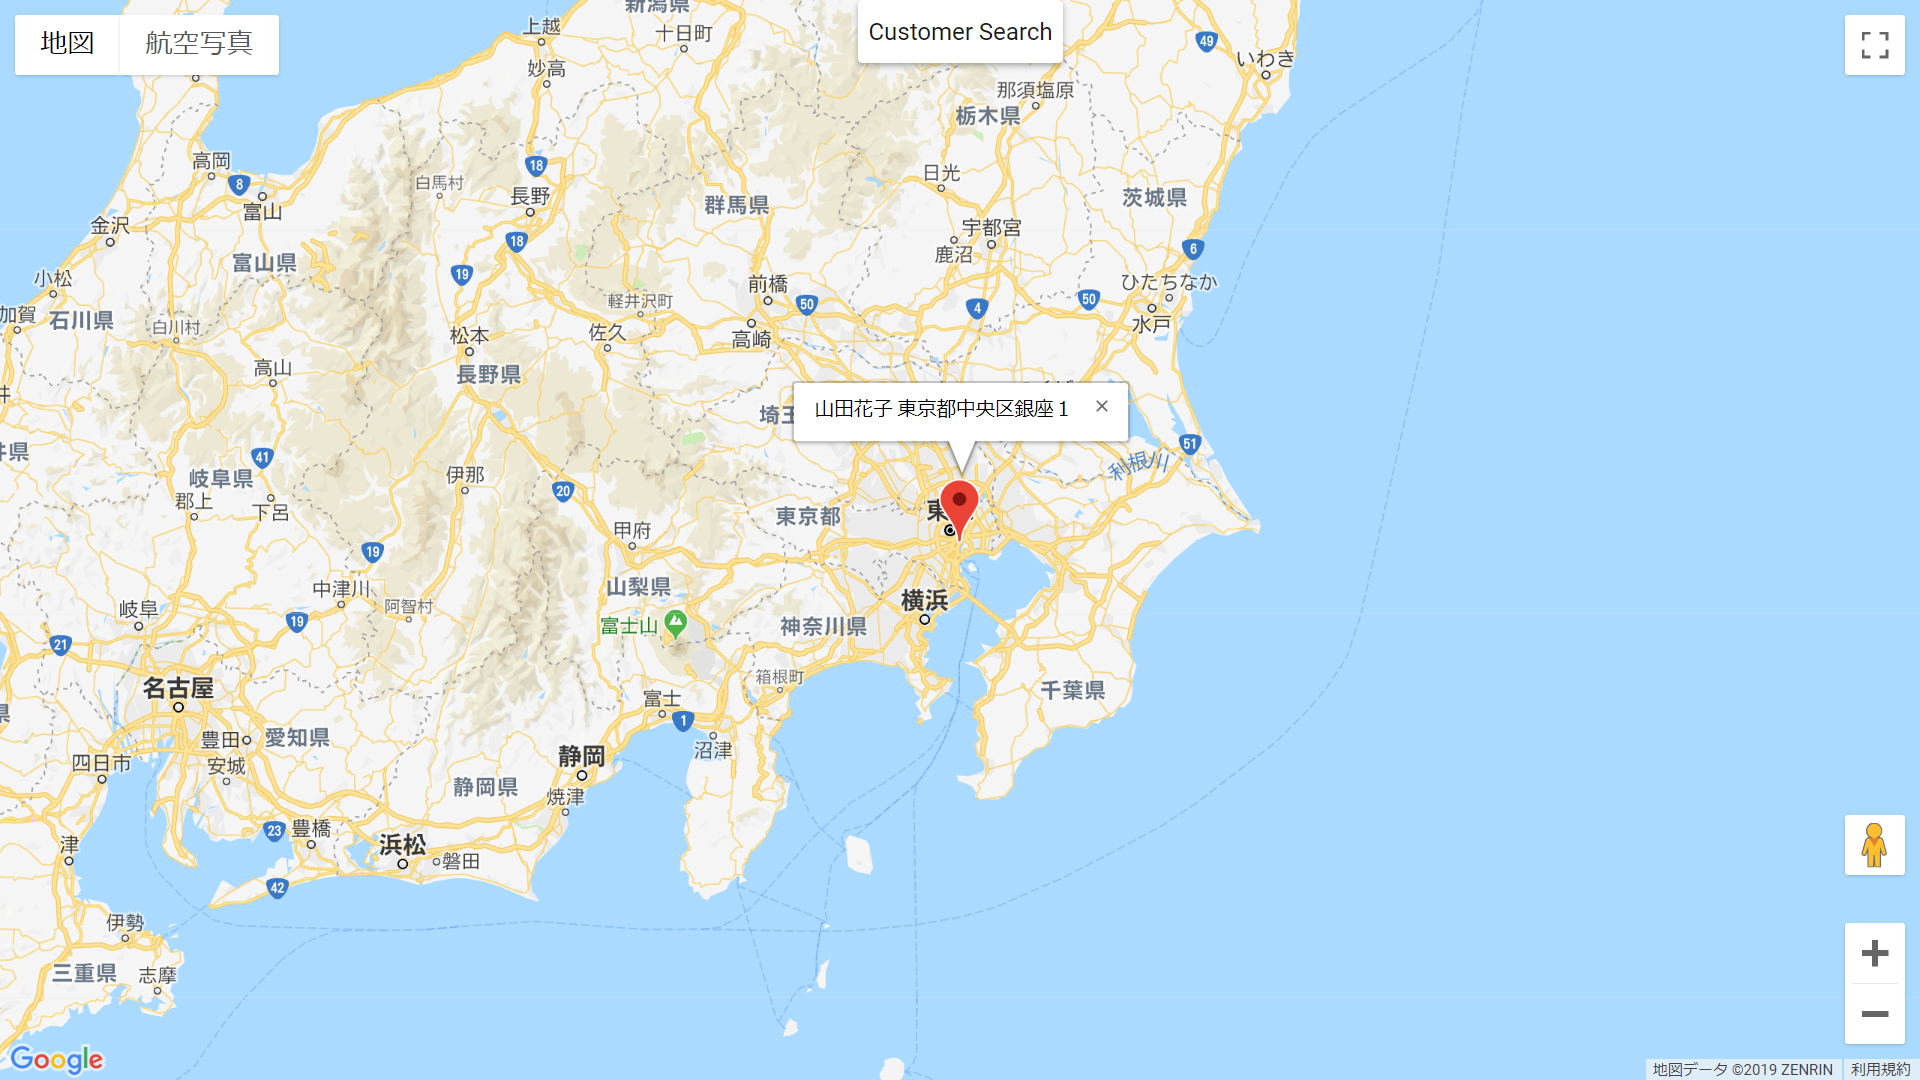
最後の動作確認
再度http://127.0.0.1:8000/gmap/ を開いて動作を確認する。画面上部の"Customer Search"をクリックして、ピンが表示される。ピンをクリックするとInfoWindowが表示される。
ここまで見ていただきありがとうございました。
以上です。