やりたいこと
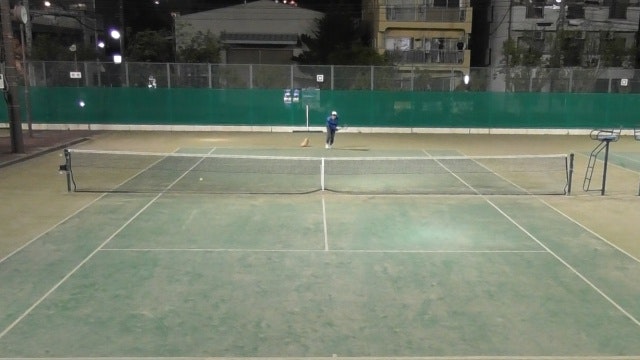
テニスのボール軌道を検出して、円で囲います。
最終的には、ボールの軌道や着弾点などを自動でデータ化できるようにしたいと思っています。
ボールの軌道を検出した動画
開発中のディープラーニングを用いたテニス映像解析システム。サーブ時のボールの軌道をトラッキングしてます。次は、着弾点を自動で記録できるようにしたい。 pic.twitter.com/NcwIdYLtrj
— おたこ (@otakoma) 2018年5月1日
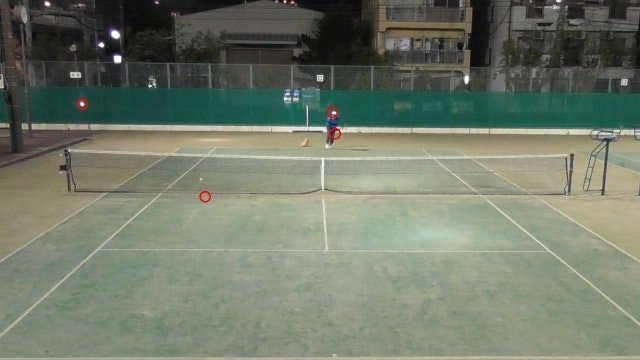
サーブのボールを検出できています。人をバウンディングボックスで検出していて、これはディープラーニングの物体検出手法(SSD)を用いてやっていますが今回は扱いません。
手順
- フレーム間の差分画像を生成
- 画像を2値化
- 膨張処理して分割してしまった物体を1つの物体としてまとめる
- 物体の重心座標(x,y)を計算し、円で囲う
全コードは最後に記載してます。
フレーム間の差分画像を生成
ボールを検出するために動いている物体のみを検出できるようにします。そのために前のフレームと今のフレームとの差分画像を作成します。
color_diff = cv2.absdiff(frame_next, frame_pre)
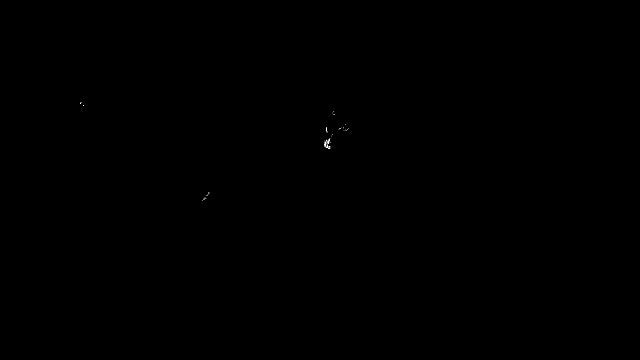
画像を2値化
↑で生成した差分画像をカラー画像から2値化した白黒画像に変換します。
color_diff = cv2.absdiff(frame_next, frame_pre)  # フレーム間の差分計算
gray_diff = cv2.cvtColor(color_diff, cv2.COLOR_BGR2GRAY)  # グレースケール変換
retval, black_diff = cv2.threshold(gray_diff, 30, 255, cv2.THRESH_BINARY)
膨張処理して分割してしまった物体を1つの物体としてまとめる
2値化した画像のままだと、白い物体が複数に分割されてしまっているので、これを1つにまとめます。そのために膨張処理dilationを使用します。
def dilation(dilationSize, kernelSize, img):  # 膨張した画像にして返す
    kernel = np.ones((kernelSize, kernelSize), np.uint8)
    element = cv2.getStructuringElement(
        cv2.MORPH_RECT, (2 * dilationSize + 1, 2 * dilationSize + 1), (dilationSize, dilationSize))
    dilation_img = cv2.dilate(img, kernel, element)
    return dilation_img
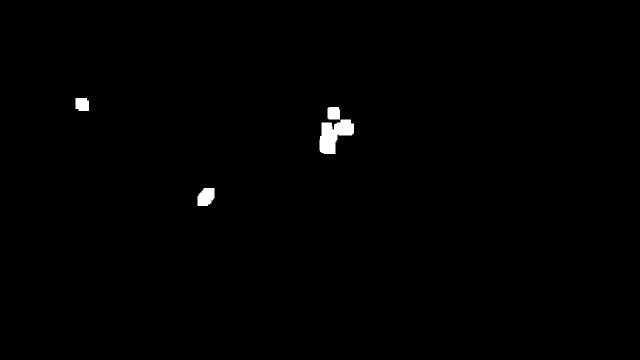
ボール以外の物体もありますが、今回はこれでよしとして進めます。
物体の重心座標(x,y)を計算し、円で囲う
物体の境界線となる点情報全てのxとyの平均値を計算することで、物体の重心位置を計算しました。もっと良い重心位置の計算方法はあるかもしれません。
image, contours, hierarchy = cv2.findContours(
dilation_img, cv2.RETR_EXTERNAL, cv2.CHAIN_APPROX_SIMPLE)  # 境界線検出

ball_pos = []

for i in range(len(contours)):  # 重心位置を計算
        count = len(contours[i])
        area = cv2.contourArea(contours[i])  # 面積計算
        x, y = 0.0, 0.0
        for j in range(count):
            x += contours[i][j][0][0]
            y += contours[i][j][0][1]

        x /= count
        y /= count
        x = int(x)
        y = int(y)
        ball_pos.append([x, y])
ボール以外も検出されていますが、ノイズ除去についてはまた次回にでも。
Pythonコード
import cv2
import sys
import numpy as np


def dilation(dilationSize, kernelSize, img):  # 膨張した画像にして返す
    kernel = np.ones((kernelSize, kernelSize), np.uint8)
    element = cv2.getStructuringElement(
        cv2.MORPH_RECT, (2 * dilationSize + 1, 2 * dilationSize + 1), (dilationSize, dilationSize))
    dilation_img = cv2.dilate(img, kernel, element)
    return dilation_img


def detect(gray_diff, thresh_diff=30, dilationSize=9, kernelSize=20):  # 一定面積以上の物体を検出
    retval, black_diff = cv2.threshold(
        gray_diff, thresh_diff, 255, cv2.THRESH_BINARY)  # 2値化
    dilation_img = dilation(dilationSize, kernelSize, black_diff)  # 膨張処理
    img = dilation_img.copy()
    image, contours, hierarchy = cv2.findContours(
        dilation_img, cv2.RETR_EXTERNAL, cv2.CHAIN_APPROX_SIMPLE)  # 境界線検出

    ball_pos = []

    for i in range(len(contours)):  # 重心位置を計算
        count = len(contours[i])
        area = cv2.contourArea(contours[i])  # 面積計算
        x, y = 0.0, 0.0
        for j in range(count):
            x += contours[i][j][0][0]
            y += contours[i][j][0][1]

        x /= count
        y /= count
        x = int(x)
        y = int(y)
        ball_pos.append([x, y])

    return ball_pos, img


def displayCircle(image, ballList, thickness=5):
    for i in range(len(ballList)):
        x = int(ballList[i][0])
        y = int(ballList[i][1])
        cv2.circle(image, (x, y), 10, (0, 0, 255), thickness)
    return image


def resizeImage(image, w=2, h=2):
    height = image.shape[0]
    width = image.shape[1]
    resizedImage = cv2.resize(image, (int(width / w), int(height / h)))
    return resizedImage


def blackToColor(bImage):
    colorImage = np.array((bImage, bImage, bImage))
    colorImage = colorImage.transpose(1, 2, 0)
    return colorImage


def run(input_video_path, output_video_path):
    video = cv2.VideoCapture(input_video_path)  # videoファイルを読み込む
    # fourcc = cv2.VideoWriter_fourcc(*'MJPG')
    fourcc = cv2.VideoWriter_fourcc(*'XVID')

    if not video.isOpened():  # ファイルがオープンできない場合の処理.
        print("Could not open video")
        sys.exit()

    vidw = video.get(cv2.CAP_PROP_FRAME_WIDTH)
    vidh = video.get(cv2.CAP_PROP_FRAME_HEIGHT)
    out = cv2.VideoWriter(output_video_path, fourcc, 20.0,
                          (int(vidw), int(vidh)))  # 出力先のファイルを開く

    ok, frame = video.read()  # 最初のフレームを読み込む
    if not ok:
        print('Cannot read video file')
        sys.exit()

    frame_pre = frame.copy()

    while True:
        ok, frame = video.read()  # フレームを読み込む
        if not ok:
            break
        frame_next = frame.copy()

        color_diff = cv2.absdiff(frame_next, frame_pre)  # フレーム間の差分計算
        gray_diff = cv2.cvtColor(color_diff, cv2.COLOR_BGR2GRAY)  # グレースケール変換
        retval, black_diff = cv2.threshold(
            gray_diff, 30, 255, cv2.THRESH_BINARY)

        ball, dilation_img = detect(gray_diff)

        frame = displayCircle(frame, ball, 2)  # 丸で加工
        cImage = blackToColor(dilation_img)  # 2値化画像をカラーの配列サイズと同じにする
        im1 = resizeImage(frame, 2, 2)
        im2 = resizeImage(cImage, 2, 2)
        im_h = cv2.hconcat([im1, im2])  # 画像を横方向に連結

        cv2.imshow("Tracking", im_h)  # フレームを画面表示
        out.write(im_h)

        frame_pre = frame_next.copy()  # 次のフレームの読み込み

        k = cv2.waitKey(1) & 0xff  # ESCを押したら中止
        if k == 27:
            break

    video.release()
    out.release()
    cv2.destroyAllWindows()


if __name__ == '__main__':
    inputFile="test.avi"
    outputFile="output.mp4"
    run(inputFile, outputFile)