はじめに
作業環境が結構、異なるのでクラウド上に環境を作ってみます。
AWS Cloud9も良いのですがこの話はまたいつか。
結論から書くと意外とイケてる。。。ような気がする![]()
ただ、AMI作って再利用すると失敗する。。。
前提条件
本記事は以下の環境等を使用しております。
| クライアント環境 | Version |
|---|---|
| Windows | 7(64bit), 8(64bit), 10(64bit) |
| Remote Desktop | - |
| クライアント環境 | Version |
|---|---|
| Mac | Yosemite, High Sierra |
| Microsoft Remote Desktop | 8, 10 |
| ターゲット環境 | Version |
|---|---|
| Amazon EC2 | Ubuntu Server 18.04 LTS |
| Terminal | 使いやすいもの |
EC2インスタンスの準備
重要な点のみ記載してます
| OSはUbuntu Server 18.04 LTSを指定 |
|---|
 |
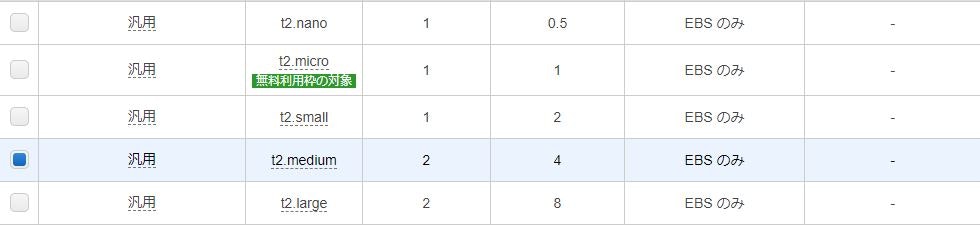
| メモリは4GB位あると良いので、t2.mediumぐらいを選択 ※無料範囲ではないので使用しない時は停止することを推奨します |
|---|
 |
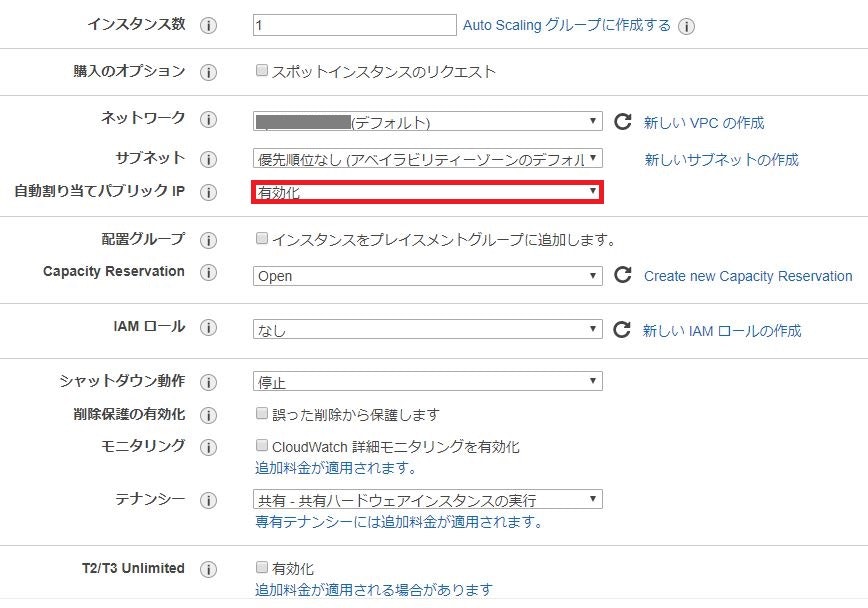
| パブリックIPは念のために有効化を選択 |
|---|
 |
| EBSは20GB以上を設定、ここでは30GBとしています |
|---|
 |
| 見分けが付くようにタグ(Name)を設定 |
|---|
 |
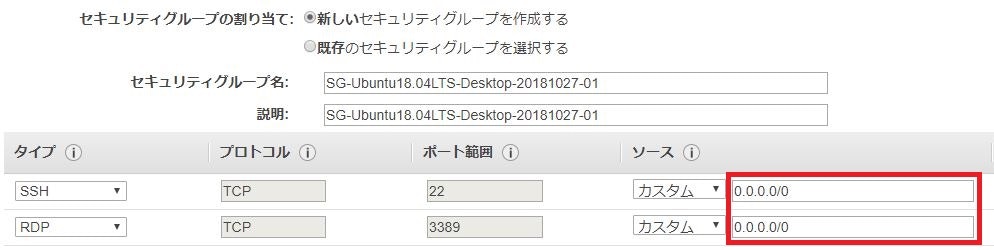
| IP制限を設定する場合は赤枠を変更 |
|---|
 |
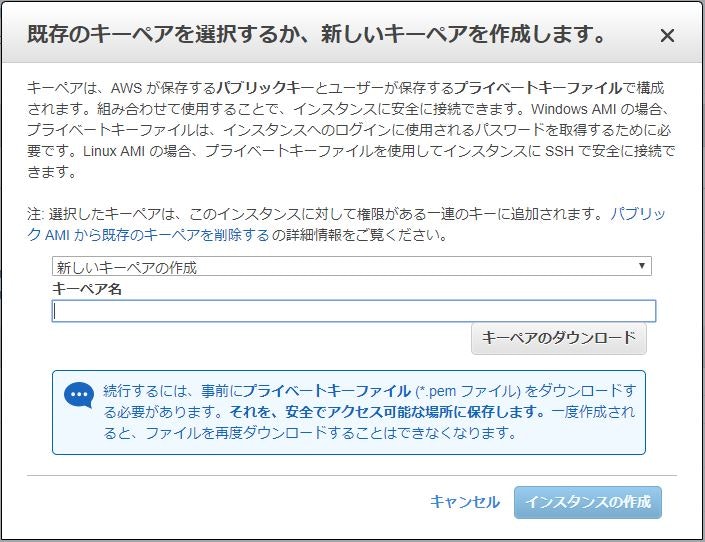
| 必要に応じて新規もしくは既存のキーペアを設定 秘密鍵は必ず保存しておいてください |
|---|
 |
| リモートデスクトップの接続先アドレスには赤枠のアドレスを使用します |
|---|
 |
EC2インスタンスの設定
インスタンスを作成後、SSHにてインスタンスへ接続します。
terminal
$ ssh -i <秘密鍵> ubuntu@<PublicIP>
リポジトリとパッケージの更新
terminal
$ sudo apt update -y
$ sudo apt upgrade -y
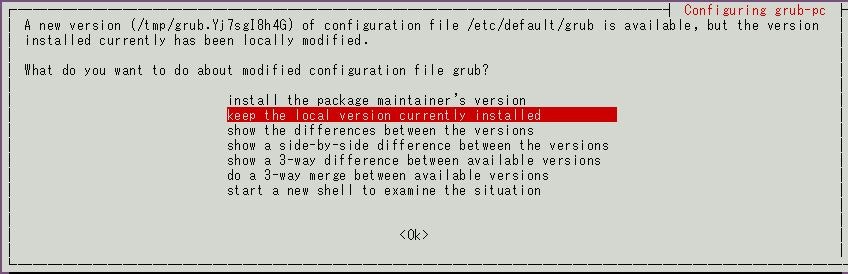
※Grub関係なので今のバージョンを維持します
「keep the local version currently installed」を選択
デスクトップ用ユーザーの作成
terminal
$ sudo adduser user_name

Enter new UNIX password:
Retype new UNIX password:
passwd: password updated successfully
Changing the user information for desktop
Enter the new value, or press ENTER for the default
        Full Name []:   ← Enterを入力
        Room Number []:  ← Enterを入力
        Work Phone []:   ← Enterを入力
        Home Phone []:   ← Enterを入力
        Other []:     ← Enterを入力
Is the information correct? [Y/n] Y ← Yを入力
デスクトップ用ユーザーをsudoグループへ追加
terminal
$ sudo gpasswd -a user_name sudo
デスクトップ環境のインストール
terminal
$ sudo apt -y install ubuntu-desktop
XRDPのインストール
terminal
# xrdpのインストール(執筆時はVersion 0.9.5)
$ sudo apt install -y xrdp
$ xrdp -v
xrdp: A Remote Desktop Protocol server.
Copyright (C) Jay Sorg 2004-2014
See http://www.xrdp.org for more information.
Version 0.9.5

# new_cursorsの無効化
$ sudo sed -e 's/^new_cursors=true/new_cursors=false/g' -i /etc/xrdp/xrdp.ini

# xrdpサービスの再起動、有効化
$ sudo systemctl restart xrdp
$ sudo systemctl enable xrdp.service
$ sudo systemctl enable xrdp-sesman.service
$ systemctl list-unit-files -t service | grep xrdp
xrdp-sesman.service                            enabled
xrdp.service                                   enabled

# xsessionファイルの作成
$ su user_name
$ cd ~
$ DESKTOP=/usr/share/ubuntu:/usr/local/share:/usr/share:/var/lib/snapd/desktop
$ cat <<EOF > ~/.xsessionrc
> export GNOME_SHELL_SESSION_MODE=ubuntu
> export XDG_CURRENT_DESKTOP=ubuntu:GNOME
> export XDG_DATA_DIRS=${DESKTOP}
> export XDG_CONFIG_DIRS=/etc/xdg/xdg-ubuntu:/etc/xdg
> EOF

# Authentication Requiredダイアログの回避
$ cat <<EOF | sudo tee /etc/polkit-1/localauthority/50-local.d/xrdp-color-manager.pkla
>[Netowrkmanager]
>Identity=unix-user:*
>Action=org.freedesktop.color-manager.create-device
>ResultAny=no
>ResultInactive=no
>ResultActive=yes
>EOF
$ sudo systemctl restart polkit
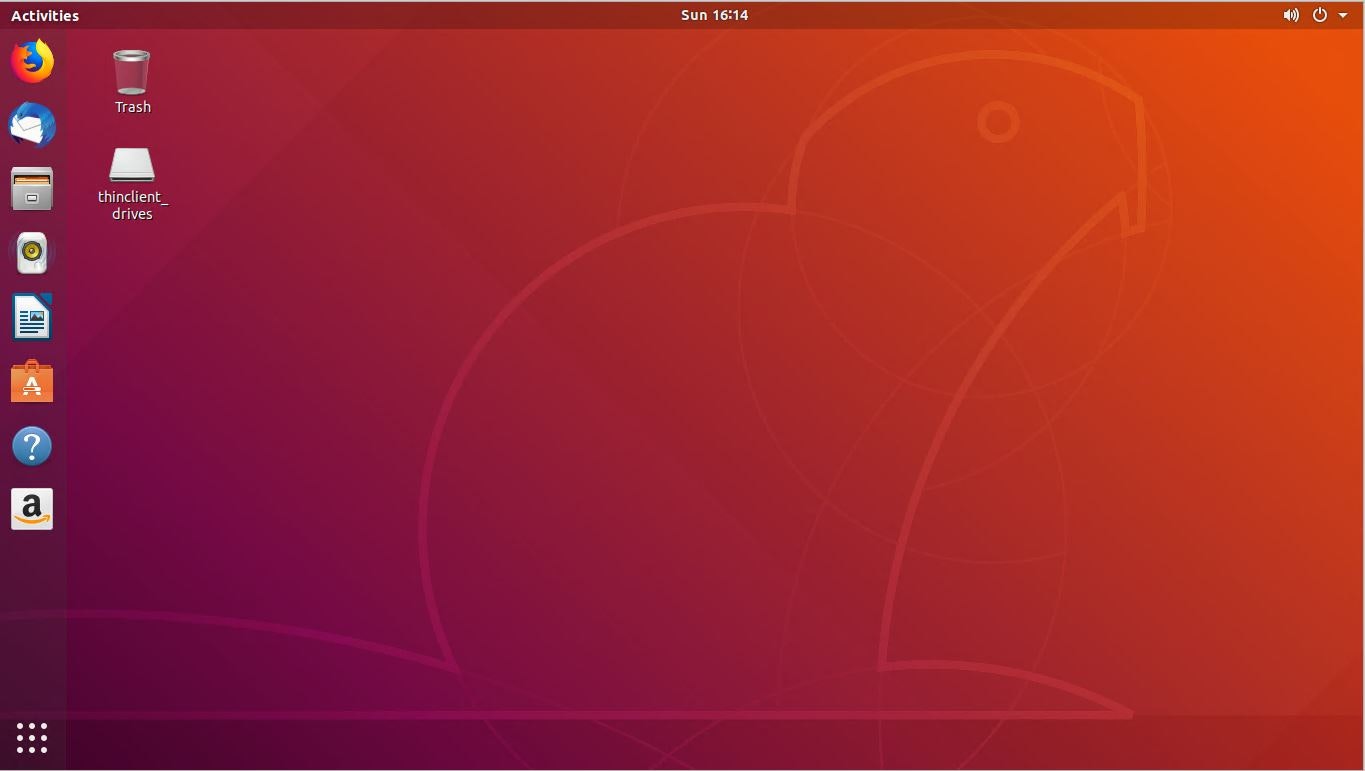
リモートデスクトップクライアントにてインスタンスへ接続します。
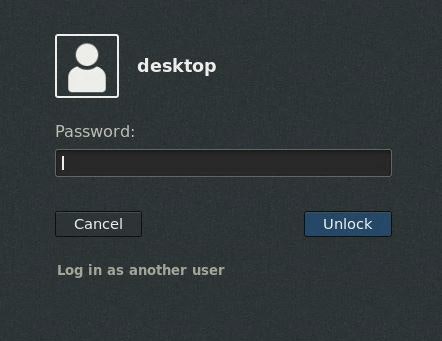
接続できると下記のようになります
日本語化
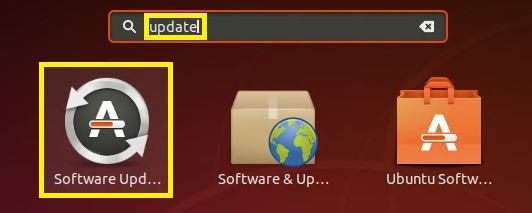
| ソフトアップデート Activitiesからupdateを検索、実行 |
|---|
 |
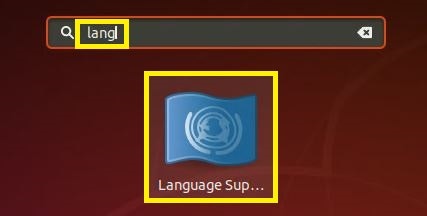
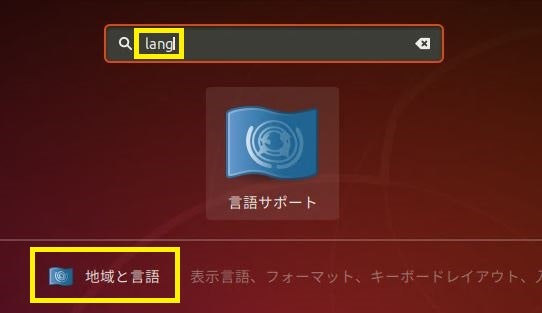
| 言語設定 Activitiesからlangを検索、実行 |
|---|
 |
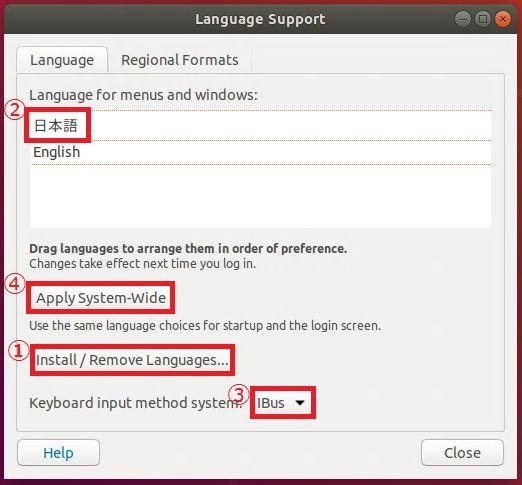
| 言語設定 ①からJapaneseを追加、②で日本語を最上位に設定、③iBusを設定、④システムへ設定 |
|---|
 |
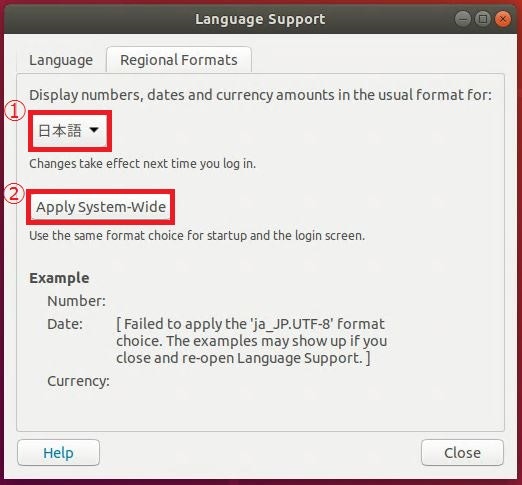
| リージョン設定 ①で日本語を設定、②システムへ設定 |
|---|
 |
上記、設定後再起動
| 再起動後のダイアログ ユーザーフォルダは英語のままにしておく |
|---|
 |
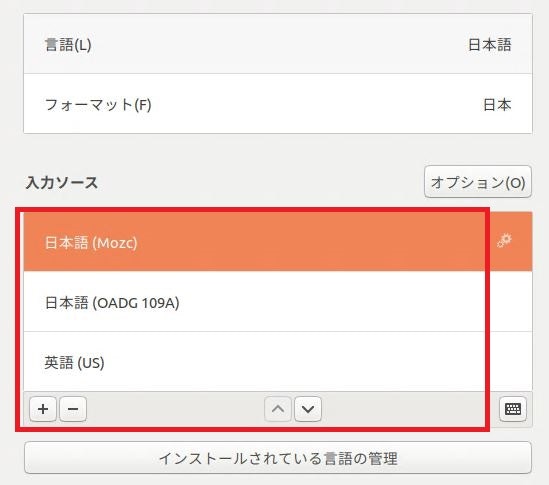
| 入力ソース設定 日本語(OADG、Mozc)を追加 |
|---|
 |
 |
 |
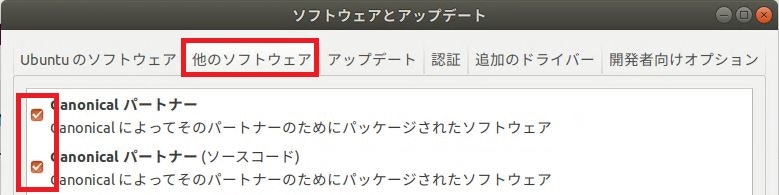
| パッケージの追加 他のソフトウェアの追加 |
|---|
 |
 |
RDP時のキーマップ変更
terminal
$ cd /etc/xrdp
$ sudo wget http://www.mail-archive.com/xrdp-devel@lists.sourceforge.net/msg00263/km-e0010411.ini
$ sudo mv km-e0010411.ini km-0411.ini
$ sudo chmod 644 km-0411.ini
$ sudo ln -s km-0411.ini km-e0010411.ini
$ sudo ln -s km-0411.ini km-e0200411.ini
$ sudo ln -s km-0411.ini km-e0210411.ini
時刻設定、表示の変更
terminal
$ sudo dpkg-reconfigure tzdata
$ gsettings set org.gnome.desktop.interface clock-show-date true
ソフトウェアの追加(任意)
Google Chrome
GIMP
GNOME Tweaks
イメージビューワ
Deepin Screenshot
Visual Studio Code