はじめに
押入れの中に埋もれていたRaspberry Pi 3を、Web技術学習用サーバーとして活用しようとふと思い立ちました。
当記事は、セットアップ時に行った設定内容のメモ書きです。
目標
- 自宅内でWebサーバーとして使う想定
- 無線WiFi接続
- 日本語化する
- 安全かつ簡単にSSH接続出来るようにする
- 消費電力を出来るだけ抑える
- microSDの寿命を延ばす設定にする
前提条件
- LPIC Level1レベルのLinux知識(vimが使える、基本的なコマンドを知ってる)
ハードウェア情報
- Raspberry Pi 3 Model B Rev 1.2
- SAMSUNG EVO plus 64GB
操作OS
Windows 11
手順
1. インストール
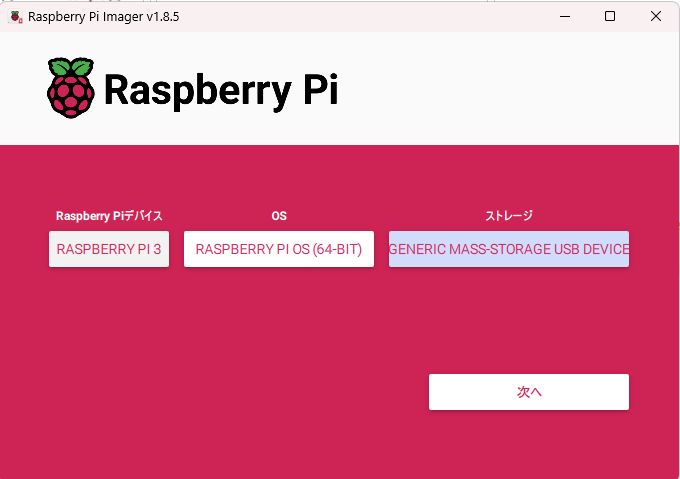
Raspberry Pi Imager でOSを焼きます。
1.1 OS選択
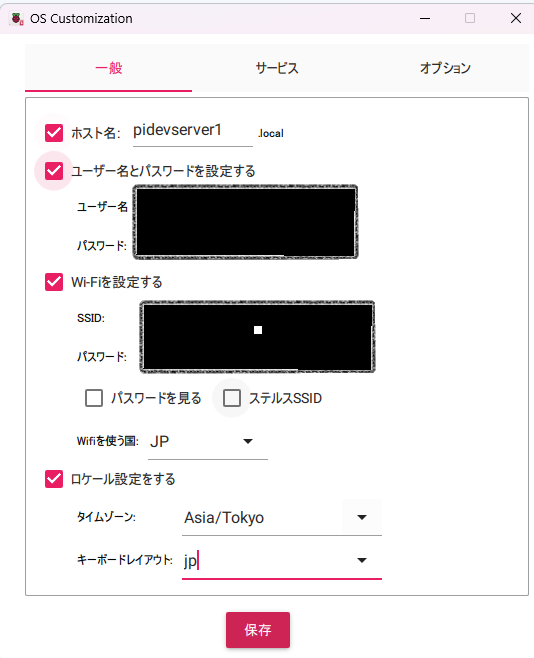
1.2 設定を編集する
一般設定
- ホスト名を設定
- ユーザー名とパスワードを設定する
-
Wi-Fiを設定する
- Wifiを使う国:JP
-
ロケール設定をする
- タイムゾーン:Asia/Tokyo
- キーボードレイアウト:jp
サービス設定
-
PowerShellで下のコマンドを実行し、SSH鍵作成
ssh-keygen -t ed25519PS C:> ssh-keygen -t ed25519 Generating public/private ed25519 key pair. Enter file in which to save the key (C:\Users\escap/.ssh/id_ed25519): Enter passphrase (empty for no passphrase): Enter same passphrase again: Your identification has been saved in C:\Users\escap/.ssh/id_ed25519 Your public key has been saved in C:\Users\escap/.ssh/id_ed25519.pub The key fingerprint is: SHA256:5qNpj6HLZQs2wOP2ZTLrZy7B3plb2WnOa4a2kk0hUX0 escap@ruggah The key's randomart image is: +--[ED25519 256]--+ | ... | | . . E | | . . | | . . . | | +. .S. | | . oo o.o . | | o.*o**=.+ | | . +o%XB+=o | | .BBB=o++. | +----[SHA256]-----+ -
SSHを有効化する
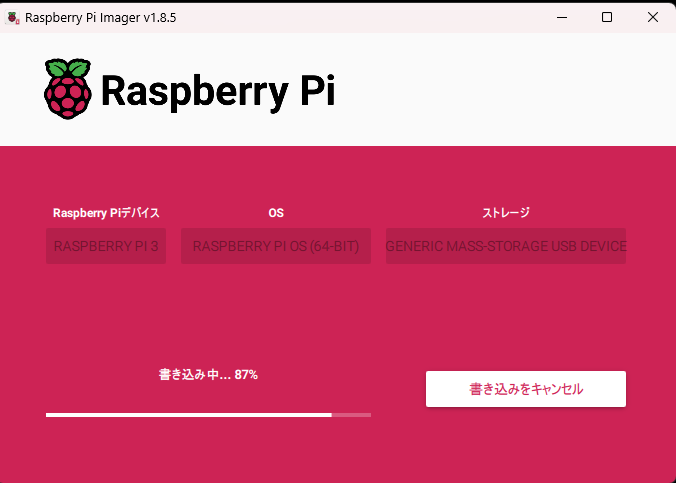
1.3 実行
2. Raspberry Pi Connect 設定
- 下の記事を参考に接続設定
- 下のサイトからRaspberry Pi を認識していることを確認
3. 初期設定内容確認
-
Raspberry Pi ConnectからRemote Shellを起動して下のコマンドを実行
cat /etc/os-release
uname -a
vcgencmd version
cat /proc/cpuinfo
lsb_release -a
getconf LONG_BIT
4. OS最新化
-
apt アップデート
sudo apt update sudo apt -y upgrade -
OSディストリビューションアップデート
sudo apt dist-upgrade -y -
ファームウェアアップデート
sudo rpi-update -
再起動
sudo apt autoremove -y
sudo apt autoclean
sudo reboot
5. 必要なライブラリインストール
-
vimをインストール
sudo apt install vim-nox
6. IPアドレスの固定化
-
IPアドレスの確認
hostname -I -
デフォルトゲートウェイ確認
ip route show -
下の記事を参考に、Raspberry Pi Connect経由でGUIからIPアドレスを固定
7. SSH接続設定
-
SSHポート番号変更&rootログイン禁止
sudo vi /etc/ssh/sshd_config#Port 22 Port 10022 #AddressFamily any #ListenAddress 0.0.0.0 #ListenAddress ::# PermitRootLogin prohibit-password PermitRootLogin no -
sshd再起動
sudo systemctl restart sshd -
PowerShellログイン設定
-
C:\Users[ユーザー名].ssh をエクスプローラーで開く
-
configファイルをテキストエディタで開く(無ければ作成する)
-
以下の設定を追加
Host raspi HostName [ホスト名] User [ユーザー名] Port 10022 IdentityFile [id_ed25519の絶対パス] -
PowerShellを開き、SSH接続
ssh raspi
-
8. ファイアウォール設定
-
ufwのインストール
sudo apt install ufw -
接続許可設定
sudo ufw allow from 192.168.10.0/24 to any port 10022 sudo ufw allow from 192.168.10.0/24 to any port 80 sudo ufw allow from 192.168.10.0/24 to any port 8080 sudo ufw allow from 192.168.10.0/24 to any port 443 -
ファイアウォールを有効化
sudo ufw enable
sudo ufw status
9. 最適化設定
9.1 不要な機能の無効化
-
cups無効化
sudo systemctl disable cups
sudo systemctl stop cups
9.2 不要なライブラリ削除
sudo apt purge bluez -y
sudo apt purge cups -y
sudo apt purge nano -y
sudo apt autoremove -y
10. GUI無効化
-
設定画面を開く
sudo raspi-config -
System Option>Boot / Auto Login
-
「B2 Console AutoLogin」を選択→「Save」して再起動
※外部に公開しないので、B1 Consoleにはしない

11. SSH接続確認&設定内容確認
-
Raspberry Pi にSSH接続
-
下のコマンドを実行して設定確認
raspi-config
cat /etc/os-release
uname -a
vcgencmd version
cat /proc/cpuinfo
lsb_release -a
getconf LONG_BIT
hostname -I
ip route show
12.消費電力を抑える
-
swap を無効化
sudo systemctl disable dphys-swapfile -
HDMIオフ(※3B+ Bookwormの設定方法)
sudo apt install ddcutil ddcutil setvcp d6 5 sudo ddcutil capabilities -
(Model Bのみ)USBコントローラー(LAN951x/LAN7515)の無効化(※3B+ Bookwormの設定方法)
echo '1-1' |sudo tee /sys/bus/usb/drivers/usb/unbind -
下のファイルを編集
sudo vi /boot/firmware/config.txt -
以下に設定を編集し、BluetoothとサウンドカードをOFFにする
# Automatically load overlays for detected DSI displays
display_auto_detect=1
# Enable audio (loads snd_bcm2835)
dtparam=audio=off

(・・省略・・)

[cm5]
dtparam=audio=off
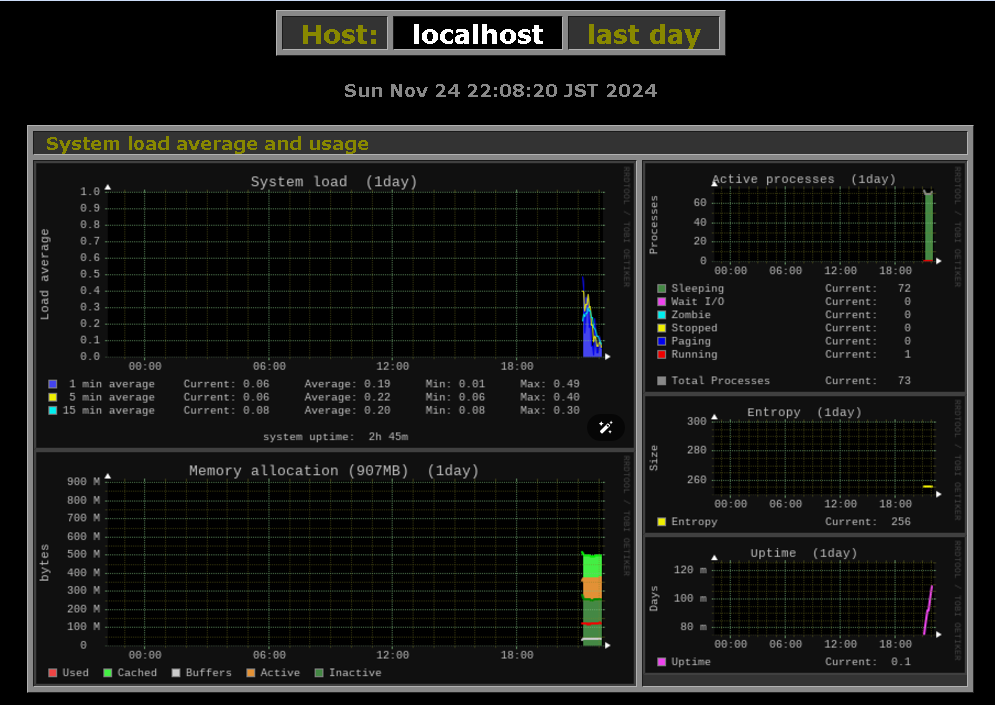
Advanced: 監視ツール導入
-
monitorixのインストール
sudo apt install monitorix -y -
vcgencmd のインストールパスを確認
pi@pidevserver1:~ $ which vcgencmd /usr/bin/vcgencmd pi@pidevserver1:~ $ -
設定ファイルを編集
sudo vi /etc/monitorix/monitorix.confraspberrypi = y<raspberrypi> cmd = /usr/bin/vcgencmd # whichコマンドの実行結果 clocks = arm, core, h264, isp, v3d, uart, emmc, pixel, hdmi volts = core, sdram_c, sdram_i, sdram_p rigid = 0, 0, 0 limit = 100, 100, 100 </raspberrypi> -
monitorix を起動
sudo systemctl enable monitorix
sudo systemctl restart monitorix
参考ページ


