要約
本記事では、Python と Flask を用いて、Google Maps API(Directions API)と ZENRINMapsAPI(route_mbn/drive_tsp)の最適巡回ルート機能を比較しました。旧記事では JavaScript、HTML、CSS による実装を紹介しており、詳細はこちらからご覧いただけます。今回は、経由地点を「東京ディズニーランド」「スカイツリー」「チームラボプラネッツ TOKYO DMM」に変更し、さらに ZENRINMapsAPI では追加パラメータ waypoint_type: [1, 1, 1] を設定しています。これにより、高速道路のみのルート計算と、通行料金情報が一括で取得可能となり、開発コストや手間が大幅に削減されます。一方、Google Maps の Directions API は有料道路やフェリーを避けるオプションはあるものの、直接通行料金の情報は提供されません。
1. プロジェクト概要
使用ライブラリ
GoogleMaps API 側
- Flask: 軽量な Web フレームワークとしてサーバー構築に使用
- python-dotenv: 環境変数(API キーなど)の管理
- googlemaps: Google の Directions API を利用するための公式ライブラリ
- gmplot: 取得したルート情報を地図上に描画するために利用
ZENRINMaps API 側
- Flask: シンプルなサーバー構築に利用
- requests: HTTP リクエストを送信し、ZENRIN Maps API からのレスポンスを取得するために使用します。
-
python-dotenv と os: 環境変数管理および API キーの取得
(ZENRINMapsAPI には公式 Python ライブラリが存在しないため、api からのレスポンス取得は python の requests ライブライブ使用、そして HTML と JavaScript のレンダリングで実装)
2. API キーの取得
2.1 Google MAPS API キーの取得方法
2.2 Zenrin MAPS API キーの取得方法
検証用 ID とパスワード(PW)取得
ZENRIN Maps API を使用するためには、検証用 ID と PW を取得しなければなりません。
必要事項を入力して送信し、お試し ID は下記からで簡単に発行できました。(2 か月無料でお試しできます)
ZENRIN Maps API 無料お試し ID お申込みフォーム
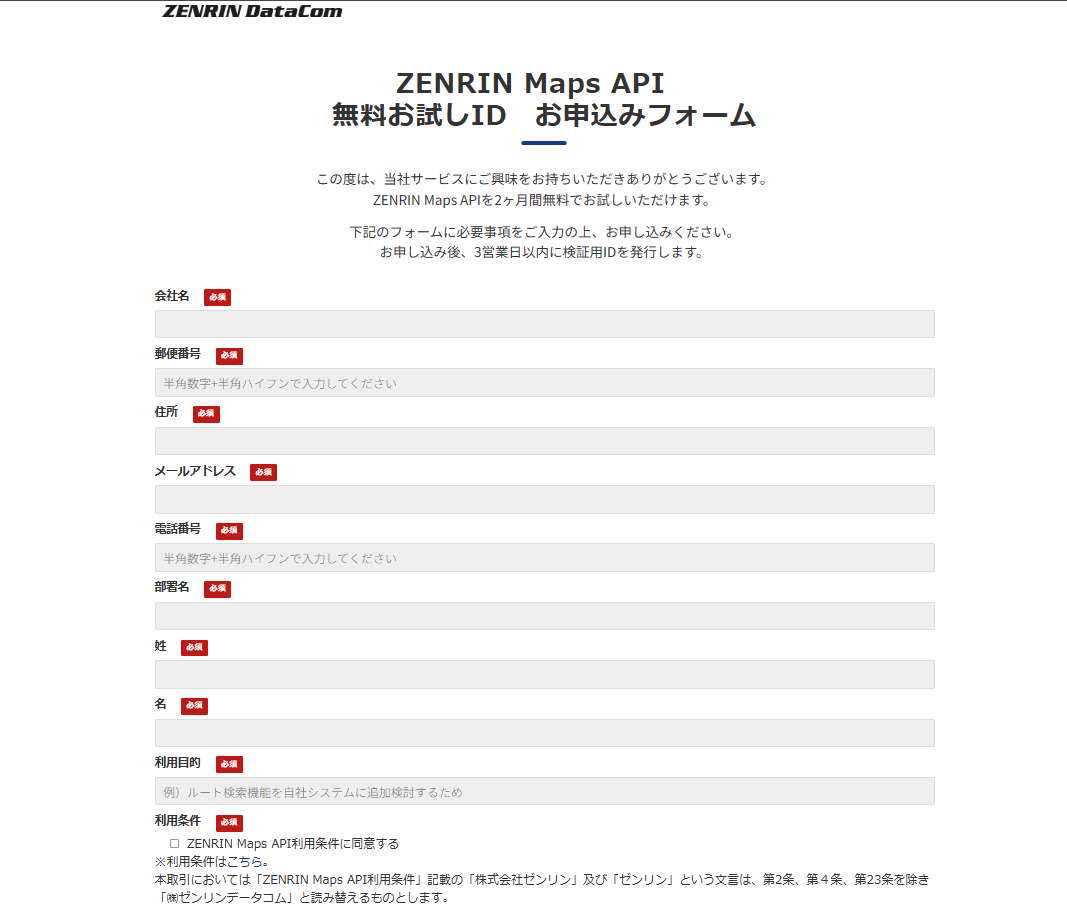
検証用 ID と PW の確認
フォーム送信から 3 営業日以内にメールにて検証用 ID と PW が発行されます。
参考サイトでコンソール内の設定、API キーや認証方式を設定してください。
3. 各 API の特徴と実装の違い
3.1 Google Maps API(Directions API)
Google Maps API の Directions API は、出発地と目的地、経由地点を指定して最適なルートを計算します。Python 用の公式ライブラリが存在し、gmplot を使ってルートやマーカーを容易に地図上に描画可能です。しかし、「高速道路のみ」といった指定はできず、通行料金の詳細情報を得るには別途 Routes API を利用し、各ウェイポイント間の料金を個別に集計する必要があります。
Directions API レファレンス
Routes API レファレンス
3.2 ZENRIN Maps API(route_mbn/drive_tsp)
ZENRINMapsAPI は、日本国内向けに高精度なルート計算が可能です。今回の実装では、出発地と目的地は従来通り新宿駅と東京タワーとし、経由地点を「東京ディズニーランド」「スカイツリー」「チームラボプラネッツ TOKYO DMM」に変更しました。さらに、waypoint_type: [1, 1, 1] というパラメータを追加することで、高速道路のみのルートが計算され、全ルートにおける高速道路利用の通行料金が一括して取得されます。この機能は、Google Maps API では直接提供されず、別途複雑な実装が必要なため、非常に有用です。
自動車ルート検索 2.0 Web API レファレンス

4. 実装コードの紹介
4.1 Google Maps API(Directions API)
以下は、Google Maps API(Directions API)を用いて最適ルートを計算し、gmplot で地図に描画する Python コードの一例です。
Python の gmplot ライブラリを使用して地図を作成する際、生成された HTML から JavaScript 部分を抽出し、gScript.js という外部ファイルとして保存します。
経由地点は「東京ディズニーランド」「スカイツリー」「チームラボプラネッツ TOKYO DMM」に変更されています。
ソースコード
gmap.py
import googlemaps
import gmplot
from flask import Flask, render_template
from dotenv import load_dotenv
import os
import string

# 環境変数をロード
load_dotenv()

# Flaskアプリケーションを初期化
app = Flask(__name__)

# Google Maps APIキーを取得
API_KEY = os.getenv("GMAPS_API_KEY")
if not API_KEY:
    raise ValueError("環境にAPI_KEYが見つかりません。")

# Google Mapsクライアントを初期化
gmaps = googlemaps.Client(key=API_KEY)

# 出発地、目的地、ウェイポイントを定義
origin = {"lat": 35.690881942542795, "lng": 139.6996382651929}      # 新宿駅
destination = {"lat": 35.658711231010265, "lng": 139.74543289660156}   # 東京タワー
waypoints = [
    {"lat": 35.63348601313571, "lng": 139.88065756898112},   # 東京ディズニーランド
    {"lat": 35.71017592344799, "lng": 139.81071112543816},   # スカイツリー
    {"lat": 35.64924265760604, "lng": 139.79020303245483}    # チームラボプラネッツ TOKYO DMM
]

# ウェイポイントをAPIフォーマットに変換
waypoints_str = [f"{point['lat']},{point['lng']}" for point in waypoints]

def format_time(duration):
    # 時間をフォーマットする関数(分単位のdurationを変換)
    hours = int(duration // 60)
    minutes = int(duration % 60)
    if hours > 0 and minutes > 0:
        return f"{hours}時{minutes}分"
    elif hours > 0:
        return f"{hours}時間"
    elif minutes > 0:
        return f"{minutes}分"
    else:
        return 'すぐに到達!!'

def add_markers(gmap, origin, optimized_waypoints, destination):
    # 出発地、ウェイポイント、目的地を1つのリストにまとめる
    opt_markers = [origin] + optimized_waypoints + [destination]
    # リストをループしてラベル付きマーカーを追加
    for idx, location in enumerate(opt_markers):
        label = string.ascii_uppercase[idx] if idx < 26 else f'Waypoint {idx + 1}'
        title = ("Start: Shinjuku Station" if idx == 0
                 else "End: Tokyo Tower" if idx == len(opt_markers) - 1
                 else f"Waypoint {label}")
        color = 'cyan'
        gmap.marker(
            location["lat"], location["lng"],
            title=title,
            label=label,
            color=color
        )

# 最適化されたウェイポイントを使用してルートの指示をリクエスト
directions_result = gmaps.directions(
    origin,
    destination,
    mode="driving",
    waypoints=waypoints_str,
    optimize_waypoints=True
)

# 合計距離(km)と所要時間(分)を計算
total_distance = sum(leg["distance"]["value"] for leg in directions_result[0]["legs"]) / 1000
total_duration = sum(leg["duration"]["value"] for leg in directions_result[0]["legs"]) / 60

# 最適化されたウェイポイントの順序を抽出
optimized_order = directions_result[0]["waypoint_order"]
optimized_waypoints = [waypoints[i] for i in optimized_order]

# ルートの各ポイントを抽出
route_points = []
for leg in directions_result[0]["legs"]:
    for step in leg["steps"]:
        polyline = step["polyline"]["points"]
        decoded_points = googlemaps.convert.decode_polyline(polyline)
        route_points.extend(decoded_points)

# 緯度と経度を抽出
lats, lngs = zip(*[(point['lat'], point['lng']) for point in route_points])

# ルートの境界を計算し中心座標を求める
min_lat = min(lats)
max_lat = max(lats)
min_lng = min(lngs)
max_lng = max(lngs)
center_lat = (min_lat + max_lat) / 2
center_lng = (min_lng + max_lng) / 2

# gmplotを初期化(中心座標とズームレベル13を使用)
gmap = gmplot.GoogleMapPlotter(center_lat, center_lng, 13, apikey=API_KEY)

# ルートを描画(赤色、幅4、透明度0.8)
gmap.plot(lats, lngs, 'red', edge_width=4, alpha=0.8)

# 各地点にマーカーを追加
add_markers(gmap, origin, optimized_waypoints, destination)

# HTMLコンテンツを生成し、JavaScriptを抽出してファイルに保存
html_content = gmap.get()
start_marker = '<script type="text/javascript">'
end_marker = '</script>'
start_index = html_content.find(start_marker) + len(start_marker)
end_index = html_content.find(end_marker, start_index)
javascript_content = html_content[start_index:end_index].strip()
js_filename = "static/gScript.js"
with open(js_filename, "w", encoding="utf-8") as js_file:
    js_file.write(javascript_content)

@app.route('/')
def home():
    formatted_duration = format_time(total_duration)
    return render_template(
        'gmap_index.html',
        api_key=API_KEY,
        total_distance=f"{total_distance:.1f} km",
        total_duration=formatted_duration,
        js_file=js_filename  # JSファイルのパスを渡す
    )

if __name__ == "__main__":
    app.run(debug=True)
templates/gmap_index.html
<!DOCTYPE html>
<html lang="ja">

<head>
    <meta charset="UTF-8">
    <meta name="viewport" content="width=device-width, initial-scale=1.0">
    <title>Google Maps Route Optimization</title>
    <link rel="stylesheet" href="static/style.css">
    <link rel="stylesheet" href="https://cdn.jsdelivr.net/npm/bootstrap@5.3.3/dist/css/bootstrap.min.css">
    <script src="https://cdn.jsdelivr.net/npm/bootstrap@5.3.3/dist/js/bootstrap.bundle.min.js"></script>
    <script src="{{ js_file }}"></script>
    <script src="https://maps.googleapis.com/maps/api/js?key={{ api_key }}&callback=initialize&v=weekly&language=ja"
        async defer></script>
</head>

<body>
    <h1>Google Maps Route Optimization</h1>

    <div id="info">
        <div id="map_canvas"></div>
        <ul class="list-group">
            <li class="list-group-item d-flex justify-content-between align-items-center">
                所要時間 ➡ <span class="badge text-bg-primary rounded-pill">{{ total_duration }}</span>
            </li>
            <li class="list-group-item d-flex justify-content-between align-items-center">
                距離 ➡ <span class="badge text-bg-primary rounded-pill">{{ total_distance }}</span>
            </li>
        </ul>
    </div>

</body>

</html>
地図上ルート描画

4.2 ZENRIN Maps API(route_mbn/drive_tsp)
ZENRINMaps API 用のコードは、Flask と python-dotenv を用いてシンプルに実装しています。
ここでは、追加パラメータとして waypoint_type: [1, 1, 1] を指定し、高速道路のみのルート計算および通行料金情報の取得を実現しています。
ソースコード
zmap.py
from flask import Flask, render_template
import requests
from dotenv import load_dotenv
import os
import json

# 環境変数を読み込む
load_dotenv()

app = Flask(__name__)

# Zenrin Maps APIのエンドポイント

# 環境変数からAPIキーを取得
API_KEY = os.getenv('ZMAPS_API_KEY')
if not API_KEY:
    raise ValueError("環境にAPI_KEYが見つかりません。'.env'ファイルに設定してください。")


def getApiResponse():
    url = "https://test-web.zmaps-api.com/route/route_mbn/drive_tsp"

    # 出発地、目的地、経由地の設定
    origin = "139.6996382651929,35.690881942542795"  # 新宿駅
    destination = "139.74543289660156,35.658711231010265"  # 東京タワー
    # 経由地の座標をカンマ区切りの文字列で定義
    # 東京ディズニーランド、東京スカイツリー、チームラボプラネッツ TOKYO DMM
    waypoints = "139.88065756898112,35.63348601313571,139.81071112543816,35.71017592344799,139.79020303245483,35.64924265760604"

    # APIリクエストのパラメータ
    params = {
        "search_type": 1,
        "from": origin,
        "to": destination,
        "waypoint": waypoints,
        "waypoint_type": "1,1,1",  # 各高速道路のみのルート計算を指定するパラメータ
    }
    # ヘッダーの設定
    headers = {
        "x-api-key": API_KEY,  # APIキー
        "Authorization": "ip"  # 認証ヘッダー
    }
    # APIリクエストの送信
    response = requests.get(url, params=params, headers=headers)

    # レスポンスのステータスコードを確認
    if response.status_code == 200:
        route_data = response.json()
        print("レスポンス取得完了")
        # レスポンスデータをresponse.jsonファイルに保存
        file_path = os.path.join(os.path.dirname(__file__), 'static/data.json')
        with open(file_path, 'w', encoding='utf-8') as f:
            json.dump(route_data, f, ensure_ascii=False, indent=4)
    else:
        print("ルート計算に失敗しました。")
        print(response.json)

getApiResponse()

@app.route('/')
def home():
    # テンプレートにAPIキーを渡してレンダリング
    return render_template('zmap_index.html', api_key=API_KEY)

if __name__ == "__main__":
    # アプリケーションをデバッグモードで実行
    app.run(debug=False)
templates/zmap_index.html
<!DOCTYPE html>
<html lang="ja">
  <head>
    <meta charset="UTF-8" />
    <meta name="viewport" content="width=device-width, initial-scale=1.0" />
    <title>Zenrin Maps Route Optimization</title>
    <link rel="stylesheet" href="static/style.css" />
    <link
      rel="stylesheet"
      href="https://cdn.jsdelivr.net/npm/bootstrap@5.3.3/dist/css/bootstrap.min.css"
    />
    <script src="	https://cdn.jsdelivr.net/npm/bootstrap@5.3.3/dist/js/bootstrap.bundle.min.js
    "></script>
    <script src="https://test-js.zmaps-api.com/zma_loader.js?key={{ api_key }}&auth=ip"></script>
  </head>

  <body>
    <h1>自動車ルート検索2.0(最適巡回考慮)</h1>

    <div id="info">
      <div id="ZMap"></div>
      <ul class="list-group">
        <li
          class="list-group-item d-flex justify-content-between align-items-center"
        >
          所要時間 ➡
          <span class="badge text-bg-primary rounded-pill" id="time"></span>
        </li>
        <li
          class="list-group-item d-flex justify-content-between align-items-center"
        >
          距離 ➡
          <span class="badge text-bg-primary rounded-pill" id="dist"></span>
        </li>
        <li
          class="list-group-item d-flex justify-content-between align-items-center"
        >
          交通費 ➡
          <span class="badge text-bg-primary rounded-pill" id="cost"></span>
        </li>
      </ul>
    </div>

    <script src="static/script.js"></script>
  </body>
</html>
static/script.js
// マップオブジェクトと中心座標の設定
var map;

// 経由地の座標をカンマ区切りの文字列で定義
// 東京ディズニーランド、東京スカイツリー、チームラボプラネッツ TOKYO DMM
let waypointString =
  "139.88065756898112,35.63348601313571,139.81071112543816,35.71017592344799,139.79020303245483,35.64924265760604";

// ルート情報(所要時間と距離)を表示する関数
function showRouteInfo(rawDuration, rawDistance, tolltax) {
  const costInfoArea = document.getElementById("cost");

  convertTime(rawDuration);
  convertDtn(rawDistance);

  costInfoArea.textContent = `${tolltax} 円`;
}

// 経由地にマーカーを表示する関数
function showMarker(waypoints) {
  waypoints.forEach((location, index) => {
    const marker = new ZDC.Marker(new ZDC.LatLng(location.lat, location.lng), {
      styleId: ZDC.MARKER_COLOR_ID_RED_L,
      contentStyleId: ZDC[`MARKER_NUMBER_ID_${index + 1}_L`],
    });
    map.addWidget(marker);
  });
}

// 経由地の文字列を解析し、最適化された順序で配列を返す関数
function parseWaypoints(waypointString, origin, destination, routeorder) {
  const coordinates = waypointString.split(",").map(Number);
  const waypoints = [origin];

  for (let i = 0; i < coordinates.length; i += 2) {
    const lng = coordinates[i];
    const lat = coordinates[i + 1];
    waypoints.push(new ZDC.LatLng(lat, lng));
  }
  optWaypts = waypointOpt(waypoints, routeorder);
  optWaypts.push(destination);
  return optWaypts;
}

// 経由地の順序を最適化する関数
function waypointOpt(waypoints, routeorder) {
  let stringArray = routeorder.split(",");
  let integerArray = stringArray.map((num) => parseInt(num, 10));
  integerArray = [0, ...integerArray];
  const optWaypts = [];
  for (let i = 0; i < integerArray.length; i++) {
    optWaypts.push(waypoints[integerArray[i]]);
  }
  return optWaypts;
}

// 所要時間を適切な形式で表示する関数
function convertTime(rawDuration) {
  const timeInfoArea = document.getElementById("time");
  if (timeInfoArea) {
    const hours = Math.floor(rawDuration / 60);
    const minutes = (rawDuration % 60).toFixed(0);

    if (hours === 0 && minutes > 0) {
      timeInfoArea.textContent = `${minutes}分`;
    } else if (hours > 0 && minutes === 0) {
      timeInfoArea.textContent = `${hours}時間`;
    } else if (hours > 0 && minutes > 0) {
      timeInfoArea.textContent = `${hours}時${minutes}分`;
    } else {
      timeInfoArea.textContent = "すぐに到着します";
    }
  } else {
    console.error("所要時間の表示エリアが見つかりません。");
  }
}

// 距離をキロメートル単位で表示する関数
function convertDtn(rawDistance) {
  const distInfoArea = document.getElementById("dist");
  if (rawDistance && distInfoArea) {
    const distanceInKm = (rawDistance / 1000).toFixed(1);
    distInfoArea.textContent = `${distanceInKm} km`;
  } else {
    console.error("距離の表示エリアが見つかりません。");
  }
}

// ルート検索を実行する関数
function calculate_route(origin, destination, response) {
  console.log(response);
  const route = response.result.item[0].route;
  const coordinates = route.link.flatMap((link) =>
    link.line.coordinates.map((coord) => new ZDC.LatLng(coord[1], coord[0]))
  );

  const bounds = calculatePolylineBounds(coordinates);
  if (bounds) {
    const adjustZoom = map.getAdjustZoom(coordinates, { fix: false });
    map.setCenter(adjustZoom.center);
    map.setZoom(adjustZoom.zoom - 0.5);
  }

  const routeorder = route.waypoint_order;
  const rawDuration = route.time;
  const rawDistance = route.distance;
  const tollTax = route.toll;
  const waypoints = parseWaypoints(
    waypointString,
    origin,
    destination,
    routeorder
  );
  showMarker(waypoints);
  showRouteInfo(rawDuration, rawDistance, tollTax);

  const polyline = new ZDC.Polyline(coordinates, {
    color: "red",
    width: 4,
    pattern: "solid",
    opacity: 1,
  });
  map.addWidget(polyline);
}

// Function to calculate the bounds of a polyline
function calculatePolylineBounds(polylineCoordinates) {
  if (!polylineCoordinates || polylineCoordinates.length === 0) {
    console.log("ポリラインの座標が無効です。");
  }

  let minLat = Number.POSITIVE_INFINITY;
  let maxLat = Number.NEGATIVE_INFINITY;
  let minLng = Number.POSITIVE_INFINITY;
  let maxLng = Number.NEGATIVE_INFINITY;

  polylineCoordinates.forEach((point) => {
    if (point.lat < minLat) minLat = point.lat;
    if (point.lat > maxLat) maxLat = point.lat;
    if (point.lng < minLng) minLng = point.lng;
    if (point.lng > maxLng) maxLng = point.lng;
  });

  const southWest = new ZDC.LatLng(minLat, minLng);
  const northEast = new ZDC.LatLng(maxLat, maxLng);
  const bounds = new ZDC.LatLngBounds(southWest, northEast);

  return bounds;
}

async function getResponse() {
  try {
    const response = await fetch("/static/data.json");
    if (!response.ok) {
      throw new Error(`HTTP エラーステータス: ${response.status}`);
    }
    return await response.json();
  } catch (error) {
    console.error("Json 取得エラー:", error.message);
    // Handle the error appropriately
    return null; // Return null or handle as needed
  }
}

ZMALoader.setOnLoad(async function (mapOptions, error) {
  if (error) {
    console.error(error);
    return;
  }
  mapOptions.centerZoom = false;
  mapOptions.mouseWheelReverseZoom = true;
  mapOptions.minZoom = 4.5;

  map = new ZDC.Map(
    document.getElementById("ZMap"),
    mapOptions,
    async function () {
      const origin = new ZDC.LatLng(35.690881942542795, 139.6996382651929); // 新宿駅
      const destination = new ZDC.LatLng(
        35.658711231010265,
        139.74543289660156
      ); // 東京タワー

      const data = await getResponse();
      if (data) {
        calculate_route(origin, destination, data);
      } else {
        console.error("レスポンスデータの取得に失敗しました。");
      }

      map.addControl(new ZDC.ZoomButton("bottom-left"));
      map.addControl(new ZDC.Compass("top-right"));
      map.addControl(new ZDC.ScaleBar("bottom-left"));
    },
    function () {
      console.log("APIエラー");
    }
  );
});
地図上ルート描画

5. 両 API の比較と考察
| 機能 | 最適巡回 | 所要時間 | 距離 | 交通費 |
|---|---|---|---|---|
| Google Maps API | 新宿駅 ➡ 東京スカイツリー ➡ 東京ディズニーランド ➡ チームラボプラネッツ TOKYO DMM➡ 東京タワー | 1 時 23 分 | 53.6 km | 無し |
| Zenrin Maps API | 新宿駅 ➡ 東京スカイツリー ➡ 東京ディズニーランド ➡ チームラボプラネッツ TOKYO DMM➡ 東京タワー | 2 時 12 分 | 52.3 km | 1950 円 |
5.1 ルートと経由地点の最適化を比較
経由地点とルート最適化の設定
-
Google Maps API(Directions API)
optimize_waypoints=Trueを利用することで、経由地点の最適化が容易に実現できます。しかし、「高速道路のみ」の指定はできないため、通行料金などの情報は直接取得できません。通行料金の情報を得るには、Routes API を用いて各ウェイポイント間の料金を個別に集計する必要があり、手間とコストがかかります。 -
ZENRIN Maps API(route_mbn/drive_tsp)
追加パラメータwaypoint_type: [1, 1, 1]により、高速道路のみのルートが計算され、全体の通行料金情報が一括して取得可能です。これにより、実装がシンプルで、開発コストも低く抑えられます。
料金情報の取得
-
Google Maps API
通行料金の詳細は直接取得できず、もし必要ならば Routes API を使って各ウェイポイント間の通行料金を集計する必要があるため、実装が複雑になります。 -
ZENRINMaps API
高速道路利用時の通行料金がルート全体で一括して返されるため、費用の見通しが立てやすく、迅速かつ低コストに実装できます。
6. 結論
今回の比較から、用途やプロジェクトの規模に応じた API の選定が重要であることが分かりました。
-
Google Maps API(Directions API)
グローバルなルート検索や多様な交通手段の選択が可能なため、国際展開や多様な利用シーンに適しています。ただし、通行料金の詳細情報を取得する場合は別途 Routes API を利用する必要があり、実装の複雑さが増します。 -
ZENRINMaps API(route_mbn/drive_tsp)
日本国内向けの高精度なルート計算が可能であり、waypoint_typeパラメータを利用することで高速道路のみのルートおよび通行料金情報を一括して取得できます。これにより、開発の手間とコストを大幅に削減できる点が大きなメリットとなります。
ぜひ、旧記事(こちら)と併せてご覧いただき、両 API の違いを理解した上で最適な選択をしていただければと思います。