フォトライブラリの使い方
まずは使い方をさくっとおさらい。
①Info.plistの設定
Privacy – Photo Library Usage Descriptionを追加する必要があります。
こちらの記事が詳しいです。
【UIKit】UIImagePickerControllerの使い方 | Fussan Blog
②Delegateの設定
フォトライブラリの使用には、UIImagePickerControllerというクラスを使います。
このクラスの親クラスがUINavigationControllerなので、以下2つのDelegateを設定する必要があります。
- UINavigationControllerDelegate
- UIImagePickerControllerDelegate
③コードの追加
フォトライブラリの表示
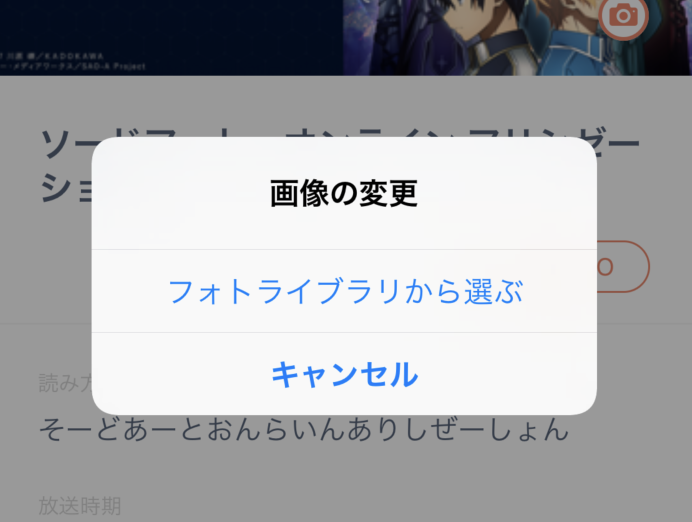
アラートを表示して、「フォトライブラリから選ぶ」が選択されたときにフォトライブラリが開くように実装してみます。

func showImagePicker() {
    let alertController:UIAlertController = UIAlertController(
        title: "画像の変更",
        message: nil,
        preferredStyle:  UIAlertControllerStyle.alert
    )

    let selectAction: UIAlertAction = UIAlertAction(title: "フォトライブラリから選ぶ", style: UIAlertActionStyle.default) { (action: UIAlertAction) in

        self.imagePicker.sourceType = UIImagePickerControllerSourceType.photoLibrary
        self.imagePicker.delegate = self
        // ナビバーの文字色を変更できます(「キャンセル」の文字色)
        self.imagePicker.navigationBar.tintColor = UIColor.white
        // ナビバーの背景色を変更できます
        self.imagePicker.navigationBar.barTintColor = Const.Color.Key
        // ナビタイトルの文字色を変更できます
        self.imagePicker.navigationBar.titleTextAttributes = [
            NSAttributedStringKey.foregroundColor : UIColor.white
        ]
        self.present(self.imagePicker, animated: true, completion: nil)
    }

    let cancelAction: UIAlertAction = UIAlertAction(title: "キャンセル", style: UIAlertActionStyle.cancel) { (action: UIAlertAction) in
    }

    alertController.addAction(selectAction)
    alertController.addAction(cancelAction)
    self.present(alertController, animated: true, completion: nil)
}
フォトライブラリ表示後の処理
// 画像が選択された時に呼ばれる
func imagePickerController(_ picker: UIImagePickerController, didFinishPickingMediaWithInfo info: [String : Any]) {
    if let selectedImage = info[UIImagePickerControllerOriginalImage] as? UIImage {
        imageView.image = selectedImage
    }
}

// 画像選択がキャンセルされた時に呼ばれる
func imagePickerControllerDidCancel(_ picker: UIImagePickerController) {
    self.dismiss(animated: true, completion: nil)
}
参考:UIImagePickerControllerDelegate - UIKit | Apple Developer Documentation
ハマったこと
できた!と思って意気揚々とアップロードしたところ、App Store Connectから以下のメールが届きました。
Dear Developer,
We identified one or more issues with a recent delivery for your app, "アプリ名". Please correct the following issues, then upload again.
Missing Purpose String in Info.plist File - Your app's code references one or more APIs that access sensitive user data. The app's Info.plist file should contain a NSPhotoLibraryUsageDescription key with a user-facing purpose string explaining clearly and completely why your app needs the data. Starting Spring 2019, all apps submitted to the App Store that access user data will be required to include a purpose string.If you're using external libraries or SDKs, they may reference APIs that require a purpose string. While your app might not use these APIs, a purpose string is still required. You can contact the developer of the library or SDK and request they release a version of their code that doesn't contain the APIs. Learn more (https://developer.apple.com/documentation/uikit/core_app/protecting_the_user_s_privacy).
要約するとNSPhotoLibraryUsageDescriptionキーがInfo.plistに無いから、直してもう一回アップロードしてね」とのこと。
あれ。Info.plistの設定したんだけど…。
もしかしてPrivacy – Photo Library Usage Descriptionのvalueは英語じゃないといけなかった?(日本語で書いてたので)とか
もしかしてよく一緒に使われるPrivacy – Camera Usage Descriptionも書く必要があった?(カメラ今回使わないけど)とか色々考えましたが、
Privacy – Photo Library Usage DescriptionではなくPrivacy - Photo Library Additions Usage Descriptionを誤って使ってしまっていたというオチでした。
NSPhotoLibraryAddUsageDescriptionとNSPhotoLibraryUsageDescriptionの違い
AppleDeveloperサイトが詳しいですが、
-
NSPhotoLibraryAddUsageDescription… write-only access、つまり書き込み専用 -
NSPhotoLibraryUsageDescription… read and write access、つまり読み書きの両方ができる
といった違いがあることがわかりました。今回は画像の選択(読み取り)がしたかったので、NSPhotoLibraryUsageDescriptionをInfo.plistに設定する必要があったんですね。
Although this keys governs read and write access to the user’s photo library, it’s best to use NSPhotoLibraryAddUsageDescription if your app needs only to add assets to the library and does not need to read any assets.
という記載がサイトにあるように、ライブラリに画像を追加するだけで読み取る必要がない場合は、NSPhotoLibraryAddUsageDescriptionを使用するのが最善とのことです。
みなさんもお気をつけください![]()