長いタイトルですが、タイトルそのまんまです。
先日、「Amazon Bedrock」で「Claude3 Opus」が使えるようになったので何かやってみたくなりました。
そこで、作ったはいいけどあまり見られる事が無い...CloudWatchダッシュボードの画像にClaude3で解析コメントを付けてSlackに送ったら、多少皆が気を留めてくれるかもと思いました。
Opusの性能を試す題材として適切かは微妙ですが、せっかくやってみたので備忘録も兼ねて手順を残します。
Amazon CloudWatch ダッシュボード
今回はサンプルとして、個人で動かしているLambdaでダッシュボードを作りました。

右上の「アクション」から「ソースの表示/編集」を開くと、ダッシュボードの内容をJson形式で取得できます。

以下のような感じでコピーできるので、source.jsonとして保存します。
{
    "widgets": [
        {
            "height": 6,
            "width": 6,
            "y": 12,
            "x": 6,
            "type": "metric",
            "properties": {
                "metrics": [
                    [ "AWS/Lambda", "Errors", "FunctionName", "test-function", { "region": "ap-northeast-1" } ]
                ],
                "view": "timeSeries",
                "stacked": false,
                "region": "ap-northeast-1",
                "period": 300,
                "stat": "Sum"
            }
        },
        {
            "height": 6,
            "width": 6,
            "y": 0,
            "x": 0,
            "type": "metric",
            "properties": {
                "metrics": [
                    [ "AWS/Lambda", "Invocations", "FunctionName", "test-function" ]
                ],
                "view": "timeSeries",
                "stacked": false,
                "region": "ap-northeast-1",
                "stat": "Sum",
                "period": 300
            }
        },
        ...
    ]
}
以下のAPIを使ってこのJsonを投げていくと画像が取得できるようです。
というわけで、ここからはLambdaに移ります。
Lambda
取得した画像をどうやって1枚の画像にしようか...と試行錯誤しつつ、Clauda君に聞いてみたらsharpというライブラリを教えてもらえたのでそれでやってみる事にしました。
最終的にDockerコンテナにして動かしてます。
FROM public.ecr.aws/lambda/nodejs:18

WORKDIR /var/task

RUN yum -y update && \
    yum install -y gcc-c++ make libpng-devel libjpeg-devel libwebp-devel giflib-devel libtiff-devel libheif-devel librsvg2-devel

ENV npm_config_arch=x64 npm_config_platform=linux npm_config_sharp_binary_host="none"

COPY package.json ./

RUN npm install
RUN npm install -g typescript

COPY . .

RUN npm run build

CMD ["dist/index.handler"]
Lambdaのコードは以下のようになりました。
画像を連結して、それをClaude3 Oupsで解析してもらっています。
色々思うところはあるものの一旦動いたからヨシとしよう!
import * as AWS from 'aws-sdk';
import sharp from 'sharp';
import { WebClient } from '@slack/web-api';
import { BedrockRuntimeClient, InvokeModelCommand } from '@aws-sdk/client-bedrock-runtime';
import source from './source.json'; //先程のjsonを読み込む

const slackToken = process.env.SLACK_APP_TOKEN;
const slackChannelId = process.env.SLACK_CHANNEL_ID;
const dashboardUrl = process.env.CLOUDWATCH_DASHBOARD_URL;
const modelId = process.env.MODEL_ID; //'anthropic.claude-3-opus-20240229-v1:0';
const prompt = 'この画像は3日間のメトリクスです。要点を簡潔に教えて下さい。優しく丁寧な言葉遣いで語尾にはワンとつけてください';

const cloudwatch = new AWS.CloudWatch();
const slackWeb = new WebClient(slackToken);
const client = new BedrockRuntimeClient({ region: 'us-west-2' });

export async function handler(event: any) {
  // CloudWatchから画像データを取得する
  const promises = source.widgets.map(async (widget) => {
    const metricWidget = {
      ...widget.properties,
      start: '-P3D', //範囲3日
      timezone: '+0900',
    };

    return cloudwatch
      .getMetricWidgetImage({
        OutputFormat: 'png',
        MetricWidget: JSON.stringify(metricWidget),
      })
      .promise();
  });
  //有効な画像データのみをフィルタリング
  const imageBuffers = (await Promise.all(promises)).map((result) => result.MetricWidgetImage).filter((buffer): buffer is Buffer => buffer !== undefined);
  if (imageBuffers.length === 0) return;
  // 画像のマージに必要な設定
  const imageWidth = 600;
  const imageHeight = 500;
  const columns = 3;
  const rows = Math.ceil(imageBuffers.length / columns);
  let mergedImage = sharp({
    create: {
      width: imageWidth * columns,
      height: imageHeight * rows,
      channels: 4,
      background: { r: 255, g: 255, b: 255, alpha: 0 },
    },
  }).png();
  // 複数の画像を一つに合成
  const compositeOptions = imageBuffers.map((buffer, index) => ({
    input: buffer,
    left: (index % columns) * imageWidth,
    top: Math.floor(index / columns) * imageHeight,
  }));
  mergedImage = mergedImage.composite(compositeOptions);
  const finalBuffer = await mergedImage.toBuffer();
  const base64String = finalBuffer.toString('base64');
  //Claude3を使用して画像分析
  const aiResponse = await claudeCompletion(base64String);
  const initialComment = `OPSちゃんからのメッセージ:\n\n${aiResponse}\n\n詳しくはこちらから:\n\n ${dashboardUrl}`;
  // Slackにファイルとして画像をアップロード
  await slackWeb.files.upload({
    channels: slackChannelId,
    file: finalBuffer,
    filename: new Date().toLocaleTimeString(),
    title: new Date().toLocaleTimeString(),
    filetype: 'image/png',
    initial_comment: initialComment,
  });

  return {
    statusCode: 200,
    body: JSON.stringify('succeed'),
  };
}

// Bedrock Claude3 Opus
const claudeCompletion = async (base64String: string) => {
  const payload = {
    anthropic_version: 'bedrock-2023-05-31',
    max_tokens: 4096,
    messages: [
      {
        role: 'user',
        content: [
          { type: 'text', text: prompt },
          {
            type: 'image',
            source: {
              type: 'base64',
              data: base64String,
              media_type: 'image/png',
            },
          },
        ],
      },
    ],
  };

  const command = new InvokeModelCommand({
    contentType: 'application/json',
    body: JSON.stringify(payload),
    modelId: modelId,
  });

  const apiResponse = await client.send(command);
  const decodedResponseBody = new TextDecoder().decode(apiResponse.body);
  const responseBody = JSON.parse(decodedResponseBody);
  const text = responseBody.content[0].text;
  console.log(text);
  return text;
};
Claude3 Opusのモデルアクセスをリクエストしておきます。
現在、米国西部 (us-west-2) で利用可能なようです。
Slackでアプリの作成、トークンの取得などは下記参照。
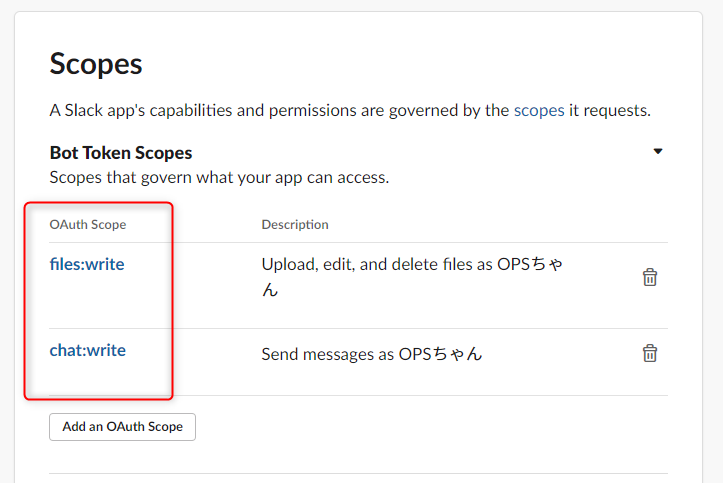
権限はfiles:write chat:write が必要です。

結果
LambdaをデプロイしEventBridgeでスケジュール設定して実行してみます。
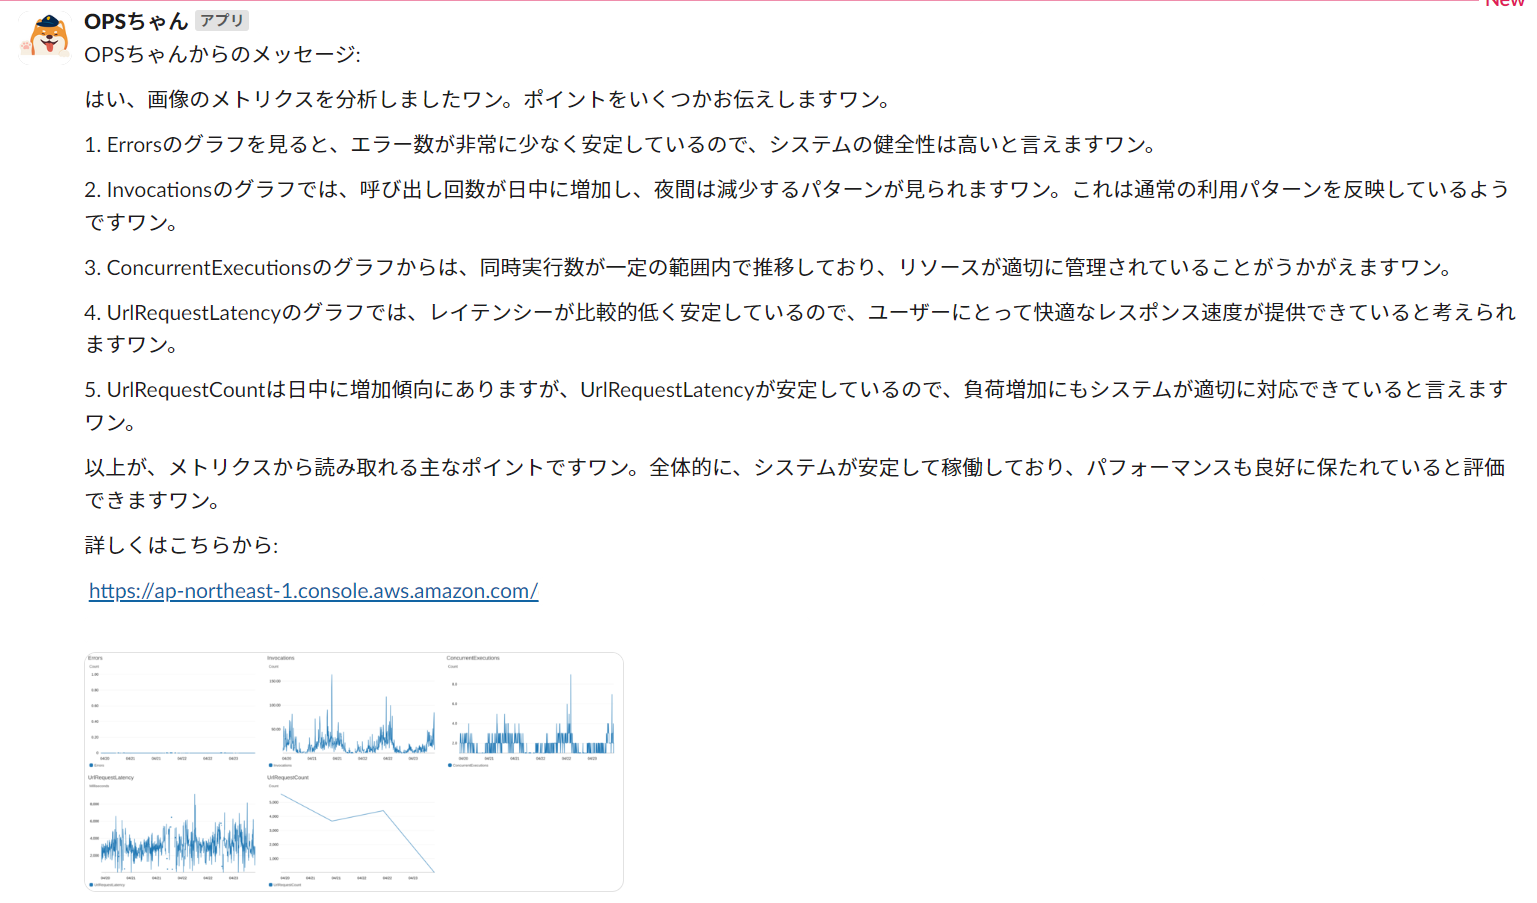
すると以下のようにSlackに画像 & コメント付きでメッセージが...
か..かわいい!!!
何度か試していて時々間違った事を言う事もありましたが、気を引くくらいの効果はありそうなので一旦はヨシとしましょう。
やっぱりただ画像を送るより明るい感じにはなりますね!
ただ、Claude3 Opusの性能を測る題材ではないですよねえ...🙇♂️
使い所は今後も色々と探していこうと思います。

