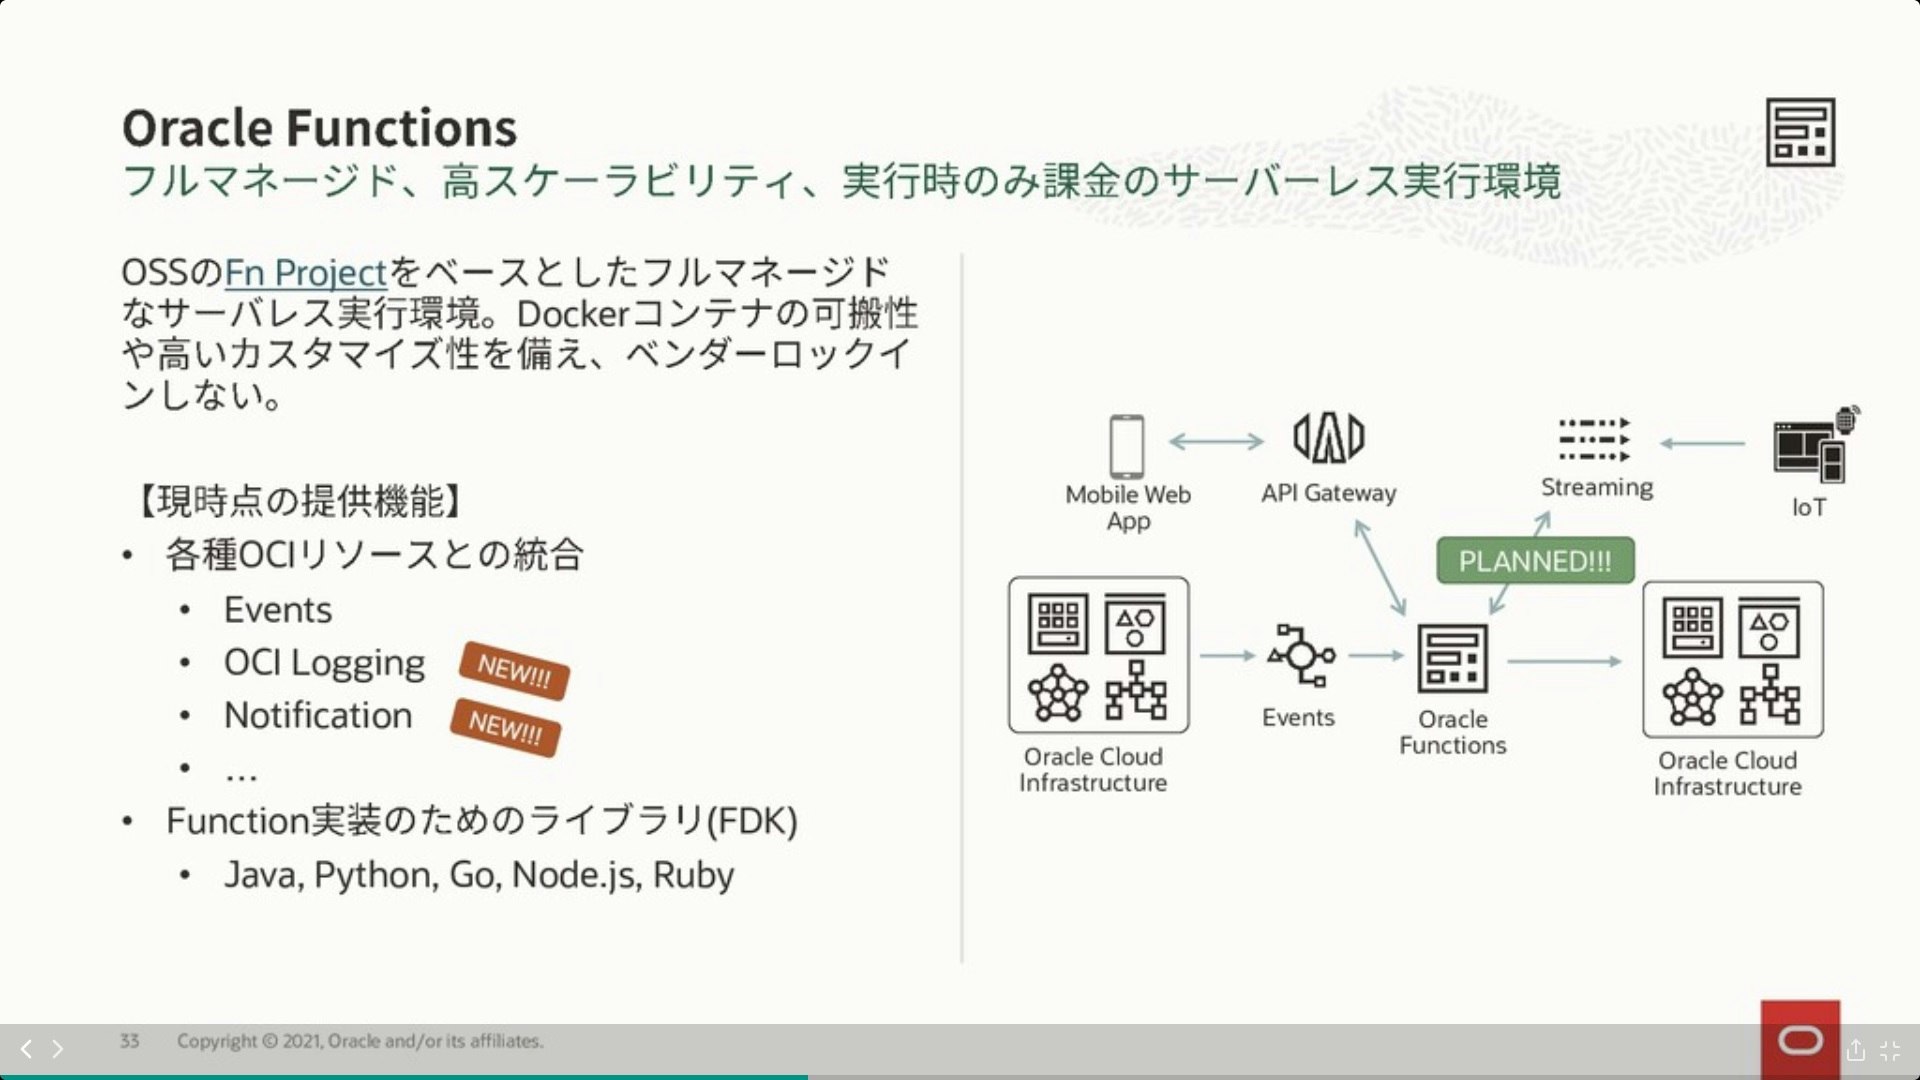
OCI Functions は OCI のサーバーレスな実行環境や!彡(^)(^)
Java や Python など様々な言語をサーバレスで実行できます。
Oracle Cloud - Cloud Native 2021
https://speakerdeck.com/oracle4engineer/oracle-cloud-hangout-cafe-premium-oracle-cloud-cloud-native-2021?slide=34Serverless な世界をのぞいてみよう!
https://speakerdeck.com/oracle4engineer/lets-dive-serverless-world
今回はシンプルな OCI Functions を作成して、API Gateway でシンプルに
呼び出して結果をブラウザ表示してみますやで彡(゚)(゚)
1. ネットワーク構成
ネットワーク構成は下記記事のとほぼ同じです。
検証によく使う Oracle Cloud Infrastructure(OCI)環境を Terraform で作成してみる。
https://qiita.com/ora_gonsuke777/items/8651c4075ec6bf436c4f
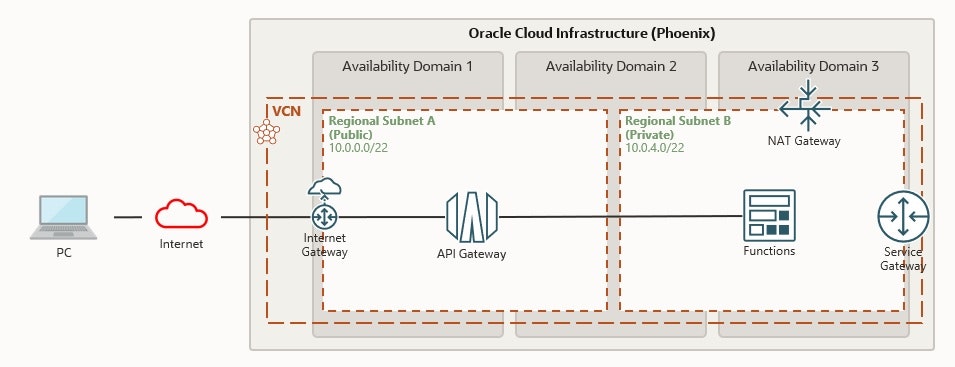
ポートは 22番(SSH), 443(https), 80(http) あたりを開けておきます。22(SSH) は今回使いませんが。
2. OCI Functions の作成
下記記事の Getting Started で使用可能になる Java のコードをほんの少し改修しました。
Functionsそのもの は Private Subnet にデプロイしています。
Oracle Functions の Getting Started を試してみる。(Oracle Cloud Infrastructure)
https://qiita.com/ora_gonsuke777/items/a9bb52faadcb9f2af38e
package com.example.fn;

public class HelloFunction {

    public String handleRequest(String input) {
        System.out.println("Inside Java Hello World function");
        return "{ \"key1\" : \"Hello world!\"}";
    }

}
package com.example.fn;

import com.fnproject.fn.testing.*;
import org.junit.*;

import static org.junit.Assert.*;

public class HelloFunctionTest {

    @Rule
    public final FnTestingRule testing = FnTestingRule.createDefault();

    @Test
    public void shouldReturnGreeting() {
        testing.givenEvent().enqueue();
        testing.thenRun(HelloFunction.class, "handleRequest");

        FnResult result = testing.getOnlyResult();
        assertEquals("{ \"key1\" : \"Hello world!\"}", result.getBodyAsString());
    }

}
生実行(fn invoke ~)の結果は下記のとおりです。
$ fn invoke ayu-functions1 hello-java
{ "key1" : "Hello world!"}
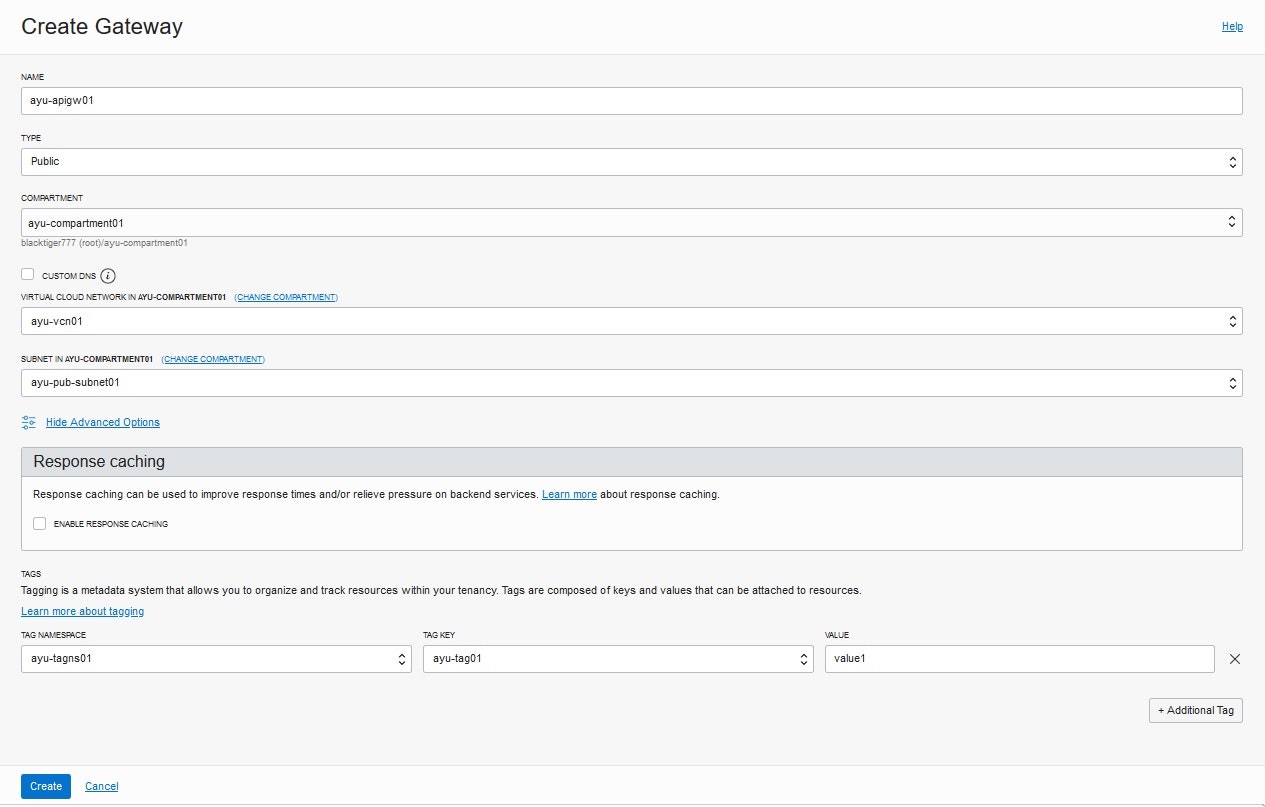
3. API Gateway の作成
API Gateway を作成します。特別な事は無く粛々と……。
API Gateway を作成するネットワークは Public の Subnet を指定します。
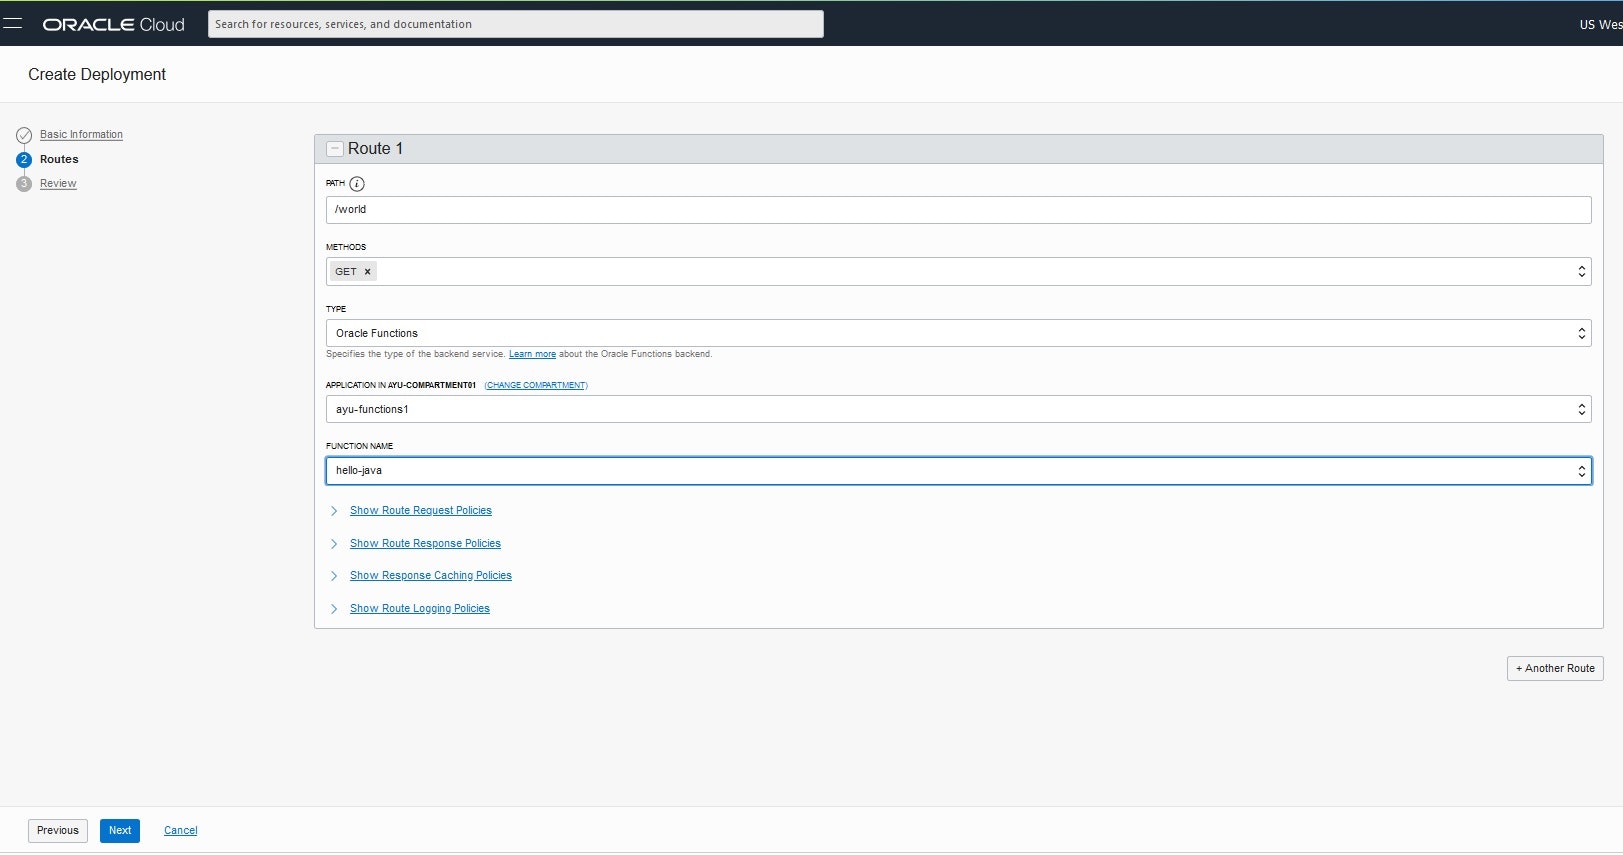
4. API Gateway の Deployment を作成
API Gateway の Deployment を作成します。シンプルなコール方法なので、こちらも特別なことはなく粛々と……。
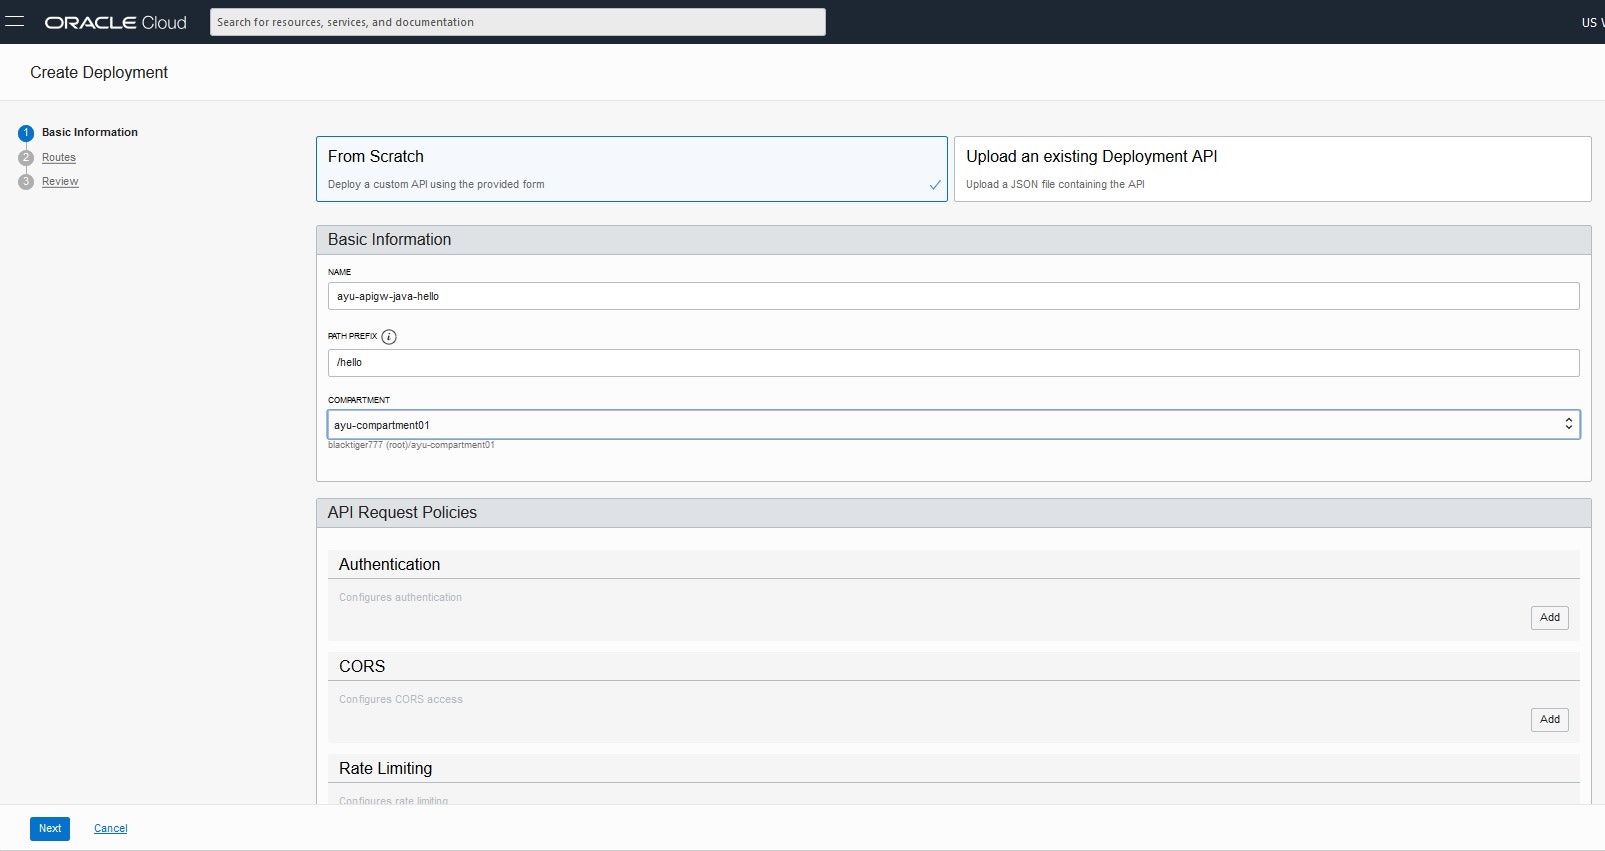
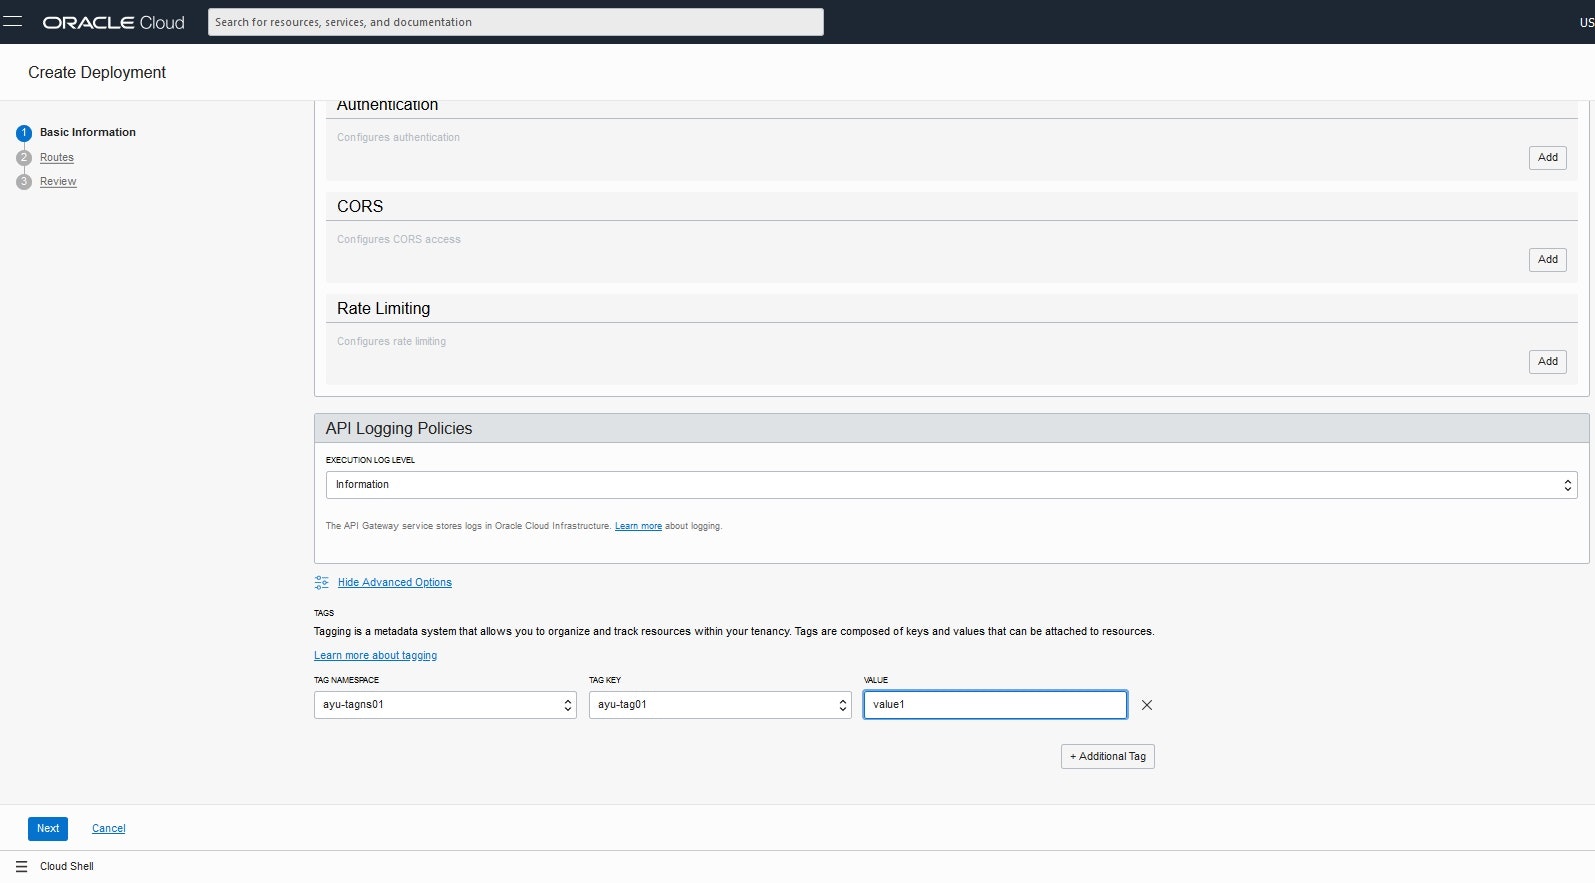
METHODS は GET のみを指定
5. 実行権限の付与(リソース・プリンシパル)
API Gateway に Functions の実行権限を付与してやります。
ネットワークおよびAPIゲートウェイ関連リソースへのアクセスを制御するポリシーの作成
https://docs.oracle.com/ja-jp/iaas/Content/APIGateway/Tasks/apigatewaycreatingpolicies.htm
下記のような IAM Policy を作成して、API Gateway に Functions の実行権限を付与します。
ALLOW any-user to use functions-family in compartment <コンパートメント名>
where ALL {
  request.principal.type= 'ApiGateway',
  request.resource.compartment.id = '<コンパートメントの OCID>'
}
OCI の権限(Policy)は通常は Group を介して IAMユーザー に
付与されますが、権限を OCI のリソースに対しても付与することが可能で、
リソースに対して権限を付与するのがリソースプリンシパルです。(あってる?)
6. API Gateway の endpoint をブラウザでアクセス
まず API Gateway の endpoint を確認します。Deployment の下記部分です。
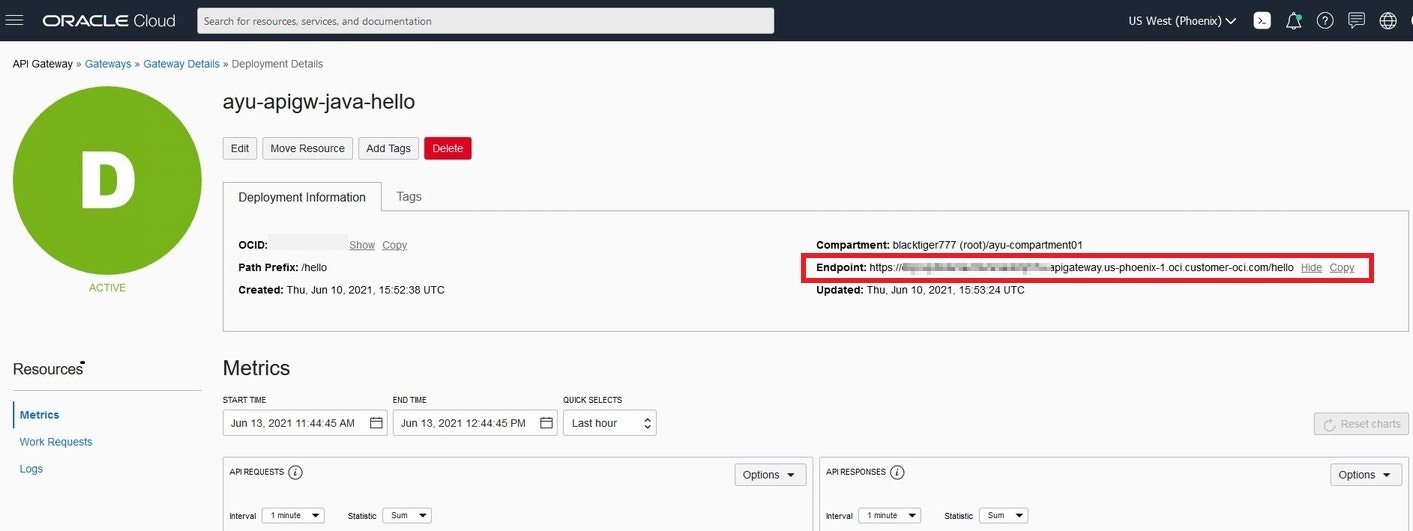
endpoint に 4. で作成した Deployment の PATH を追記してブラウザでアクセスします。

成功や!ブラウザに Functions の結果が表示されたやで彡(^)(^)
7. まとめ
API Gateway と Functions の組み合わせでブラウザに文字列を返すことが出来ました。
これは従来型の Web/AP + DB(データストア) の三層構造のアプリケーションを
サーバーレスなサービスで置き換えられる事を示しています。
AWS の Lambda相当の事を、OCI でも出来るんやで彡(^)(^)
Always Free も充実してきた OCI をどんどん活用して下さいね。
8. 参考ドキュメント
文中のリンクのほか、以下のドキュメントを参照しました。
サーバーレスOracle Functionsを呼び出すための完全ガイド
https://blogs.oracle.com/otnjp/the-complete-guide-to-invoking-serverless-oracle-functions-ja
APIゲートウェイの概要
https://docs.oracle.com/ja-jp/iaas/Content/APIGateway/Concepts/apigatewayoverview.htm
Functionsの概要
https://docs.oracle.com/ja-jp/iaas/Content/Functions/Concepts/functionsoverview.htm