RoboGuice とは
Android 用の DI コンテナ。
Google Guice をベースにしている。
インストール
dependencies {
    compile 'org.roboguice:roboguice:2.0'
}
Hello World(View をインジェクションする)
実装
<RelativeLayout xmlns:android="http://schemas.android.com/apk/res/android"
    xmlns:tools="http://schemas.android.com/tools"
    android:layout_width="match_parent"
    android:layout_height="match_parent"
    android:paddingBottom="@dimen/activity_vertical_margin"
    android:paddingLeft="@dimen/activity_horizontal_margin"
    android:paddingRight="@dimen/activity_horizontal_margin"
    android:paddingTop="@dimen/activity_vertical_margin"
    tools:context="com.example.guicesample.MainActivity" >

    <TextView
        android:id="@+id/helloWorld"
        android:layout_width="wrap_content"
        android:layout_height="wrap_content"
        android:text="@string/hello_world" />

</RelativeLayout>
package com.example.guicesample;

import roboguice.activity.RoboActivity;
import roboguice.inject.InjectView;
import android.os.Bundle;
import android.widget.TextView;

public class MainActivity extends RoboActivity {

    @InjectView(R.id.helloWorld)
    private TextView textView;

    @Override
    protected void onCreate(Bundle savedInstanceState) {
        super.onCreate(savedInstanceState);
        setContentView(R.layout.activity_main);

        this.textView.setText("Hello RoboGuice!!");
    }
}
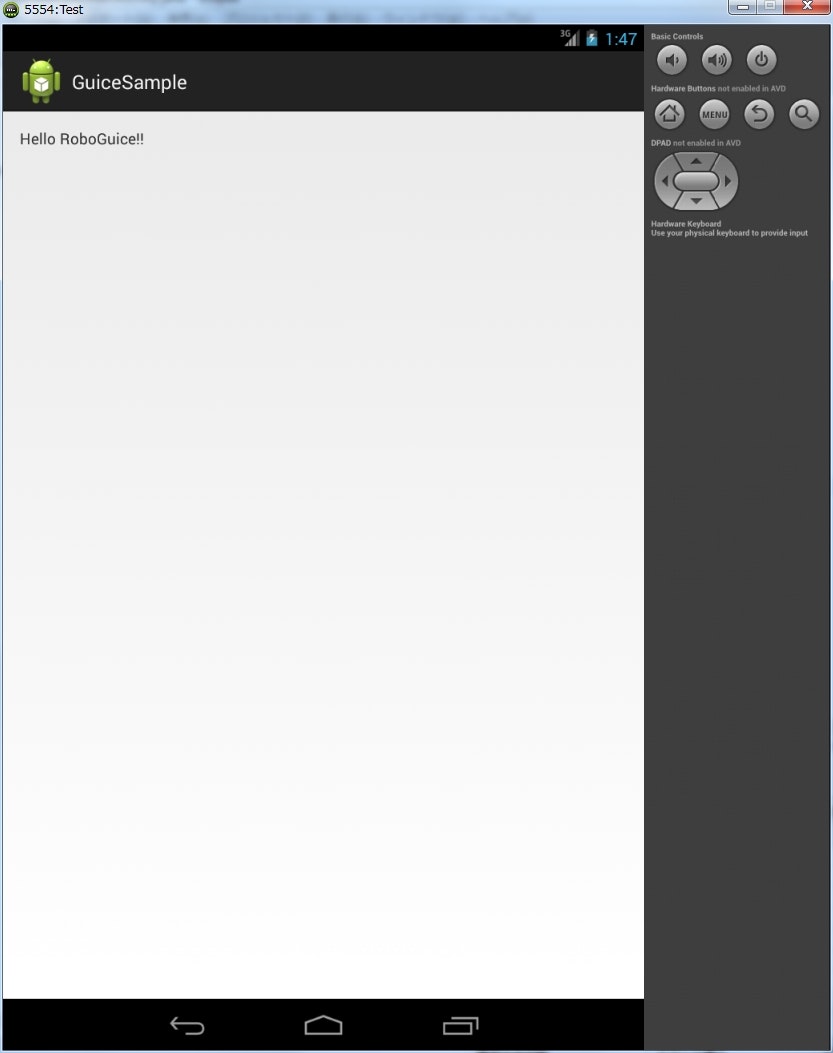
動作結果
説明
- Activity クラスは、
RoboActivityを継承して作成する。 -
onCreate()をオーバーライドして、RoboActivityのonCreate()を呼ぶ。 -
@InjectViewアノテーションで View をインジェクションできる。
レイアウトをアノテーションで設定する
package com.example.guicesample;

import roboguice.activity.RoboActivity;
import roboguice.inject.ContentView;
import roboguice.inject.InjectView;
import android.os.Bundle;
import android.widget.TextView;

@ContentView(R.layout.activity_main)
public class MainActivity extends RoboActivity {

    @InjectView(R.id.helloWorld)
    private TextView textView;

    @Override
    protected void onCreate(Bundle savedInstanceState) {
        super.onCreate(savedInstanceState);

        this.textView.setText("Hello RoboGuice!!!!");
    }
}
@ContentView で Activity をアノテートすることで、レイアウトを設定できる。
onCreate() が大分すっきりした印象。
リソースをインジェクションする
<?xml version="1.0" encoding="utf-8"?>
<resources>

    <string name="app_name">GuiceSample</string>
    <string name="hello_message">Hello Guice!!</string>

</resources>
package com.example.guicesample;

import roboguice.activity.RoboActivity;
import roboguice.inject.ContentView;
import roboguice.inject.InjectResource;
import android.os.Bundle;

@ContentView(R.layout.activity_main)
public class MainActivity extends RoboActivity {

    @InjectResource(R.string.hello_message)
    private String message;

    @Override
    protected void onCreate(Bundle savedInstanceState) {
        super.onCreate(savedInstanceState);

        System.out.println(this.message);
    }
}
I/System.out(1376): Hello Guice!!
@InjectResource でリソースをインジェクションできる。
システムサービスをインジェクションする
package com.example.guicesample;

import javax.inject.Inject;

import roboguice.activity.RoboActivity;
import roboguice.inject.ContentView;
import android.graphics.Point;
import android.os.Bundle;
import android.view.Display;
import android.view.WindowManager;

@ContentView(R.layout.activity_main)
public class MainActivity extends RoboActivity {

    @Inject
    private WindowManager manager;

    @Override
    protected void onCreate(Bundle savedInstanceState) {
        super.onCreate(savedInstanceState);

        Display display = this.manager.getDefaultDisplay();
        Point size = new Point();
        display.getSize(size);

        System.out.println("x=" + size.x + ", y=" + size.y);
    }
}
I/System.out(1437): x=800, y=1216
@Inject で システムサービス をインジェクションできる。
POJO をインジェクションする
package com.example.guicesample;

public class MyClass {

    public String method() {
        return "MyClass!!";
    }
}
package com.example.guicesample;

import javax.inject.Inject;

import roboguice.activity.RoboActivity;
import roboguice.inject.ContentView;
import android.os.Bundle;

@ContentView(R.layout.activity_main)
public class MainActivity extends RoboActivity {

    @Inject
    private MyClass myClass;

    @Override
    protected void onCreate(Bundle savedInstanceState) {
        super.onCreate(savedInstanceState);

        System.out.println(this.myClass.method());
    }
}
@Inject で POJO をインジェクションできる。
このへんの使い方は、普通の Google Guice の使い方と同じだと思う。
シングルトンで定義する
package com.example.guicesample;

import javax.inject.Singleton;

@Singleton
public class SingletonClass {

    @Override
    public String toString() {
        return "SingletonClass[hash=" + hashCode() + "]";
    }
}
package com.example.guicesample;

import roboguice.activity.RoboActivity;
import roboguice.inject.ContentView;
import roboguice.inject.InjectView;
import android.content.Intent;
import android.os.Bundle;
import android.view.View;
import android.view.View.OnClickListener;
import android.widget.Button;

@ContentView(R.layout.activity_main)
public class MainActivity extends RoboActivity {

    @InjectView(R.id.nextPageButton)
    private Button nextPageButton;

    @Override
    protected void onCreate(Bundle savedInstanceState) {
        super.onCreate(savedInstanceState);

        this.nextPageButton.setOnClickListener(new OnClickListener() {

            @Override
            public void onClick(View v) {
                Intent intent = new Intent(MainActivity.this, NextActivity.class);
                startActivity(intent);
            }
        });
    }
}
package com.example.guicesample;

import javax.inject.Inject;

import roboguice.activity.RoboActivity;
import roboguice.inject.ContentView;
import android.os.Bundle;
import android.util.Log;

@ContentView(R.layout.activity_next)
public class NextActivity extends RoboActivity {

    @Inject
    private SingletonClass singleton;

    @Override
    protected void onCreate(Bundle savedInstanceState) {
        super.onCreate(savedInstanceState);
        Log.v("roboguice-sample", "onCreate. singleton=" + this.singleton);
    }

    @Override
    protected void onDestroy() {
        super.onDestroy();
        Log.v("roboguice-sample", "onDestroy");
    }
}
@Singleton アノテーションでクラスをアノテートすると、そのクラスのインスタンスはシングルトンになる。
インジェクションは @Inject で行う。
上記実装を動かして、 MainActivity と NextActivity を戻るボタンを使いつつ何度か行き来すると、以下のようにログが出力される。
V/roboguice-sample(1627): onCreate. singleton=SingletonClass[hash=1098067568]
V/roboguice-sample(1627): onDestroy
V/roboguice-sample(1627): onCreate. singleton=SingletonClass[hash=1098067568]
V/roboguice-sample(1627): onDestroy
V/roboguice-sample(1627): onCreate. singleton=SingletonClass[hash=1098067568]
Activity が破棄されたあとでも、常に同じインスタンスがインジェクションされている。
アプリを再起動させれば、別のインスタンスが生成される。
メモリリークの危険性
前述の通り、シングルトンで定義した場合、そのインスタンスはアプリケーションが終了するまでメモリ上から削除されない。
つまり、注意して使わないとメモリリークの原因となりえる。
Context Singleton で定義する
package com.example.guicesample;

import roboguice.inject.ContextSingleton;

@ContextSingleton
public class ContextSingletonClass {

    @Override
    public String toString() {
        return "ContextSingletonClass[hash=" + hashCode() + "]";
    }
}
先ほどの NextPageActivity に ContextSingletonClass をインジェクションするようにして、アプリを実行する。
V/roboguice-sample(1749): onCreate. contextSingleton=ContextSingletonClass[hash=1098269536]
V/roboguice-sample(1749): onDestroy
V/roboguice-sample(1749): onCreate. contextSingleton=ContextSingletonClass[hash=1098326064]
V/roboguice-sample(1749): onDestroy
V/roboguice-sample(1749): onCreate. contextSingleton=ContextSingletonClass[hash=1097928128]
Activity が破棄されるたびに新しいインスタンスが生成されている。
@ContextSingleton でクラスをアノテートすると、そのクラスのインスタンスは Activity のライフサイクル内でシングルトンになる。
インターフェースの実装クラスを指定する
実装
package com.example.guicesample;

public interface MyInterface {

    String method();
}
package com.example.guicesample;

public class Hoge implements MyInterface {

    @Override
    public String method() {
        return "hoge";
    }
}
package com.example.guicesample;

import javax.inject.Inject;

import roboguice.activity.RoboActivity;
import roboguice.inject.ContentView;
import android.os.Bundle;

@ContentView(R.layout.activity_main)
public class MainActivity extends RoboActivity {

    @Inject
    private MyInterface obj;

    @Override
    protected void onCreate(Bundle savedInstanceState) {
        super.onCreate(savedInstanceState);
        System.out.println("obj=" + obj.method());
    }
}
package com.example.guicesample;

import com.google.inject.AbstractModule;

public class MyModule extends AbstractModule {

    @Override
    protected void configure() {
        bind(MyInterface.class).to(Hoge.class);
    }
}
<?xml version="1.0" encoding="utf-8"?>
  <resources>
    <string-array name="roboguice_modules">
    <item>com.example.guicesample.MyModule</item>
  </string-array>
</resources>
動作確認
I/System.out(2345): obj=hoge
説明
- インターフェースに対して、どのクラスのインスタンスをインジェクションするかは、
AbstractModuleクラスを継承したクラスのconfigure()メソッド内で指定する。-
configure()内の実装方法については こちら を参考のこと。
-
-
res/valuesの下に xml を追加して(roboguice.xml)、そこにroboguice_modulesという名前でAbstractModuleのサブクラスを定義する。
Activity 以外のクラスを作る
Activity 以外にも Robo* と付く名前のクラスが用意されている。
サービスなどを作るときは、それらのクラスを継承して作成する。
以下が、用意されている Robo* クラスの一部。
- RoboActivity
- RoboListActivity
- RoboExpandableListActivity
- RoboMapActivity
- RoboPreferenceActivity
- RoboAccountAuthenticatorActivity
- RoboActivityGroup
- RoboTabActivity
- RoboFragmentActivity
- RoboLauncherActivity
- RoboService
- RoboIntentService
- RoboFragment
- RoboListFragment
- RoboDialogFragment
- etc.
テストを動かす
ActivityInstrumentationTestCase2 を使ったテストが動かせるか試す。
package com.example.guicesample;

public interface MyInterface {

    String method();
}
package com.example.guicesample;

public class Hoge implements MyInterface {

    @Override
    public String method() {
        return "hoge";
    }
}
package com.example.guicesample;

import javax.inject.Inject;

import roboguice.activity.RoboActivity;
import roboguice.inject.ContentView;
import android.os.Bundle;

@ContentView(R.layout.activity_main)
public class MainActivity extends RoboActivity {

    @Inject
    private MyInterface obj;

    @Override
    protected void onCreate(Bundle savedInstanceState) {
        super.onCreate(savedInstanceState);
        System.out.println(this.obj.method());
    }
}
package com.example.guicesample;

import com.google.inject.AbstractModule;

public class MyModule extends AbstractModule {

    @Override
    protected void configure() {
        bind(MyInterface.class).to(Hoge.class);
    }
}
package com.example.guicesample;

import android.test.ActivityInstrumentationTestCase2;

public class MainActivityTest extends  ActivityInstrumentationTestCase2<MainActivity> {

    public MainActivityTest() {
        super(MainActivity.class);
    }

    public void test() {
        getActivity();
    }
}
I/System.out(2769): hoge
普通に動かせた。
モジュールを差し替える
テストのときだけインジェクションするクラスを差し替える。
package com.example.guicesample;

public class Fuga implements MyInterface {

    @Override
    public String method() {
        return "fuga";
    }
}
package com.example.guicesample;

import com.google.inject.AbstractModule;

public class TestModule extends AbstractModule {

    @Override
    protected void configure() {
        bind(MyInterface.class).to(Fuga.class);
    }
}
package com.example.guicesample;

import roboguice.RoboGuice;
import android.app.Application;
import android.test.ActivityInstrumentationTestCase2;

import com.google.inject.Module;
import com.google.inject.util.Modules;

public class MainActivityTest extends  ActivityInstrumentationTestCase2<MainActivity> {

    public MainActivityTest() {
        super(MainActivity.class);
    }

    @Override
    protected void setUp() throws Exception {
        super.setUp();

        Application app = (Application) getInstrumentation().getTargetContext().getApplicationContext();

        Module module = Modules.override(RoboGuice.newDefaultRoboModule(app)).with(new TestModule());

        RoboGuice.setBaseApplicationInjector(app, RoboGuice.DEFAULT_STAGE, module);
    }

    public void test() {
        getActivity();
    }

    @Override
    protected void tearDown() throws Exception {
        super.tearDown();
        RoboGuice.util.reset();
    }
}
I/System.out(2851): fuga
RoboGuice.setBaseApplicationInjector() でモジュールを差し替えられる。
ロギングユーティリティ
RoboGuice は、 Ln というロギング用のユーティルクラスを持つ。
標準の Log との大きな違いは、
- フォーマットを指定できる。
- 出力ログに自動でソースコードの場所やスレッド名などの情報が追加されて出力される(リリースビルドすると出力されなくなる)。
String message = "Ln Verbose Log";
Ln.v("message=%s", message);
V/COM.EXAMPLE.GUICESAMPLE/MainActivity.java:15(2970): main Ln Verbose Log
Activity のイベントをフックする
package com.example.guicesample;

import roboguice.activity.event.OnCreateEvent;
import roboguice.event.Observes;

public class MyEventListener {

    public void handleOnCreate(@Observes OnCreateEvent event) {
        System.out.println("MyEventListener");
    }
}
package com.example.guicesample;

import javax.inject.Inject;

import roboguice.activity.RoboActivity;
import roboguice.inject.ContentView;
import android.os.Bundle;

@ContentView(R.layout.activity_main)
public class MainActivity extends RoboActivity {

    @Inject
    private MyEventListener listener;

    @Override
    protected void onCreate(Bundle savedInstanceState) {
        super.onCreate(savedInstanceState);
        System.out.println("MainActivity.onCreate()");
    }
}
I/System.out(3205): MyEventListener
I/System.out(3205): MainActivity.onCreate()
特定のイベントオブジェクトを引数に取るメソッドを定義し、そのパラメータを @Observes でアノテートする。
そのメソッドを持つクラスを Acitivity にインジェクションすることで、イベントオブジェクトに対応するイベントをフックできるようになる。
「特定のイベントオブジェクト」には以下のものがある。
- OnActivityResultEvent
- OnConfigurationChangedEvent
- OnContentChangedEvent
- OnContentViewAvailableEvent
- OnCreateEvent
- OnDestroyEvent
- OnNewIntentEvent
- OnPauseEvent
- OnRestartEvent
- OnResumeEvent
- OnStartEvent
- OnStopEvent
