組み込み利用での Jetty の使い方をメモ。
Hello World
build.gradle
apply plugin: 'java'

repositories {
    mavenCentral()
}

dependencies {
    compile 'org.eclipse.jetty.aggregate:jetty-all:9.1.4.v20140401'
}
実装
package sample.jetty;

import java.io.IOException;

import javax.servlet.ServletException;
import javax.servlet.http.HttpServletRequest;
import javax.servlet.http.HttpServletResponse;

import org.eclipse.jetty.server.Request;
import org.eclipse.jetty.server.Server;
import org.eclipse.jetty.server.handler.AbstractHandler;

public class HelloJetty extends AbstractHandler {

    public static void main(String[] args) throws Exception {
        Server server = new Server(1234);
        server.setHandler(new HelloJetty());
        server.start();
        server.join();
    }

    @Override
    public void handle(String target, Request baseRequest, HttpServletRequest request, HttpServletResponse response) throws IOException, ServletException {
        System.out.println("target = " + target);

        response.setContentType("text/html;charset=utf-8");
        response.setStatus(HttpServletResponse.SC_OK);
        baseRequest.setHandled(true);
        response.getWriter().println("<h1>Hello Jetty!!</h1>");
    }
}
動作確認
実行して、 Web ブラウザから http://localhost:1234 にアクセスする。
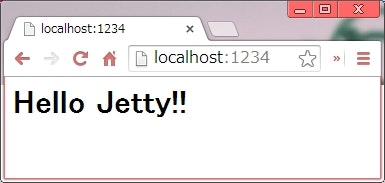
target = /
説明
Server
- Jetty を組み込みで使うときは、 Server クラスを使用する。
- コンストラクタの引数で、ポート番号を指定できる。
Handler
- Handler を Server に登録しておくと、全てのリクエストがこの Handler に渡される。
- リクエストが届くと、 Handler の
handle()メソッドが実行される。 -
handle()メソッドの第一引数には、リクエストのあった URI が渡される。
Servlet を登録する
実装
package sample.jetty;
import java.io.IOException;
import javax.servlet.http.HttpServlet;
import javax.servlet.http.HttpServletRequest;
import javax.servlet.http.HttpServletResponse;
import org.eclipse.jetty.server.Server;
import org.eclipse.jetty.servlet.ServletHandler;
public class SampleServlet extends HttpServlet {
private static final long serialVersionUID = 1L;
public static void main(String[] args) throws Exception {
ServletHandler handler = new ServletHandler();
handler.addServletWithMapping(SampleServlet.class, "/sample");
Server server = new Server(1234);
server.setHandler(handler);
server.start();
server.join();
}
@Override
public void doGet(HttpServletRequest req, HttpServletResponse res) throws IOException {
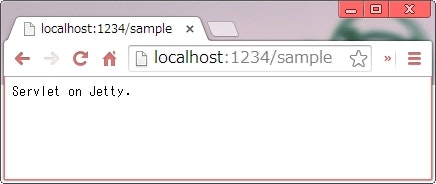
res.getWriter().println("Servlet on Jetty.");
}
}
動作確認
実行して、 Web ブラウザから http://localhost:1234/sample にアクセスする。
説明
-
ServletHandler#addServletWithMapping()メソッドで Servlet と URI のマッピングを定義する。
war ファイルをデプロイする
組み込みで起動する jetty に war ファイルをデプロイする。
デプロイする war プロジェクト
何の変哲もない war プロジェクト。
build.gradle
apply plugin: 'war'

repositories {
    mavenCentral()
}

dependencies {
    providedCompile 'javax.servlet:javax.servlet-api:3.1.0'
}

war.baseName = 'sample'
実装
package sample.jetty;
import javax.servlet.annotation.WebServlet;
import javax.servlet.http.HttpServlet;
import javax.servlet.http.HttpServletRequest;
import javax.servlet.http.HttpServletResponse;
import java.io.IOException;
@WebServlet("/servlet")
public class SampleServlet extends HttpServlet {
private static final long serialVersionUID = 1L;
@Override
public void doGet(HttpServletRequest req, HttpServletResponse res) throws IOException {
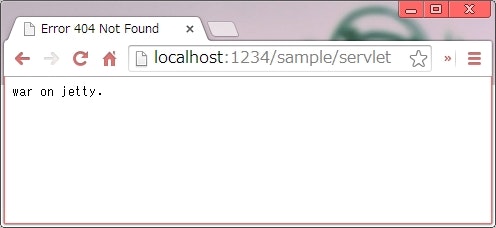
res.getWriter().println("war on jetty.");
}
}
起動側プロジェクト
build.gradle
apply plugin: 'java'

repositories {
    mavenCentral()
}

dependencies {
    compile 'org.eclipse.jetty:jetty-webapp:9.1.4.v20140401'
    compile 'org.eclipse.jetty:jetty-annotations:9.1.4.v20140401'
}
-
jetty-allだと、@WebServletのような Servlet 3.0 流の実装を使ったときにClassNotFoundExceptionが発生するので、dependenciesを若干変えてる(推移的な依存関係の管理とは何だったのか...)。
実装
package sample.jetty;

import org.eclipse.jetty.annotations.AnnotationConfiguration;
import org.eclipse.jetty.plus.webapp.EnvConfiguration;
import org.eclipse.jetty.plus.webapp.PlusConfiguration;
import org.eclipse.jetty.server.Server;
import org.eclipse.jetty.webapp.Configuration;
import org.eclipse.jetty.webapp.FragmentConfiguration;
import org.eclipse.jetty.webapp.JettyWebXmlConfiguration;
import org.eclipse.jetty.webapp.MetaInfConfiguration;
import org.eclipse.jetty.webapp.WebAppContext;
import org.eclipse.jetty.webapp.WebInfConfiguration;
import org.eclipse.jetty.webapp.WebXmlConfiguration;

public class Main {
    public static void main(String[] args) throws Exception {
        // 1. war ファイルの設定
        WebAppContext war = new WebAppContext();
        war.setContextPath("/sample");
        war.setWar("./sample.war");

        // 2. @WebServlet とかを有効にしている
        Configuration[] configurations = {
            new AnnotationConfiguration(),
            new WebInfConfiguration(),
            new WebXmlConfiguration(),
            new MetaInfConfiguration(),
            new FragmentConfiguration(),
            new EnvConfiguration(),
            new PlusConfiguration(),
            new JettyWebXmlConfiguration()
        };

        war.setConfigurations(configurations);

        Server server = new Server(1234);
        server.setHandler(war);
        server.start();
        server.join();
    }
}
-
WebAppContextのsetContextPath()でコンテキストパスを、setWar()でデプロイする war のパスを指定している。 - 上記のような感じで
setConfigurations()を設定しないと、@WebServletの設定は無視され、 Servlet 3.0 流の実装ができない。
動作確認
起動したら Web ブラウザで http://localhost:1234/sample/servlet にアクセスする。
実行可能な war を作成する
jenkins みたいに
>java -jar hoge.war
でサーバーの起動と war の配備ができたら cool ですよね。
ということで、やってみる。
build.gradle
apply plugin: 'war'

repositories {
    mavenCentral()
}

dependencies {
    providedCompile 'org.eclipse.jetty:jetty-webapp:9.1.4.v20140401'
    providedCompile 'org.eclipse.jetty:jetty-annotations:9.1.4.v20140401'
}

war {
    baseName = 'jetty-sample'

    from {
        configurations.providedCompile.collect {
            it.isDirectory() ? it : project.zipTree(it)
        }
    }
    from fileTree(dir: 'build/classes/main', include: '**/Main.class')

    manifest.attributes('Main-Class': 'sample.jetty.Main')
}
実装
package sample.jetty;

import java.net.URL;
import java.security.ProtectionDomain;

import org.eclipse.jetty.annotations.AnnotationConfiguration;
import org.eclipse.jetty.plus.webapp.EnvConfiguration;
import org.eclipse.jetty.plus.webapp.PlusConfiguration;
import org.eclipse.jetty.server.Server;
import org.eclipse.jetty.webapp.Configuration;
import org.eclipse.jetty.webapp.FragmentConfiguration;
import org.eclipse.jetty.webapp.JettyWebXmlConfiguration;
import org.eclipse.jetty.webapp.MetaInfConfiguration;
import org.eclipse.jetty.webapp.WebAppContext;
import org.eclipse.jetty.webapp.WebInfConfiguration;
import org.eclipse.jetty.webapp.WebXmlConfiguration;

public class Main {
    public static void main(String[] args) throws Exception {

        WebAppContext war = new WebAppContext();
        war.setContextPath("/sample");

        // ここで war ファイルの場所を取得している
        ProtectionDomain domain = Main.class.getProtectionDomain();
        URL warLocation = domain.getCodeSource().getLocation();
        war.setWar(warLocation.toExternalForm());

        Configuration[] configurations = {
            new AnnotationConfiguration(),
            new WebInfConfiguration(),
            new WebXmlConfiguration(),
            new MetaInfConfiguration(),
            new FragmentConfiguration(),
            new EnvConfiguration(),
            new PlusConfiguration(),
            new JettyWebXmlConfiguration()
        };

        war.setConfigurations(configurations);

        Server server = new Server(1234);
        server.setHandler(war);
        server.start();
        server.join();
    }
}
package sample.jetty;
import java.io.IOException;
import javax.servlet.annotation.WebServlet;
import javax.servlet.http.HttpServlet;
import javax.servlet.http.HttpServletRequest;
import javax.servlet.http.HttpServletResponse;
@WebServlet("/servlet")
public class SampleServlet extends HttpServlet {
private static final long serialVersionUID = 1L;
@Override
public void doGet(HttpServletRequest req, HttpServletResponse res) throws IOException {
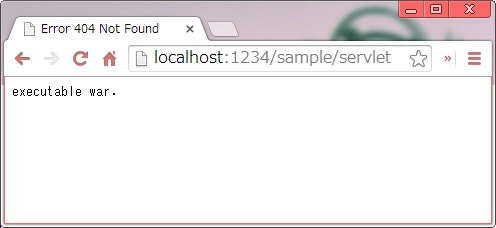
res.getWriter().println("executable war.");
}
}
動作確認
war を作って起動する。
>gradle war

>java -jar build\libs\jetty-sample.war
2014-04-29 23:39:57.074:INFO::main: Logging initialized @105ms
2014-04-29 23:39:57.130:INFO:oejs.Server:main: jetty-9.1.z-SNAPSHOT
2014-04-29 23:39:57.840:INFO:oejw.StandardDescriptorProcessor:main: NO JSP Support for /sample, did not find org.apache.jasper.servlet.JspServlet
2014-04-29 23:39:57.869:INFO:oejsh.ContextHandler:main: Started o.e.j.w.WebAppContext@483bf400{/sample,file:/<省略>/jetty-0.0.0.0-1234-jetty-sample.war-_sample-any-951802741547862236.dir/webapp/,AVAILABLE}{file:<省略>/build/libs/jetty-sample.war}
2014-04-29 23:39:57.888:INFO:oejs.ServerConnector:main: Started ServerConnector@5d624da6{HTTP/1.1}{0.0.0.0:1234}
2014-04-29 23:39:57.888:INFO:oejs.Server:main: Started @938ms
Web ブラウザを開いて、 http://localhost:1234/sample/servlet にアクセスする。
停止はコマンドライン上で Ctrl + C 。
説明
war ファイルの場所を取得する方法
ProtectionDomain domain = Main.class.getProtectionDomain();
URL warLocation = domain.getCodeSource().getLocation();
war.setWar(warLocation.toExternalForm());
仕組みはよくわかってないけど、こうすれば jar として実行している「この war ファイルの場所」が取得できるらしい。
war ファイルを「実行可能 jar 形式」にする方法
war {
    // 1
    from {
        configurations.providedCompile.collect {
            it.isDirectory() ? it : project.zipTree(it)
        }
    }

    // 2
    from fileTree(dir: 'build/classes/main', include: '**/Main.class')

    // 3
    manifest.attributes('Main-Class': 'sample.jetty.Main')
}
- jetty およびその依存対象を war の直下に展開している。
- 起動用の Main クラスを war の直下に展開している。
- マニフェストファイルに Main クラスを定義している。
war ファイルを解凍すると、以下のような構成になっている。
jetty-sample/
│
│  about.html
│  jetty-dir.css
│  jndi.properties
├javax/
│  ├annotation/
│  └servlet/
├org/
│  ├eclipse/
│  │  └jetty/
│  └objectweb/
│      └asm/
├META-INF/
│  └MANIFEST.MF
├sample/
│  └jetty/
│     Main.class
│
└WEB-INF/
    └classes/
        └sample/
            └jetty/
               Main.class
               SampleServlet.class
実行可能 jar としての構成と war としての構成がごちゃ混ぜになった構造になっている。
つまり、当然 http://localhost:1234/sample/abount.html とか http://localhost:1234/sample/org/eclipse/jetty/server/Server.class にアクセスすると、当該ファイルが丸見えになっている。
やや格好悪いけど、我慢するか、どうしても嫌なら Filter を作って、見られたくないパスへのアクセスは全部 404 にしてしまうという方法もありかなと。
web フォルダを指定する
package sample.jetty;

import java.net.URL;
import java.security.ProtectionDomain;

import org.eclipse.jetty.annotations.AnnotationConfiguration;
import org.eclipse.jetty.plus.webapp.EnvConfiguration;
import org.eclipse.jetty.plus.webapp.PlusConfiguration;
import org.eclipse.jetty.server.Server;
import org.eclipse.jetty.webapp.Configuration;
import org.eclipse.jetty.webapp.FragmentConfiguration;
import org.eclipse.jetty.webapp.JettyWebXmlConfiguration;
import org.eclipse.jetty.webapp.MetaInfConfiguration;
import org.eclipse.jetty.webapp.WebAppContext;
import org.eclipse.jetty.webapp.WebInfConfiguration;
import org.eclipse.jetty.webapp.WebXmlConfiguration;

public class Main {
    public static void main(String[] args) throws Exception {
        WebAppContext war = new WebAppContext();
        war.setContextPath("/sample");
        war.setResourceBase("src/main/webapp");

        Configuration[] configurations = {
            new AnnotationConfiguration(),
            new WebInfConfiguration(),
            new WebXmlConfiguration(),
            new MetaInfConfiguration(),
            new FragmentConfiguration(),
            new EnvConfiguration(),
            new PlusConfiguration(),
            new JettyWebXmlConfiguration()
        };

        war.setConfigurations(configurations);

        Server server = new Server(1234);
        server.setHandler(war);
        server.start();
        server.join();
    }
}
-
WebAppContext#setResourceBase(path)で、 web フォルダを指定して起動できる。
参考