この記事は、Amazon LinuxでSelenium環境を最短で構築するのAmazon Linux2版です。
Amazon LinuxでのSelenium環境を構築したい方は上記リンクを参考にしてください。
概要
2020年6月30日に Amazon Linux のセキュリティ更新提供が終了するということで、
Amazon Linux2でもSelenium環境を構築出来るようにしました。
ほとんど手順は変わりませんが、一部変更点がありました。以下は全てrootで実施したものです。
手順
・Google Chrome のインストール
・GConf2 のインストール ※変更あり
・ChromeDriver のインストール
・Google Noto Fonts のインストール
・Selenium のインストール ※変更あり
Google Chromeのインストール
yum install google-chrome-stableでやると依存関係で死にます。
以下を実行しましょう。
curl https://intoli.com/install-google-chrome.sh | bash
最新のGoogle Chromeがうまく入るはずです。
GConf2のインストール
Amazon Linuxの時はリポジトリを追加しないとインストール出来なかったのですが、
Amazon Linux2では簡単にインストール出来ます。
yum -y install GConf2
ChromeDriverのインストール
現時点でインストールしたGoogle Chromeが79.0.3945.88なので、それに対応する79.0.3945.36を取得します。
Google Chromeのバージョンはgoogle-chrome-stable -versionで確認できます。
※ Google Chromeのバージョンと対応するChromeDriverのバージョンの確認はこちら
wget https://chromedriver.storage.googleapis.com/79.0.3945.36/chromedriver_linux64.zip
unzip chromedriver_linux64.zip
mv chromedriver /usr/local/bin/
Google Noto Fontsのインストール
このままだとSeleniumで画面のスクリーンショットを撮った際に
日本語が文字化けしてしまうのでフォントをインストールします。
https://www.google.com/get/noto/
cd ~/Downloads   # どこか適当な場所で
wget https://noto-website-2.storage.googleapis.com/pkgs/Noto-hinted.zip
unzip Noto-hinted.zip
mkdir -p /usr/share/fonts/opentype/noto
cp *otf *ttf /usr/share/fonts/opentype/noto
fc-cache -f -v # optional
Seleniumのインストール
ここがAmazon Linux2になって面倒になったところです。
Amazon Linux2では、pipがデフォルトで入っていないため、まずはpipをインストールしましょう。
Amazon Linux2のデフォルトのpythonのバージョンが2.7.16なので、本当は3系に上げてからpipをインストールしたいですが、
yumが動かなくなったりする懸念があったため、そのままインストールしています。
※yum周り含めて、安全にpython3系に上げる方法をご存知の方は是非ご教授を…
yum install -y python-pip
その後、seleniumをインストールすることが出来ます。
pip install selenium
インストールするものは以上になります。
Seleniumを使ってみよう
googleのトップページのスクリーンショットを撮る簡単なテストコードを作成して
実行してみましょう。
from selenium import webdriver
from selenium.webdriver.chrome.options import Options

options = Options()
options.add_argument('--headless')
options.add_argument('--no-sandbox')
options.add_argument('--disable-gpu')
options.add_argument('--window-size=1280,1024')
driver = webdriver.Chrome(chrome_options=options)
driver.get('https://www.google.co.jp/')
driver.save_screenshot('test.png')
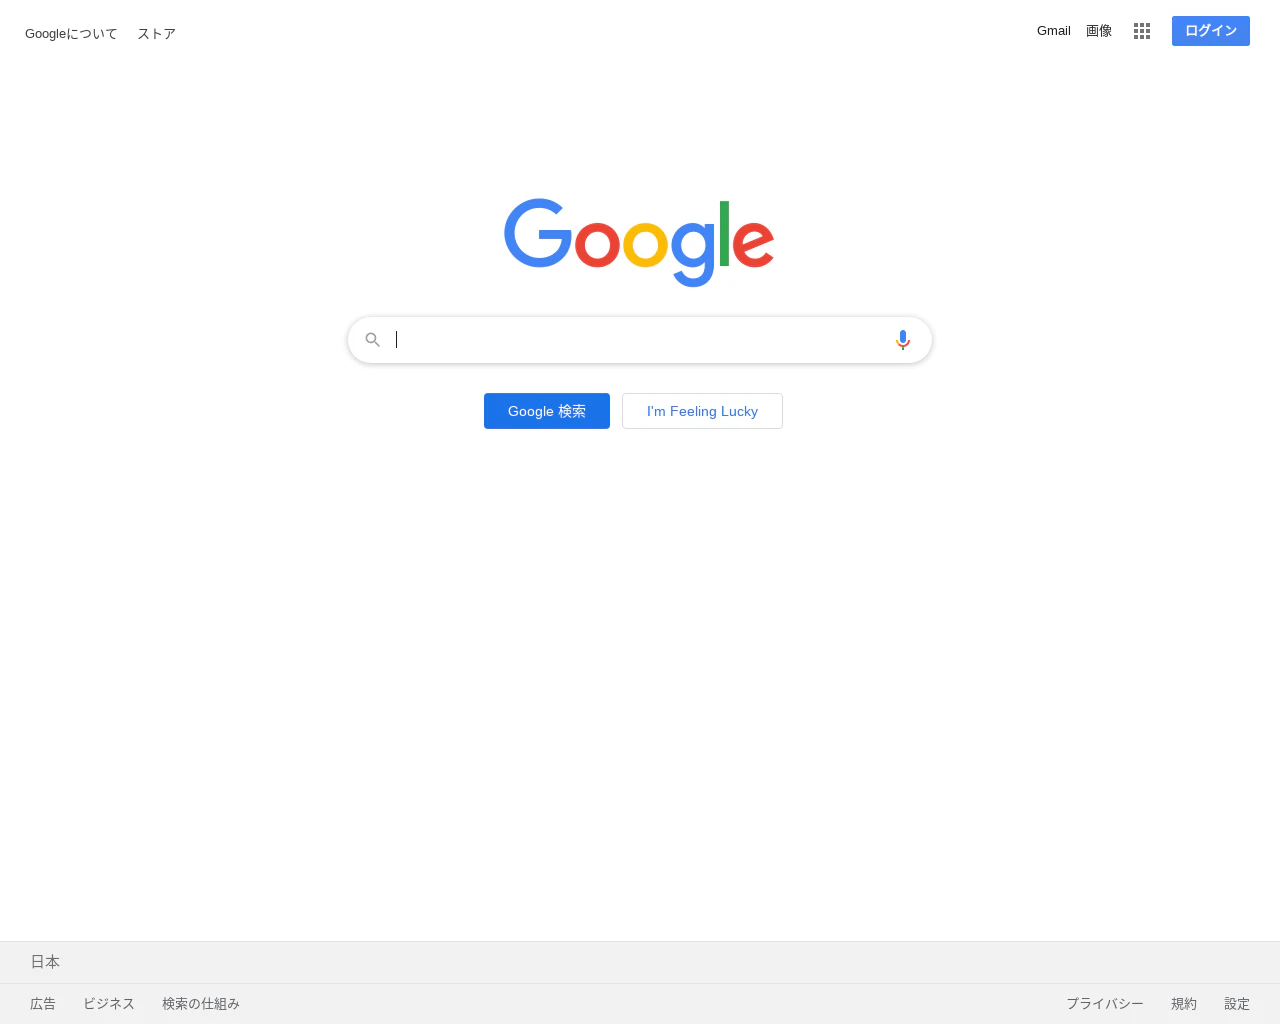
実行ディレクトリにtest.pngが作成されます。
ちなみにoptionsに追加している引数ですが、
・--headlessでヘッドレスモード
(これで実行しないと動きません)
・--no-sandboxはgoogle-chrome-stableが動くために必要
(google-chrome-stableを実行すると分かるはず)
・--disable-gpuで描画周りが安定するらしい
(これ無しで実行したら作られたpngファイルが真っ黒だった)
・--window-sizeはそのままウィンドウサイズの指定
となります。
最後に
作成されたtest.pngは以下のようになっていました。文字化けしていませんね。
Amazon Linux2への移行で大きく変更があるかと思いましたが、そこまで影響はなさそうです。