Androidアプリ開発初級編ということで
カウンターアプリ
アプリ開発の登竜門といえばカウンターアプリですね(適当
自分自身の理解の確認ということも含め,
グローバル変数を利用しないカウンターアプリを製作します.
要件としては以下の通り.
- グローバル変数を使わない
- Androidアプリ開発の基本を抑える
- +とーが可能であるカウンターを製作
製作していこう
前提知識として
1. AndroidStudioを利用
2. プロジェクトの作成方法がわかる
3. ある程度プログラミング経験あり
今までJS触ってたけどネイティブアプリ作りたい〜みたいな人向け
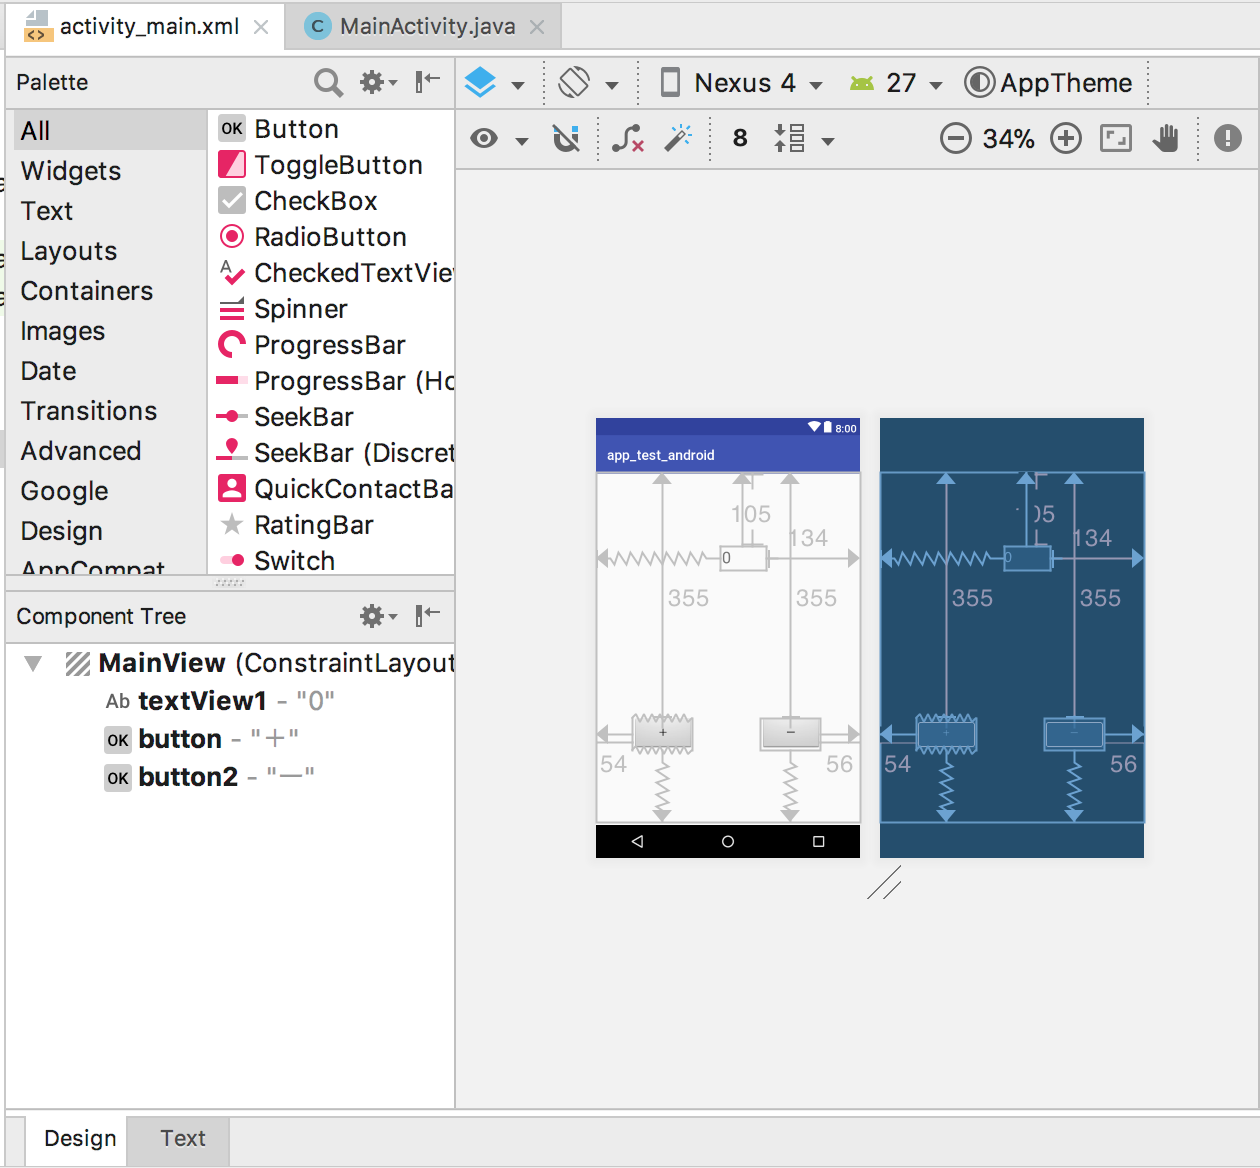
まずは機能ですが, とりあえずres/layoutディレクトリにある
XMLファイルを, GUIでいじいじ(コードで書いてもいいです).
こんな感じ.
コードの方はこっち
activity_main.xml
<?xml version="1.0" encoding="utf-8"?>
<android.support.constraint.ConstraintLayout xmlns:android="http://schemas.android.com/apk/res/android"
    xmlns:app="http://schemas.android.com/apk/res-auto"
    xmlns:tools="http://schemas.android.com/tools"
    android:id="@+id/MainView"
    android:layout_width="match_parent"
    android:layout_height="match_parent"
    android:visibility="visible"
    tools:context="com.example.name.app_test_android.MainActivity">
    <TextView
        android:id="@+id/textView1"
        android:layout_width="67dp"
        android:layout_height="35dp"
        android:layout_centerHorizontal="true"
        android:layout_marginEnd="134dp"
        android:layout_marginStart="183dp"
        android:layout_marginTop="105dp"
        android:text="0"
        android:textSize="24sp"
        app:layout_constraintEnd_toEndOf="parent"
        app:layout_constraintStart_toStartOf="parent"
        app:layout_constraintTop_toTopOf="parent" />

    <Button
        android:id="@+id/button"
        style="@android:style/Widget.Button"
        android:layout_width="0dp"
        android:layout_height="wrap_content"
        android:layout_alignParentBottom="true"
        android:layout_alignParentRight="true"
        android:layout_marginBottom="108dp"
        android:layout_marginStart="54dp"
        android:layout_marginTop="355dp"
        android:onClick="plus" //追加箇所
        android:text="+"
        app:layout_constraintBottom_toBottomOf="parent"
        app:layout_constraintStart_toStartOf="parent"
        app:layout_constraintTop_toTopOf="parent" />

    <Button
        android:id="@+id/button2"
        style="@android:style/Widget.Button"
        android:layout_width="wrap_content"
        android:layout_height="wrap_content"
        android:layout_alignParentBottom="true"
        android:layout_alignParentRight="true"
        android:layout_marginBottom="108dp"
        android:layout_marginEnd="56dp"
        android:layout_marginTop="355dp"
        android:onClick="minus" //追加箇所
        android:text="ー"
        app:layout_constraintBottom_toBottomOf="parent"
        app:layout_constraintEnd_toEndOf="parent"
        app:layout_constraintTop_toTopOf="parent" />
</android.support.constraint.ConstraintLayout>
GUIで適当にButtonやTextViewを配置することによって,
頭のいいIDEくんが勝手にXMLにオブジェクト情報を追加してくれます.
ただ, 今回はイベントを追加するために.
android:onClick="plus or minus"を追加していますが,
それ以外はGUIでいじればできます.
次に,Clickイベントの際に呼び出すメソッドの定義を書いていきます.
ここからは, プログラミングやってないとわかりにくいかも.
グローバル変数を使わないということで,
基本的には, TextViewの値をパースしていきます.
View関連のValue取得は少し癖があるようで,
取得したTextViewのTextValue自体をtoString()で変換していくようです.
MainActivity.java
package com.example.name.app_test_android;

import android.support.v7.app.AppCompatActivity;
import java.lang.*;
import android.app.Activity;
import android.os.Bundle;
import android.view.*;
import android.widget.*;

public class MainActivity extends Activity {

    @Override
    protected void onCreate(Bundle savedInstanceState) {
        super.onCreate(savedInstanceState);
        setContentView(R.layout.activity_main);
    }

    public void plus(View view) {
        TextView set_view = (TextView) findViewById(R.id.textView1);
        //Text Value を String型に変換
        String countView = new String((set_view.getText()).toString());
        if(isNumber(countView) == true) {
            int mCount = Integer.parseInt(countView);
            mCount++;
            set_view.setText(String.valueOf(mCount));
        }
    }
    public void minus(View view) {
        TextView set_view = (TextView) findViewById(R.id.textView1);
        String countView = new String((set_view.getText()).toString());

        if(isNumber(countView) == true) {
            int mCount = Integer.parseInt(countView);
            mCount--;
            set_view.setText(String.valueOf(mCount));
        }
    }
    //Stringの整数判定
    private static boolean isNumber(String str) {
        try {
            Integer.parseInt(str);
            return true;
        } catch (NumberFormatException e) {
            return false;
        }
    }
}
参考サイトはこちら
https://qiita.com/hys-rabbit/items/1251e86d9d22507d309a
https://qiita.com/gabu/items/6ed716bb9af7cc3c26a3