UITableViewControllerを使うと嬉しいこと
2つのメリット
-
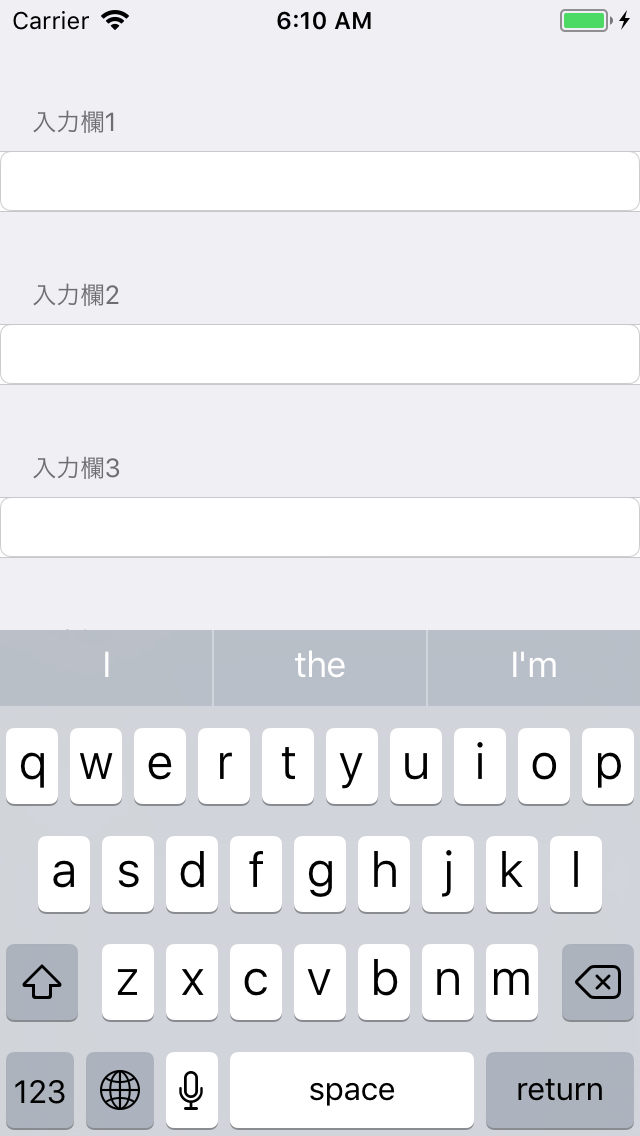
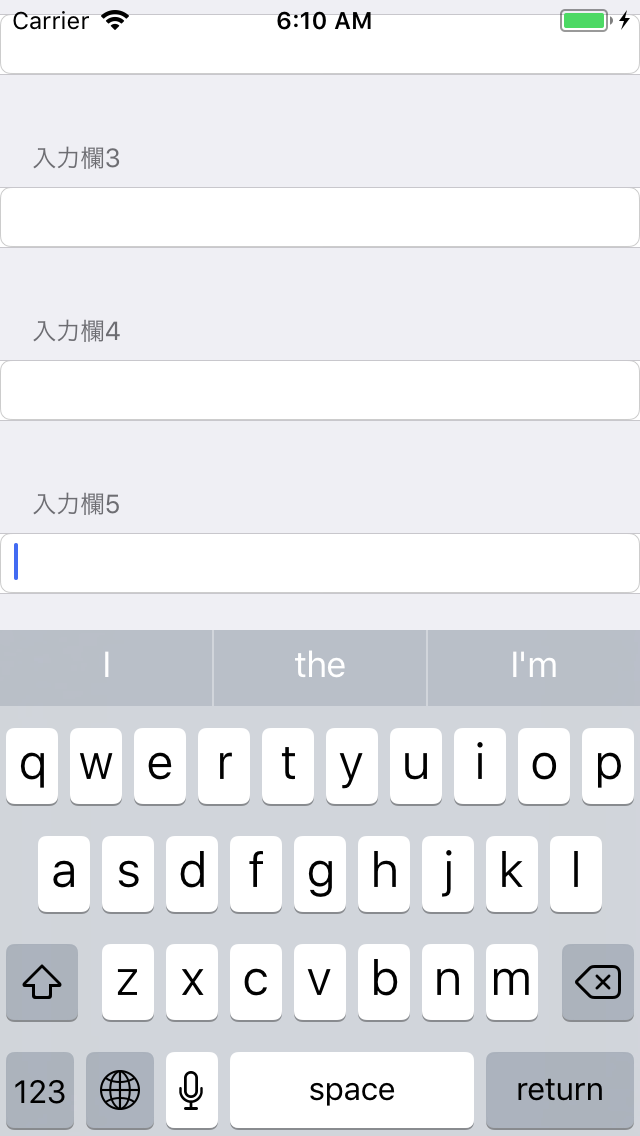
Static Cellが使えること - 入力欄をタップしてキーボードが表示された際、入力欄が隠れないよう、自動的にスクロールしてくれる点
Static Cellって?
- 静的にセクションやセルの数を指定するもの
- 設定画面など、単純なTableViewを使った画面を作りたいときに、サクッと作れて便利
- 普通の
UITableViewではStatic Cellは使えず、指定してもコンパイルエラーになる
入力欄のスクロール制御
-
UIScrollViewの中に入力欄を設置した場合、キーボードが表示されてもスクロール制御はされず、入力欄が隠れてしまうことがある- 入力欄が隠れないようにするためには、コード側でちょっとややこしいスクロール制御を加える必要がある
-
UITableViewControllerの中に入力欄を設置した場合、キーボードを開いても入力欄が隠れないように自動制御してくれるため、コード側での指定が不要で、とても簡単
Static Cell を使った入力画面の作成手順
準備
- プロジェクトを
Single View Appで作成 -
ViewController.swiftのUIViewControllerをUITableViewControllerに変更
import UIKit

class ViewController: UITableViewController {

    override func viewDidLoad() {
        super.viewDidLoad()
    }

}
Main.storyboard
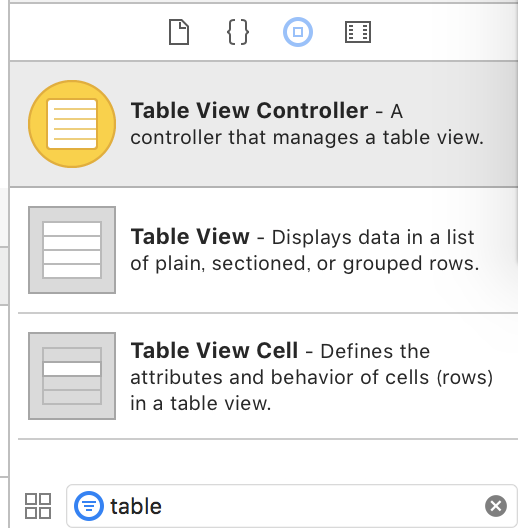
- Storyboard上に
Table View Controllerを設置
-
Storyboard Entry Pointを追加したTable View Controllerに変更 -
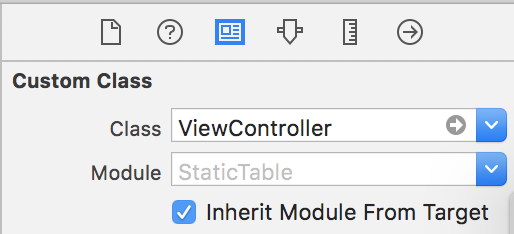
Identify InspectorパネルのCustom Class>Class欄に、ViewControllerを入力
-
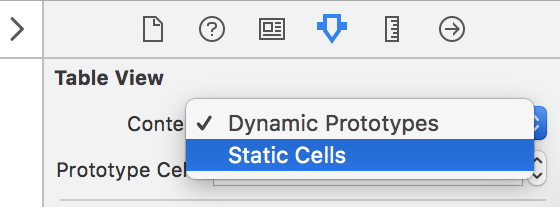
Attributes Inspectorパネルの最上部にあるContentをStatic Cellに変更
-
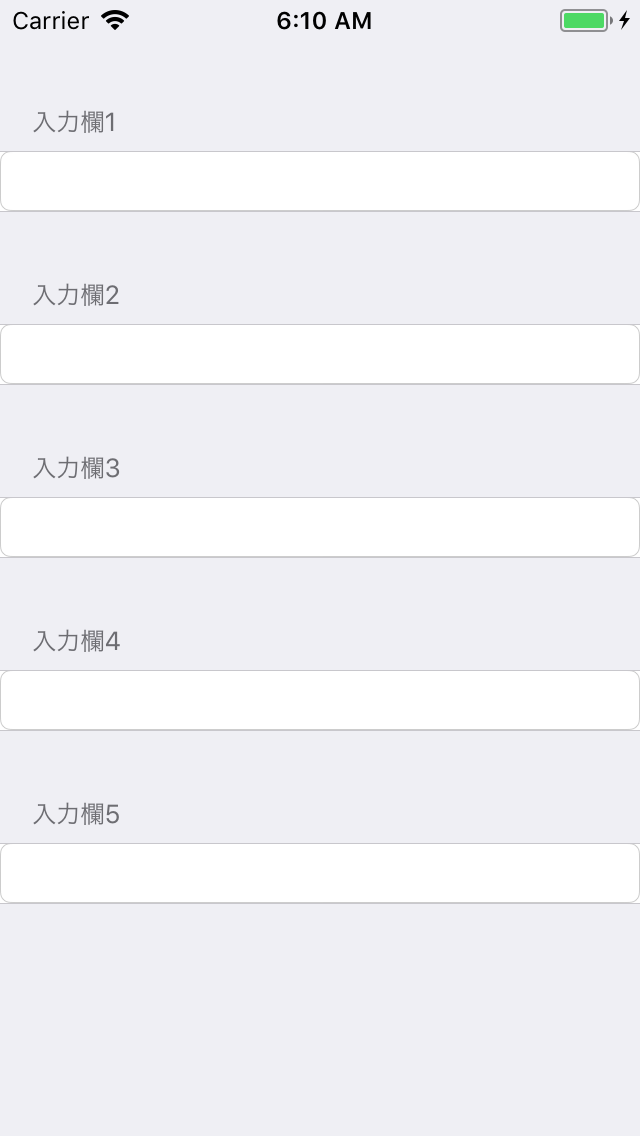
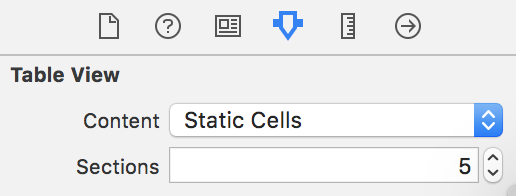
Sectionsの部分で、必要なセクション数に変更 (今回は5)
 - `Document Outline` パネルから `Table View Section` を選択し、 `Attributes Inspector` パネル の `Rows` 欄でCell数を指定し、 `Header` 欄でセクションのタイトルを指定

-
Table View Cellの中にText Fieldを設置し、上下左右にConstraintsを加える (今回は全て0)

備考
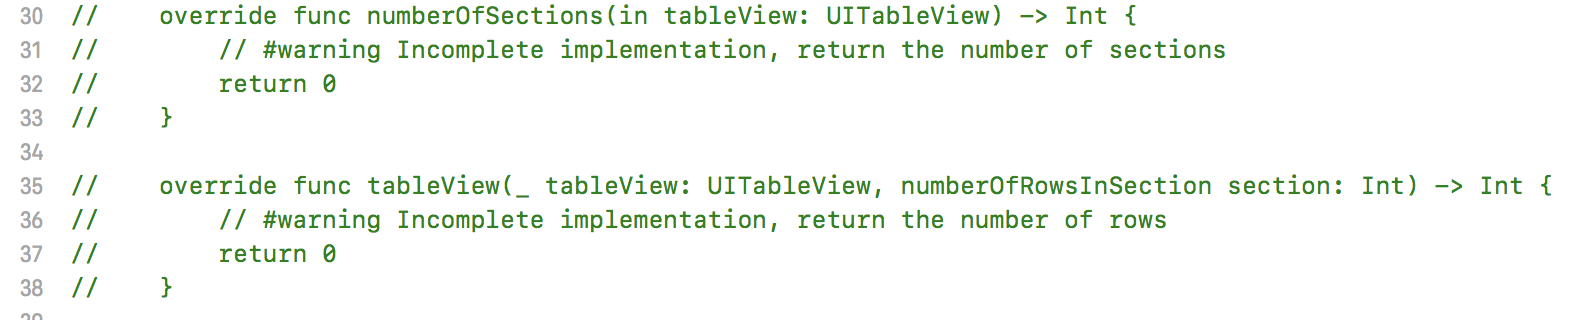
最初から UITableViewController でswiftファイルを作成した場合
- Static Cell にすることで不要となる
numberOfSections(in tableView: UITableView)とtableView(_ tableView: UITableView, numberOfRowsInSection section: Int)を削除
環境
- Xcode Version 9.4.1