個人的に長らく望んでいた UWP 版 Prism ですが、このたび Prism の Uno Platform 対応という形の Pull request がマージされました。そのおかげで UWP でも Prism が使えるようになりました。なんといっても Uno Platform は UWP のコードを Android/iOS/WebAssembly などで動かすプロジェクトだからね!
該当のPR: Add support for Uno Platform and WinUI #2054
こちらですが、Prism 8.0 での公開が予定されています。なので現段階では以下の MyGet からプレビュー版を入手して使う必要があります。
ただ、これを書いている時点の MyGet の Uno 用の Prism は参照に追加しただけでビルドエラーになってしまいます。そのビルドエラーになる修正自体はソースに反映されていて、Prism の Azure DevOps のビルドパイプラインでビルドされているので、そのビルド成果物の NuGet をダウンロードして、そこからパッケージを追加するようにしました。
私が試したのは #1717 のビルドパイプラインの成果物から NuGet のパッケージをダウンロードしてます。
では、早速使ってみましょう。UWP で DI コンテナーを Unity にしたい場合は Prism.Unity.Uno になります。

とりあえず MainPage.xaml はいらないので消します。そして Views フォルダーを作って、そこに Shell という名前でページを作りましょう。
そして、App.xaml を PrismApplication タグに置き換えます。
<prism:PrismApplication
    x:Class="PrismHelloWorld.App"
    xmlns="http://schemas.microsoft.com/winfx/2006/xaml/presentation"
    xmlns:x="http://schemas.microsoft.com/winfx/2006/xaml"
    xmlns:prism="using:Prism.Unity">
</prism:PrismApplication>
App.xaml.cs も PrismApplication に親クラスを置き換えて Prism ではおなじみのメソッドをオーバーライドします。とりあえず、先ほど作った Shell をメインの画面となるように CreateShell メソッドの戻り値として返すようにしました。
using Prism.Ioc;
using Prism.Unity;
using PrismHelloWorld.Views;
using Windows.UI.Xaml;

namespace PrismHelloWorld
{
    sealed partial class App : PrismApplication
    {
        public App()
        {
            this.InitializeComponent();
        }

        protected override UIElement CreateShell() => Container.Resolve<Shell>();

        protected override void RegisterTypes(IContainerRegistry containerRegistry)
        {
        }
    }
}
現状のソリューションエクスプローラーはこんな感じです。

では、実行してみましょう。
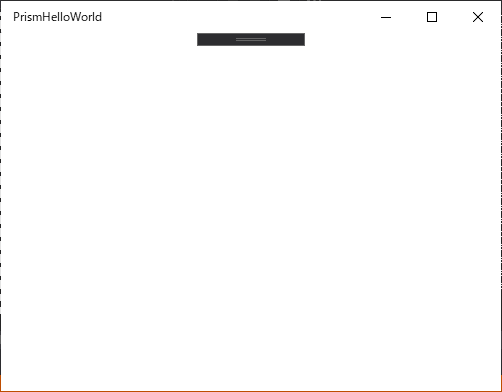
ちゃんとウィンドウが出ました!!
リージョンとモジュールの追加
では、Prism の画面遷移の機能であるリージョンを追加します。
Shell.xaml のコードを以下のようにしてリージョンを追加します。
<Page
    x:Class="PrismHelloWorld.Views.Shell"
    xmlns="http://schemas.microsoft.com/winfx/2006/xaml/presentation"
    xmlns:x="http://schemas.microsoft.com/winfx/2006/xaml"
    xmlns:local="using:PrismHelloWorld.Views"
    xmlns:d="http://schemas.microsoft.com/expression/blend/2008"
    xmlns:mc="http://schemas.openxmlformats.org/markup-compatibility/2006"
    xmlns:regions="using:Prism.Regions"
    mc:Ignorable="d"
    Background="{ThemeResource ApplicationPageBackgroundThemeBrush}">

    <Grid>
        <Grid.RowDefinitions>
            <RowDefinition Height="Auto" />
            <RowDefinition />
        </Grid.RowDefinitions>
        <TextBlock Text="The hello world app"
                   Style="{StaticResource HeaderTextBlockStyle}" />
        <ContentControl Grid.Row="1"
                        regions:RegionManager.RegionName="ContentRegion" />
    </Grid>
</Page>
動かすとこんな感じになります。まだリージョンに何もページを追加してないので、TextBlock が表示されているだけです。

ソリューションにクラスライブラリープロジェクトを追加して、Prism.Unity.Uno パッケージを追加します。Class1.cs は消して MainModule という名前でクラスを作ります。
そして IModule インターフェースを実装します。
using Prism.Ioc;
using Prism.Modularity;

namespace PrismHelloWorld.Main
{
    public class MainModule : IModule
    {
        public void OnInitialized(IContainerProvider containerProvider)
        {
        }

        public void RegisterTypes(IContainerRegistry containerRegistry)
        {
        }
    }
}
ここで登録する画面を作りましょう。Views フォルダーを作って MainView という名前のユーザーコントロールと、ViewModels フォルダーを作って MainViewModel という名前のクラスを作成します。
MainViewModel.cs は適当に以下のように作りました。
using Prism.Commands;
using Prism.Mvvm;
using Prism.Services.Dialogs;

namespace PrismHelloWorld.Main.ViewModels
{
    public class MainViewModel : BindableBase
    {
        public string Message => "Hello from MainViewModel";
    }
}
MainView.xaml.cs でコンパイル時データバインディング使うために DataContext を MainViewModel にキャストして返す ViewModel プロパティを定義します。
using PrismHelloWorld.Main.ViewModels;
using Windows.UI.Xaml.Controls;

namespace PrismHelloWorld.Main.Views
{
    public sealed partial class MainView : UserControl
    {
        private MainViewModel ViewModel => (MainViewModel)DataContext;
        public MainView()
        {
            this.InitializeComponent();
        }
    }
}
MainView.xaml のほうは、AutoWireViewModel の設定をして、適当に ViewModel の Message とバインドするための TextBlock を置きました。
<UserControl
    x:Class="PrismHelloWorld.Main.Views.MainView"
    xmlns="http://schemas.microsoft.com/winfx/2006/xaml/presentation"
    xmlns:x="http://schemas.microsoft.com/winfx/2006/xaml"
    xmlns:d="http://schemas.microsoft.com/expression/blend/2008"
    xmlns:mc="http://schemas.openxmlformats.org/markup-compatibility/2006"
    xmlns:mvvm="using:Prism.Mvvm"
    mvvm:ViewModelLocator.AutoWireViewModel="True"
    mc:Ignorable="d"
    d:DesignHeight="300"
    d:DesignWidth="400">

    <StackPanel>
        <TextBlock Text="{x:Bind ViewModel.Message}" />
    </StackPanel>
</UserControl>
画面が出来たので MainModule.cs でコンテナーに登録したりリージョンに表示するように設定してみたいと思います。
なんか、ここら辺書いてると WPF の Prism で色々やってたころを思い出して懐かしくなってきますね。
using Prism.Ioc;
using Prism.Modularity;
using Prism.Regions;
using PrismHelloWorld.Main.Views;

namespace PrismHelloWorld.Main
{
    public class MainModule : IModule
    {
        public void OnInitialized(IContainerProvider containerProvider)
        {
            var regionManager = containerProvider.Resolve<IRegionManager>();
            regionManager.RegisterViewWithRegion("ContentRegion", typeof(MainView));
        }

        public void RegisterTypes(IContainerRegistry containerRegistry)
        {
        }
    }
}
モジュールが出来たのでアプリ側から読み込むようにしましょう。モジュールのプロジェクトへの参照をメインのアプリ側に追加して App.xaml.cs でモジュールを ModuleCatalog に追加します。
using Prism.Ioc;
using Prism.Modularity;
using Prism.Unity;
using PrismHelloWorld.Main;
using PrismHelloWorld.Views;
using Windows.UI.Xaml;

namespace PrismHelloWorld
{
    sealed partial class App : PrismApplication
    {
        public App()
        {
            this.InitializeComponent();
        }

        protected override UIElement CreateShell() => Container.Resolve<Shell>();

        protected override void RegisterTypes(IContainerRegistry containerRegistry)
        {
        }

        protected override void ConfigureModuleCatalog(IModuleCatalog moduleCatalog)
        {
            moduleCatalog.AddModule<MainModule>();
        }
    }
}
実行してみると…

動いた!!
まとめ
とりあえずプロジェクトテンプレートで吐き出されるレベルのコードを作ってみただけですが、個人的に慣れ親しんだ WPF 版の Prism と同じ書き味で UWP のアプリ開発も出来るようになるのは、控えめに言って最高なので最高です。(語彙力の低下)
Prism 8.0 のリリースが楽しみですね。
今まで、UWP アプリ開発を楽にするためのフレームワークが個人的な決め手になるものが無かったのですが Prism が使えるなら割と積極的に使ってもいいかも。