はじめに
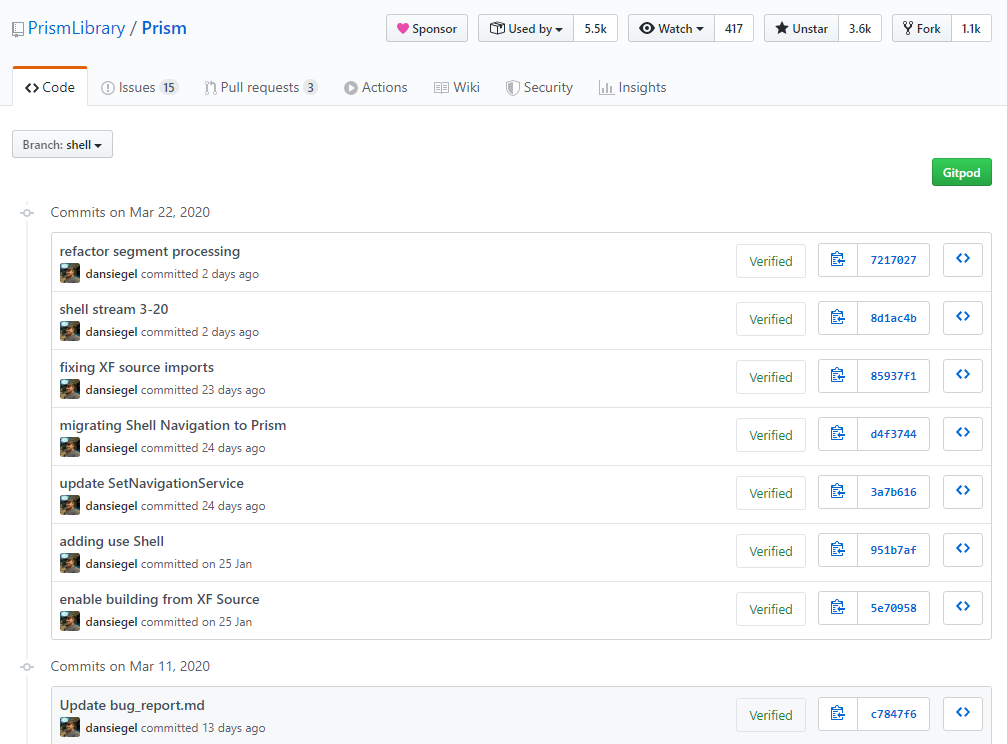
最終的に Prism 公式でのサポートは以下の Issue がクローズしてるかしてないかになります。
Support for Xamarin Form Shell?
Shell をサポートするためのブランチも、shell という名前のブランチが出来ていて、最近ちょいちょい更新が入っています。
以上を踏まえて、製品で採用するなら上記対応が終わるのを待ちましょう。ここは、ただ単に個人的にやってみた!というレベルの内容になります。
本文
ということでやっていきます。Xamarin.Forms でいい感じに Shell を使おうと思ったら以下の機能を捨てます。
- ナビゲーション
- View の BindingContext に ViewModel を自動でインジェクションしてくれる機能
ひとつずつ見ていきましょう。
ナビゲーション
Tab やら MasterDetail やら NavigationPage やらに細かく対応してくれている Xamarin.Forms のナビゲーションが Shell に対応していないのが一番の障害なので、これは使えません。
諦めましょう。
ナビゲーションの仕組みとうまく動くための便利 Behavior が裏でこっそり自動追加されているのも使えないので、それも諦めましょう。
View の BindingContext に ViewModel を自動でインジェクションしてくれる機能
SetAutoWireViewModel を自動で true にしてくれる処理がナビゲーション処理の中に組み込まれているので、View の BindingContext に自動で ViewModel が入るのですが、これもナビゲーション使えないので使えません。
昔のように自分で書きましょう。
対応してみよう
では、Prism.Forms のプロジェクトを作ります。NuGet パッケージも最新に更新しておきましょう。そして Views 名前空間に Shell を作りましょう。コンテンツページを AppShell という名前で作って基本クラスを Shell にして XAML も Shell にします。
using System;
using System.Collections.Generic;
using System.Linq;
using System.Text;
using System.Threading.Tasks;

using Xamarin.Forms;
using Xamarin.Forms.Xaml;

namespace BlankApp3.Views
{
    [XamlCompilation(XamlCompilationOptions.Compile)]
    public partial class AppShell : Shell
    {
        public AppShell()
        {
            InitializeComponent();
        }
    }
}
<?xml version="1.0" encoding="utf-8" ?>
<Shell xmlns="http://xamarin.com/schemas/2014/forms"
       xmlns:x="http://schemas.microsoft.com/winfx/2009/xaml"
       xmlns:d="http://xamarin.com/schemas/2014/forms/design"
       xmlns:mc="http://schemas.openxmlformats.org/markup-compatibility/2006"
       xmlns:views="clr-namespace:BlankApp3.Views"
       mc:Ignorable="d"
       x:Class="BlankApp3.Views.AppShell">
    <views:MainPage />
</Shell>
とりあえず MainPage をデフォルトで表示しておくようにしました。
そして、App.xaml.cs の OnInitialized でナビゲーションしているところを MainPage を直接設定するようにします。そして、RegisterTypes もデフォルトではナビゲーション用のしかないので消しておきます。
using Prism;
using Prism.Ioc;
using BlankApp3.ViewModels;
using BlankApp3.Views;
using Xamarin.Forms;
using Xamarin.Forms.Xaml;

[assembly: XamlCompilation(XamlCompilationOptions.Compile)]
namespace BlankApp3
{
    public partial class App
    {
        /*
         * The Xamarin Forms XAML Previewer in Visual Studio uses System.Activator.CreateInstance.
         * This imposes a limitation in which the App class must have a default constructor.
         * App(IPlatformInitializer initializer = null) cannot be handled by the Activator.
         */
        public App() : this(null) { }

        public App(IPlatformInitializer initializer) : base(initializer) { }

        protected override async void OnInitialized()
        {
            InitializeComponent();

            // await NavigationService.NavigateAsync("NavigationPage/MainPage");
            MainPage = new AppShell();
        }

        protected override void RegisterTypes(IContainerRegistry containerRegistry)
        {
            //containerRegistry.RegisterForNavigation<NavigationPage>();
            //containerRegistry.RegisterForNavigation<MainPage, MainPageViewModel>();
        }
    }
}
すっきりだね。この時点で実行してみましょう。

とりあえず画面は動きました。
ViewModel との紐づけ
MainPage.xaml で以下のように Title に ViewModel の Title をバインドしていますが
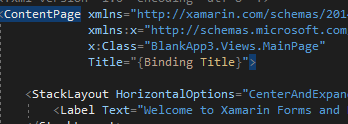
ViewModel で指定している Main Page という文字列が出ていません。これは自動での View と ViewModel の紐づけが動かないからですね。ということで MainPage.xaml に明示的に AutoWireViewModel を指定しましょう。
<?xml version="1.0" encoding="utf-8" ?>
<ContentPage xmlns="http://xamarin.com/schemas/2014/forms"
             xmlns:x="http://schemas.microsoft.com/winfx/2009/xaml"
             x:Class="BlankApp3.Views.MainPage"
             xmlns:prism="http://prismlibrary.com"
             prism:ViewModelLocator.AutowireViewModel="True"
             Title="{Binding Title}">

    <StackLayout HorizontalOptions="CenterAndExpand" VerticalOptions="CenterAndExpand">
        <Label Text="Welcome to Xamarin Forms and Prism!" />
    </StackLayout>

</ContentPage>
デバッグ実行のまま書き換えたら、ホットリロードの機能がうまく動いてくれて勝手にエミュレーターの見た目が更新されました。ちゃんと動いてる!便利!

画面遷移したい
Shell での画面遷移は以下のドキュメントにまとまってます。
ViewModel をユニットテスト可能な状態をキープしつつ、ナビゲーションを ViewModel でやりたいので、これをラップするためのクラスを作ります。とりあえず必要最低限を用意。
using System.Threading.Tasks;
using Xamarin.Forms;

namespace BlankApp3.Navigations
{
    public interface IShellNavigationService
    {
        ShellNavigationState CurrentState { get; }

        Task GoToAsync(ShellNavigationState state);
        Task GoToAsync(ShellNavigationState state, bool animated);
        Task PopAsync();
    }

    public class ShellNavigationService : IShellNavigationService
    {
        public Task GoToAsync(ShellNavigationState state) => Shell.Current.GoToAsync(state);
        public Task GoToAsync(ShellNavigationState state, bool animated) => Shell.Current.GoToAsync(state, animated);
        public ShellNavigationState CurrentState => Shell.Current.CurrentState;
        public Task PopAsync() => Shell.Current.Navigation.PopAsync();
    }
}
そして、これを DI コンテナに登録します。登録する際に Prism.Forms の INavigationService と決別するために PrismApplicationBase クラスの RegisterRequiredTypes をオーバーライドして追加します。
using Prism;
using Prism.Ioc;
using BlankApp3.ViewModels;
using BlankApp3.Views;
using Xamarin.Forms;
using Xamarin.Forms.Xaml;
using BlankApp3.Navigations;

[assembly: XamlCompilation(XamlCompilationOptions.Compile)]
namespace BlankApp3
{
    public partial class App
    {
        /*
         * The Xamarin Forms XAML Previewer in Visual Studio uses System.Activator.CreateInstance.
         * This imposes a limitation in which the App class must have a default constructor.
         * App(IPlatformInitializer initializer = null) cannot be handled by the Activator.
         */
        public App() : this(null) { }

        public App(IPlatformInitializer initializer) : base(initializer) { }

        protected override void OnInitialized()
        {
            InitializeComponent();

            // await NavigationService.NavigateAsync("NavigationPage/MainPage");
            MainPage = new AppShell();
        }

        protected override void RegisterTypes(IContainerRegistry containerRegistry)
        {
            //containerRegistry.RegisterForNavigation<NavigationPage>();
            //containerRegistry.RegisterForNavigation<MainPage, MainPageViewModel>();
        }

        protected override void RegisterRequiredTypes(IContainerRegistry containerRegistry)
        {
            base.RegisterRequiredTypes(containerRegistry);
            containerRegistry.RegisterSingleton<IShellNavigationService, ShellNavigationService>();
        }
    }
}
遷移先のページとして NextPage を Views フォルダーに追加します。この際なので ViewModelBase.cs から各種ナビゲーション用コールバックを排除して IShellNavigationService を受け取るようにしましょう。
using BlankApp3.Navigations;
using Prism.Commands;
using Prism.Mvvm;
using Prism.Navigation;
using System;
using System.Collections.Generic;
using System.Text;

namespace BlankApp3.ViewModels
{
    public class ViewModelBase : BindableBase //, IInitialize, INavigationAware, IDestructible
    {
        //protected INavigationService NavigationService { get; private set; }

        private string _title;
        public string Title
        {
            get { return _title; }
            set { SetProperty(ref _title, value); }
        }

        protected IShellNavigationService ShellNavigationService { get; }

        public ViewModelBase(IShellNavigationService shellNavigationService)
        {
            ShellNavigationService = shellNavigationService;
        }

        //public ViewModelBase(INavigationService navigationService)
        //{
        //    NavigationService = navigationService;
        //}

        //public virtual void Initialize(INavigationParameters parameters)
        //{

        //}

        //public virtual void OnNavigatedFrom(INavigationParameters parameters)
        //{

        //}

        //public virtual void OnNavigatedTo(INavigationParameters parameters)
        //{

        //}

        //public virtual void Destroy()
        //{

        //}
    }
}
MainPage.xaml.cs に以下のように画面遷移する処理を追加して…
using BlankApp3.Navigations;
using Prism.Commands;
using Prism.Mvvm;
using Prism.Navigation;
using System;
using System.Collections.Generic;
using System.Linq;
using System.Text;

namespace BlankApp3.ViewModels
{
    public class MainPageViewModel : ViewModelBase
    {
        private DelegateCommand _navigateToNextPageCommand;
        public DelegateCommand NavigateToNextPageCommand =>
            _navigateToNextPageCommand ?? (_navigateToNextPageCommand = new DelegateCommand(ExecuteNavigateToNextPageCommand));

        private async void ExecuteNavigateToNextPageCommand()
        {
            await ShellNavigationService.GoToAsync("//next");
        }

        public MainPageViewModel(IShellNavigationService navigationService)
            : base(navigationService)
        {
            Title = "Main Page";
        }
    }
}
MainPage.xaml にコマンドに紐づいた Button を作っておきます。
<?xml version="1.0" encoding="utf-8" ?>
<ContentPage xmlns="http://xamarin.com/schemas/2014/forms"
             xmlns:x="http://schemas.microsoft.com/winfx/2009/xaml"
             x:Class="BlankApp3.Views.MainPage"
             xmlns:prism="http://prismlibrary.com"
             prism:ViewModelLocator.AutowireViewModel="True"
             Title="{Binding Title}">

    <StackLayout HorizontalOptions="CenterAndExpand" VerticalOptions="CenterAndExpand">
        <Label Text="Welcome to Xamarin Forms and Prism!" />
        <Button Text="Go to Next"
                Command="{Binding NavigateToNextPageCommand}" />
    </StackLayout>

</ContentPage>
NextPage を Shell に追加します。あわせて ShellContent でラップしてタイトルとかも追加してハンバーガーメニューに出るようにします。
<?xml version="1.0" encoding="utf-8" ?>
<Shell xmlns="http://xamarin.com/schemas/2014/forms"
       xmlns:x="http://schemas.microsoft.com/winfx/2009/xaml"
       xmlns:d="http://xamarin.com/schemas/2014/forms/design"
       xmlns:mc="http://schemas.openxmlformats.org/markup-compatibility/2006"
       xmlns:views="clr-namespace:BlankApp3.Views"
       mc:Ignorable="d"
       x:Class="BlankApp3.Views.AppShell">
    <ShellContent Title="Main" Route="main">
        <views:MainPage />
    </ShellContent>
    <ShellContent Title="Next" Route="next">
        <views:NextPage />
    </ShellContent>
</Shell>
実行してみましょう。

私の PC のマウスカーソルの形がちょっと変なのを除けば思った通りに動いています。
しかし、現状では戻るボタンを押すとさくっとアプリが終了してしまいます。
どうにかしようと思ったらこんな Issue が…
Shell - OnBackButtonPressed not executing
諦めよう。
まとめ
ということでナビゲーションの機能を使うことをあきらめるなら Prism.Forms でも Shell が使えます。でも、大人しく対応を待つのがいいでしょう。