React や Angular は Visual Studio にテンプレートがあるのでそれを使えばいいでしょう。
ドキュメントにも React と Angular についての解説があります。
ASP.NET Core でのシングルページアプリケーションの認証の概要
まぁ、最近は Google, Twitter, Facebook, Azure AD, etc... の外部認証プロバイダーを何かしら使うのがいいとは思うのですが、内部でユーザー管理するというのも需要はあると思うので、IdentityServer 4 で ASP.NET Core Identity 使って API のアプリ側(ASP.NET Core)でDBにユーザーを突っ込むパターンをしてみようと思います。
API サーバー側で重要なのは Startup.cs です。呼び出し元の Client のための CORS の設定と、認証の設定をしています。ついでに NSwag を使って Swagger にも対応する設定を追加しています。
RequireConfirmedAccount を false にして、メールアドレスの確認処理はスキップしています。ここを true にするとメール送信処理が必要になるので。
using Microsoft.AspNetCore.Authentication;
using Microsoft.AspNetCore.Builder;
using Microsoft.AspNetCore.Hosting;
using Microsoft.EntityFrameworkCore;
using TodoApi.Server.Data;
using TodoApi.Server.Models;
using Microsoft.Extensions.Configuration;
using Microsoft.Extensions.DependencyInjection;
using Microsoft.Extensions.Hosting;

namespace TodoApi.Server
{
    public class Startup
    {
        private static readonly string MyAllowSpecificOrigins = "_myAllowSpecificOrigins";
        private IHostEnvironment _env;
        public Startup(IConfiguration configuration)
        {
            Configuration = configuration;
        }

        public IConfiguration Configuration { get; }

        // This method gets called by the runtime. Use this method to add services to the container.
        public void ConfigureServices(IServiceCollection services)
        {
            services.AddCors(options =>
            {
                options.AddPolicy(name: MyAllowSpecificOrigins,
                    builder =>
                    {
                        // TODO: IsProduction のときの処理も追加する
                        if (_env.IsDevelopment())
                        {
                            builder.WithOrigins("http://localhost:8080")
                                .AllowAnyHeader()
                                .AllowAnyMethod();
                        }
                    });
            });

            services.AddDbContext<ApplicationDbContext>(options =>
                options.UseSqlServer(
                    Configuration.GetConnectionString("DefaultConnection")));

            services.AddDefaultIdentity<ApplicationUser>(options => options.SignIn.RequireConfirmedAccount = false)
                .AddEntityFrameworkStores<ApplicationDbContext>();

            services.AddIdentityServer()
                .AddApiAuthorization<ApplicationUser, ApplicationDbContext>();

            services.AddAuthentication()
                .AddIdentityServerJwt();

            services.AddControllersWithViews();
            services.AddRazorPages();

            services.AddSwaggerDocument();
        }

        // This method gets called by the runtime. Use this method to configure the HTTP request pipeline.
        public void Configure(IApplicationBuilder app, IWebHostEnvironment env)
        {
            _env = env;
            if (env.IsDevelopment())
            {
                app.UseDeveloperExceptionPage();
                app.UseDatabaseErrorPage();
            }
            else
            {
                app.UseExceptionHandler("/Error");
                app.UseHsts();
            }

            app.UseHttpsRedirection();
            app.UseStaticFiles();

            app.UseRouting();

            // CORS, Swagger, 認証の設定
            app.UseCors(MyAllowSpecificOrigins);
            app.UseOpenApi();
            app.UseSwaggerUi3();

            app.UseAuthentication();
            app.UseIdentityServer();
            app.UseAuthorization();
            app.UseEndpoints(endpoints =>
            {
                endpoints.MapControllerRoute(
                    name: "default",
                    pattern: "{controller}/{action=Index}/{id?}");
                endpoints.MapRazorPages();
            });
        }
    }
}
あとは、ApplicationDbContext, ApplicationUser クラスを定義して、接続文字列をユーザーシークレットか appsettings.json か appsettings.Development.json あたりに定義しておけば動きます。DB は Entity Framework のマイグレーション機能か何かで作っておきましょう。
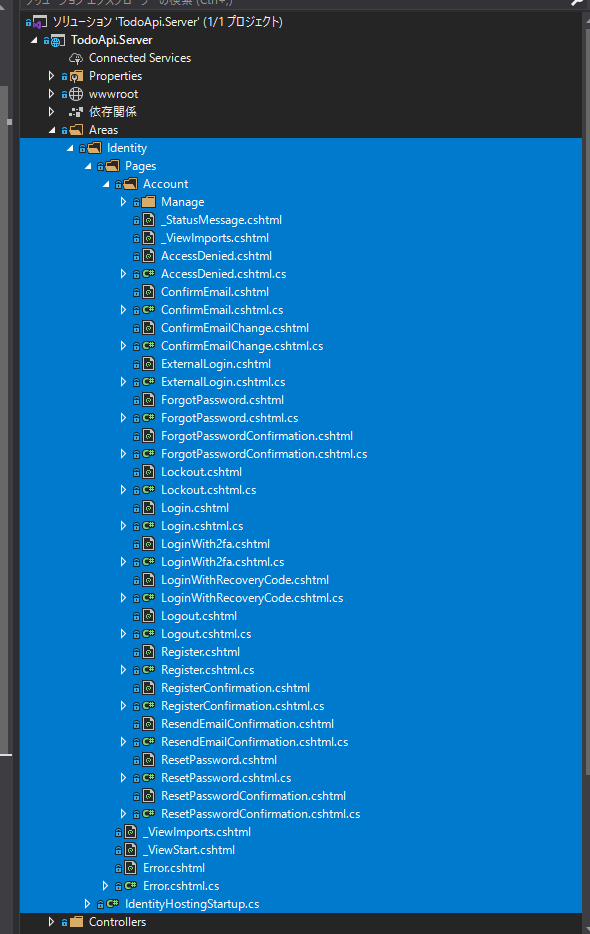
認証ページの見た目とかをカスタマイズしたい場合はプロジェクトの右クリックメニューから追加で「新規スキャフォールディング アイテムの追加」で ID を追加すればファイルが沢山生成されるので、いじってカスタマイズできます。
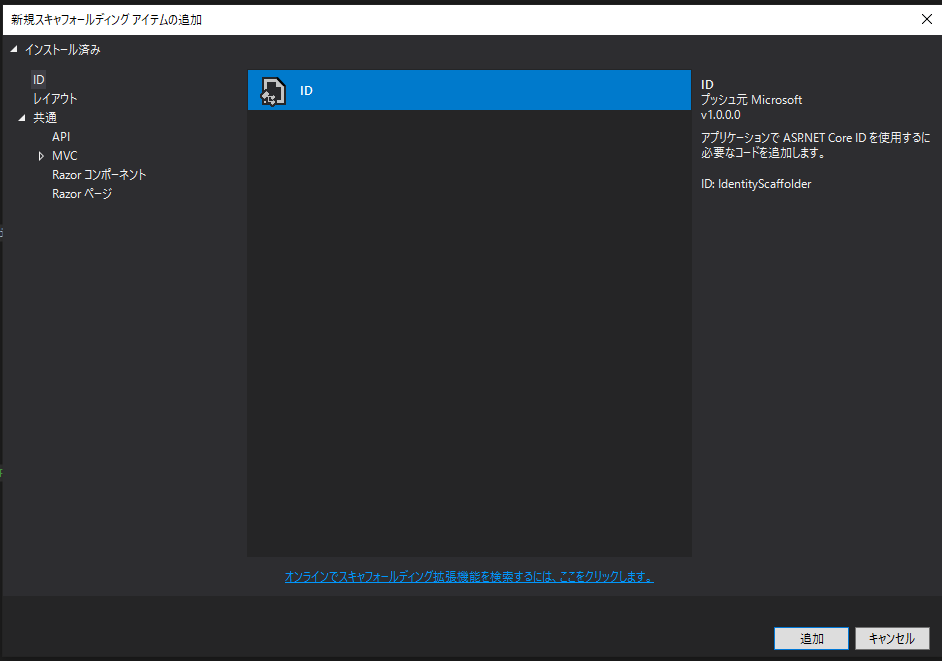
本当、ドン引きするくらい作ってくれます。
そして、OidcConfigurationController を作ります。以下のような感じで
using Microsoft.AspNetCore.ApiAuthorization.IdentityServer;
using Microsoft.AspNetCore.Mvc;
using Microsoft.Extensions.Logging;

namespace TodoApi.Server.Controllers
{
    public class OidcConfigurationController : Controller
    {
        private readonly ILogger<OidcConfigurationController> _logger;

        public OidcConfigurationController(IClientRequestParametersProvider clientRequestParametersProvider, ILogger<OidcConfigurationController> logger)
        {
            ClientRequestParametersProvider = clientRequestParametersProvider;
            _logger = logger;
        }

        public IClientRequestParametersProvider ClientRequestParametersProvider { get; }

        [HttpGet("_configuration/{clientId}")]
        public IActionResult GetClientRequestParameters([FromRoute] string clientId)
        {
            var parameters = ClientRequestParametersProvider.GetClientParameters(HttpContext, clientId);
            return Ok(parameters);
        }
    }
}
このコントローラーから返す情報は、appsettings.json や appsettings.Development.json で Clients のところに定義します。外部の SPA の場合は Profile に SPA を指定します。
{
  "Logging": {
    "LogLevel": {
      "Default": "Information",
      "Microsoft": "Warning",
      "Microsoft.Hosting.Lifetime": "Information"
    }
  },
  "IdentityServer": {
    "Key": {
      "Type": "Development"
    },
    "Clients": {
      "todoapp-client": {
        "Profile": "SPA",
        "RedirectUri": "http://localhost:8080/authentication/login-callback",
        "LogoutUri": "http://localhost:8080/authentication/logout-callback"
      }
    }

  },
  "ConnectionStrings": {
    "DefaultConnection": "Data Source=(localdb)\\MSSQLLocalDB;Initial Catalog=ApiTest;Integrated Security=True;Connect Timeout=30;Encrypt=False;TrustServerCertificate=False;ApplicationIntent=ReadWrite;MultiSubnetFailover=False"
  }
}
Authorize が属性をつけた Controller を適当に用意しておきましょう。
using System;
using System.Collections.Generic;
using System.Linq;
using System.Threading.Tasks;
using Microsoft.AspNetCore.Authorization;
using Microsoft.AspNetCore.Mvc;
using Microsoft.Extensions.Logging;

namespace TodoApi.Server.Controllers
{
    [Authorize]
    [ApiController]
    [Route("[controller]")]
    public class WeatherForecastController : ControllerBase
    {
        private static readonly string[] Summaries = new[]
        {
            "Freezing", "Bracing", "Chilly", "Cool", "Mild", "Warm", "Balmy", "Hot", "Sweltering", "Scorching"
        };

        private readonly ILogger<WeatherForecastController> _logger;

        public WeatherForecastController(ILogger<WeatherForecastController> logger)
        {
            _logger = logger;
        }

        [HttpGet]
        public IEnumerable<WeatherForecast> Get()
        {
            var rng = new Random();
            return Enumerable.Range(1, 5).Select(index => new WeatherForecast
            {
                Date = DateTime.Now.AddDays(index),
                TemperatureC = rng.Next(-20, 55),
                Summary = Summaries[rng.Next(Summaries.Length)],
            })
            .ToArray();
        }
    }
}
Vue.js 側
oidc-client を入れて以下のような感じでログイン処理を書きます。ちなみに、これは ASP.NET Core の React のプロジェクトテンプレートに含まれてる AuthorizeService.js をコピペして TypeScript にしました。
async signIn(state: SignInState): Promise<SignInResult> {
    await this.ensureUserManagerInitialized();
    assertIsDefined(this.userManager);
    try {
        const silentUser = await this.userManager.signinSilent(this.createArguments(null));
        this.updateState(silentUser);
        return this.success(state);
    } catch (silentError) {
        // User might not be authenticated, fallback to popup authentication
        console.log("Silent authentication error: ", silentError);

        try {
            if (this._popUpDisabled) {
                throw new Error('Popup disabled. Change \'AuthorizeService.js:AuthorizeService._popupDisabled\' to false to enable it.')
            }

            const popUpUser = await this.userManager.signinPopup(this.createArguments(null));
            this.updateState(popUpUser);
            return this.success(state);
        } catch (popUpError) {
            if (popUpError.message === "Popup window closed") {
                // The user explicitly cancelled the login action by closing an opened popup.
                return this.error("The user closed the window.");
            } else if (!this._popUpDisabled) {
                console.log("Popup authentication error: ", popUpError);
            }

            // PopUps might be blocked by the user, fallback to redirect
            try {
                await this.userManager.signinRedirect(this.createArguments(state));
                return this.redirect();
            } catch (redirectError) {
                console.log("Redirect authentication error: ", redirectError);
                return this.error(redirectError);
            }
        }
    }
}
_popUpDisabled というプロパティが AuthorizeService にあるので、false にしておきます。Edge で動かなくても知らん。
この AuthorizationService を使って signIn メソッドを呼び出すと画面が立ち上がってサインイン出来るようになります。
ルーターの beforeEach で認証が必要なメタデータがあったらサインインするような処理を組んでおくといい。
router.beforeEach(async (to, from, next) => {
  await store.auth.getUser();
  if (to.matched.some(x => !!x.meta?.requiresLogin)) {
    if (store.auth.isAuthenticated) {
      next();
    } else {
      const returnUrl = to.fullPath;
      const redirectUrl = `${ApplicationPaths.Login}?${QueryParameterNames.ReturnUrl}=${encodeURI(returnUrl)}`
      const result = await store.auth.signIn({
        returnUrl: redirectUrl,
      });
      switch (result.status) {
        case AuthenticationResultStatus.Redirect:
          break;
        case AuthenticationResultStatus.Success:
          await store.auth.getUser();
          next();
          break;
        case AuthenticationResultStatus.Fail:
          next(`/error?message=${result.message}`);
          break;
        default:
          throw new Error(`Invalid status result ${result.status}.`);
      }

    }
  } else {
    next();
  }
});
アクセストークンの取得はサインインが終わったタイミングでアクセストークンをゲットしておいて、axios の interceptors でヘッダーに付与するようにしておきました。
_axios.interceptors.request.use(
  function(config) {
    // Do something before request is sent
    if (store.auth.isAuthenticated) {
      config.headers = config.headers ?? {};
      config.headers['Authorization'] = `Bearer ${store.auth.accessToken}`;
    }
    return config;
  },
  function(error) {
    // Do something with request error
    return Promise.reject(error);
  }
);
正直クライアントサイドはたくさん書きすぎて説明しきれないので、コードを GitHub に上げてお茶をにごす
動きは以下のような感じです。Forecasts ページが認証が必要なページになります。
Forecasts ページに表示してるデータはサーバーの認証が必要な API からとってきています。
