13
6

Delete article

Deleted articles cannot be recovered.

Draft of this article would be also deleted.

Are you sure you want to delete this article?

More than 5 years have passed since last update.

mac で eps 形式の図を作成する

Last updated at Posted at 2019-07-12

本記事の概要

mac 環境で eps ファイルを作成する方法について書いてます.
Keynote で作成した図を pdf に書き出し,
それをさらに eps 形式に変換する方法を書いています.

執筆時点での筆者のソフトウェア環境:

  • macOS 10.14.5
  • Keynote 9.1
  • TeXShop 4.27

手順

図を作成して PDF に書き出す

  1. Keynote (または PowerPoint などでも可) で図を作ります.
  2. [ファイル]->[プリント] をクリックします (または command+P).
  3. [ページ: 選択部分] にチェックを入れます.
  4. 左下のプルダウンから [PDFとして保存] を選択し,任意の場所に保存します.
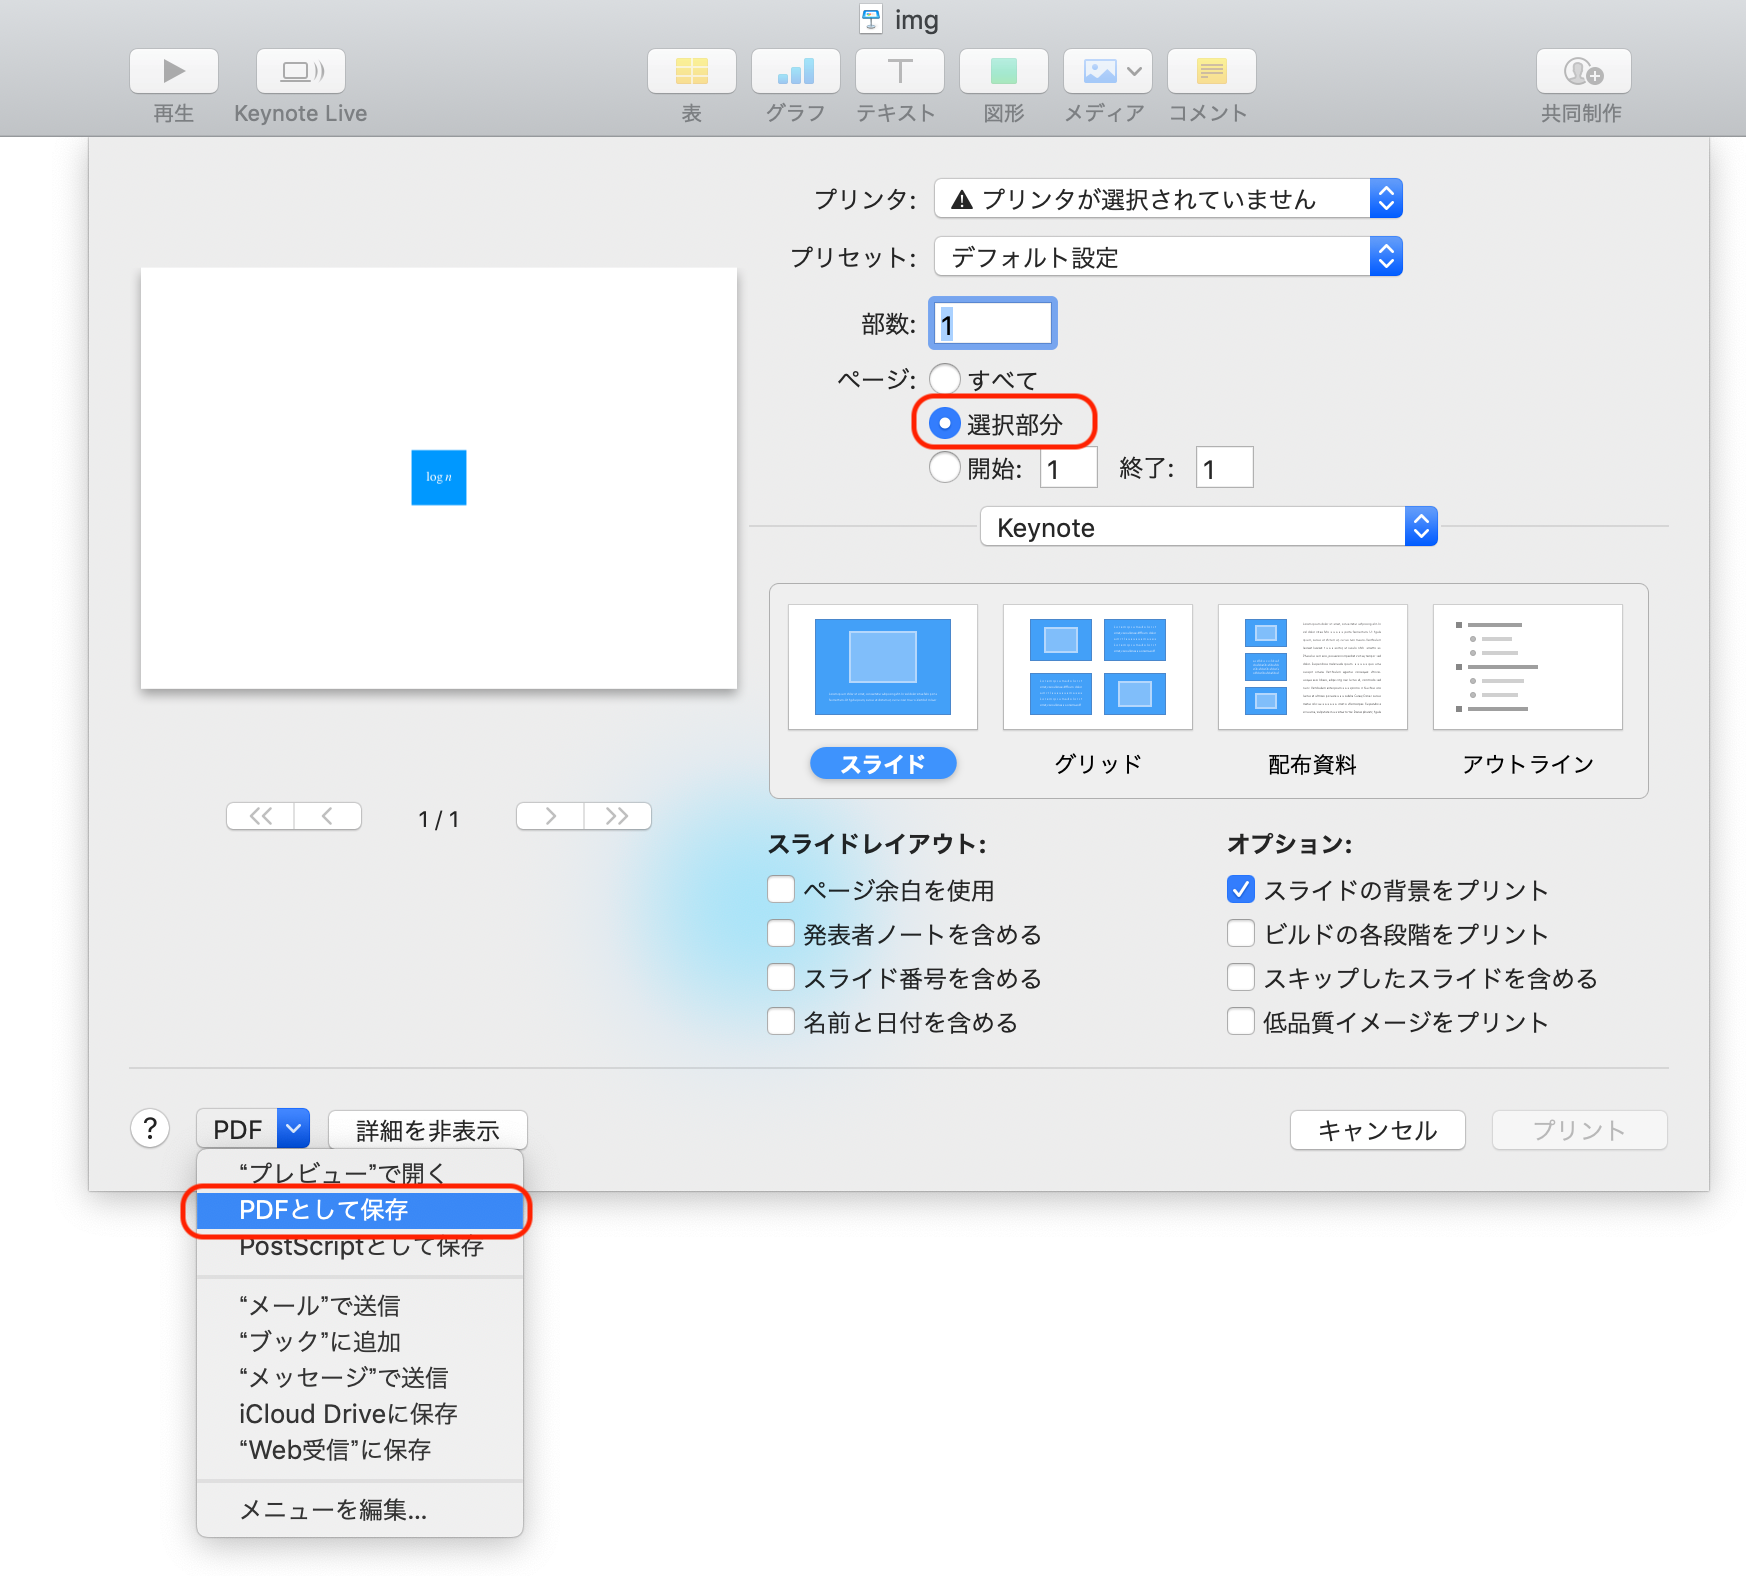
1.png

作成した PDF を TeXShop で開き EPS に変換する

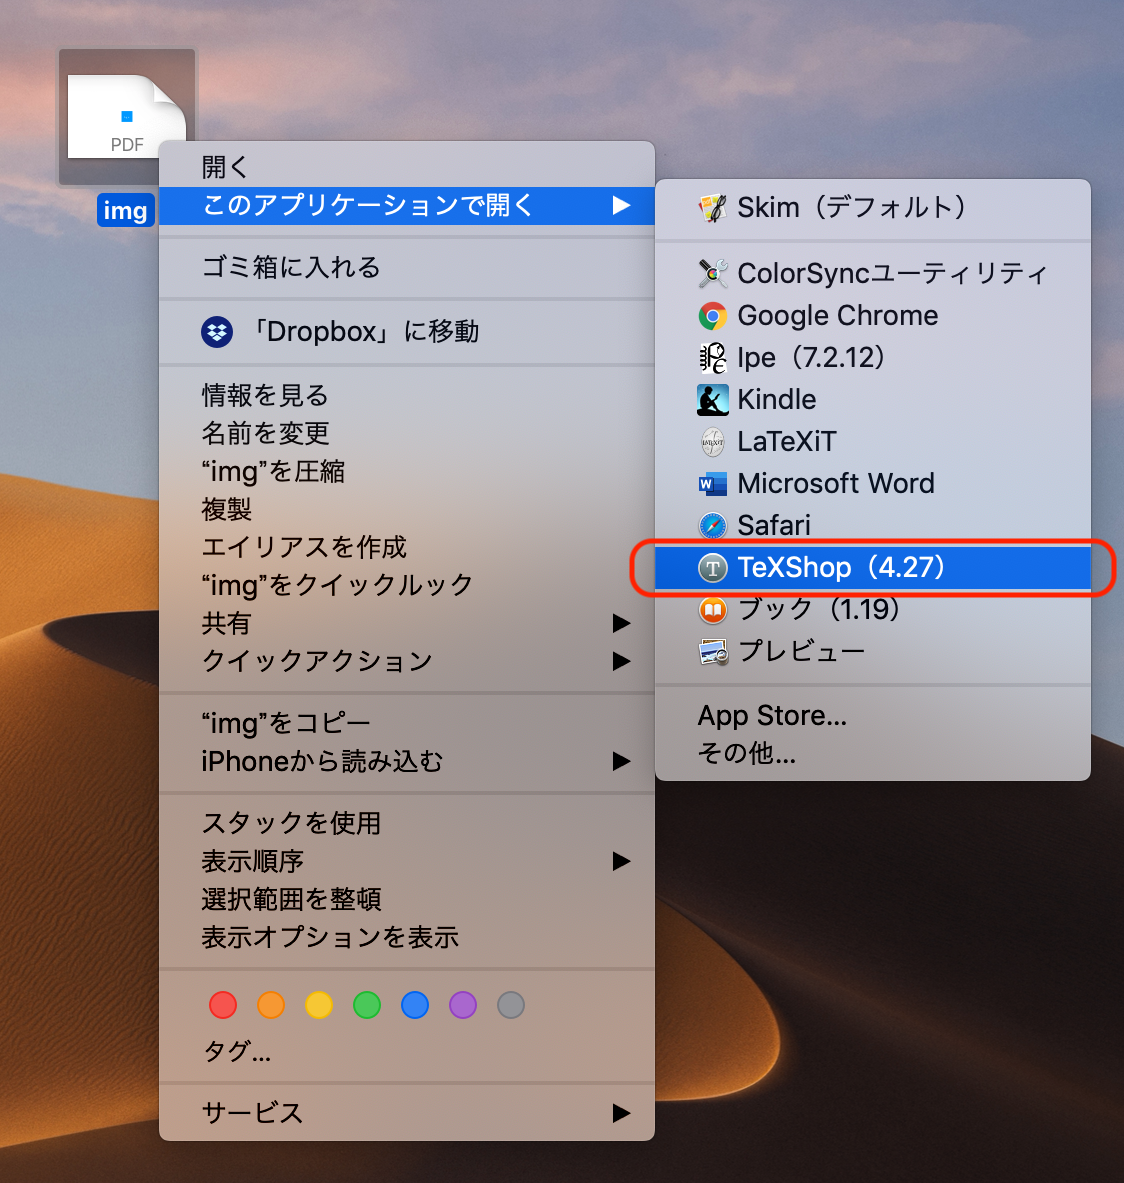
  1. 作成した PDF ファイルを TeXShop で開きます.
2.png
  1. 矩形選択モードで EPS ファイルに変換したい部分を選択し,その状態で [プレビュー]->[選択部分をファイルに保存] をクリックします.
3.png
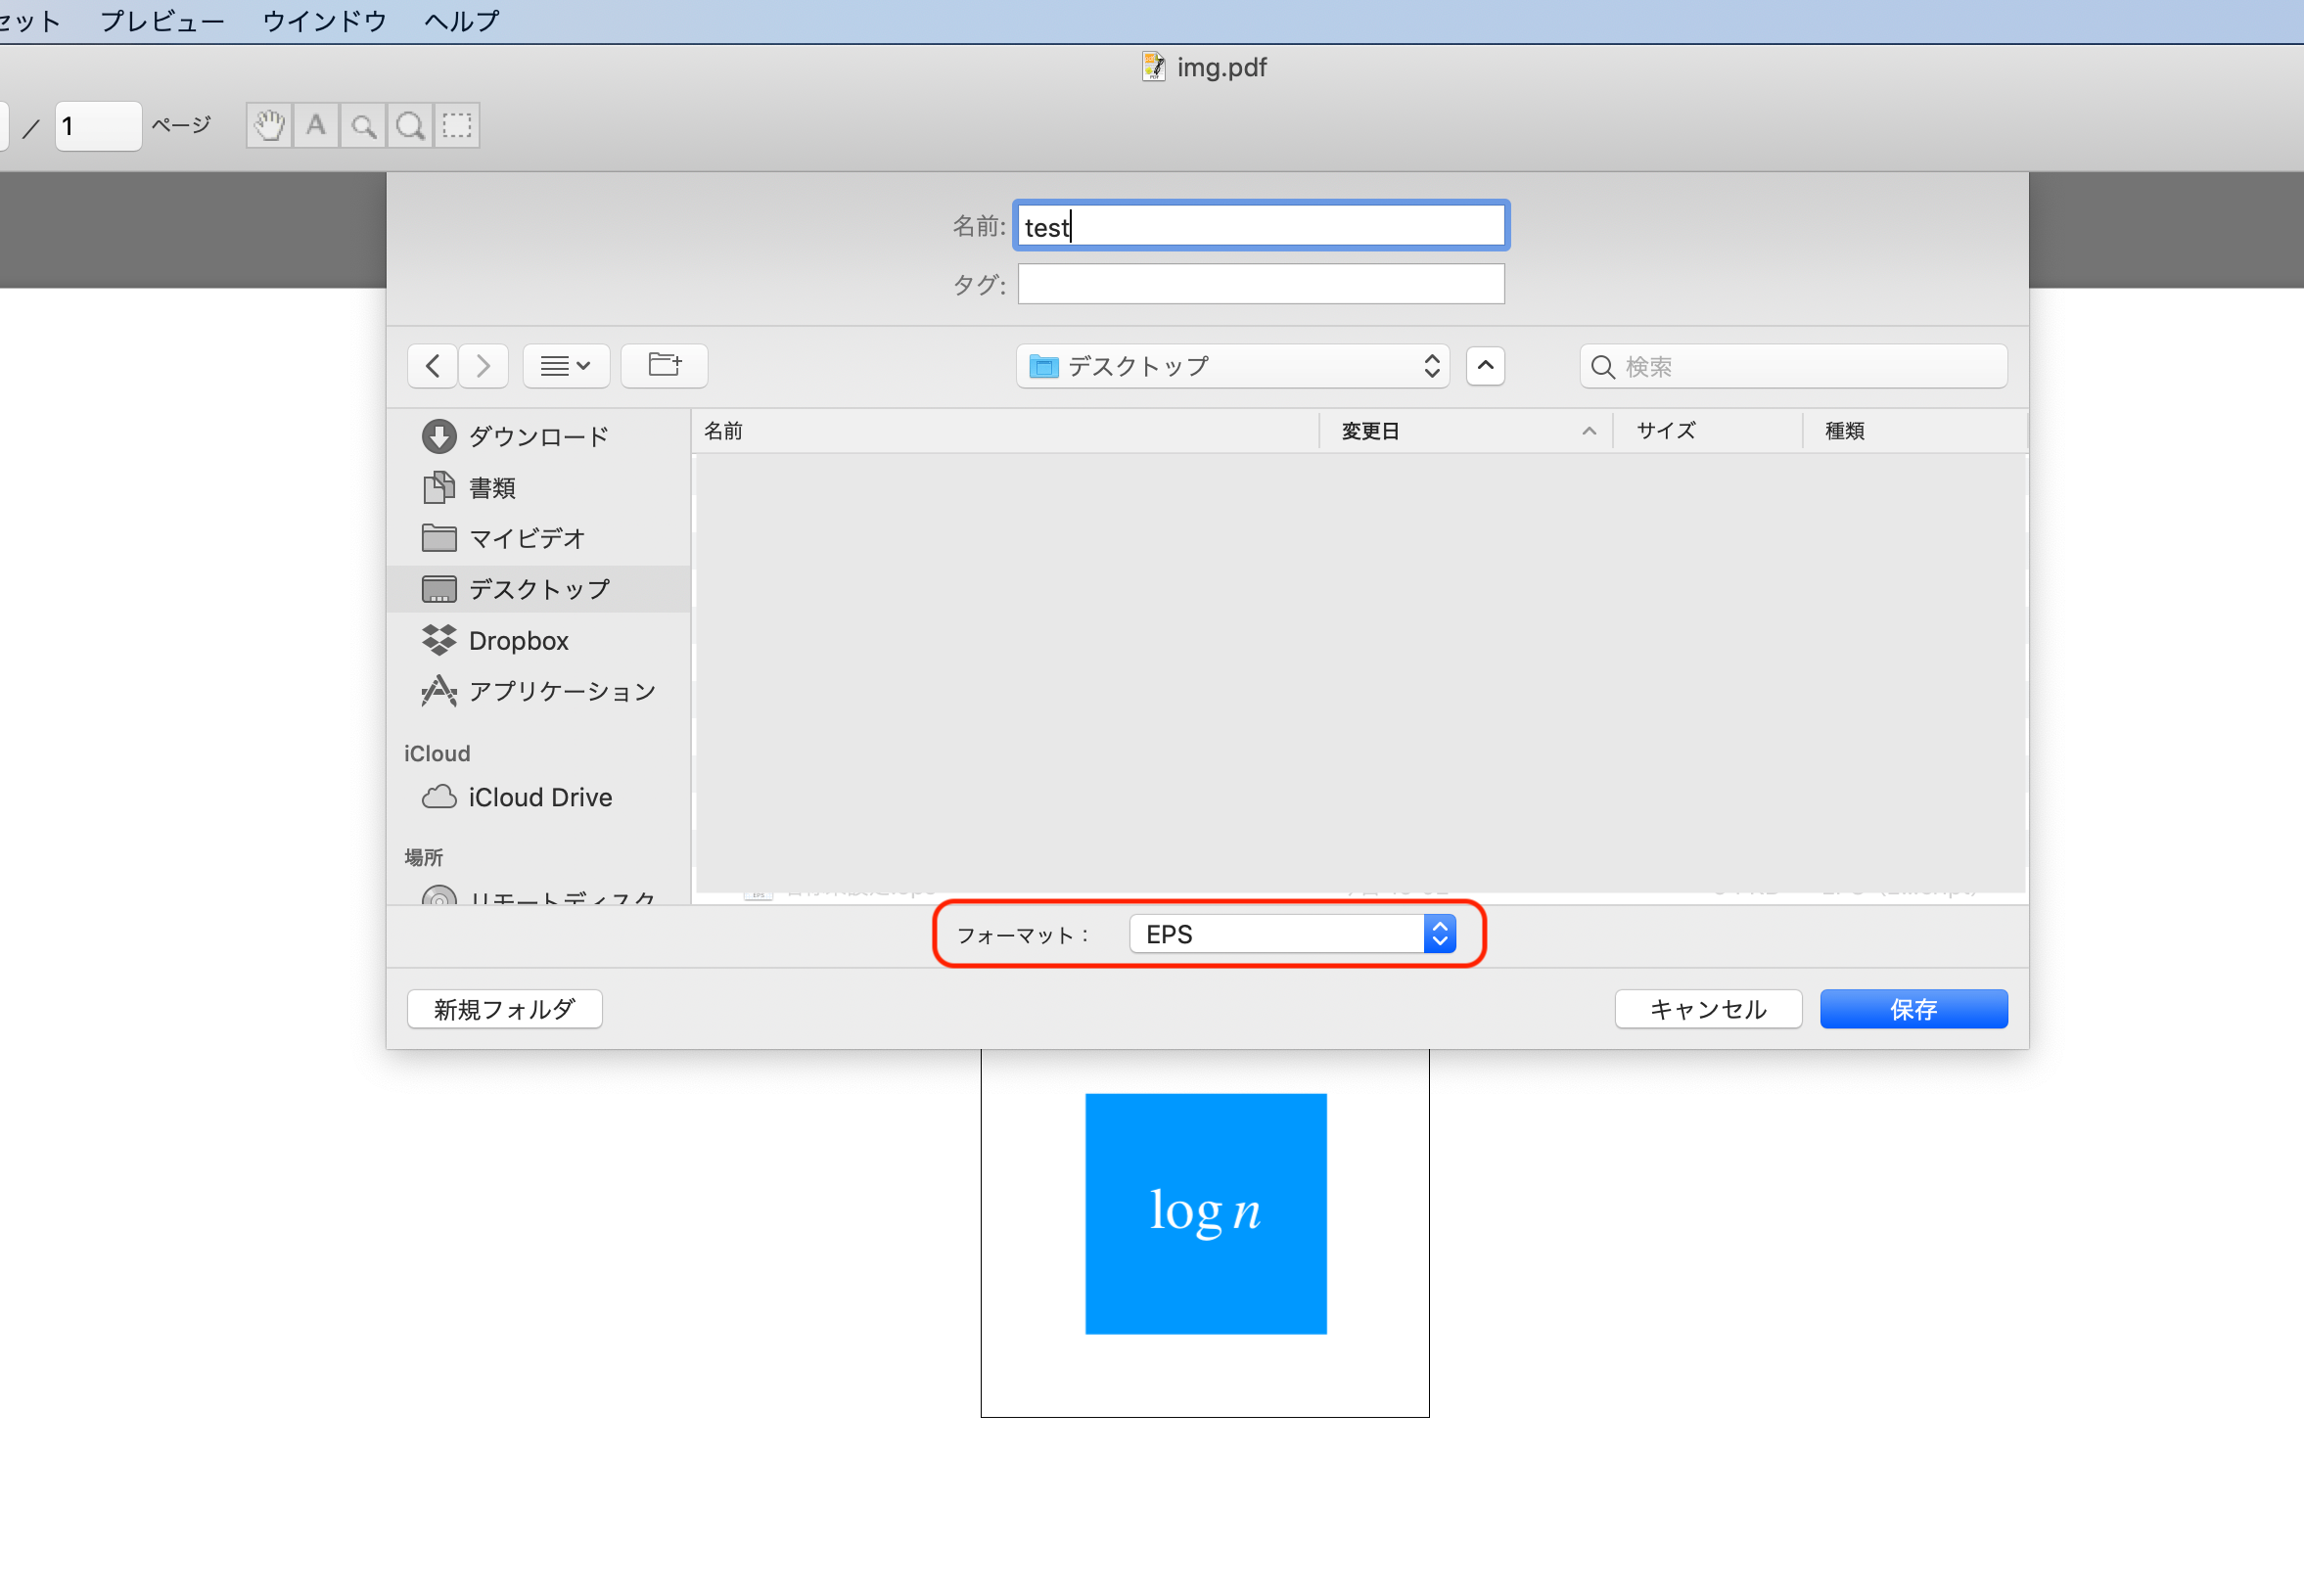
  1. [フォーマット: EPS] を選択し,任意の場所に保存します.
4.png

完成

選択部分だけからなる EPS ファイルが作成されました.
文字オブジェクトも選択できる状態になっているはずです.
めでたしめでたし

13
6
0

Register as a new user and use Qiita more conveniently

  1. You get articles that match your needs
  2. You can efficiently read back useful information
  3. You can use dark theme
What you can do with signing up
13
6

Delete article

Deleted articles cannot be recovered.

Draft of this article would be also deleted.

Are you sure you want to delete this article?