Packer でイメージ作るのを CircleCI でやってみる
Packer でイメージ作る最中に色々やってみる で作った Packer の json を使って、CircleCI 上で Packer を動かしてみたいと思います。
- github に push する
- CircleCI でフックして、自動的に packer が動く
- packer で作られたイメージが aws の AMI にプッシュされる
まぁ、こんな流れをやってみたいと思います。
ちょっと調べたら、CircleCI の 熊(bear)さんが Packer Workflows to validate, build and deploy AMIs using CircleCI というのを上げてくれてます。ただ、ちょっと内容が難しい感じなので、もうちょい簡単なやつを作ってみたいと思います。
前提
- CircleCI にアカウントを作りましょう(githubログインすれば自動で連携される・・・ハズ)
- CircleCI の Contexts に AWS のキー情報を設定しましょう
aws とか github とかは今さらな感じなので、割愛します。。。
レポジトリ作りましょう
github 上にレポジトリ作って下さい。
New repository なんていうボタンを押せば、適当に作れると思います。

Repository name 入れて、 private 選んで、 Create repository 押します。
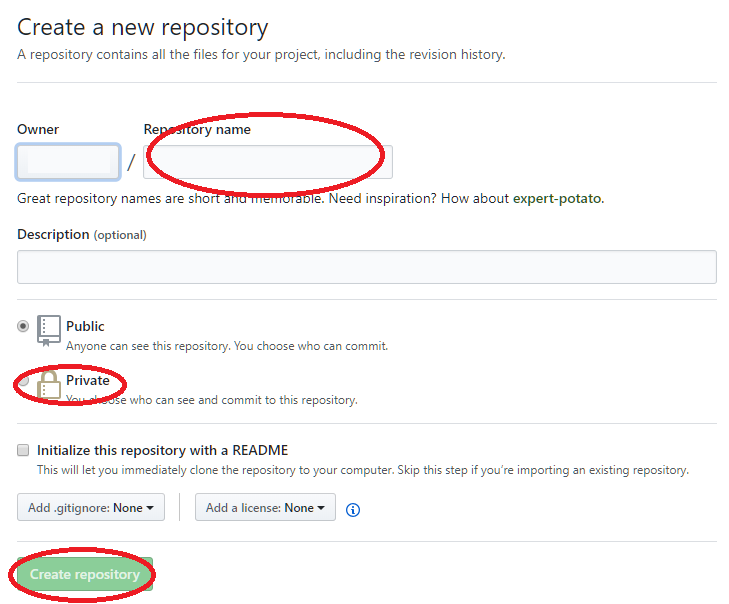
できたやつの HTTPS アドレス確認しておいてください。
github に上げる用のソース作ります。
まず、レポジトリ用のディレクトリ作ります。
> mkdir circleci_test
> cd circleci_test
> mkdir .circlrci
CircleCI 用のコンフィグファイル作ります。
とりあえず、Packer でビルドするだけしかやってません。
version: 2
jobs:
  build:
    docker:
      - image: hashicorp/packer:1.3.3
    working_directory: ~/packer
    steps:
      - checkout
      - attach_workspace:
          at: ~/packer
      - run:
          name: Build
          command: packer build build.json
          no_output_timeout: 30m
workflows:
  version: 2
  build-and-deploy:
    jobs:
      - build:
          context: AMI
※context を AMI で設定しているので、これは適宜合わせてください。
Packer 用のビルドファイルは前回と同じでよいです。
(名前だけ example.json -> build.json に変更しました)
{
  "variables": {
    "aws_access_key": "",
    "aws_secret_key": ""
  },
  "builders": [{
    "type": "amazon-ebs",
    "access_key": "{{user `aws_access_key`}}",
    "secret_key": "{{user `aws_secret_key`}}",
    "region": "ap-northeast-1",
    "source_ami_filter": {
      "filters": {
        "virtualization-type": "hvm",
        "name": "ubuntu/images/*ubuntu-bionic-18.04-amd64-server-*",
        "root-device-type": "ebs"
      },
      "owners": ["099720109477"],
      "most_recent": true
    },
    "instance_type": "t2.micro",
    "ssh_username": "ubuntu",
    "ami_name": "packer-example {{timestamp}}"
  }],
  "provisioners": [
    {
      "type": "shell",
      "inline": [
        "sleep 30",
        "sudo apt-get update",
        "sudo apt-get install -y nginx"
      ]
    }
  ]
}
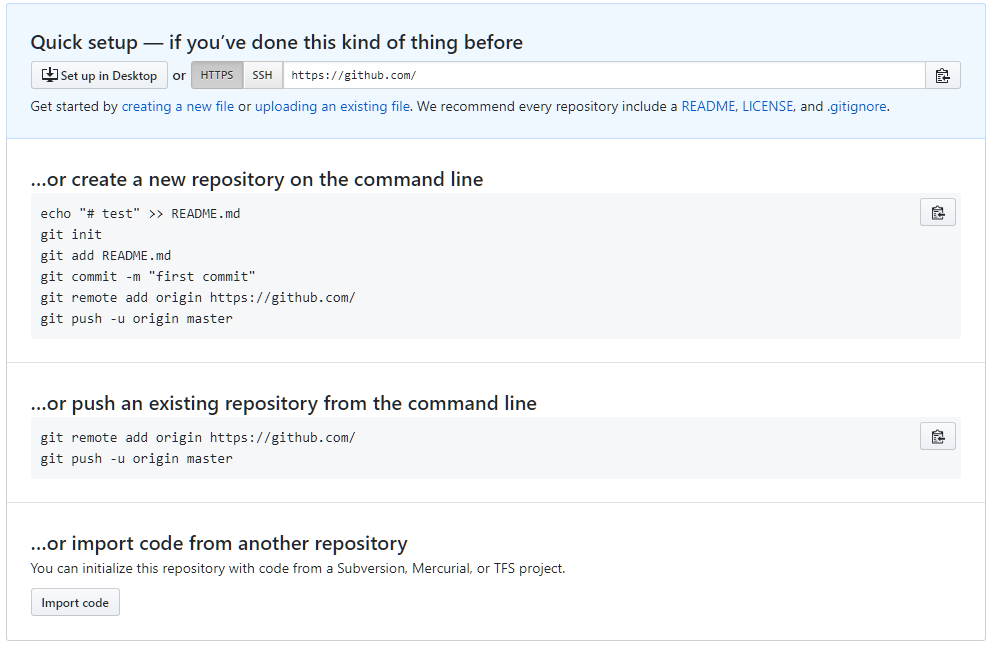
そしたら、コミットしてプッシュしちゃいましょう。
> git init
> git add .
Initialized empty Git repository in ~/circleci_test/.git/
> git commit -m "first commit"
[master 00ffe8c] second commit
 2 files changed, 54 insertions(+)
 create mode 100644 .circleci/config.yml
 create mode 100644 build.json
> git remote add origin https://github.com/<your account>/<repository name>.git
> git push -u origin master
Username for 'https://github.com': <account mail>
Password for 'https://<account mail>@github.com':
Counting objects: 6, done.
Delta compression using up to 3 threads.
Compressing objects: 100% (4/4), done.
Writing objects: 100% (5/5), 958 bytes | 0 bytes/s, done.
Total 5 (delta 0), reused 0 (delta 0)
To https://github.com/<your account>/<repository name>.git
   e5d5887..00ffe8c  master -> master
Branch master set up to track remote branch master from origin.
とりあえず、これでプッシュはできたはずです。
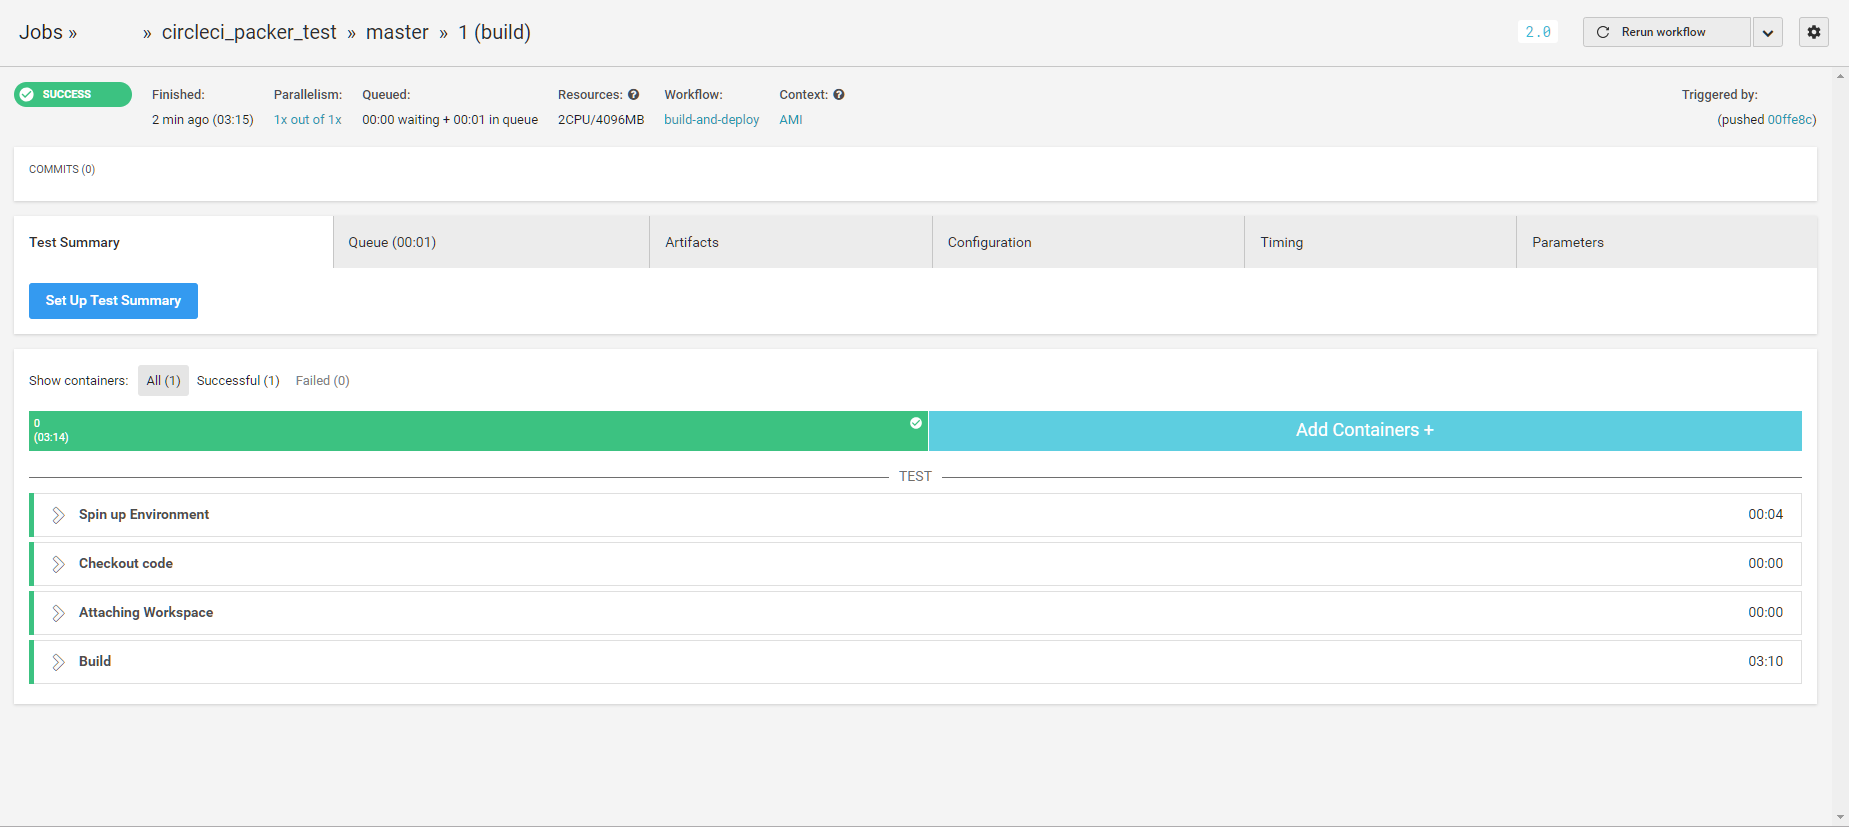
CircleCI で連携させてみよう
CircleCI にログインして、ADD PROJECTS で作成したレポジトリ名のやつを Set Up Project します。

Start Building って出ると思うのでポチっと押します。

ビルドが走り、成功すると、SUCCESS になります。
忘れるとできない Contexts
Create Cotext をポチっとします。
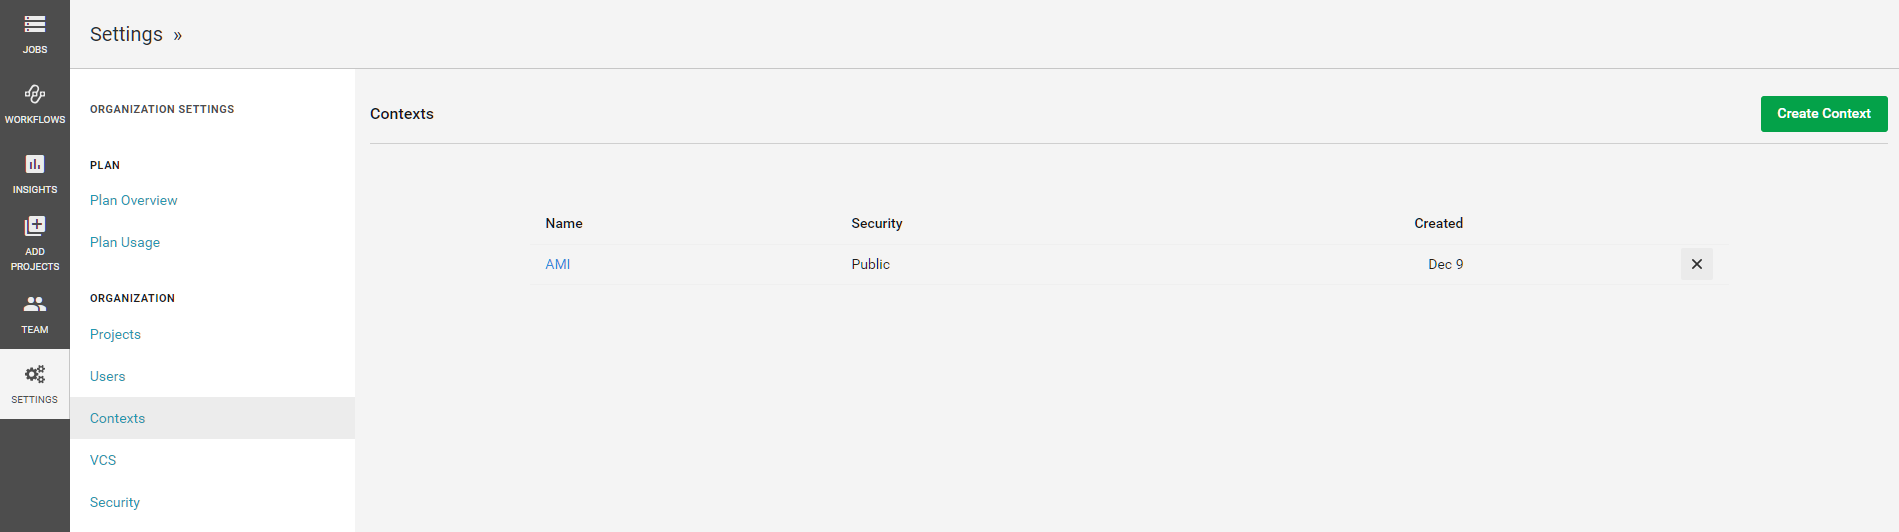
AMI を作成して、必要な AWS のキーを登録します。
Security が Public なのは、同じ組織内で見られるという意味です。
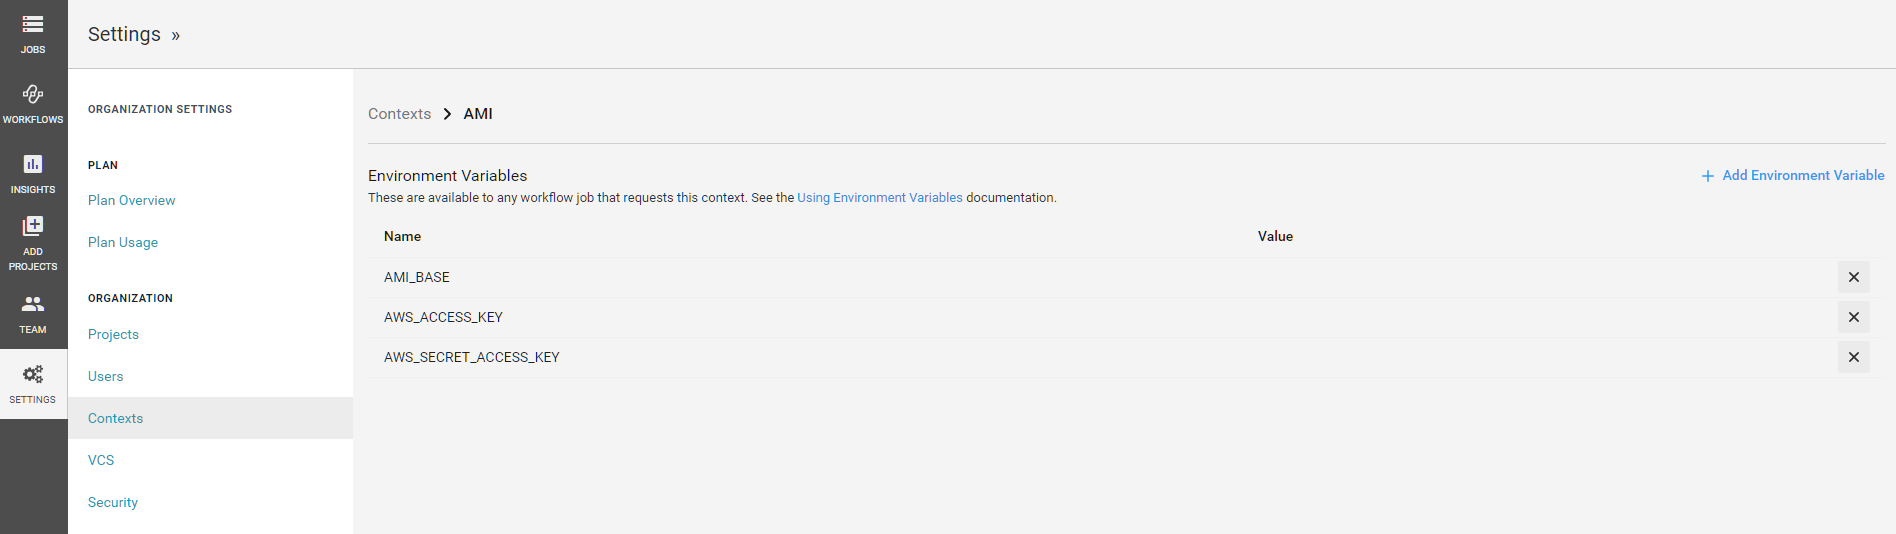
今回の作業だと AWS_IMAGE は使わないです。
AMI ができているか確認
AWSのコンパネで確認してみましょう。

できてますね。
まとめ
とりあえずテストとかなしでやってみました。
これで、github を更新するたびに、AMI が作成されるようになります。