サマーイベント用に環境セットアップ方法を説明
1. Arduinoインストール
1.1: 初心者の方はWindows Installer使用を推奨(下図赤丸をクリック)
1.2: "just download"もしくは”CONTRIBUTE & DOWNLOAD"をクリック
2. CH34xドライバインストール (互換nano利用時)
3. OTTO DIYソース(ZIPファイル)ダウンロード
参考:初心者向けのGithubからのZIPファイルダウンロード方法
https://qiita.com/okamot_dmc/items/c6cd951a75449c201d9a
4. OTTOライブラリのコピー
- 3でダウンロードしたZIPファイルを解凍
- 解凍されたフォルダ内の"DIY-master\libraries"を開く
- librariesフォルダ内のすべてを<ユーザ名>\Documents\Arduino\librariesにコピー
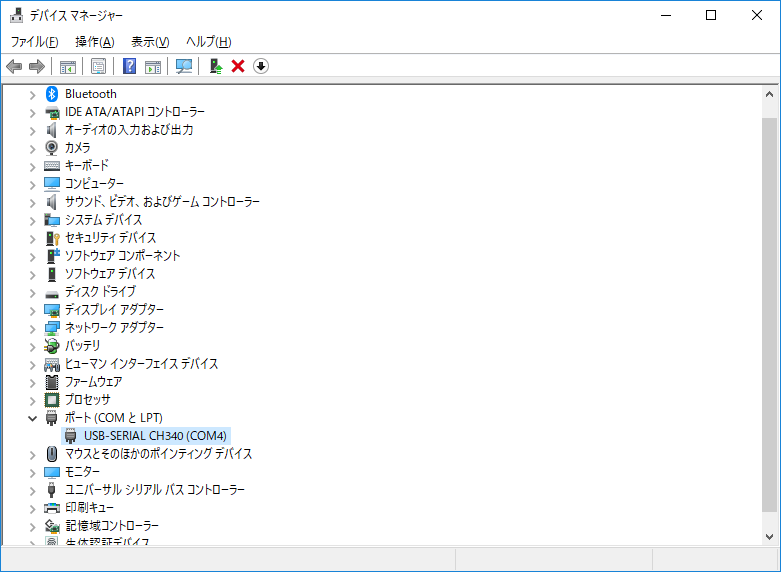
5. Arduino接続テスト
Arduino nanoを所定のUSBケーブルでPCに接続し、
デバイスマネージャにCH340のCOMポートが追加されていることを確認。
(下画面のように追加されない場合はUSBケーブルを差し直し、CH34xドライバ再インストール、
PC再起動を実施する。それでもNGの場合はスタッフにヘルプ求める)
6. Arduinoツールセットアップ+書き込みテスト
Arduinoを起動し、DIY-master\Otto_Footalign\Otto_Footalign.inoを開く。
Arduinoのツールメニューを開き、下記4項目を設定する。
ボード:Arduino nano
プロセッサ: ATmega328P
シリアルポート: COMx (xはデバイスマネージャで追加されたポート番号を選択)
書込装置:USBasp
「スケッチ」メニューをクリックし、「マイコンボードに書き込む」を選択する
"ボードへの書き込みが完了しました"が表示されれば書き込み成功。
そうでない場合は失敗しているので、ツールの設定や接続を見直す。
以上


