はじめに
Next.js × AWS で ToDo アプリを作りました🚀
ToDo アプリを作ろうと思った理由はほかにアイデアが浮かばなかったからです。
アカウント登録はメール認証を行っていないため、 test@examle.com のようなダミーのメールアドレスで可能です。ぜひ使ってみてください!
💻 フロントエンド
🔑 ログイン画面の実装
シンプルなログイン画面を作りました。

工夫したところはパスワードマスクの解除です。目のアイコンをクリックすると type を text にすることでマスクを解除します。
<div className={styles.formGroup}>
  <label htmlFor="password">パスワード</label>
  <div className={styles.passwordContainer}>
    <input
      id="password"
      type={showPassword ? "text" : "password"} // textにすることでパスワードマスク解除
      value={password}
      onChange={(e) => setPassword(e.target.value)}
      required
      minLength={6}
      className={styles.input}
    />
    <span
      className={styles.passwordToggleIcon}
      onClick={() => setShowPassword(!showPassword)} // アイコンクリック時ステートを更新
    >
      {/* パスワードマスクアイコン切り替え */}
      {showPassword ? <PasswordEyeIcon /> : <PasswordCloseEyeIcon />}
    </span>
  </div>
</div>
✏️ ToDo登録画面
ToDo登録画面はサイドメニューにToDo一覧を表示し、右側にタスク詳細を表示するように実装しました。
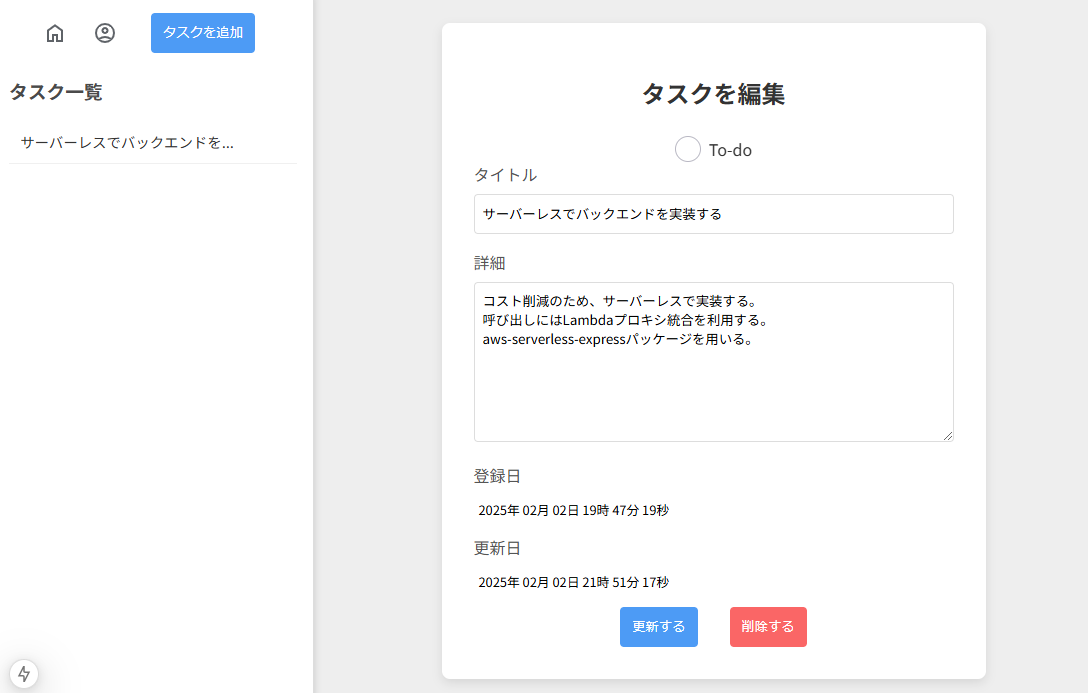
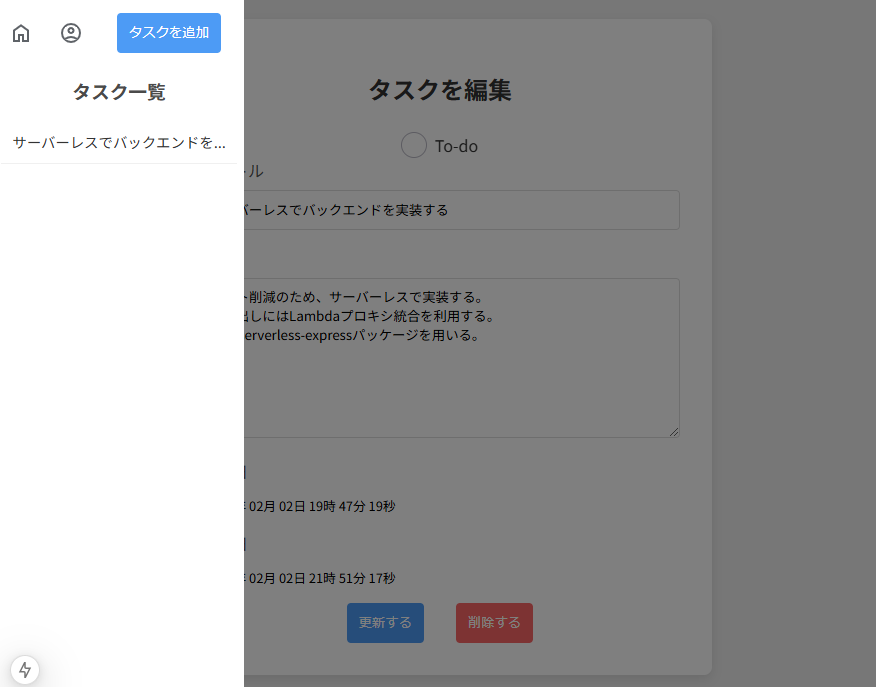
画面サイズが 950 px 以下になったとき、サイドメニューをアイコンで表示/非表示を切り替えることができるようにしました。

アイコンは以下を利用しました。
画面サイズの変更イベントをリッスンするために useEffect で addEventListener を行います。
useEffect(() => {
  if (userInfo.userId) {
    getTodos();
  }

  // 画面サイズのステートを更新する関数
  const handleResize = () => {
    setWindowSize({
      width: window.innerWidth,
      height: window.innerHeight,
    });
  };

  handleResize();

  // イベントリスナーに追加
  window.addEventListener("resize", handleResize);

  return () => {
    window.removeEventListener("resize", handleResize);
  };
}, [userInfo.userId]);
参考: https://ja.react.dev/learn/separating-events-from-effects
メニューアイコンをクリックするとオーバーレイを施します。
ToDoチェックボックスをおしゃれにする
To-Do のチェックボックスをおしゃれにしてみました。

以下を参考にしました。
👉 こちらのサイトはとても便利でおしゃれな CSS の例が載っています。
ローディングアイコンをおしゃれにする
ローディングアイコンもおしゃれにしてみました。

👉 こちらのサイトは豊富なローディングアイコンの例が載っています。
⚡ バックエンド
バックエンドはコスト削減のためサーバーレス構成にしました。
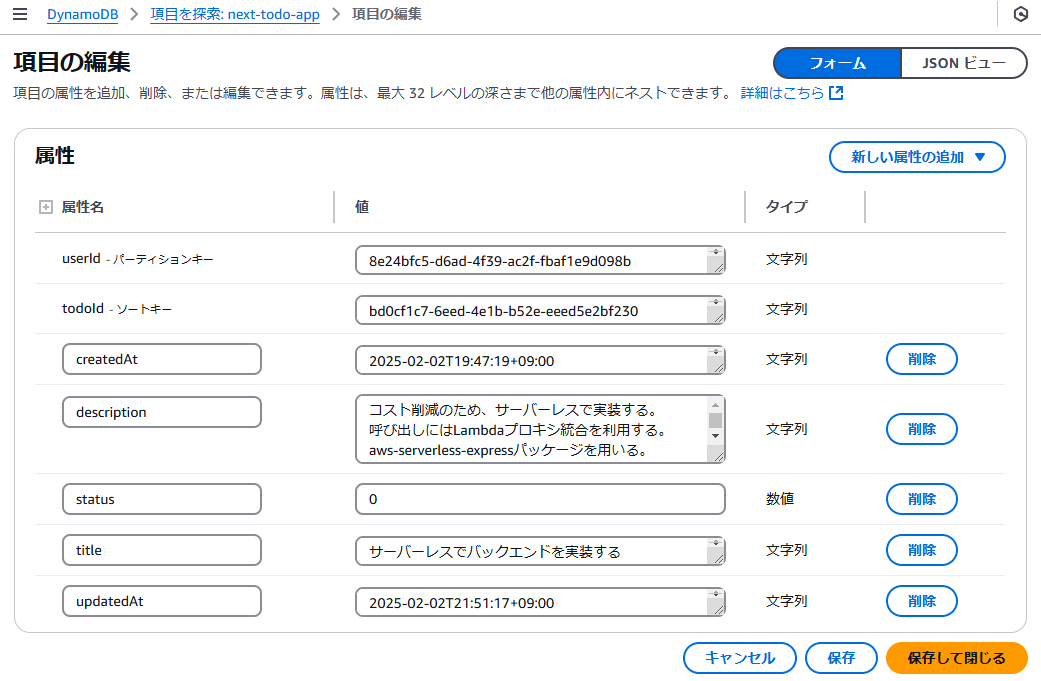
DynamoDB キー設計
| 属性名 | 型 | 用途 |
|---|---|---|
| userId | S | ユーザー ID(UUID) |
| todoId | S | ToDo ID(UUID) |
| title | S | ToDo タイトル |
| description | S | ToDo 説明 |
| status | N | 0: 未完了、1: 完了 |
| createdAt | S | 作成日時(ISO8601 JST) |
| updatedAt | S | 更新日時(ISO8601 JST) |
Lambda 関数による DynamoDB CRUD 操作
SDK for JavaScript を用いたデータ登録・更新・削除を実装しました。
- 共通設定
import { DynamoDBClient } from "@aws-sdk/client-dynamodb";
import {
  DynamoDBDocumentClient,
  GetCommand,
  PutCommand,
  QueryCommand,
  ScanCommand,
  UpdateCommand,
  DeleteCommand
} from "@aws-sdk/lib-dynamodb";

// DynamoDBクライアント設定
const client = new DynamoDBClient({ region: process.env.AWS_REGION });
const dynamoDb = DynamoDBDocumentClient.from(client);

// DynamoDBテーブル
const TABLE_NAME = 'next-todo-app';
const USER_TABLE_NAME = 'next-todo-app-users'
登録、更新、削除は以下にコード例があります。
ToDo登録
const newItem = {
  userId,
  todoId,
  title,
  description: description || '',
  status,
  createdAt: timestamp,
  updatedAt: timestamp,
};

const params = {
  TableName: TABLE_NAME,
  Item: newItem,
};

await dynamoDb.send(new PutCommand(params));
ToDo更新
const params = {
  TableName: TABLE_NAME,
  Key: {
    userId: userId,
    todoId: todoId,
  },
  UpdateExpression:
    'set #title = :title, #description = :description, #status = :status, #updatedAt = :updatedAt',
  ExpressionAttributeNames: {
    '#title': 'title',
    '#description': 'description',
    '#status': 'status',
    '#updatedAt': 'updatedAt',
  },
  ExpressionAttributeValues: {
    ':title': title,
    ':description': description,
    ':status': status,
    ':updatedAt': updatedAt,
  },
  ReturnValues: 'ALL_NEW',
};

const result = await dynamoDb.send(new UpdateCommand(params));
res.json(result.Attributes);
ToDo削除
const params = {
  TableName: TABLE_NAME,
  Key: {
    userId: userId,
    todoId: todoId,
  },
};

await dynamoDb.send(new DeleteCommand(params));
API Gateway
リソースはルートパスの直下に {proxy+} で作成します。 Lambda プロキシ統合を True にします。URL パスパラメータは設定していませんが、勝手に追加されていました。

CORS 設定とデプロイを忘れがちなので注意が必要です。
最後に
個人開発はハマると楽しいです!しかしアイデアが浮かばなかったりモチベーション維持が難しいです。そんなときに無理にひねり出そうとすると結局何もやらないことになってしまいがちです。そんなときは初心に帰ってシンプルなアプリを作ってみると案外ハマります!