こんにちは。
株式会社クラスアクト インフラストラクチャ事業部の大塚です。
今回は前回作成したサーバ証明書を使ってapache2への通信を暗号化していきたいと思います。
前回の記事は以下を参照ください。
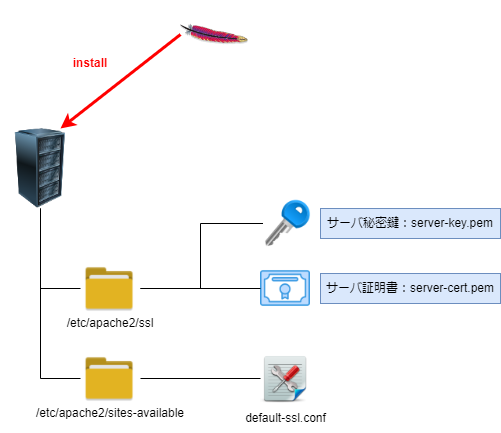
環境イメージ
今回構築する環境は以下となります。
※このサーバは前回の記事と同じサーバとなります。OSはubuntu22.04です。
apache2をサーバにインストールして/etc/apache2/ディレクトリにsslディレクトリを作成します。そしてそのsslディレクトリに前回作成したサーバ秘密鍵とサーバ証明書を配置します。
次にapache2のconfigファイルの1つであるdefault-ssl.confを編集し、ssl通信の有効化及びその際に使用する秘密鍵と証明書を指定していきます。
環境構築
apacheのインストールと環境設定
以下コマンドを実行してapache2をubuntuにインストールします。
root@ca-server:~# apt install -y apache2
次にapache2のSSLモジュールを有効化します。
実行時色々出てきますが、あまり気にしなくていいと思います。
最後の行の出力として"systemctl restart apache2"とあるので後程実行します。
root@ca-server:~# a2enmod ssl
Considering dependency setenvif for ssl:
Module setenvif already enabled
Considering dependency mime for ssl:
Module mime already enabled
Considering dependency socache_shmcb for ssl:
Enabling module socache_shmcb.
Enabling module ssl.
See /usr/share/doc/apache2/README.Debian.gz on how to configure SSL and create self-signed certificates.
To activate the new configuration, you need to run:
  systemctl restart apache2
apache2を再起動します。また自動起動もonにしておきます。
root@ca-server:~# systemctl restart apache2
root@ca-server:~# systemctl enable apache2
前回作成したサーバ秘密鍵とサーバ証明書と、任意のディレクトリに移動します。
今回は/etc/apache2/ssl/配下に配置します。
ログを取り忘れて恐縮ですが、/etc/apache2/の配下にデフォルトではsslディレクトリは無いのでmkdirで事前に作成してください。
root@ca-server:~# cp -p /etc/ssl/demoCA/server-cert.pem /etc/apache2/ssl/
root@ca-server:~# cp -p /etc/ssl/demoCA/server-key.pem  /etc/apache2/ssl/
次に/etc/apache2/sites-available/ディレクトリ配下にあるdefault-ssl configを弄っていきます。
SSLEngineやSSLProtocol、SSLCipherSuiteはデフォルトだと書いておりませんでしたので追記しております。
またSSLCertificateFile及びSSLCertificateKeyFileには上で移動したサーバの秘密鍵とサーバ証明書を指定しています。
root@ca-server:~# cd /etc/apache2/sites-available/
root@ca-server:/etc/apache2/sites-available# ls
000-default.conf  default-ssl.conf
root@ca-server:/etc/apache2/sites-available# cp -p default-ssl.conf default-ssl.conf.org
root@ca-server:/etc/apache2/sites-available# vi default-ssl.conf
root@ca-server:/etc/apache2/sites-available# diff default-ssl.conf default-ssl.conf.org
2,3c2,3
<       <VirtualHost *:443>
<               ServerName example.com
---
>       <VirtualHost _default_:443>
>               ServerAdmin webmaster@localhost
32,37c32,33
<               SSLCertificateFile      /etc/apache2/ssl/server-cert.pem
<               SSLCertificateKeyFile   /etc/apache2/ssl/server-key.pem
<               # <https化の為追記>
<               SSLEngine on
<               SSLProtocol all -SSLv2 -SSLv3
<               SSLCipherSuite HIGH:!aNULL:!MD5
---
>               SSLCertificateFile      /etc/ssl/certs/ssl-cert-snakeoil.pem
>               SSLCertificateKeyFile /etc/ssl/private/ssl-cert-snakeoil.key
設定したdefault-ssl.confをapache2に読み込ませます。
その後apache2をreloadします。
root@ca-server:/etc/apache2/sites-available# a2ensite default-ssl.conf
Enabling site default-ssl.
To activate the new configuration, you need to run:
  systemctl reload apache2
root@ca-server:/etc/apache2/sites-available# systemctl restart apache2
httpsで通信できるか確認する。
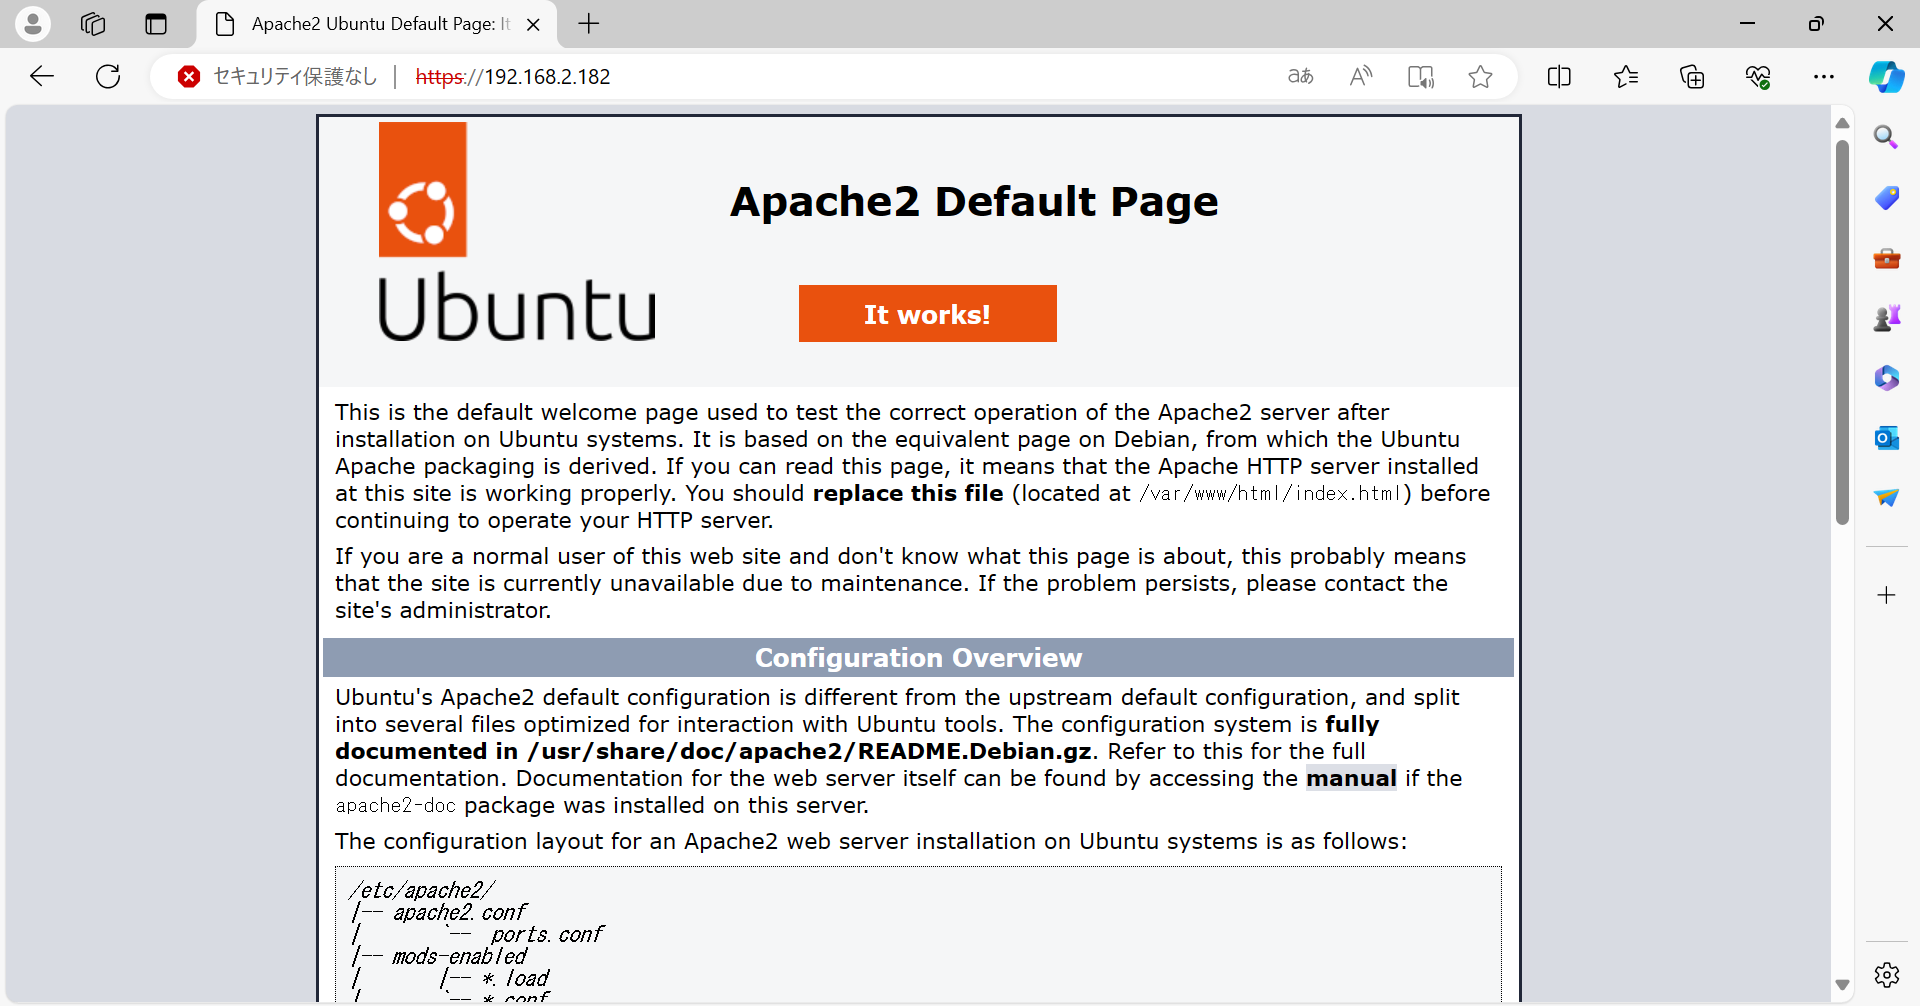
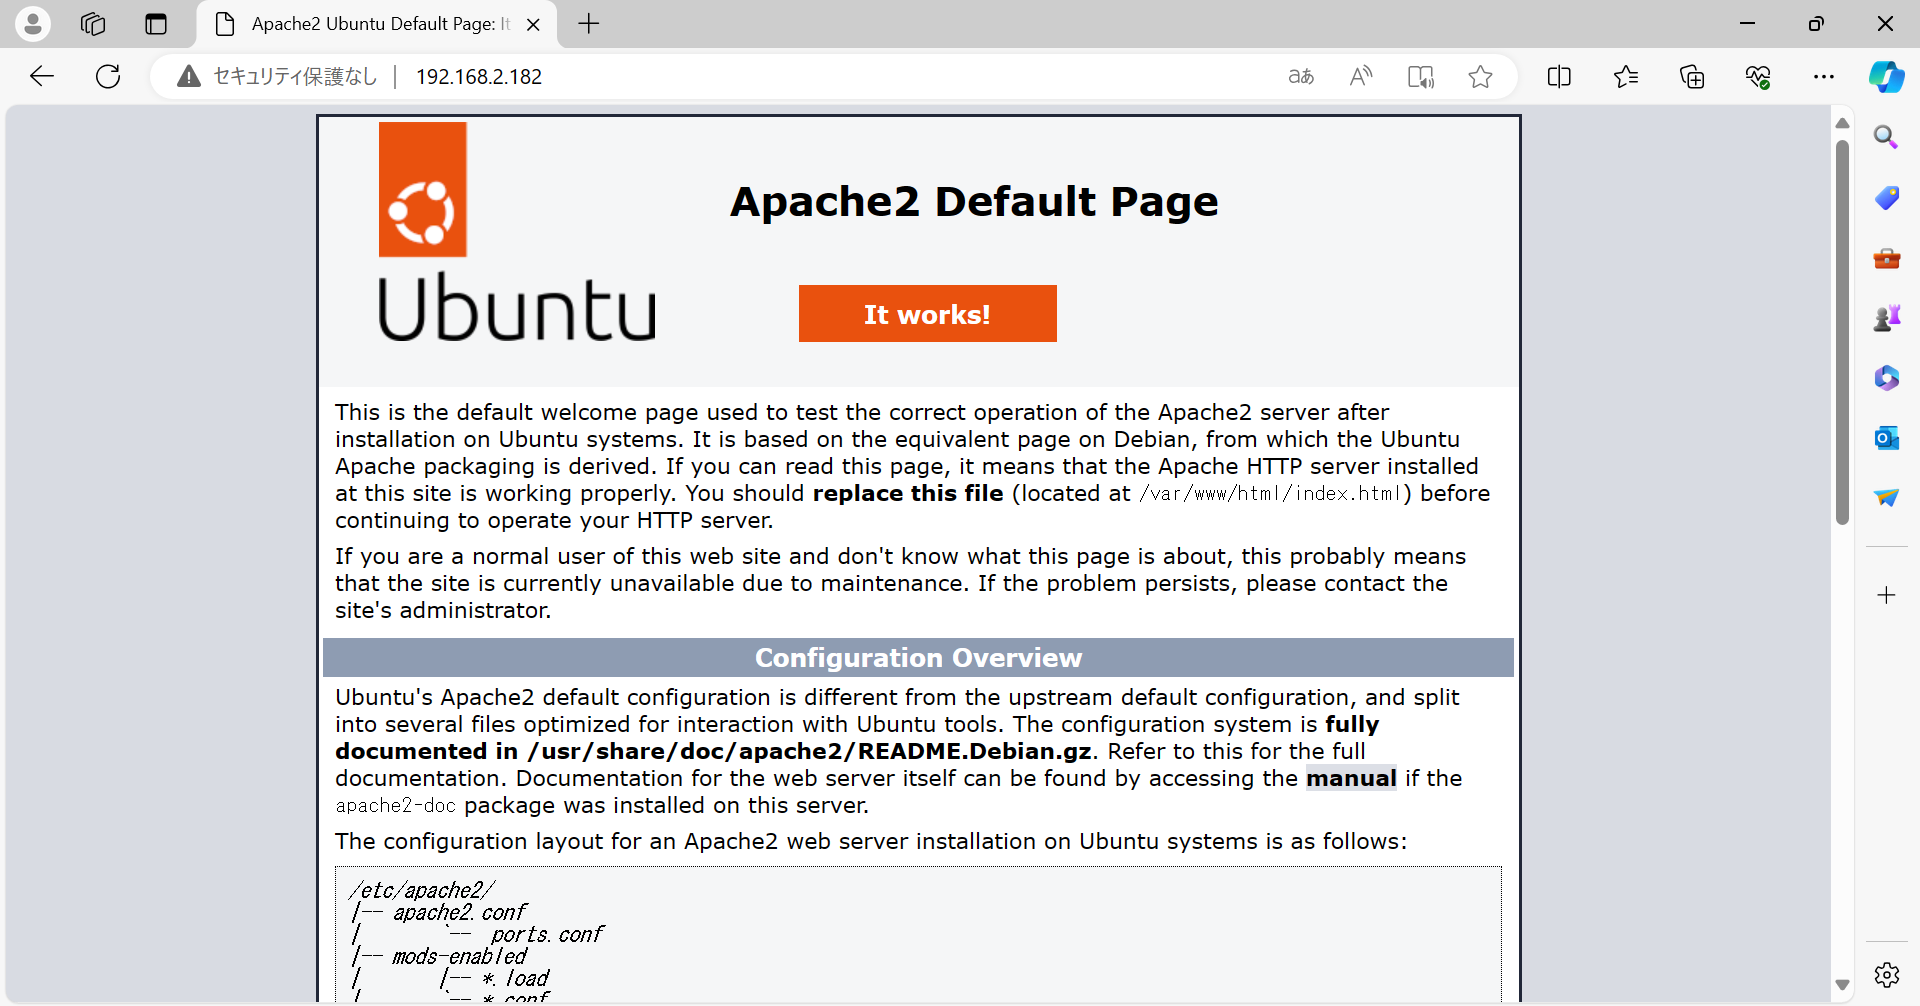
適当なWebブラウザを開き、サーバに接続してみます。まずはhttpで繋いでみます。
サーバのIPアドレスが192.168.2.182でした。
apache2のデフォルトの画面が表示されていることがわかります。httpでは問題なく通信できているようですね。
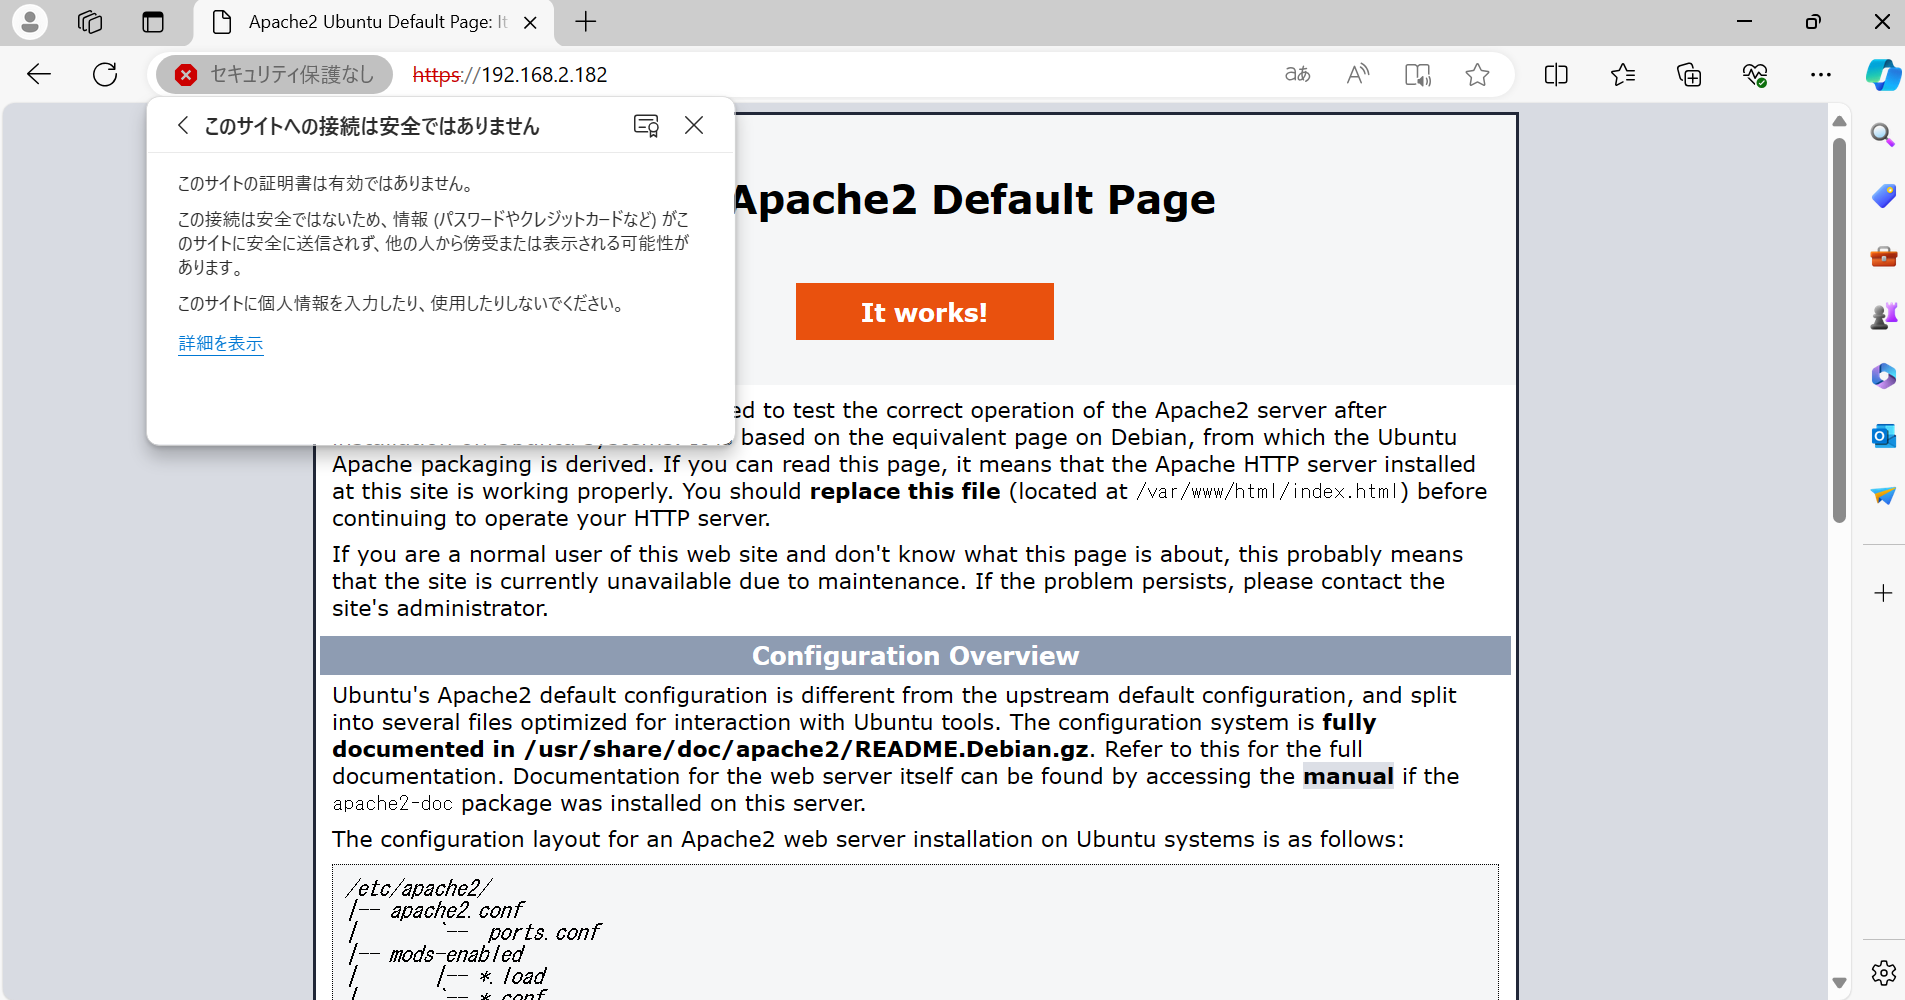
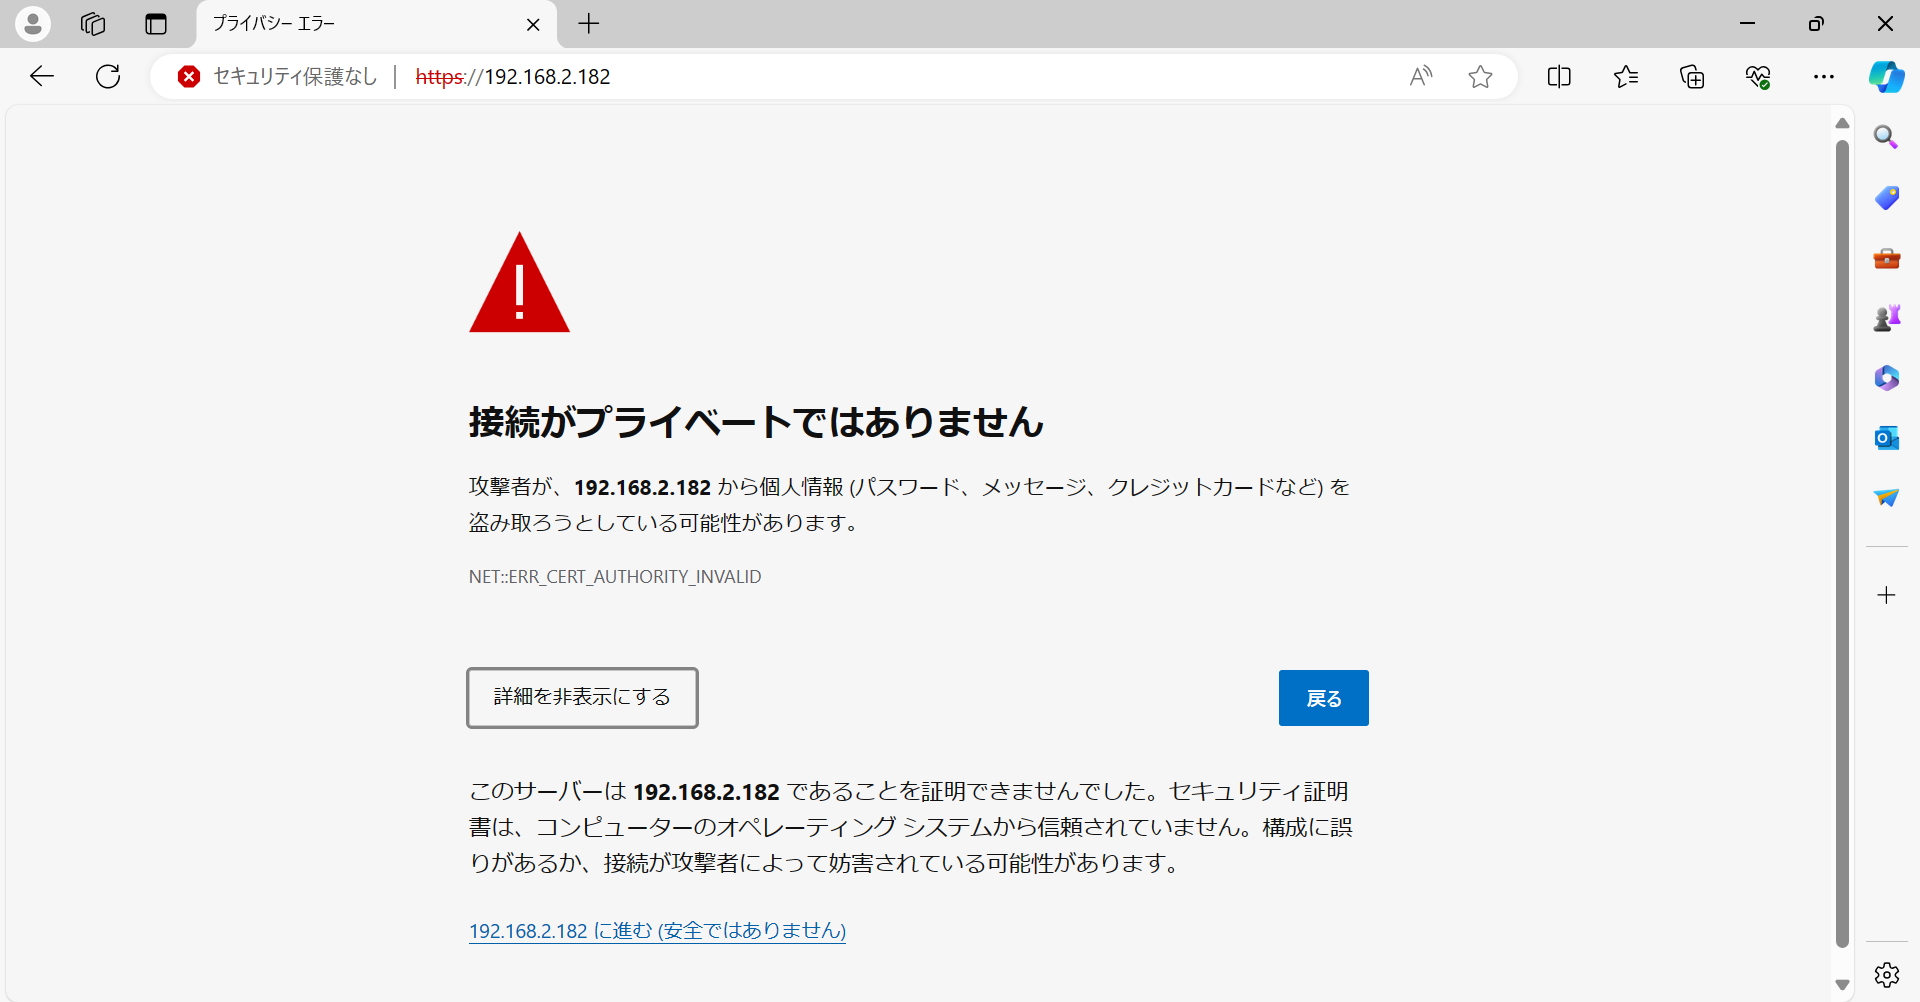
次にhttpsで通信が出来るかを確認します。https://192.168.2.182と入力しアクセスします。
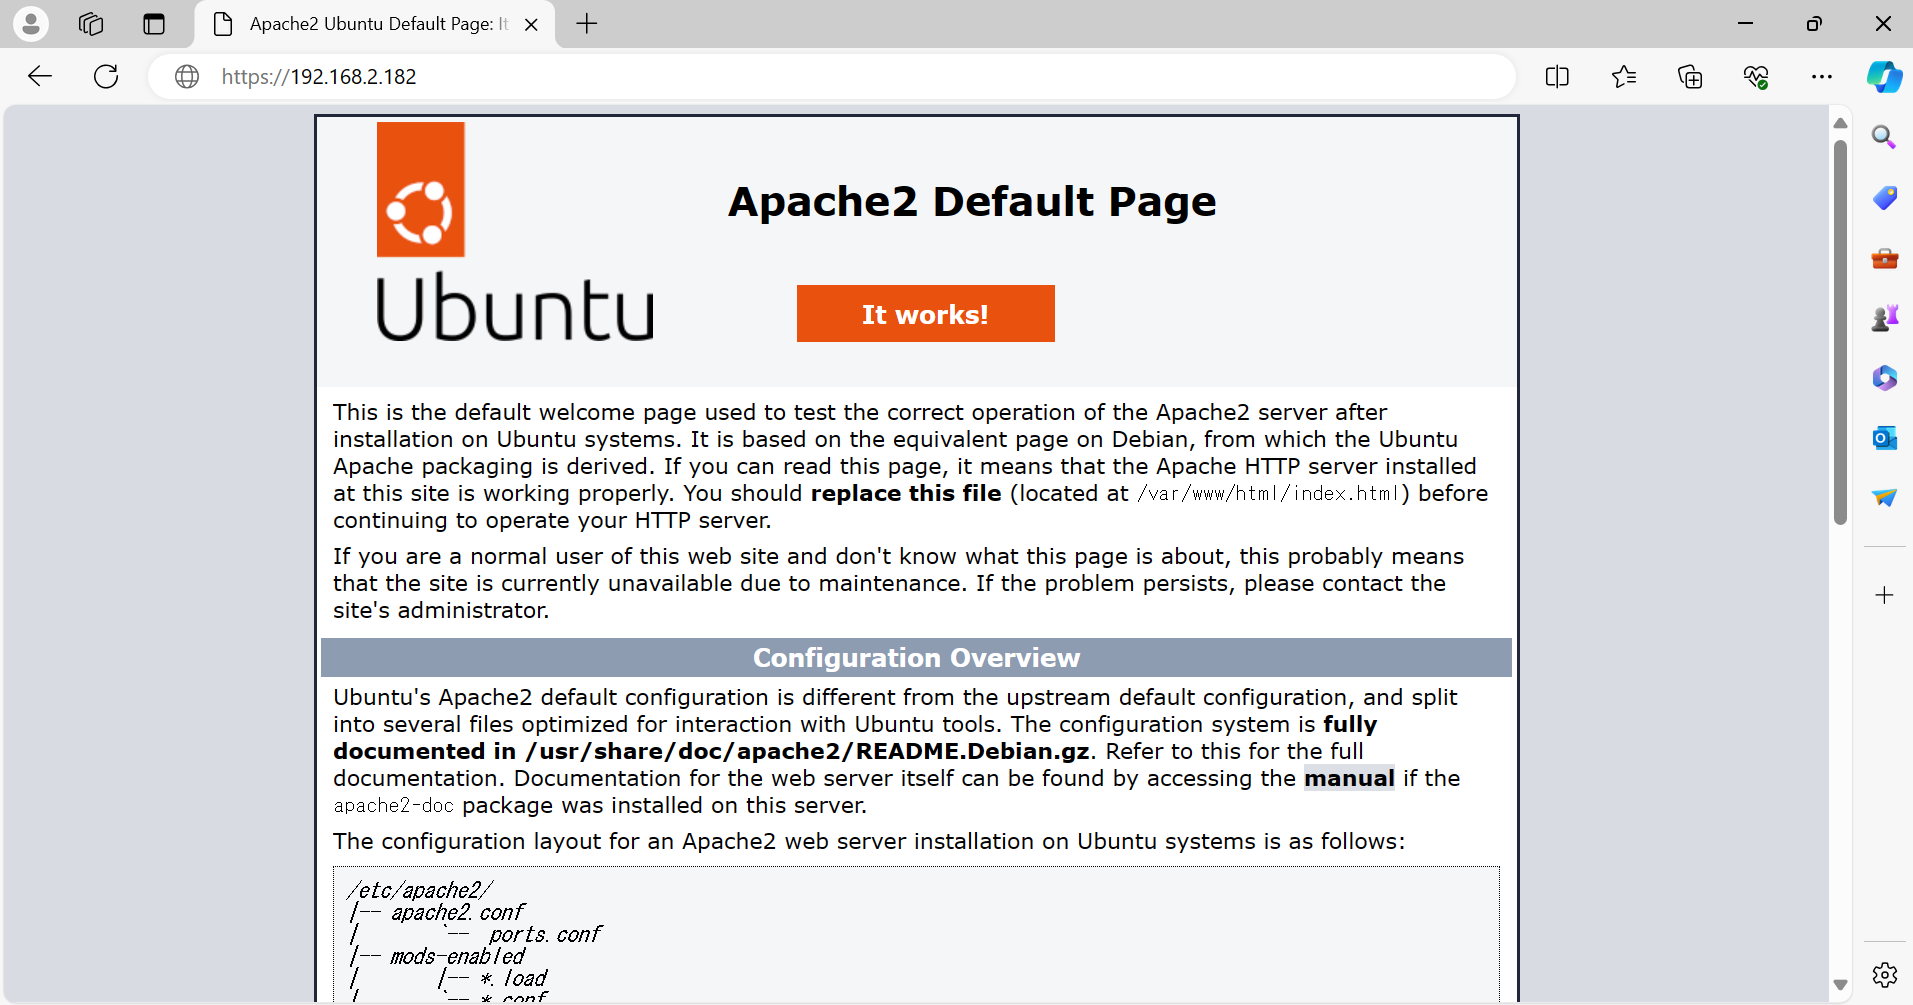
CERT_AUTHORITY_INVALIDという警告が表示されます。これはサーバ側から提供された証明書がクライアント(Webブラウザ)が信頼しているCAによって署名されていないことによるものです。想定内ですので問題ありません。
"サーバのIPアドレス"に進む(安全ではありません)を押下します。
接続できました。問題なさそうですね。