こんにちは。
株式会社クラスアクト インフラストラクチャ事業部の大塚です。
先日microk8sベースのKubernetesクラスタ上にArgoCD環境をデプロイし、WebUIにログインするところまでを行いました。
今回はその続き。ArgoCDとGitLabを連携してGitOps環境を作り、DeamonSetを自動デプロイしていきたいと思います。
用語
GitLab
以下公式より引用です。
競合サービスとしてGitHubがあるかと思いますが、GitLabがナウくてGitHubが質実剛健みたいなイメージがあるみたいですね。私はどちらのアカウントも持っていますが、今のところGitLabの方が取っつき易いです。
GitLabは先進的なソフトウェア開発に必要な多くの機能を統合した製品です。課題管理、バージョン管理、コードレビュー、CI、CD、モニタリングを1つのアプリケーションで行うことができ、インストールも簡単にできます。GitLabを活用すると、ソフトウェア開発の計画からモニタリングまでを効率的に行うことができます。
参考にしている動画
以下の動画が非常にわかりやすかったです。
比較的簡単な英語で話しておりスピードも速くなく聞き取りやすい印象です。日本語の字幕を付けることが出来るので、英語がからっきしダメな方でもたぶん行けるはず・・・!
更に、JenkinsとArgoCDの比較について最初の方で話しており、イメージを多分に使用していることも相まって私の様なCI/CDやGitOps、ArgoCD初学者にとって有用であると思います。
構築
GitLabのアカウントを作成し、ログインしてください。
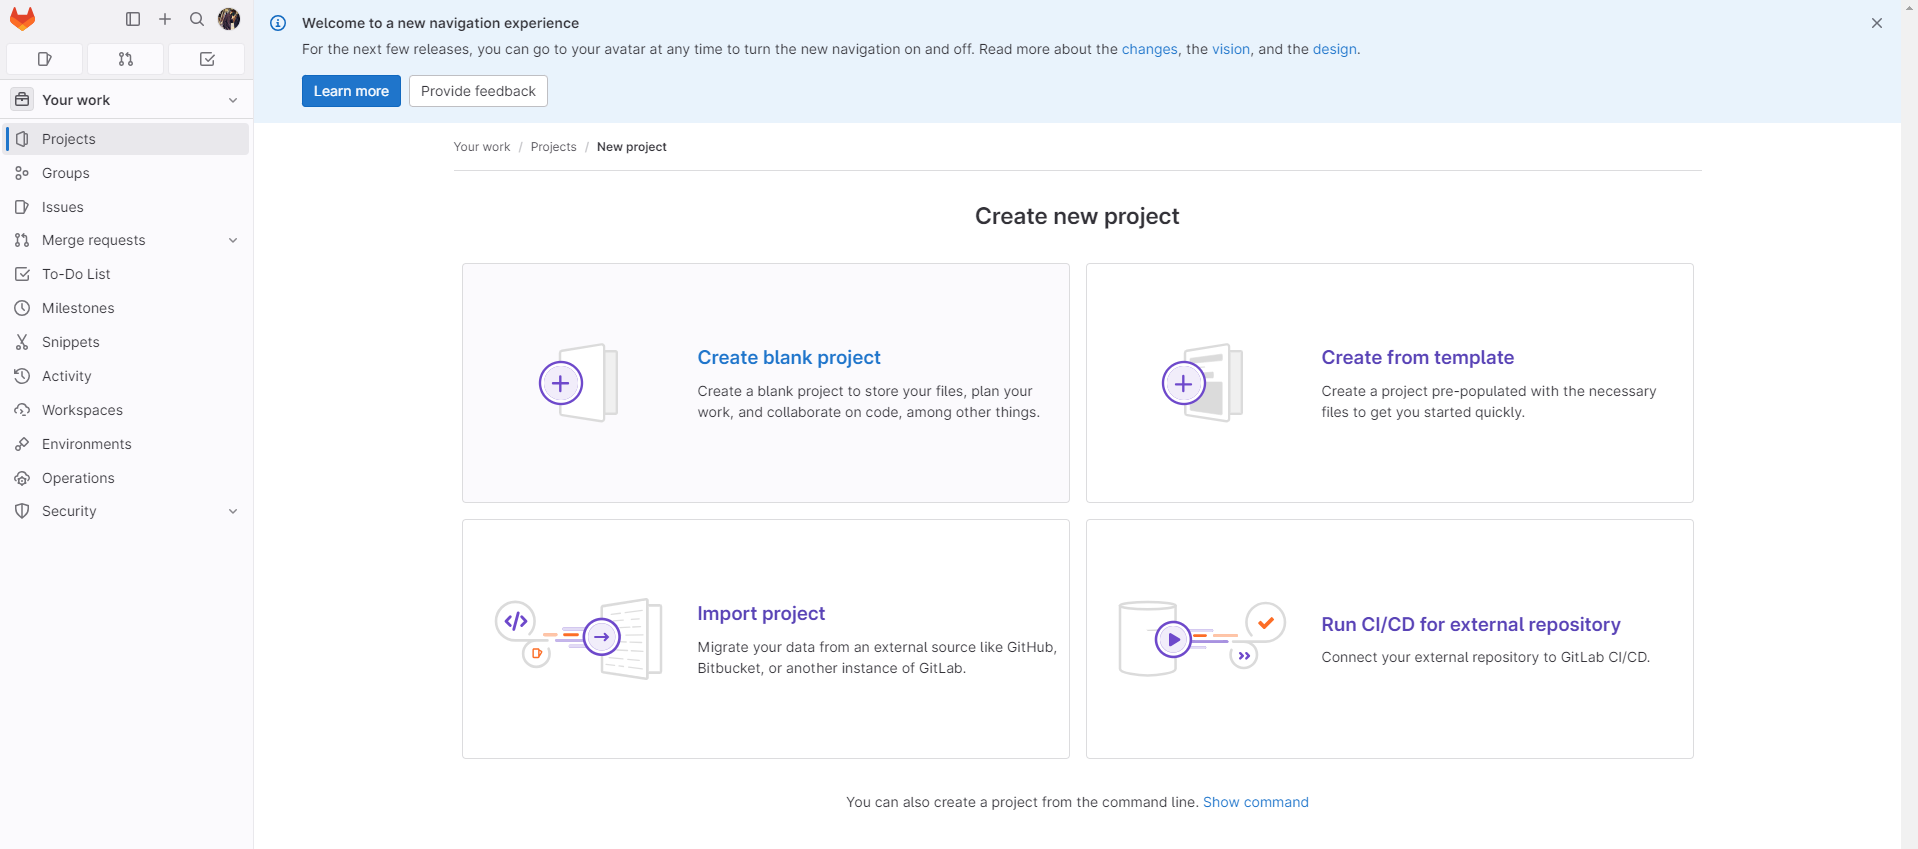
Projectを開き、New projectを押下します。
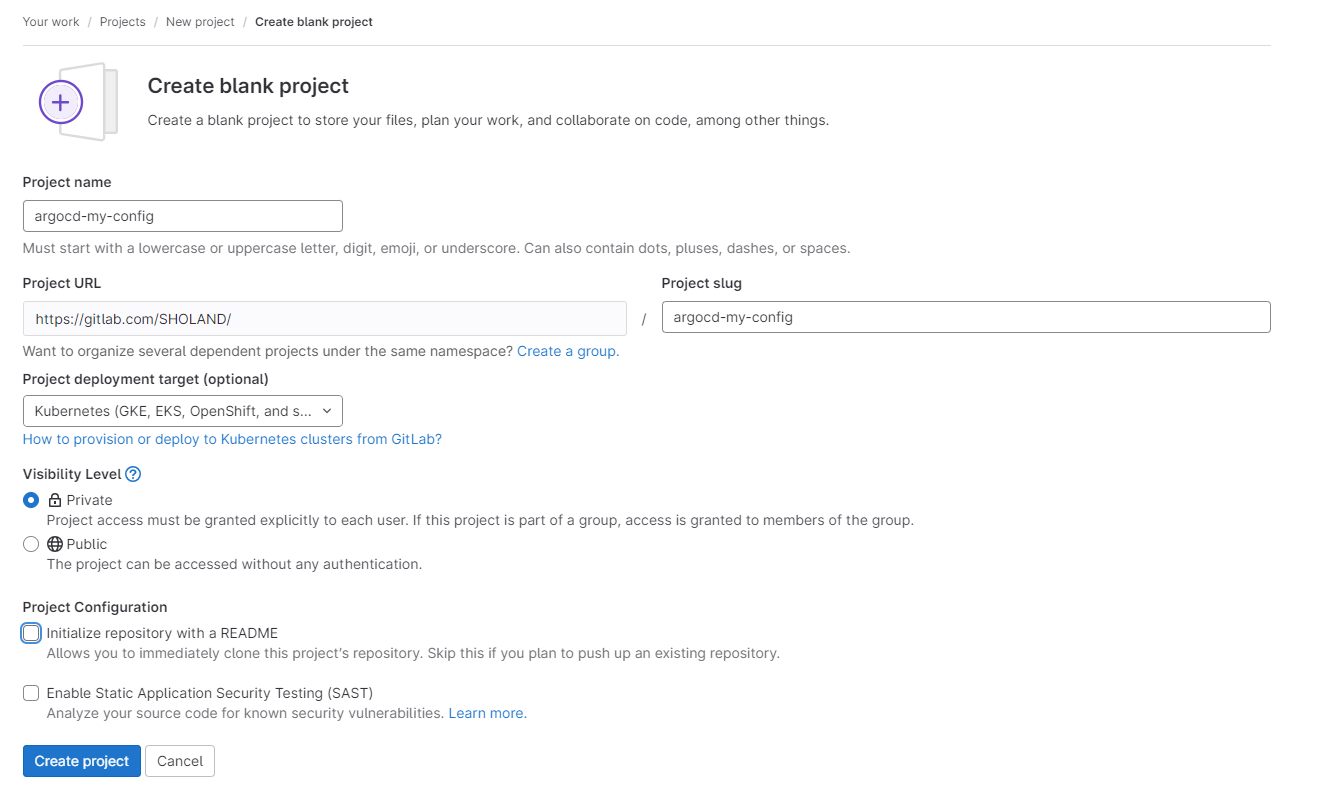
Create blank projectを押下します。
Project nameを入力し、deployment targetはKubernetesを選択しておきます。
Create projectを押下します。
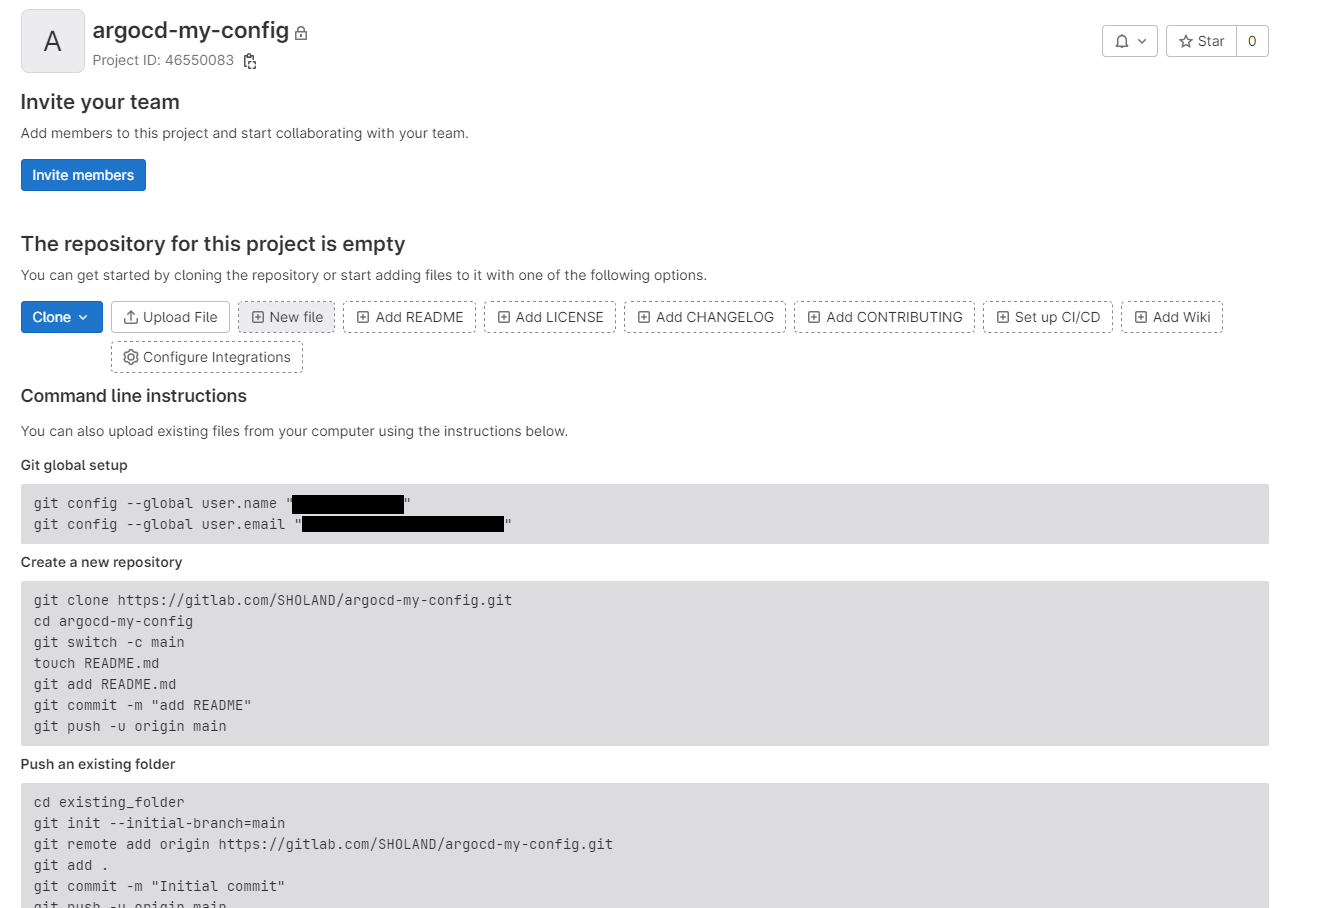
Projectが作成されたことを確認します。Command line instractionsのGit global setupとCreate a new repositoryはk8sのホストで実際に入力していきます。
k8sのホストでコマンドを実行していきます。
git cloneコマンドの後にユーザ名とパスワードを求められますが、GitLabにログインする際に使用したメールアドレスとパスワードで問題無いかと思います。
root@k8s-master:~# git config --global user.name "●●●●"
root@k8s-master:~# git config --global user.email "●●●●"
root@k8s-master:~# git clone https://gitlab.com/SHOLAND/argocd-my-config.git
Cloning into 'argocd-my-config'...
Username for 'https://gitlab.com':(メールアドレス入力)
Password for 'https://●●●●':(パスワード入力)
warning: You appear to have cloned an empty repository.
ここまで実行した後、lsコマンドを叩いてみると直下にGitLabで作成したProject名を関したディレクトリが表示されているはずです。
root@k8s-master:~# ls
argocd-my-config  kubernetes-argocd-nodeport.yaml  kubernetes-dashboard-nodeport.yaml  kubernetes-grafana.yaml  kubernetes-prometheus.yaml  snap  wp-backup-yaml
ディレクトリに移動してコマンドの続きを打っていきます。
root@k8s-master:~# cd argocd-my-config
root@k8s-master:~/argocd-my-config# git switch -c main
Switched to a new branch 'main'
root@k8s-master:~/argocd-my-config# touch README.md
root@k8s-master:~/argocd-my-config# git add README.md

root@k8s-master:~/argocd-my-config# git commit -m "add README"
[main (root-commit) 64e07d0] add README
 1 file changed, 0 insertions(+), 0 deletions(-)
 create mode 100644 README.md

root@k8s-master:~/argocd-my-config# git push -u origin main
Username for 'https://gitlab.com':(メールアドレス入力)
Password for 'https://●●●●':(パスワード入力)
Enumerating objects: 3, done.
Counting objects: 100% (3/3), done.
Writing objects: 100% (3/3), 220 bytes | 220.00 KiB/s, done.
Total 3 (delta 0), reused 0 (delta 0), pack-reused 0
To https://gitlab.com/SHOLAND/argocd-my-config.git
 * [new branch]      main -> main
Branch 'main' set up to track remote branch 'main' from 'origin'.
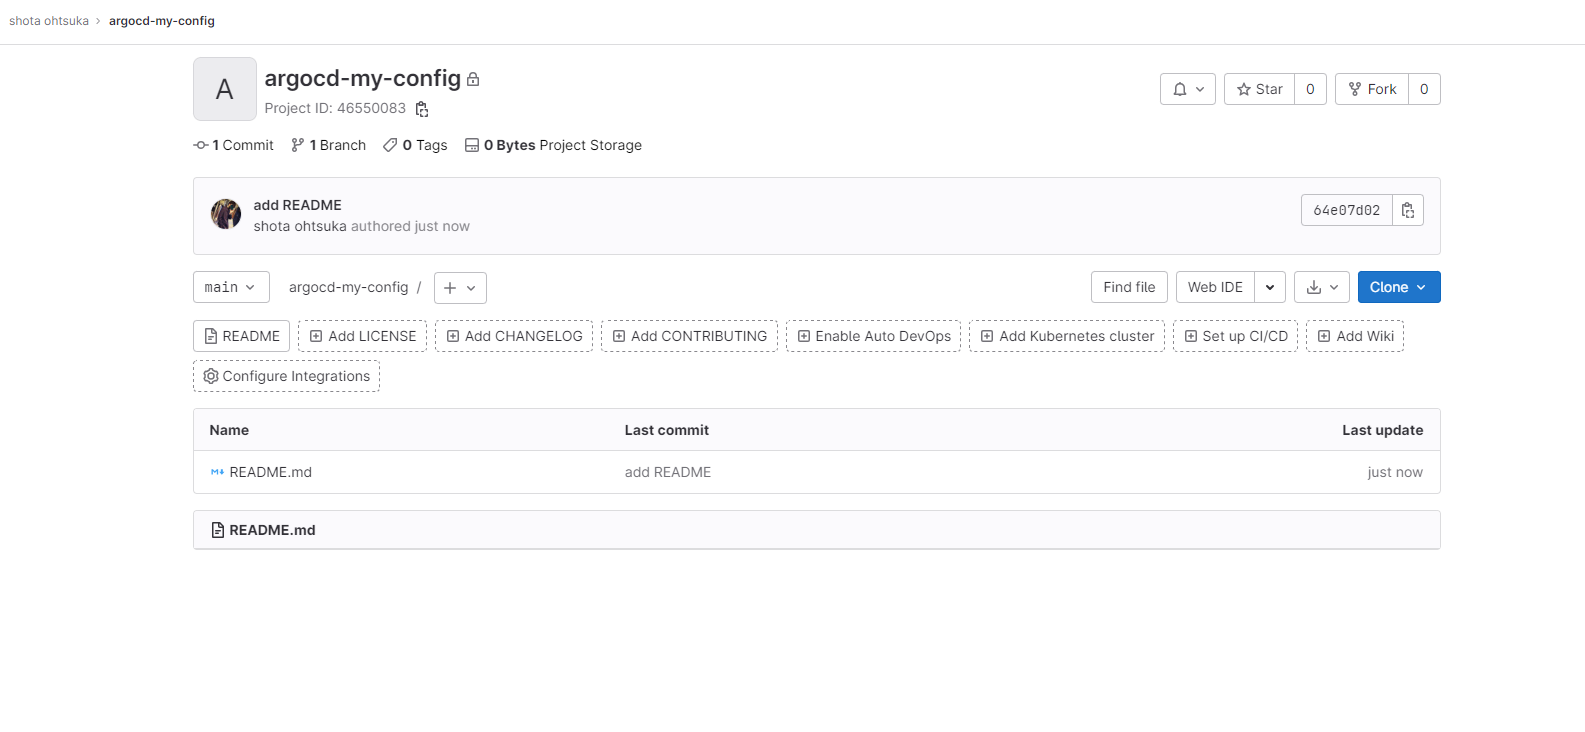
GitLabのWebUI上でreadmeファイルがProject配下に作成されていることを確認します。
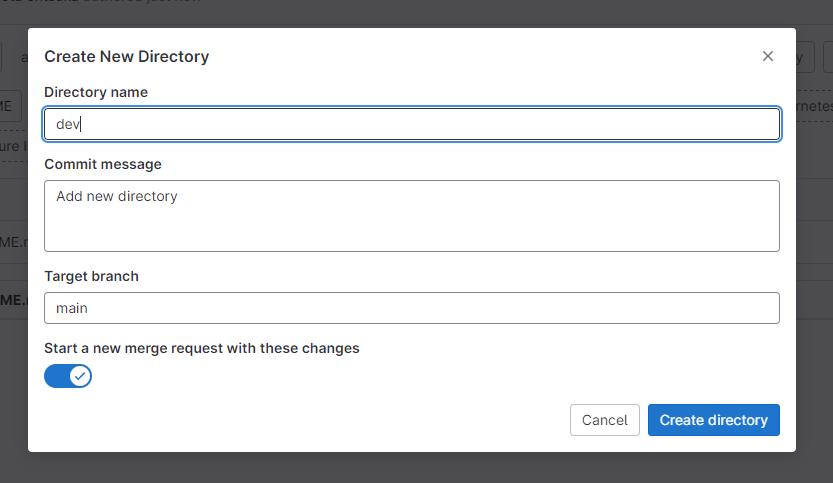
動画ではdevディレクトリ上で色々作業をしているのでそれに合わせるために、devディレクトリを作成していきます。画面中央左にある【+】を押下します。
Directory nameにdevと入力してCreateします。
GitLabで作成したディレクトリをk8sホスト側で認識させます。
認識させるにはgit pullコマンドを使用する様です。
root@k8s-master:~/argocd-my-config# ls
README.md
root@k8s-master:~/argocd-my-config# git pull origin main
Username for 'https://gitlab.com':(メールアドレス入力)
Password for 'https://●●●●':(パスワード入力)
remote: Enumerating objects: 4, done.
remote: Counting objects: 100% (4/4), done.
remote: Compressing objects: 100% (2/2), done.
remote: Total 3 (delta 0), reused 0 (delta 0), pack-reused 0
Unpacking objects: 100% (3/3), 297 bytes | 297.00 KiB/s, done.
From https://gitlab.com/SHOLAND/argocd-my-config
 * branch            main       -> FETCH_HEAD
   64e07d0..bd827c2  main       -> origin/main
Updating 64e07d0..bd827c2
Fast-forward
 dev/.gitkeep | 0
 1 file changed, 0 insertions(+), 0 deletions(-)
 create mode 100644 dev/.gitkeep
pullが正常に終了するとdevディレクトリが表示されると思います。
次の作業の為、そのディレクトリに移動します。
root@k8s-master:~/argocd-my-config# ls
dev  README.md
root@k8s-master:~/argocd-my-config# cd dev/
root@k8s-master:~/argocd-my-config/dev# ls
root@k8s-master:~/argocd-my-config/dev#
以下のサイトを参考にしながらArgoCDの為のyamlファイルを作成していきます。
用意したyamlは以下
sourceがGitLabについて。destnationがKubernetesについての記述です。動画を見ればこの辺りはすんなり入ると思います。
apiVersion: argoproj.io/v1alpha1
kind: Application
metadata:
  name: argo-application
  namespace: argocd
spec:
  project: default
  source:
    repoURL: https://gitlab.com/SHOLAND/argocd-my-config.git
    targetRevision: HEAD
    path: dev
  destination:
    server: 'https://kubernetes.default.svc'
    namespace: argo-app-ns
  syncPolicy:
    syncOptions:
    - CreateNamespace=true
    automated:
      selfHeal: true
      prune: true
また、このタイミングでGitOps(CI/CD)試験用のyamlファイルを用意しておきます。今回用意したyamlは以下。nginx podを各nodeにデプロイするDeamonSetになります。metadata内でどのnamespaceにデプロイするかを併せて記載しておきます。
apiVersion: apps/v1
kind: DaemonSet
metadata:
  name: argo-test-ds-app
  namespace: argo-app-ns
spec:
  selector:
    matchLabels:
      name: nginx
  template:
    metadata:
      labels:
        name: nginx
    spec:
      containers:
      - name: nginx-container
        image: nginx:latest
これらのyamlファイルをGitLabにpushします。
git statusコマンドで差分を確認。2つのファイルが差分として出ていることが分かります。
git addでステージエリアにファイルを載せて、git commitでステージエリアに乗せたファイルをGitLabにコミットします。
root@k8s-master:~/argocd-my-config/dev# ls
Application.yaml  argo-test-ds-app.yaml

root@k8s-master:~/argocd-my-config/dev# git status
On branch main
Your branch is up to date with 'origin/main'.
Untracked files:
  (use "git add <file>..." to include in what will be committed)
        Application.yaml
        argo-test-ds-app.yaml
nothing added to commit but untracked files present (use "git add" to track)

root@k8s-master:~/argocd-my-config/dev# git add .
root@k8s-master:~/argocd-my-config/dev# git commit -m "ArgoCD trial"
[main f3ceada] ArgoCD trial
 2 files changed, 37 insertions(+)
 create mode 100644 dev/Application.yaml
 create mode 100644 dev/argo-test-ds-app.yaml
root@k8s-master:~/argocd-my-config/dev# git push
Username for 'https://gitlab.com':(メールアドレス入力)
Password for 'https://●●●●':(パスワード入力)
Enumerating objects: 7, done.
Counting objects: 100% (7/7), done.
Delta compression using up to 16 threads
Compressing objects: 100% (5/5), done.
Writing objects: 100% (5/5), 833 bytes | 833.00 KiB/s, done.
Total 5 (delta 0), reused 0 (delta 0), pack-reused 0
To https://gitlab.com/SHOLAND/argocd-my-config.git
   384d2b2..f3ceada  main -> main
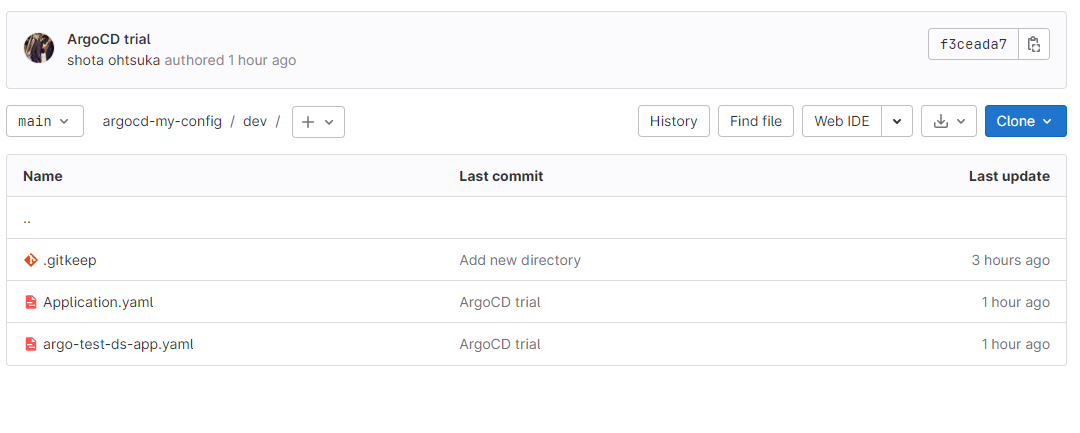
GitLabのWebUI上にも表示されることを確認します。出力されていればpushが上手くいったことを示します。
ArgoCDの為のyamlをデプロイしていきます。
root@k8s-master:~/argocd-my-config/dev# kubectl apply -f Application.yaml
application.argoproj.io/argo-application created
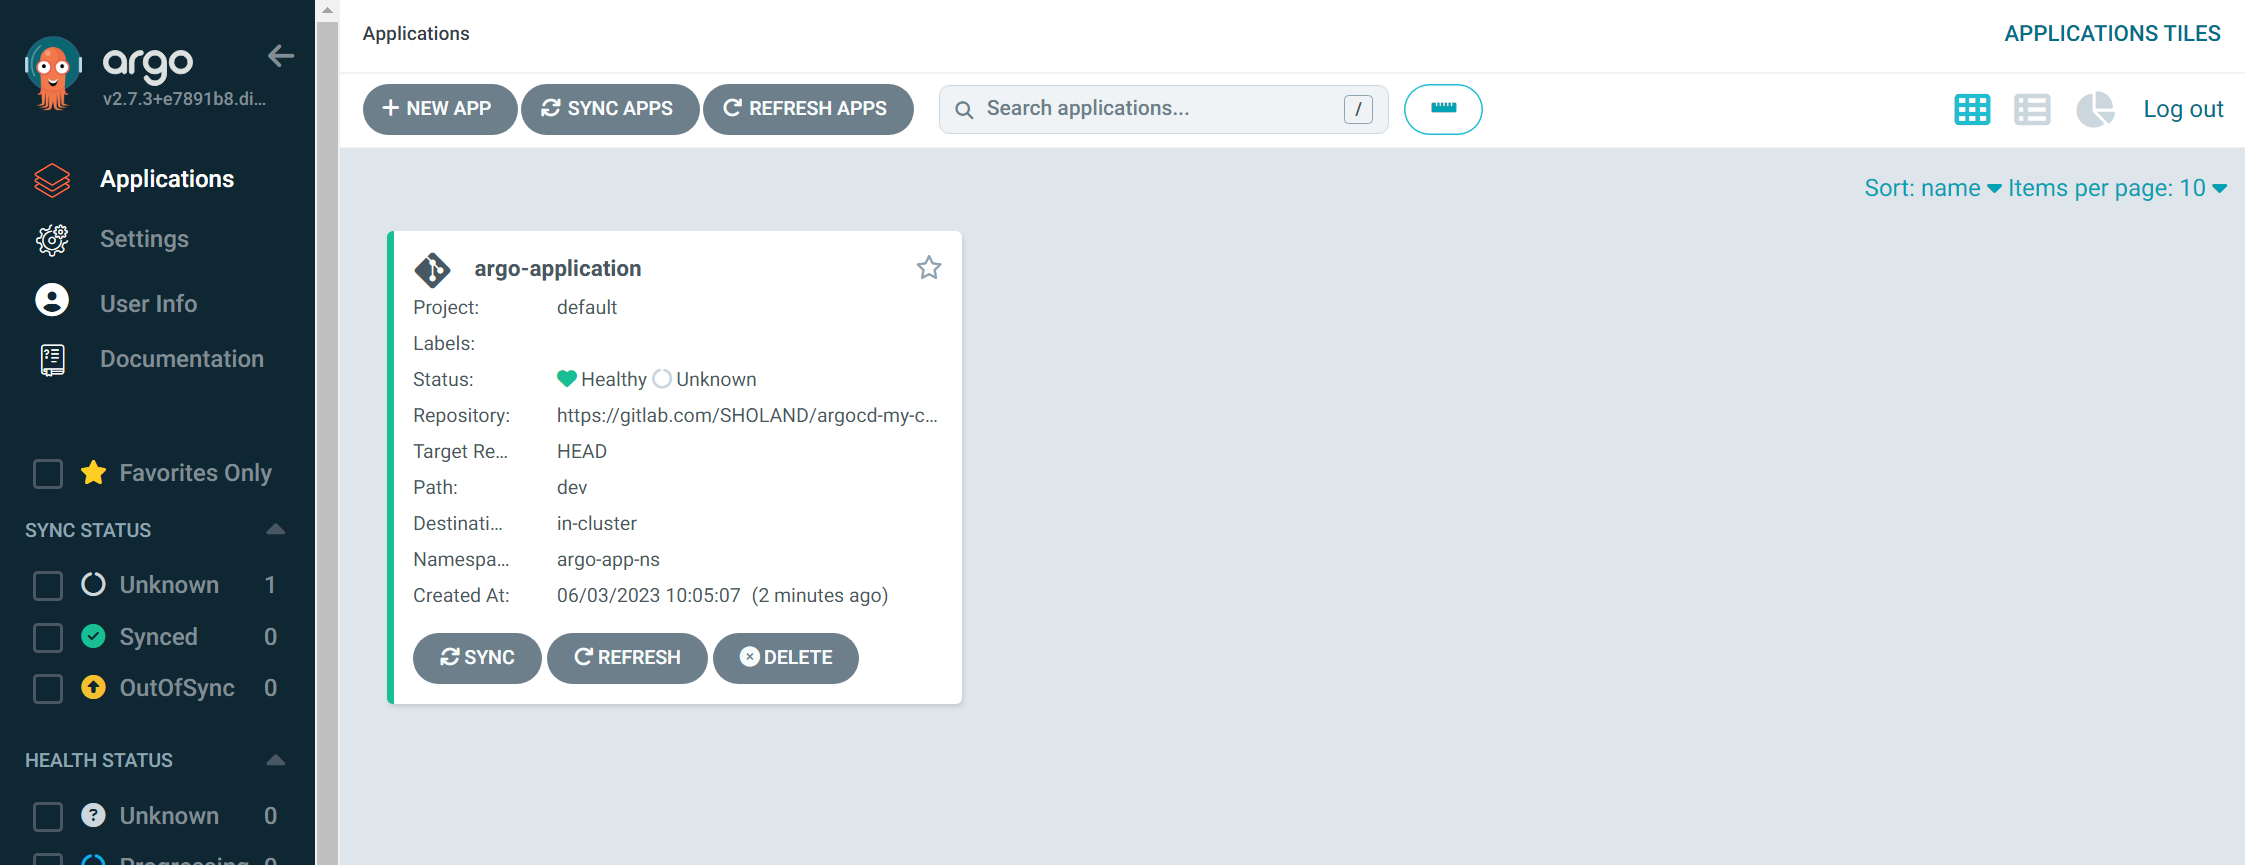
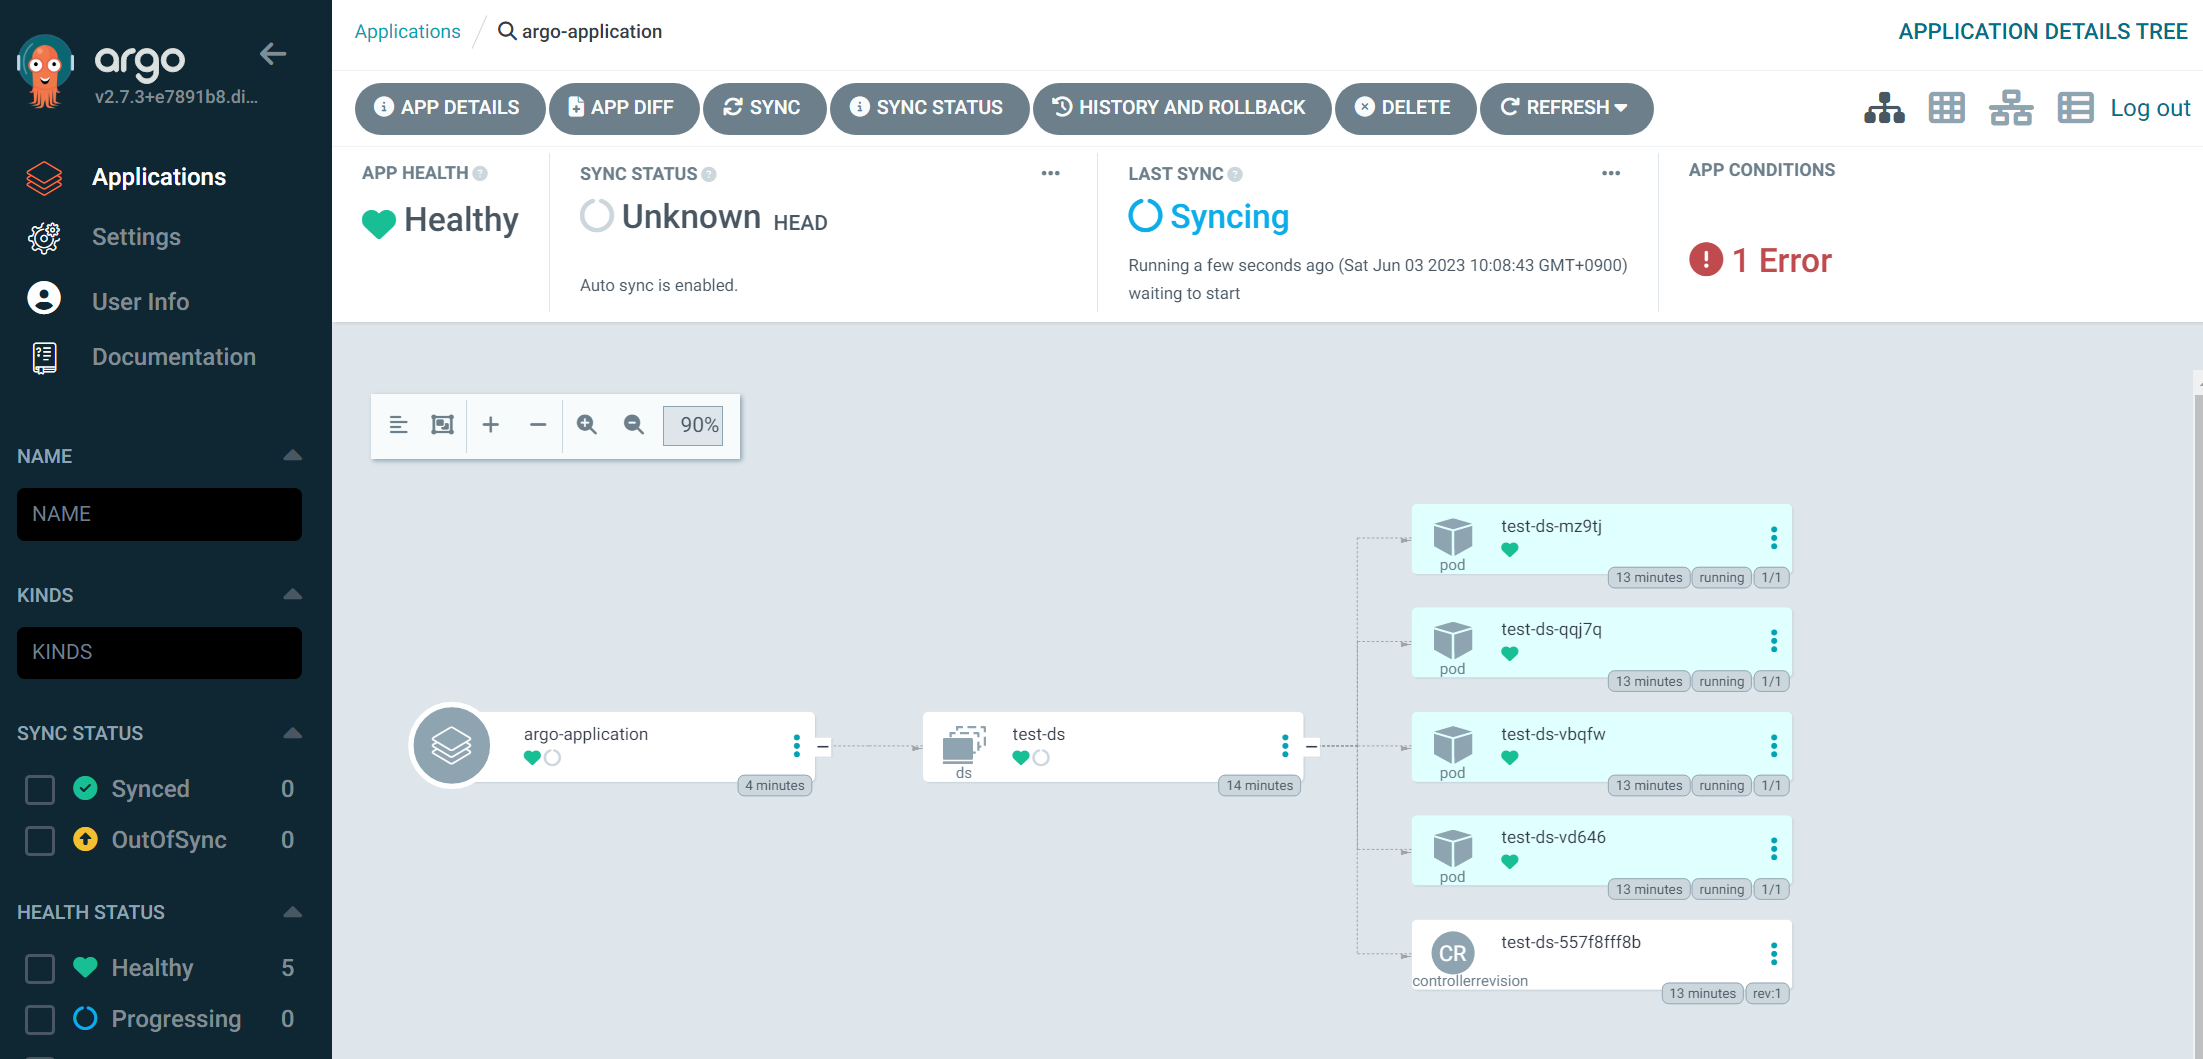
デプロイするとArgoCDのWebUI上でも確認が出来るようになると思いますが、下記の様にSync関連で上手くいっていなかったリ、authenticationが上手くいっていないようなエラーが出力されると思います。
ArgoCDやGitLab初心者の推測ですが、恐らくArgoCDにもGitLabについて登録をしていないから、このようなエラーを吐かれるのだと思います。
(k8s上でコマンドを実行してGitLabと連携を取りましたが、あっちはあくまでもk8s⇔GitLabの設定をしただけで、ArgoCD⇔GitLabの設定をしているわけではない。という推測)
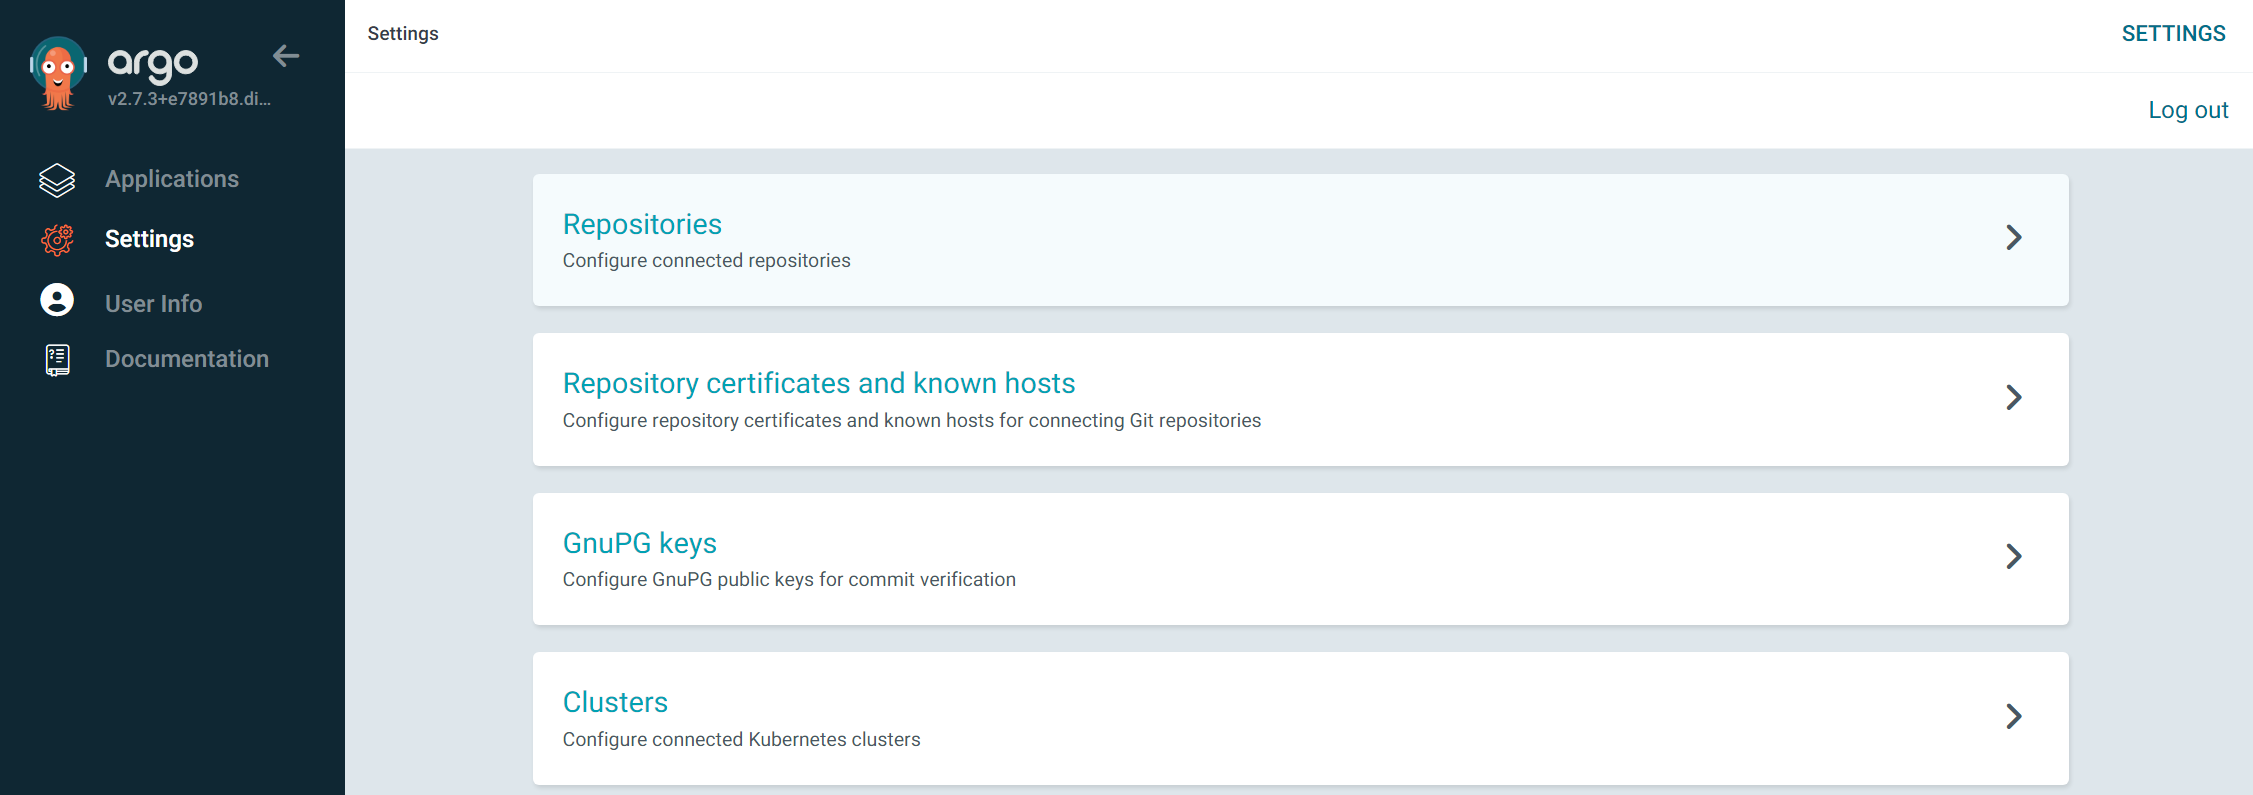
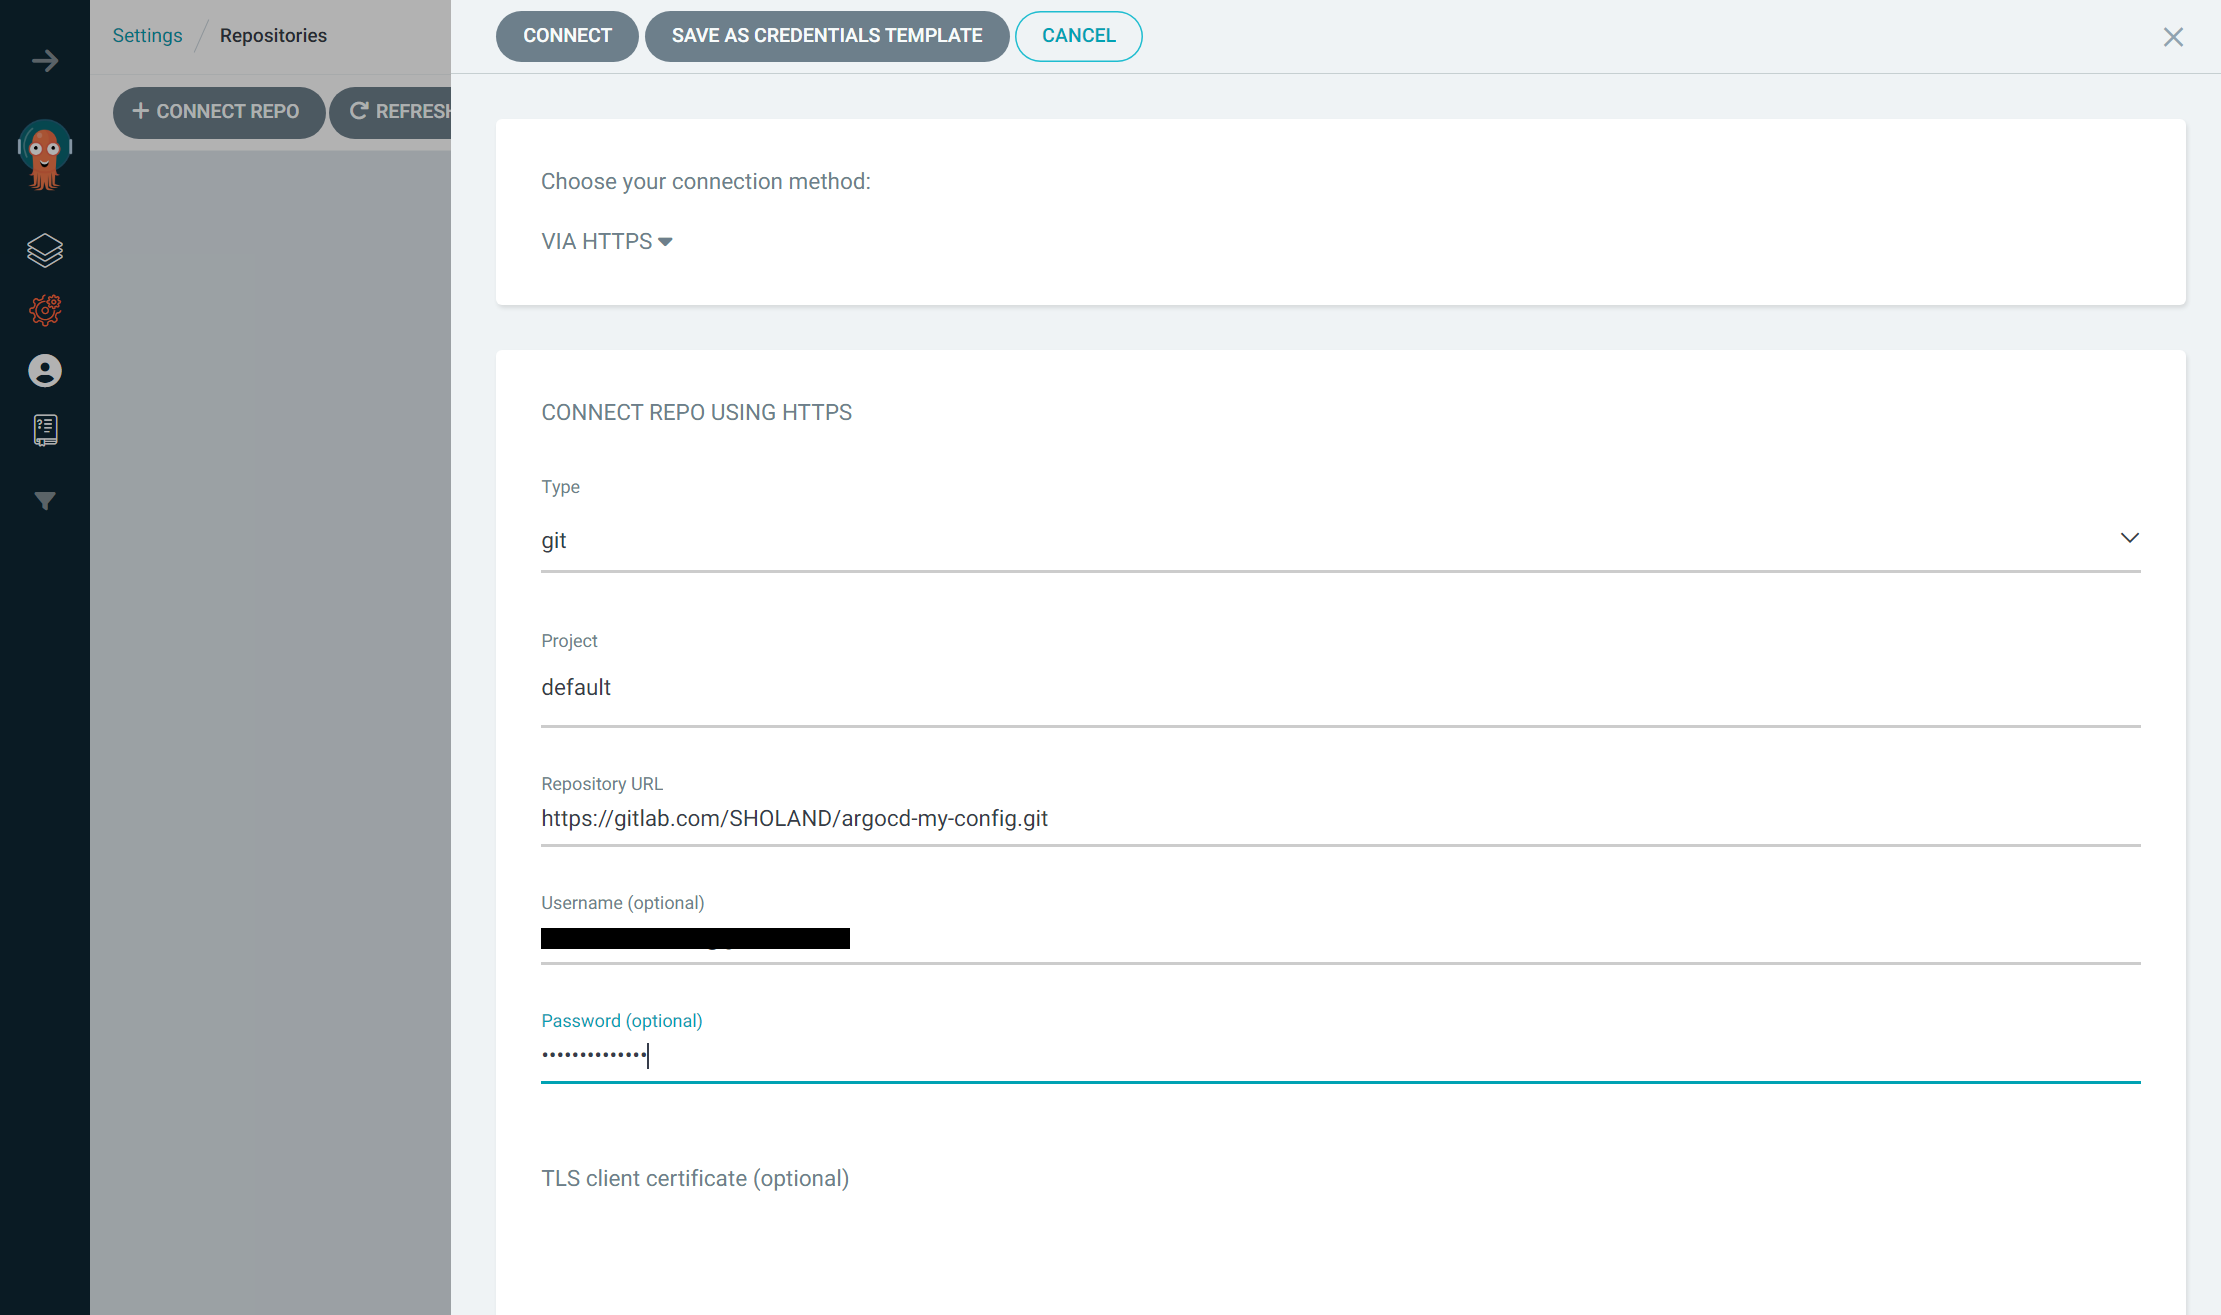
ArgoCDのSettingsからRepositoriesに遷移します。
情報を入力します。ここまで設定が出来ているのであれば感覚的にどこに何を入れればいいかわかるかと思います。情報を入れましたら上部にあるCONNECTを押下します。
以下の様にSuccessfulとなればOKです。
元の場所に戻り、SYNCを押下します。
するとSyncingステータスになると思います。
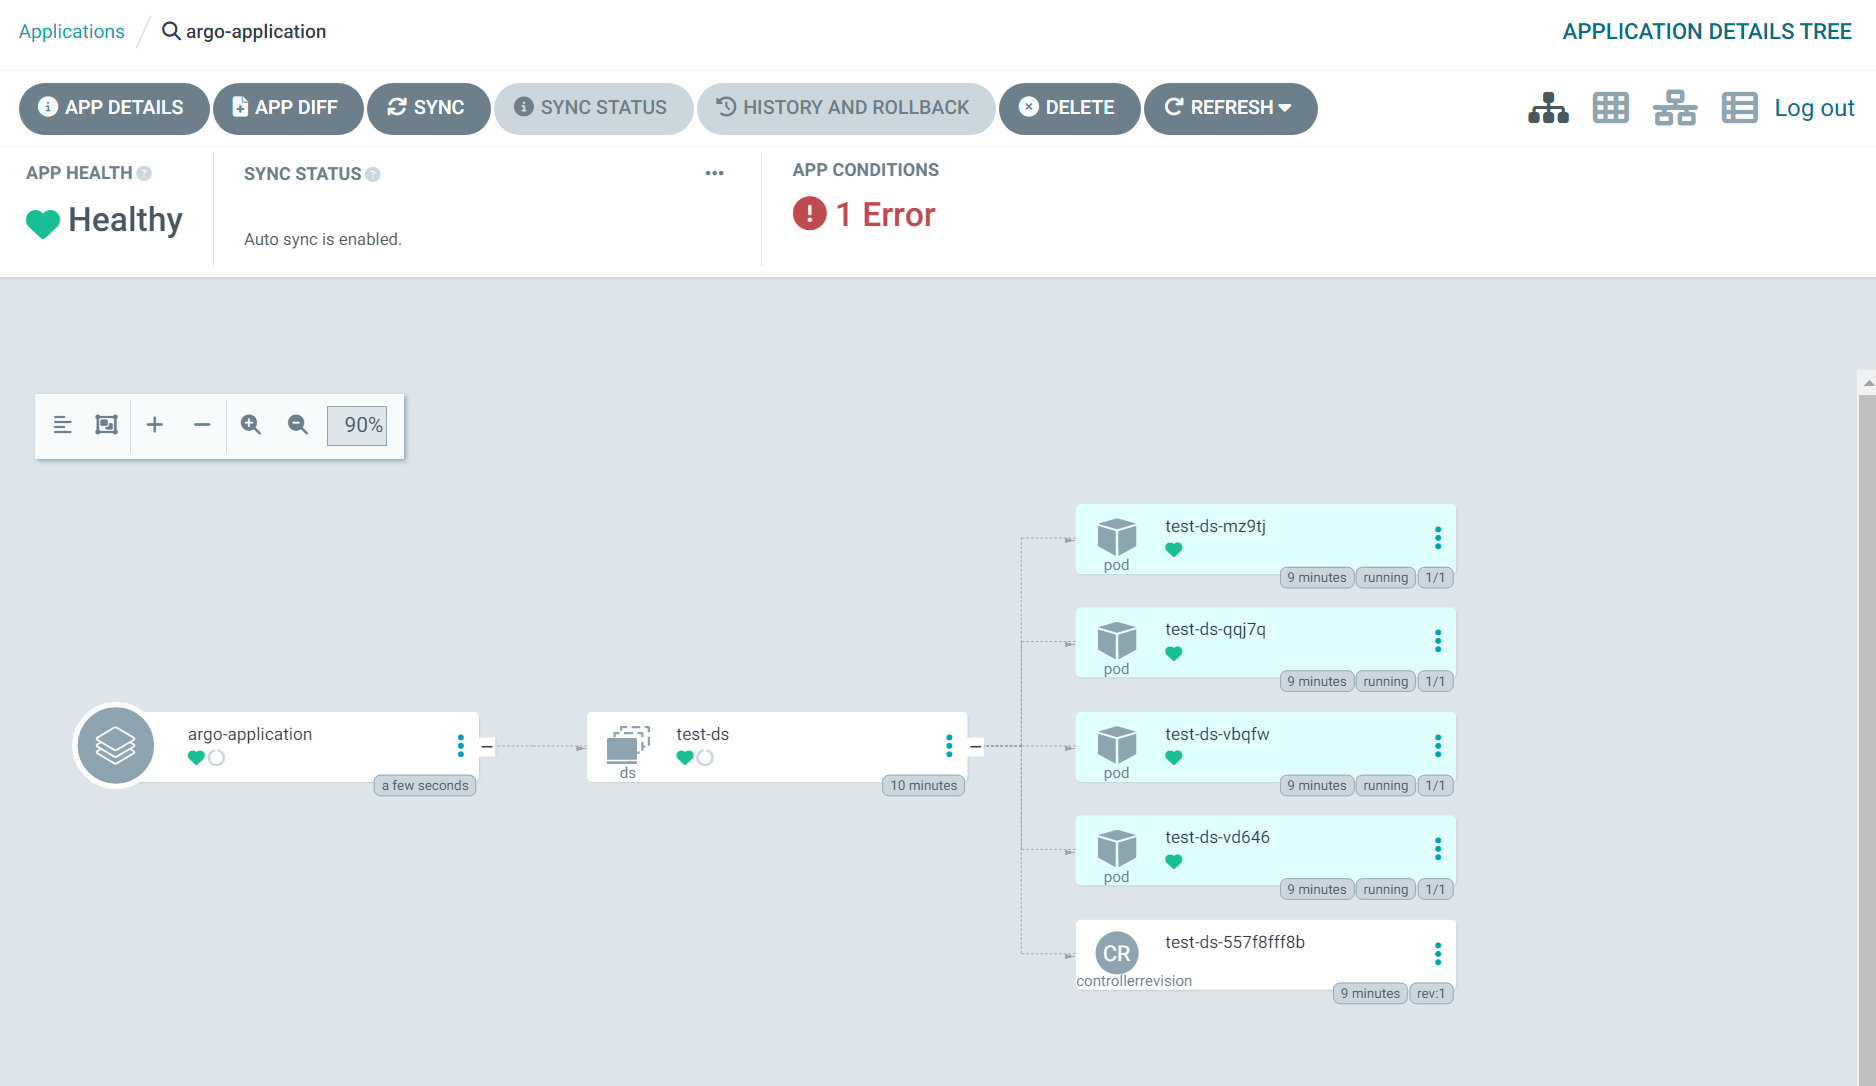
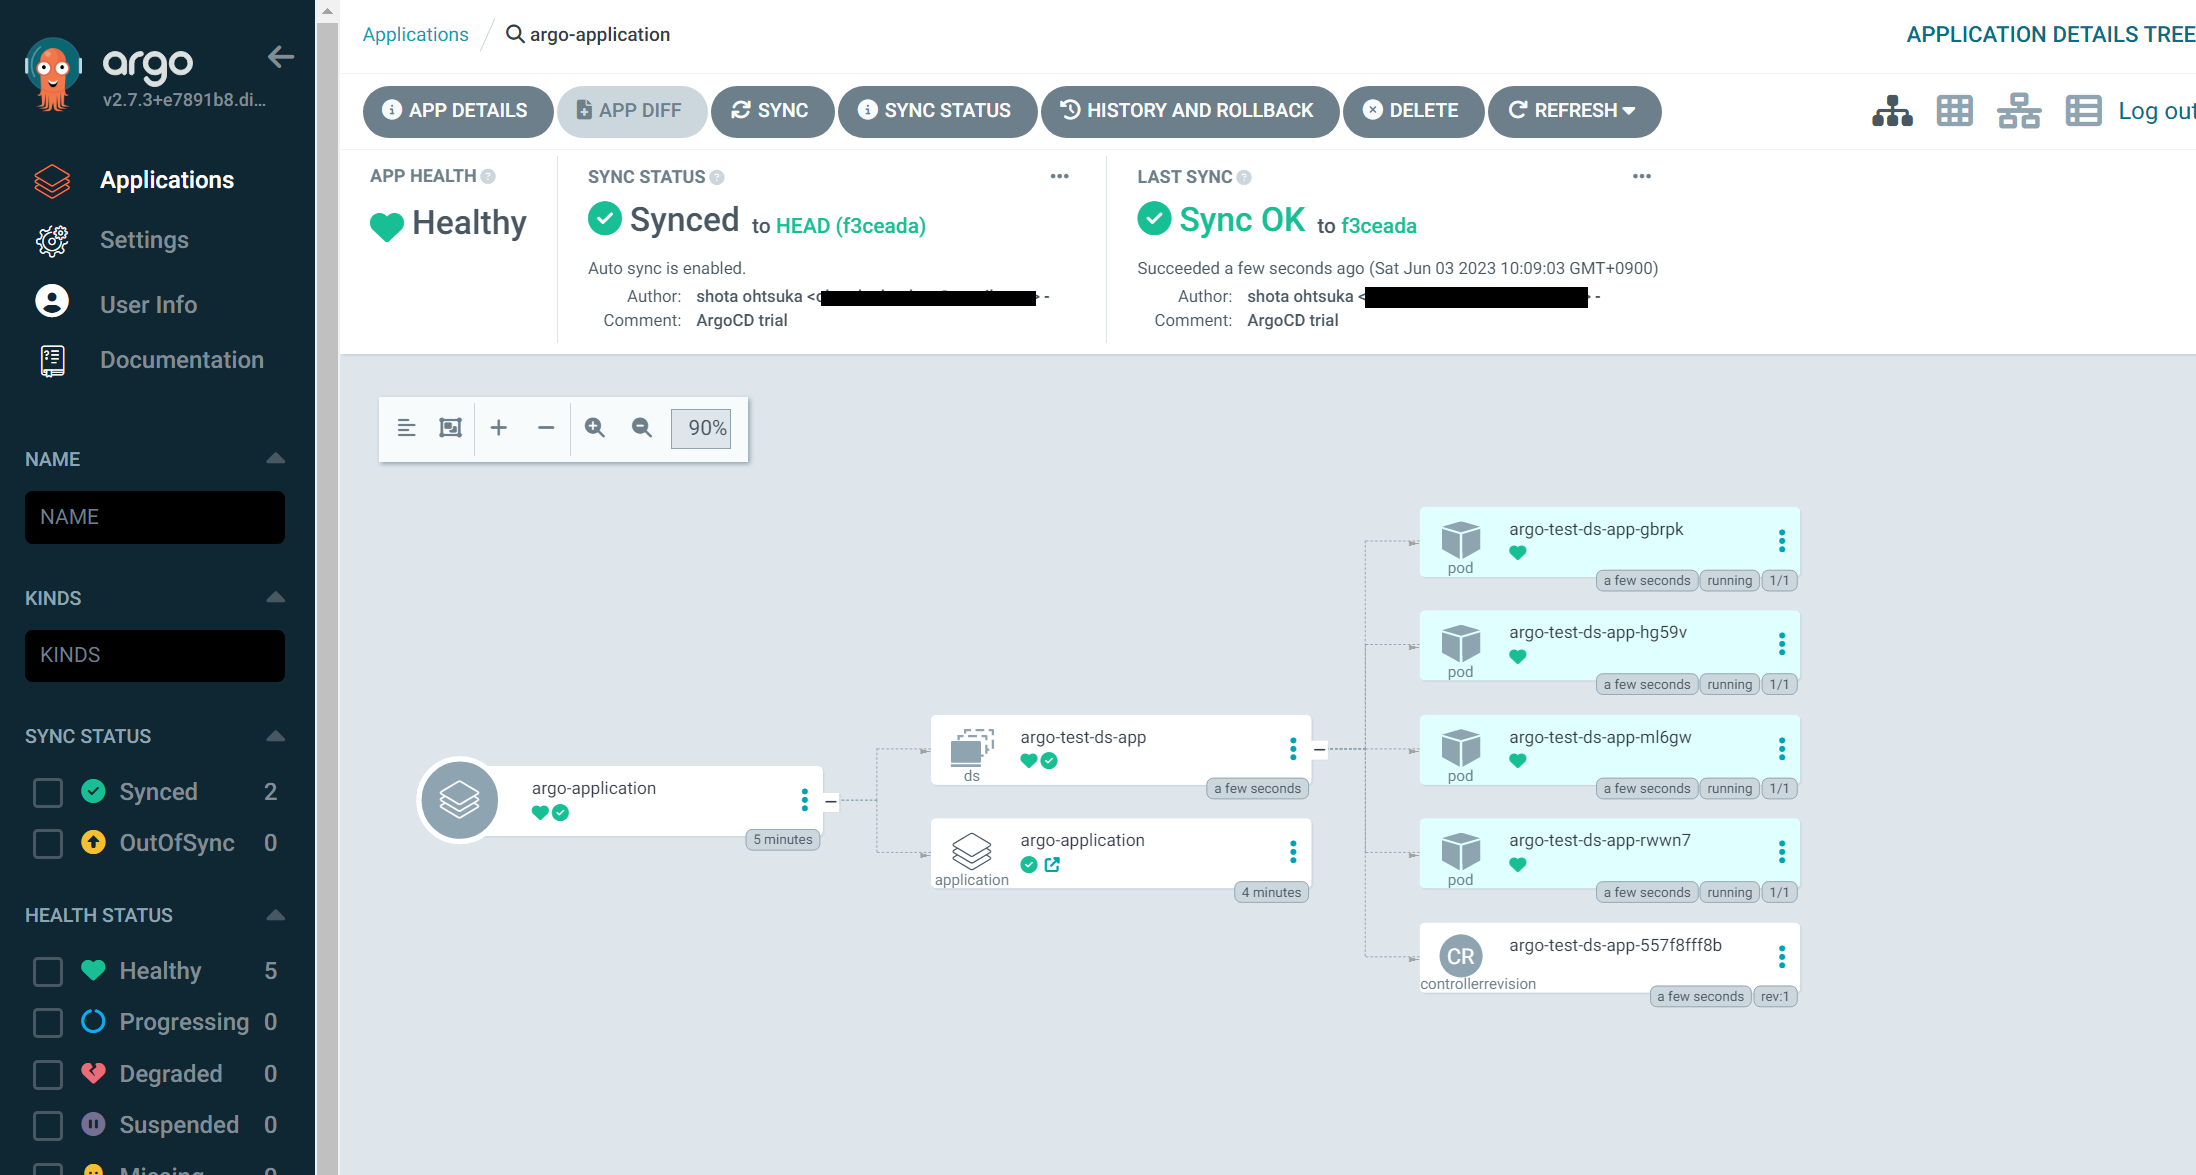
数分待つとエラーが解消され、Healthy/Syncedステータスに変わるはずです。
DeamonSetも勝手にデプロイされていますね。
移行このディレクトリにyamlを置くとArgoCDがそれをpullして、k8sに環境を自動でデプロイしてくれるようになります。

