こんにちは
株式会社クラスアクト インフラストラクチャ事業部の大塚です。
ひとつき位前に、dockerコンテナを用いたrancherサーバをデプロイしました。
前回はrancherサーバ内にデフォルトで作成されたk8s環境上に、それとなくnginx/apache podをデプロイし、NodePortを使ってなんとなくWebブラウザから接続してみました。
ただ、これはrancherの良さを引き出せておりません。
rancherとは何かを改めて記載します。
マルチクラウド/オンプレミス環境にk8s環境を容易に構築することを目的に据えています。
上記私のQiitaでは全くその目的を果たせていません。
Rancherは、コンテナ技術を採用しているチーム向けのコンテナ管理のプラットフォームです。マルチクラウドとオンプレミス環境にKubernetesクラスターをより簡単に構築および管理できます。
今回はだいぶ時間がかかりましたが、rancherを使ってマルチノードのk8sクラスタを組んでみたいと思います。
構築する環境イメージ
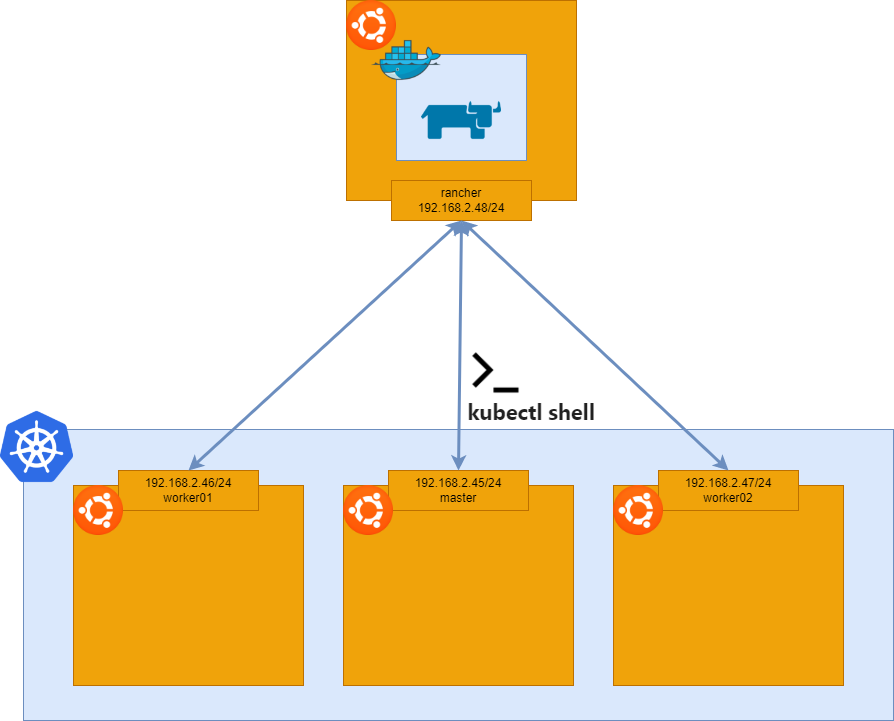
構築
rancherコンテナデプロイまでは上記Qiitaと同じで構いません。
強いて言うのであればdocker runのコマンドは以下で構わないかと思います。上記Qiitaのものは余計なポートも空けておりますので。
docker run -d --name=rancher-server --restart=unless-stopped -p 80:80 -p 443:443 --privileged rancher/rancher:latest
rancherコンテナデプロイ後、https://(サーバのIPアドレス)でrancherにアクセスします。
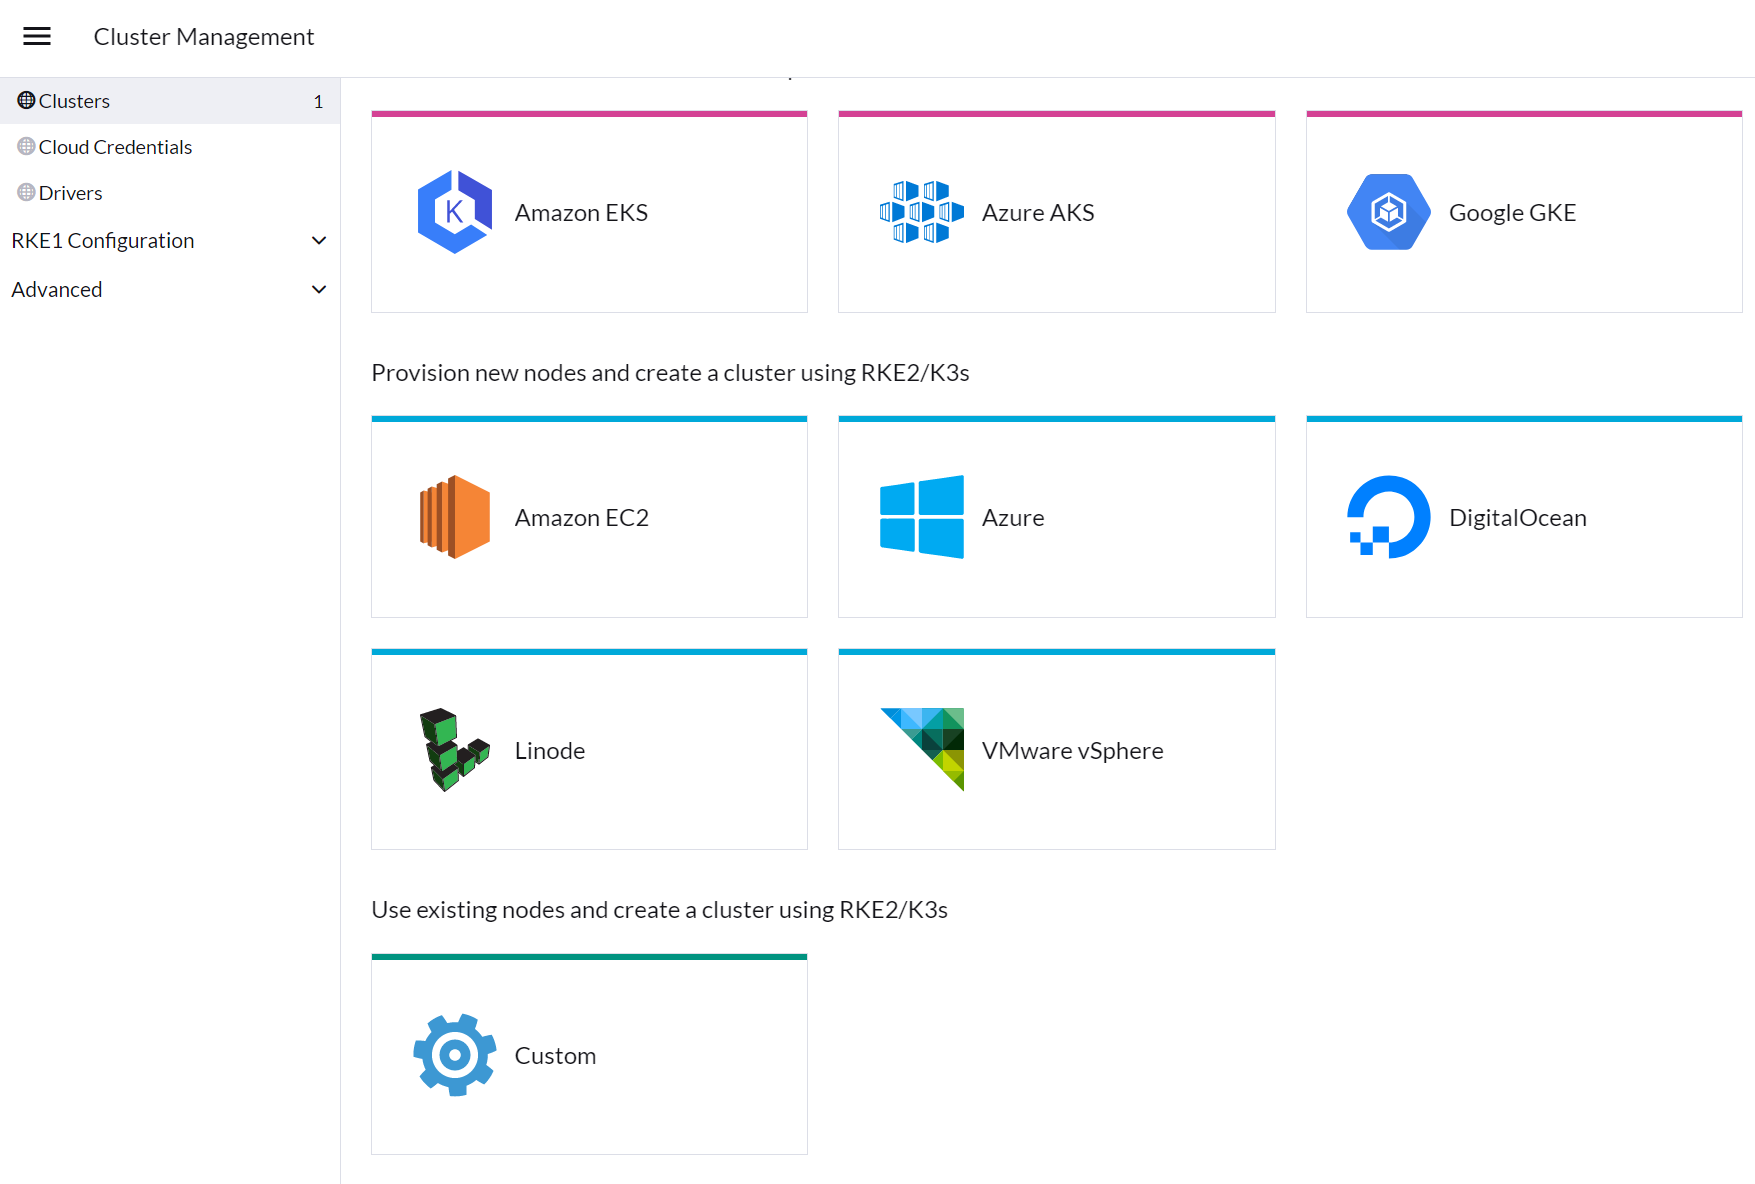
localというのがデフォルトで作成されるk8s環境になります。今回は新しいk8s環境をrancher外部に作成します。
青地白抜きで表示されているCreateを押下します。

パブリッククラウドではなくローカルのサーバにデプロイしますので、ここはCustomを押下します。
クラスタの名前を"k8s-rancher-based"とし、他はデフォルトのままとします。Createを押下します。
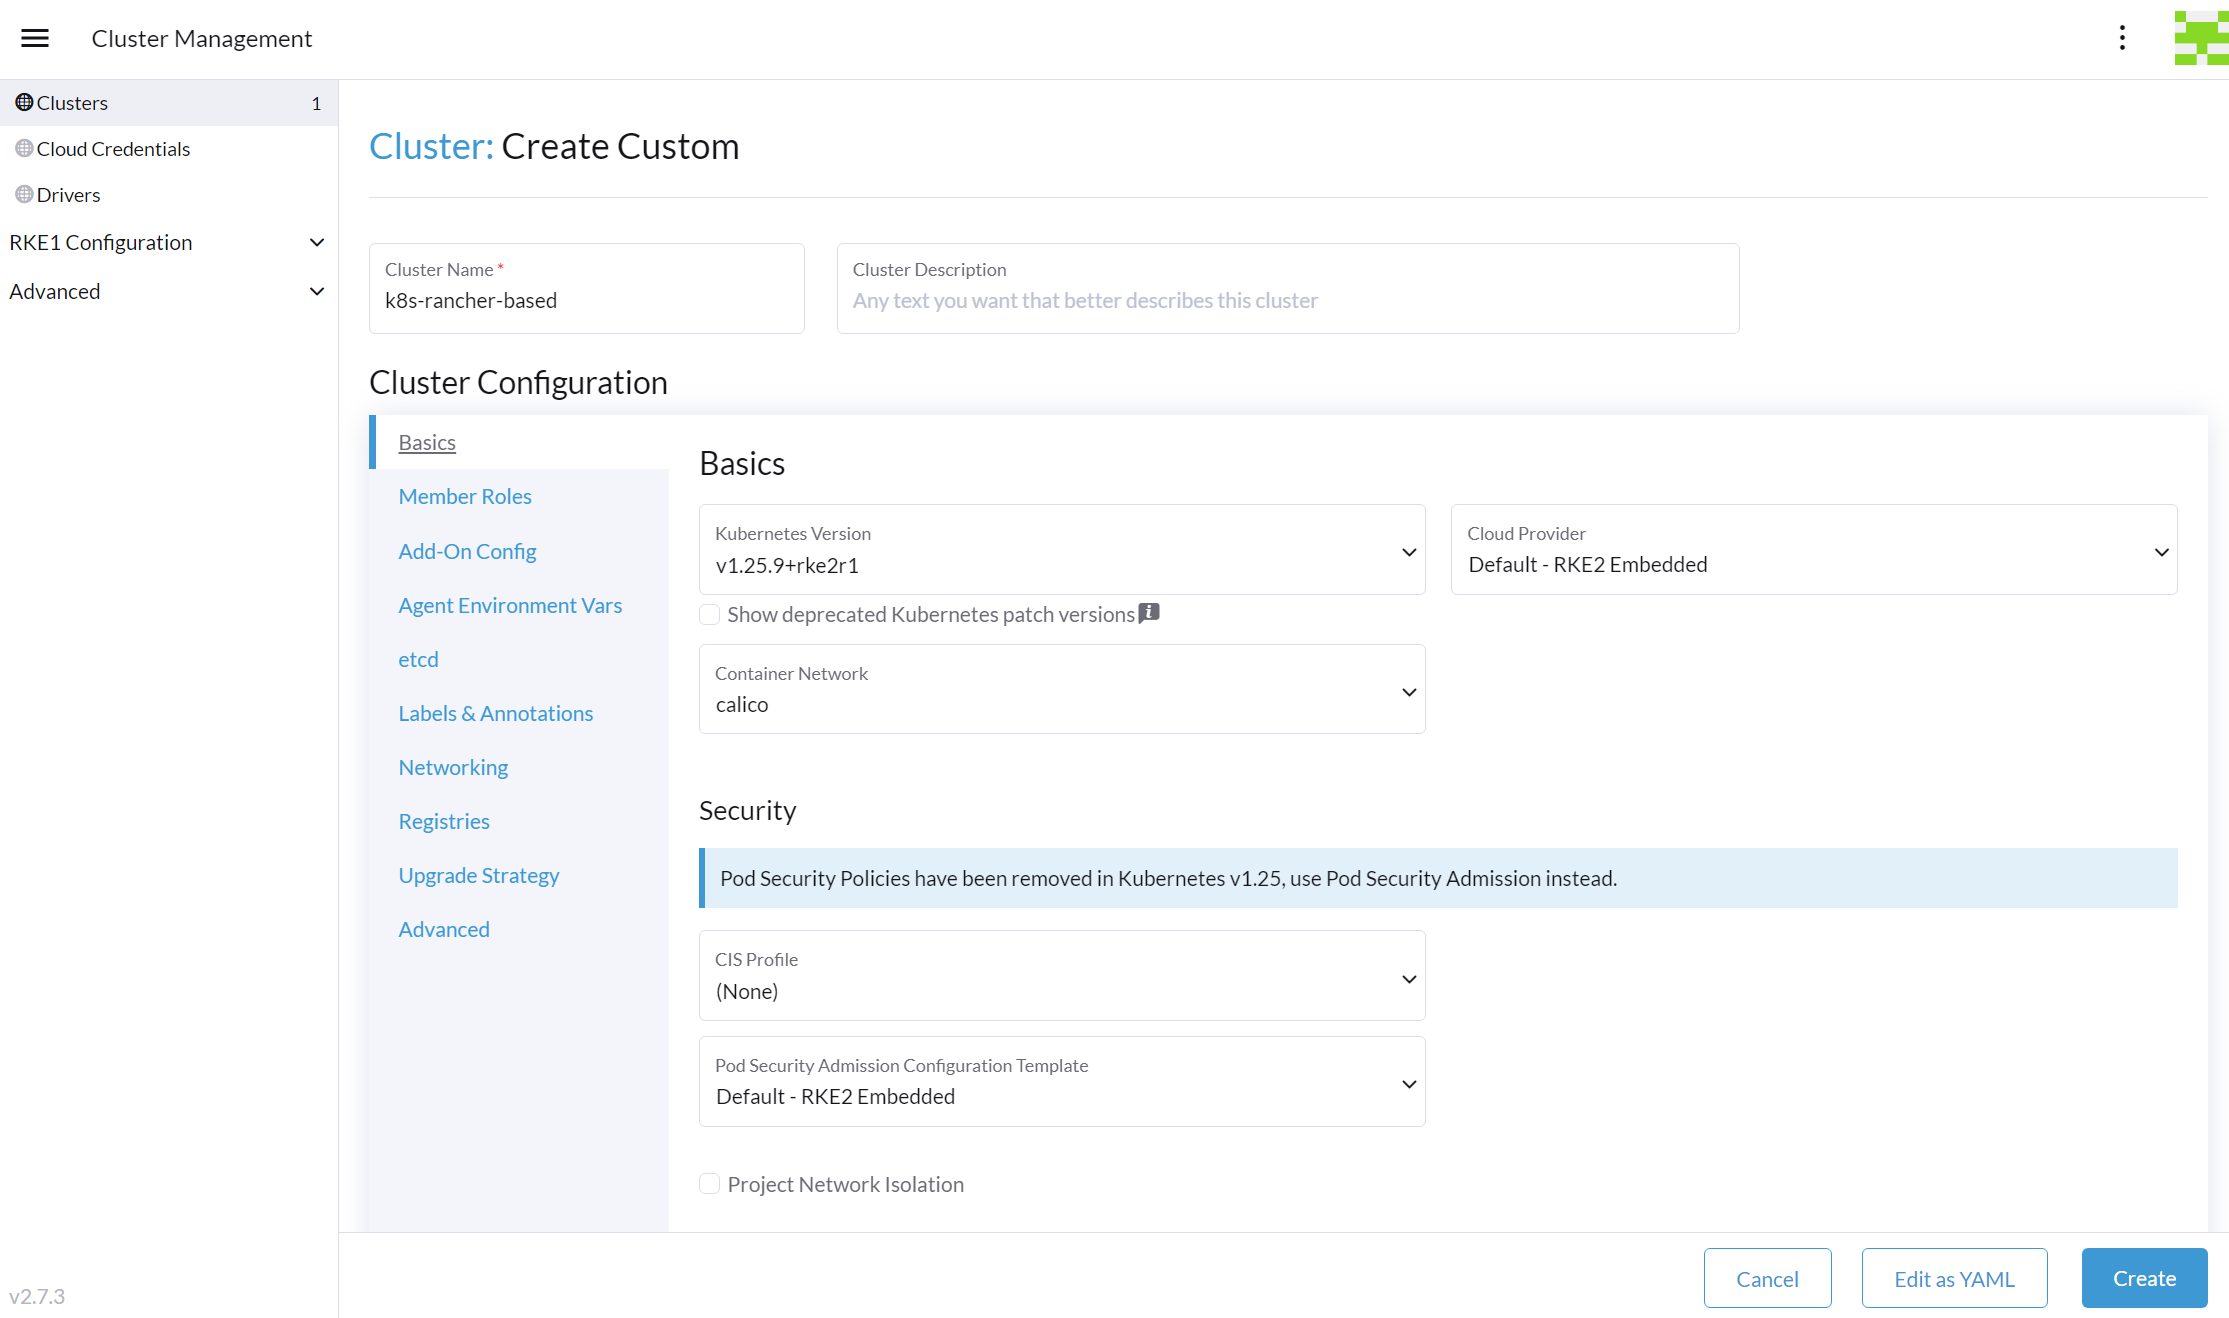
次にクラスタにアサインするノードについて設定していきます。
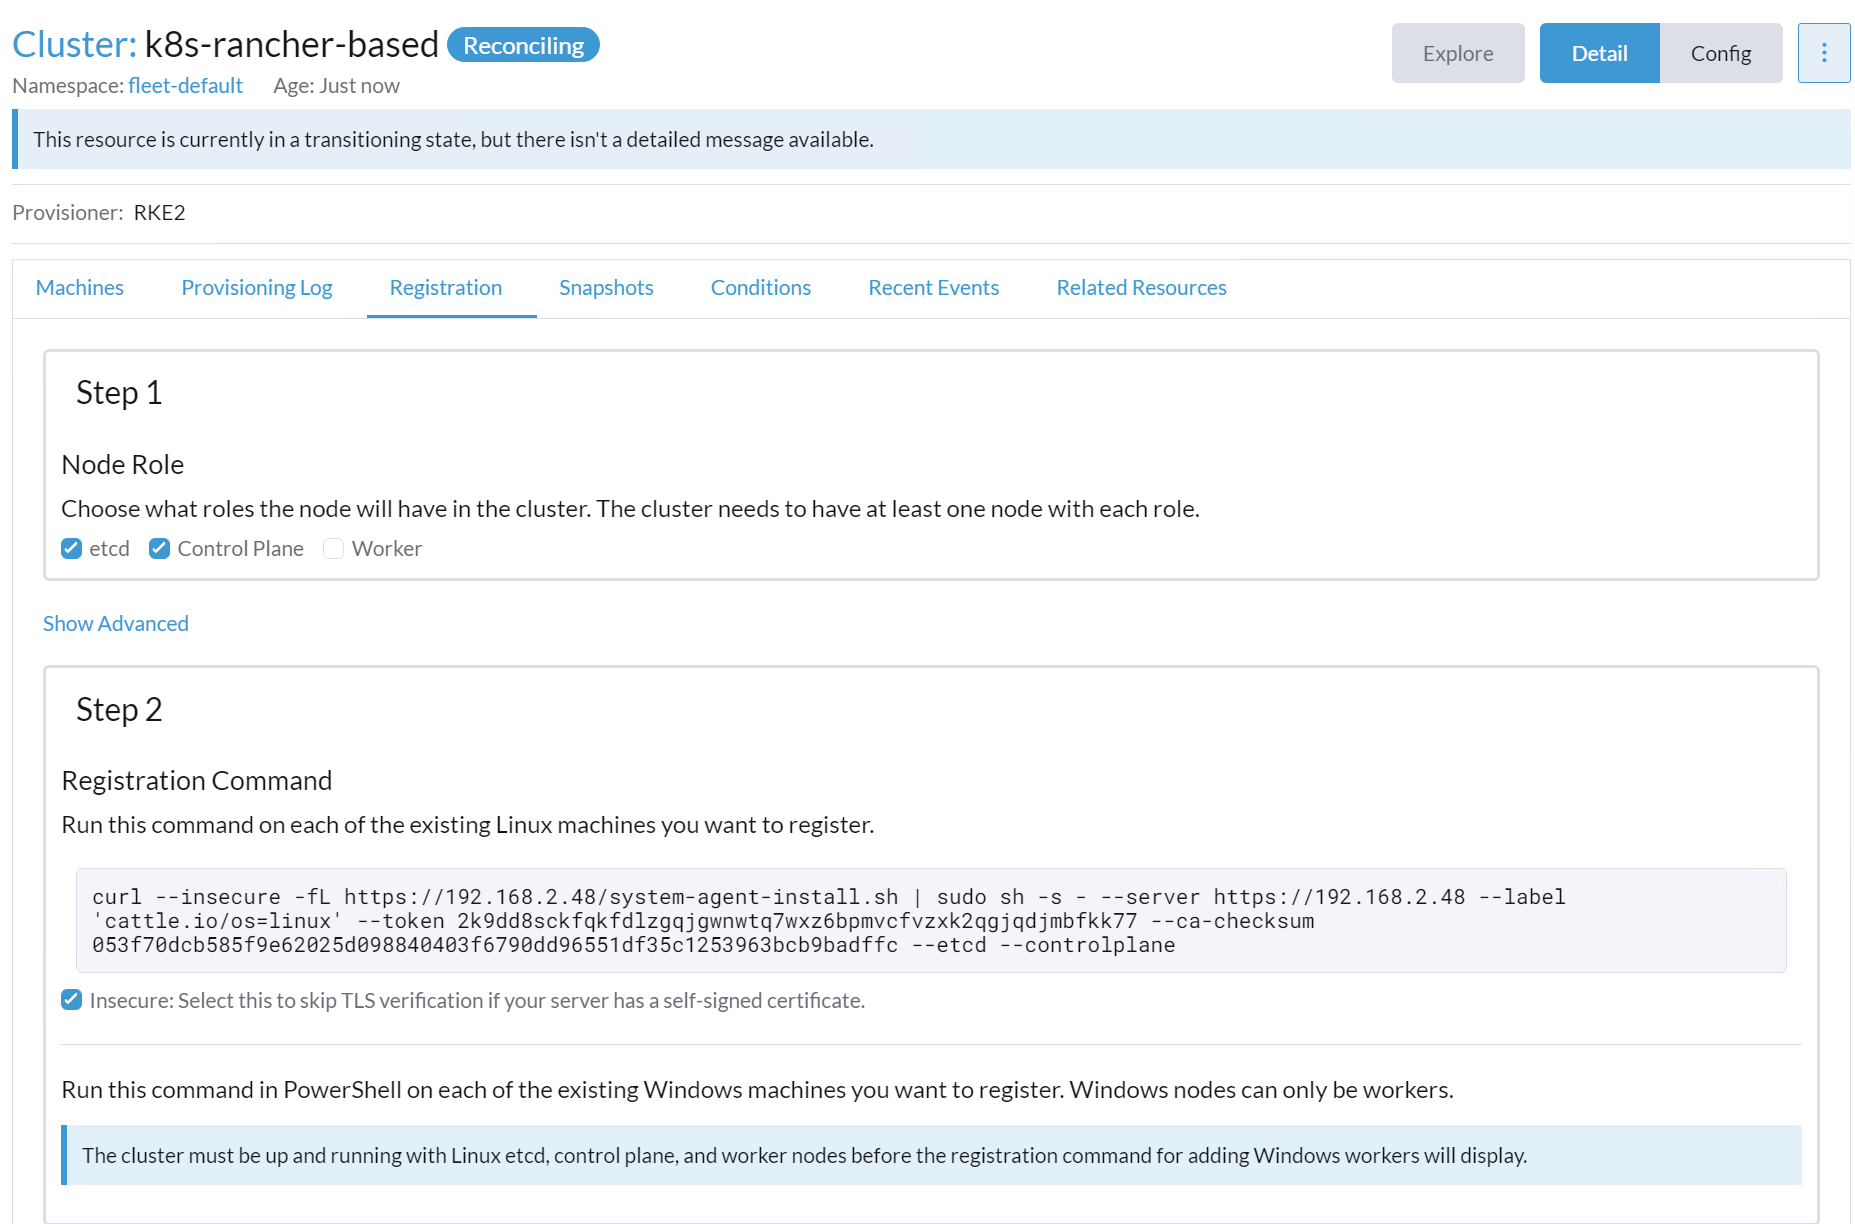
まずはクラスタmasterの設定から行います。Step1のNodeRoleでetcdとControlPlaneを押下し、Step2の"Insecure:Select ~"部分を押下します。
ここまで設定し、"curl ~"部分のコマンドをコピーします。
※シングルノードのk8s環境をデプロイする場合はWorkerにもチェックを入れます。
※Insecure部分にチェックをつけないとrancher⇔クラスタmaster間の通信が暗号化されます。
上記でコピーしたコマンドをクラスタmasterとなるノード上で実行します。
実行結果を以下に示します。
root@k8s-siken-master:~# curl --insecure -fL https://192.168.2.48/system-agent-install.sh | sudo  sh -s - --server https://192.168.2.48 --label 'cattle.io/os=linux' --token 2k9dd8sckfqkfdlzgqjgwnwtq7wxz6bpmvcfvzxk2qgjqdjmbfkk77 --ca-checksum 053f70dcb585f9e62025d098840403f6790dd96551df35c1253963bcb9badffc --etcd --controlplane
  % Total    % Received % Xferd  Average Speed   Time    Time     Time  Current
                                 Dload  Upload   Total   Spent    Left  Speed
100 29788    0 29788    0     0   933k      0 --:--:-- --:--:-- --:--:--  969k
[INFO]  Label: cattle.io/os=linux
[INFO]  Role requested: etcd
[INFO]  Role requested: controlplane
[INFO]  Using default agent configuration directory /etc/rancher/agent
[INFO]  Using default agent var directory /var/lib/rancher/agent
[INFO]  Determined CA is necessary to connect to Rancher
[INFO]  Successfully downloaded CA certificate
[INFO]  Value from https://192.168.2.48/cacerts is an x509 certificate
[INFO]  Successfully tested Rancher connection
[INFO]  Downloading rancher-system-agent binary from https://192.168.2.48/assets/rancher-system-agent-amd64
[INFO]  Successfully downloaded the rancher-system-agent binary.
[INFO]  Downloading rancher-system-agent-uninstall.sh script from https://192.168.2.48/assets/system-agent-uninstall.sh
[INFO]  Successfully downloaded the rancher-system-agent-uninstall.sh script.
[INFO]  Generating Cattle ID
[INFO]  Successfully downloaded Rancher connection information
[INFO]  systemd: Creating service file
[INFO]  Creating environment file /etc/systemd/system/rancher-system-agent.env
[INFO]  Enabling rancher-system-agent.service
Created symlink /etc/systemd/system/multi-user.target.wants/rancher-system-agent.service → /etc/systemd/system/rancher-system-agent.service.
[INFO]  Starting/restarting rancher-system-agent.service
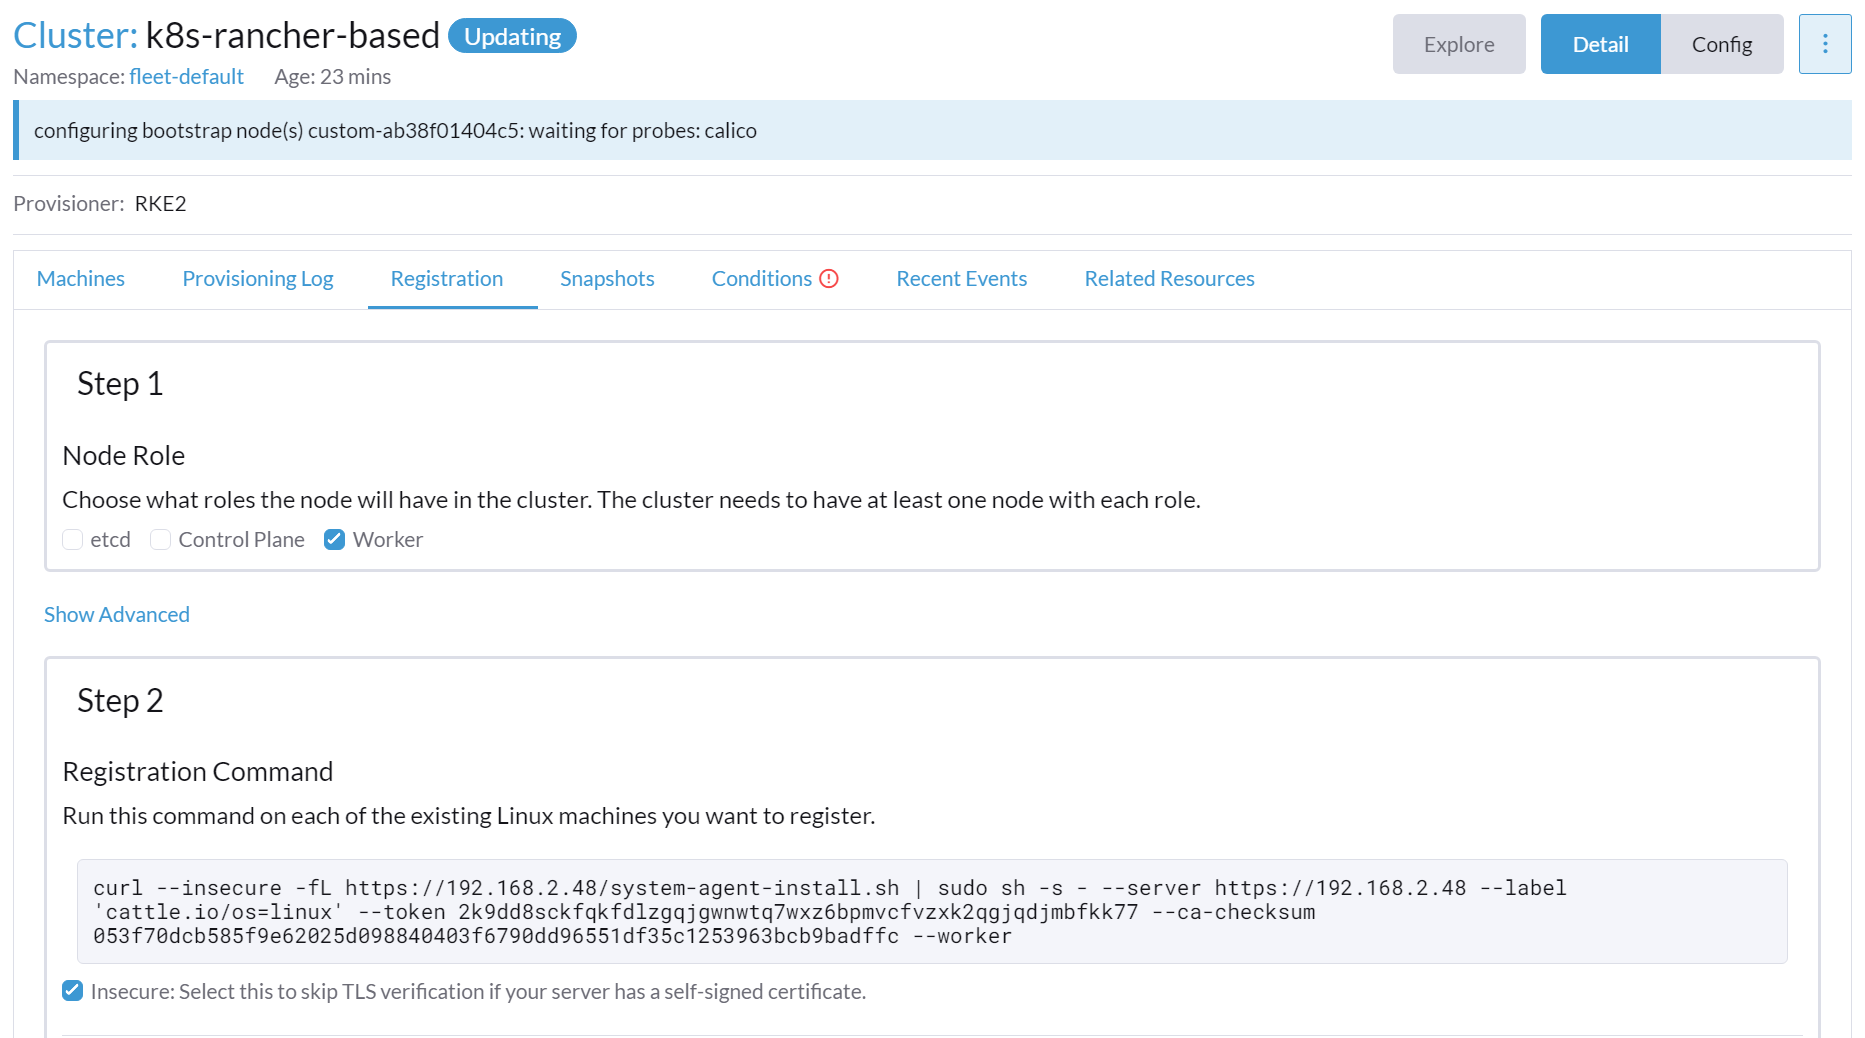
同様にクラスタworkerの設定も行います。
Step1のNodeRoleでworkerを押下し、Step2の"Insecure:Select ~"部分を押下します。
その後、"curl ~"部分のコマンドをコピーします。
上記でコピーしたコマンドをworkerノード上で実行します。
ここではworker1つ分しか記載しませんが、もう1つworkerを追加しています。
root@k8s-siken-worker01:~# curl --insecure -fL https://192.168.2.48/system-agent-install.sh | sudo  sh -s - --server https://192.168.2.48 --label 'cattle.io/os=linux' --token 2k9dd8sckfqkfdlzgqjgwnwtq7wxz6bpmvcfvzxk2qgjqdjmbfkk77 --ca-checksum 053f70dcb585f9e62025d098840403f6790dd96551df35c1253963bcb9badffc --worker
  % Total    % Received % Xferd  Average Speed   Time    Time     Time  Current
                                 Dload  Upload   Total   Spent    Left  Speed
100 29788    0 29788    0     0   147k      0 --:--:-- --:--:-- --:--:--  146k
[INFO]  Label: cattle.io/os=linux
[INFO]  Role requested: worker
[INFO]  Using default agent configuration directory /etc/rancher/agent
[INFO]  Using default agent var directory /var/lib/rancher/agent
[INFO]  Determined CA is necessary to connect to Rancher
[INFO]  Successfully downloaded CA certificate
[INFO]  Value from https://192.168.2.48/cacerts is an x509 certificate
[INFO]  Successfully tested Rancher connection
[INFO]  Downloading rancher-system-agent binary from https://192.168.2.48/assets/rancher-system-agent-amd64
[INFO]  Successfully downloaded the rancher-system-agent binary.
[INFO]  Downloading rancher-system-agent-uninstall.sh script from https://192.168.2.48/assets/system-agent-uninstall.sh
[INFO]  Successfully downloaded the rancher-system-agent-uninstall.sh script.
[INFO]  Generating Cattle ID
[INFO]  Successfully downloaded Rancher connection information
[INFO]  systemd: Creating service file
[INFO]  Creating environment file /etc/systemd/system/rancher-system-agent.env
[INFO]  Enabling rancher-system-agent.service
Created symlink /etc/systemd/system/multi-user.target.wants/rancher-system-agent.service → /etc/systemd/system/rancher-system-agent.service.
[INFO]  Starting/restarting rancher-system-agent.service
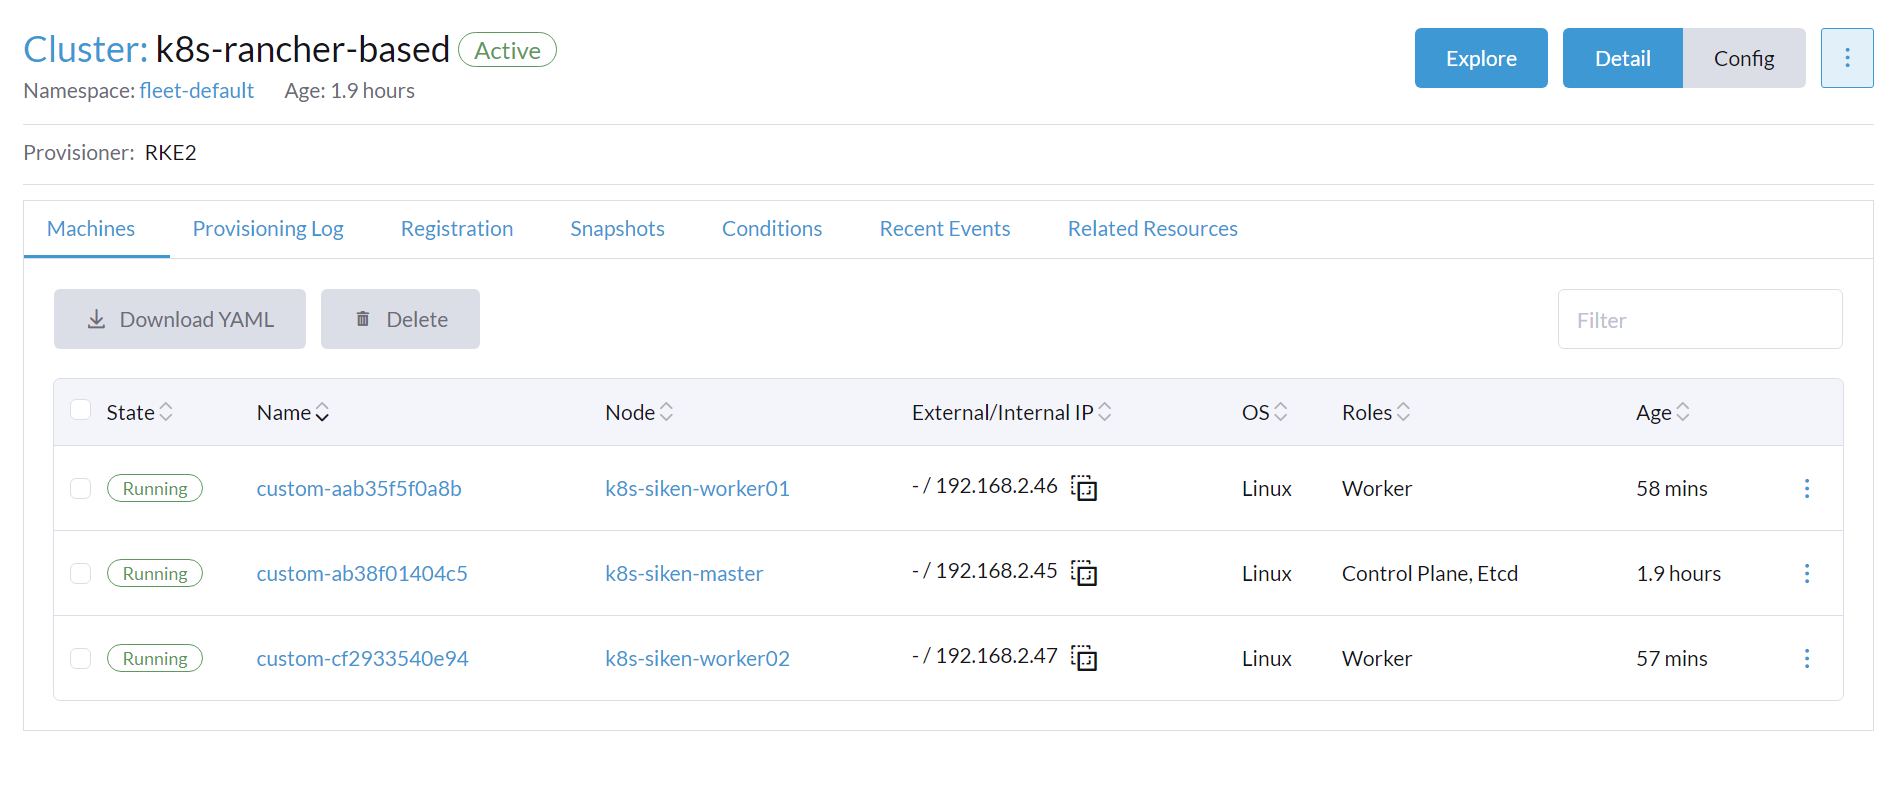
参加させたいノードとIPアドレスが表示されていること、StateがRunningとなっていることを確認します。
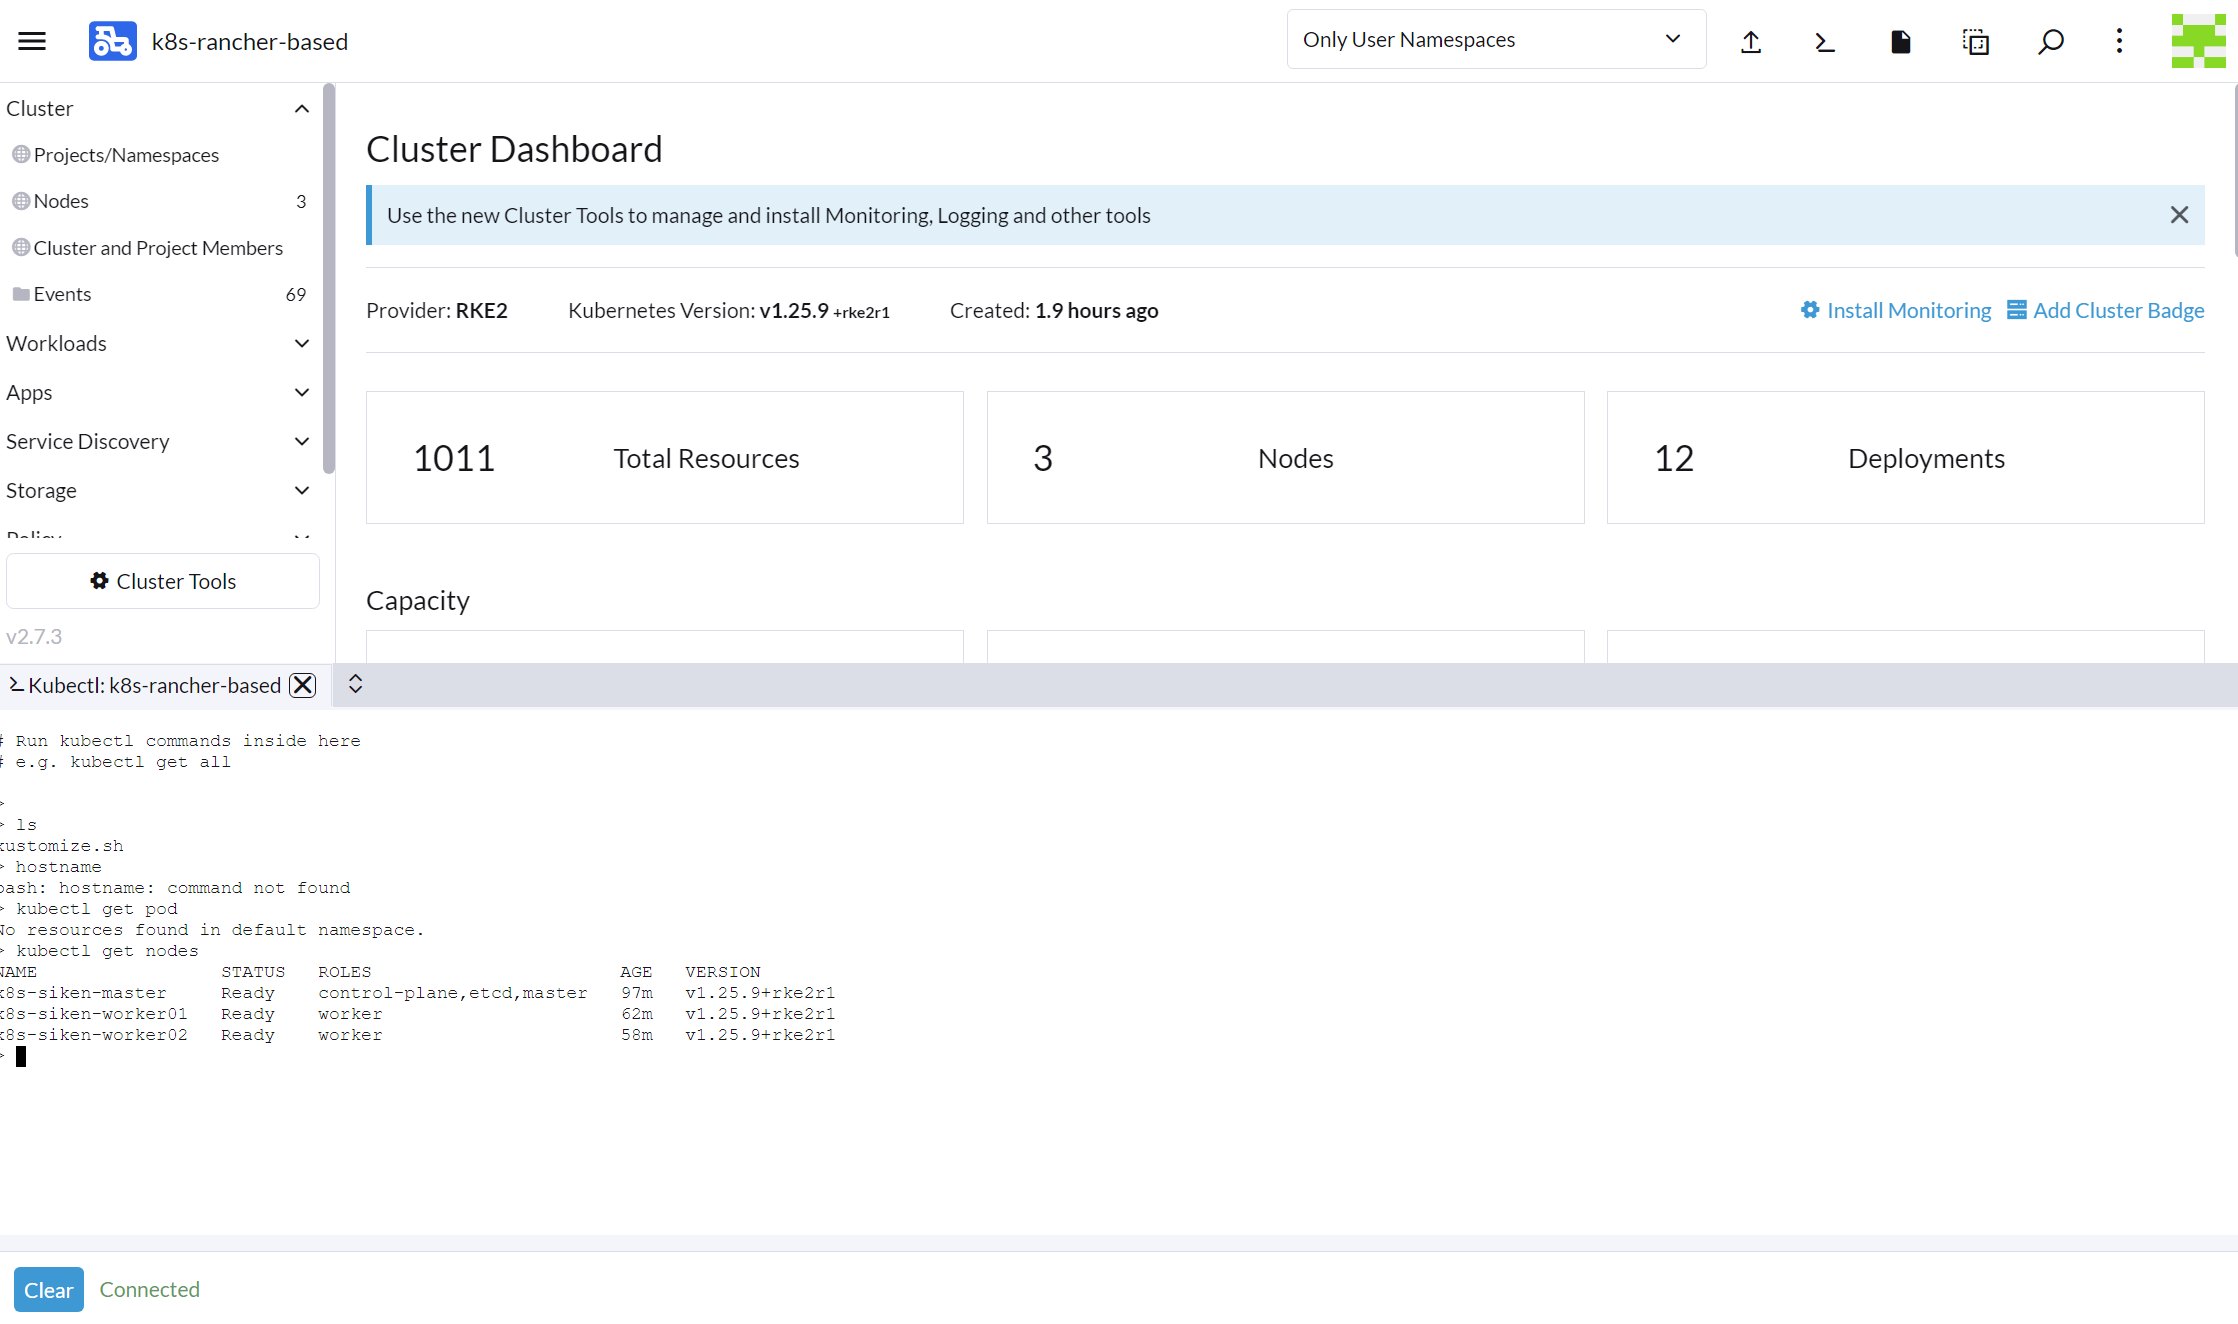
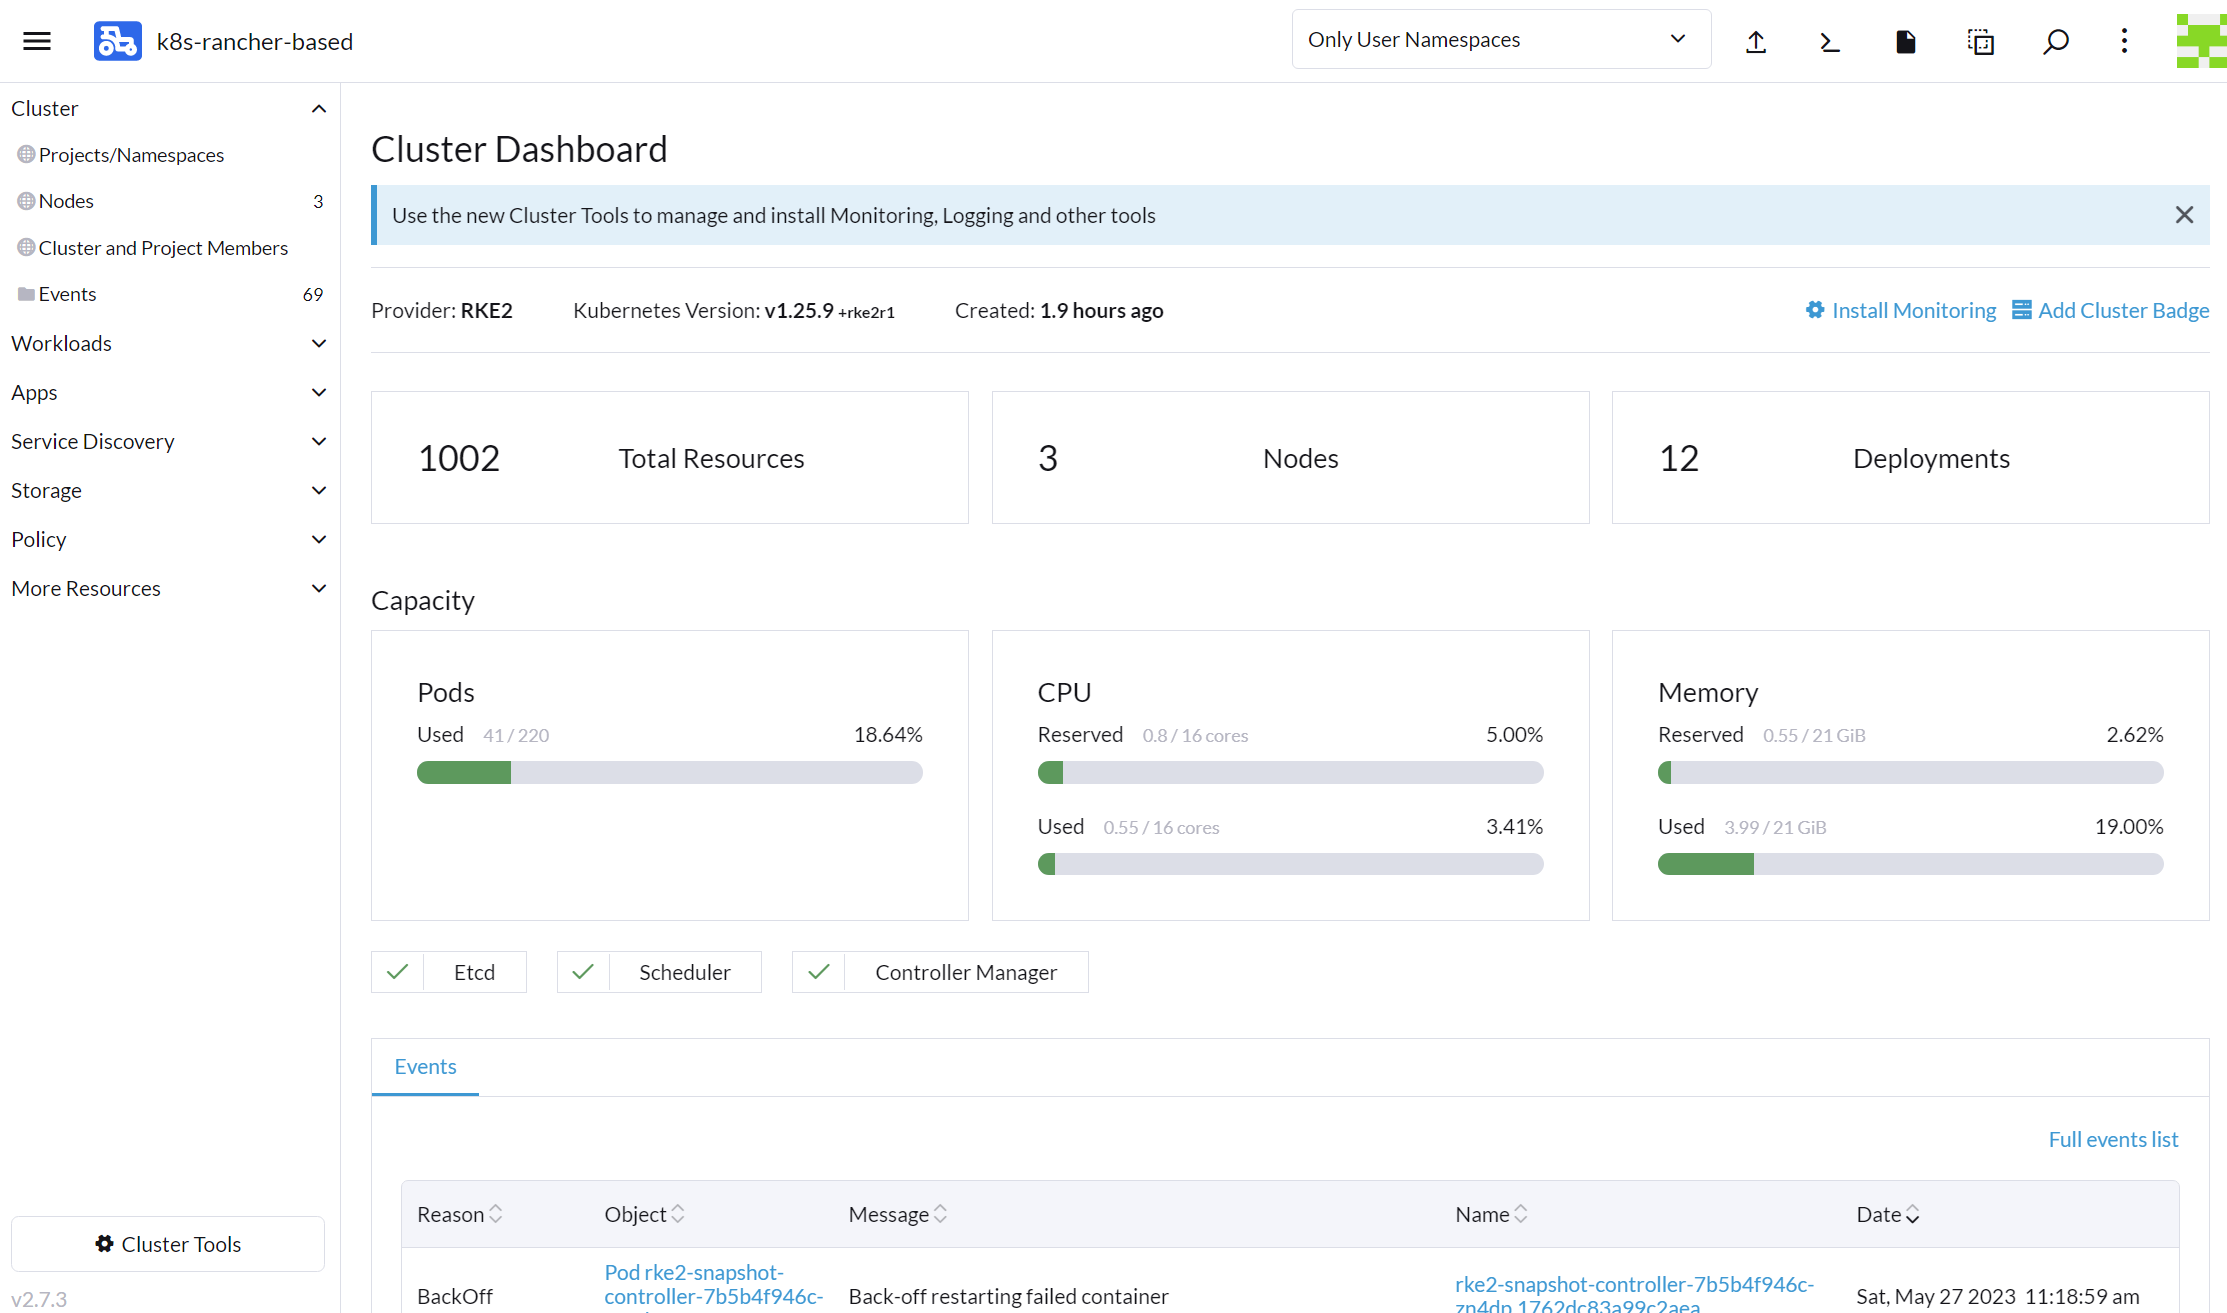
k8sクラスタの作成が上手くいっていると、rancher画面の左側のEXPLORE CLUSTERに作成したk8sクラスタの名前が表示されているはずです。これを押下します。

遷移した画面は以下です。
画面右上にアイコンが複数並んでおりますが、左から3番目の【>_】を押下します。
k8sクラスタを操作する為のシェルが画面下部から中部にかけて表示されます。
後は通常通りkubectlコマンドなどでk8sを操作できます。
比較的容易に構築出来ましたし、microk8sやkubeadm等と違い、環境構築する為のコマンドがほぼrancher側で完結するのは便利だと思いました。