こんにちは。
株式会社クラスアクト インフラストラクチャ事業部の大塚です。
前回、DjangoのDeleteView/CreateView周りの実装方法をToDo Webアプリを作成しながら確認しました。
今回は同じTodo webアプリに機能を追加していく形でUpdateViewを実装していきたいと思います。前回の記事は以下となりますので、併せて参考にしていただければと思います。
Github
今回のコードは以下で確認できます。
適宜ご覧頂ければ幸いです。
環境構築
環境イメージ
updateTestPJという名前のプロジェクトを作成し、todoAppという名前のアプリケーションを作成しております。
ファイル単位で前回から増えたところはUpdateViewを実装するためのHTMLくらいかと思います。CSSに関しては今回は面倒だったのでCreateViewを実装しているHTML(ここではtodoCreate.html)で使用しているCSSを利用しています。コードベースではアプリ側のurls.pyやviews.pyに対して記載が増えています。

個人的に重要そうだと思う部分のメモ
todoApp/urls.py
from django.urls import path
from .views import todoListView, todoDetailView, todoCreateView, todoDeleteView, todoUpdateView

app_name = "todoApp"

urlpatterns = [
    path("list/", todoListView.as_view(), name="todoListPage"),
    path("detail/<int:pk>", todoDetailView.as_view(), name="todoDetailPage"),
    path("create/", todoCreateView.as_view(), name="todoCreatePage"),
    path("delete/<int:pk>", todoDeleteView.as_view(), name="todoDeletePage"),
    path("update/<int:pk>", todoUpdateView.as_view(), name="todoUpdatePage"),
]
- UpdateViewを実装する時もDetailViewやDeleteViewを実装させる時と同じように<int:pk>を指定してあげるといいようです。
todoApp/views.py
# todoApp views.py

from django.shortcuts import render
from django.views.generic import ListView, DetailView, DeleteView, CreateView, UpdateView
from .models import todoTable
from django.urls import reverse_lazy

class todoListView(ListView):
    template_name = "todoList.html"
    model = todoTable

class todoDetailView(DetailView):
    template_name = "todoDetail.html"
    model = todoTable

class todoDeleteView(DeleteView):
    template_name = "todoDelete.html"
    model = todoTable
    success_url = reverse_lazy("todoApp:todoListPage")

class todoCreateView(CreateView):
    template_name = "todoCreate.html"
    model = todoTable
    fields = ("title", "memo", "priority", "deadline")
    success_url = reverse_lazy("todoApp:todoListPage")

class todoUpdateView(UpdateView):
    template_name = "todoUpdate.html"
    model = todoTable
    fields = ("title", "memo", "priority", "deadline")
    def get_success_url(self):
        return reverse_lazy("todoApp:todoDetailPage", kwargs={'pk': self.object.pk})
- urlsでも記載の通り、viewsでもDetailViewやCreateViewと同じような記載で問題ないようです。ただ、success_urlに関しては少し書き方を変えています。
今回、UpdateViewを実装しているページでToDoの内容を更新した後、DetailViewを実装しているページにリダイレクトしてupdateがされているかをすぐに確認できるようにしたいと思っていました。その場合単純に'success_url = reverse_lazy("todoApp:todoDetailPage")'とか'success_url = reverse_lazy("todoApp:todoDetailPage int:pk")'みたいなことをしてもはじかれてしまいます。
単純にToDo一覧に戻るような機構で問題ないのであれば、CreateViewへの記載の通り'success_url = reverse_lazy("todoApp:todoListPage")'と書けばいいかと思います。
templates/todoDetail.html
{% load static %}

<!DOCTYPE html>
    <html lang="ja">

        <head>
            <meta charset="utf-8">
            <meta name="viewport", content="width=device-width">
            <title>{{ object.title }}</title>
            <link href="{% static 'todoStyleSheet/todoDetailStyle.css' %}" rel="stylesheet">
        </head>

        <body>
            <h1 class="title">{{ object.title }}</h1>
            <h3 class="sub-title">タスク詳細<h5 class="content">{{ object.memo }}</h5></h3>
            <h3 class="sub-title">タスク優先度<h5 class="content">{{ object.priority }}</h5></h3>
            <h3 class="sub-title">タスク完了期日<h5 class="content">{{ object.deadline }}</h5></h3>
            <div id="submit-form">
                <button type="button" class="btn" onclick="window.location.href='{% url 'todoApp:todoUpdatePage' pk=object.pk %}'">todo更新</button>
                <button type="button" class="btn" onclick="window.location.href='{% url 'todoApp:todoListPage' %}'">一覧に戻る</button>
            </div>
        </body>

    </html>
- ToDoの詳細を確認するDeitalViewを表示しているHTMLになりますが、このページからそのToDoの更新をかけるページに移動するためのコードとして'<button type="button" class="btn" onclick="window.location.href='{% url 'todoApp:todoUpdatePage' pk=object.pk %}'">todo更新</button>'を追記しています。object.pkとするようで、今開いているToDoのpkを取得し、そのToDoの更新ページに遷移できるようです。
templates/todoUpdate.html
{% load static %}

<!DOCTYPE html>
<html lang="ja">

<head>
    <meta charset="UTF-8">
    <meta name="viewport" content="width=device-width">
    <title>todo更新</title>
    <link href="{% static 'todoStyleSheet/todoCreateStyle.css' %}" rel="stylesheet">
</head>

<body>
    <div>
        <div class="header-container">
            <h1 class="title">task更新</h1>
        </div>
        <form method="post" action="{% url 'todoApp:todoUpdatePage' pk=object.pk %}" class="form-group">
            {% csrf_token %}
            <div class="task-create-form">
                <h3>タスク名</h3>
                <input class="task-create-content" type="text" placeholder="Title"
                    name="{{ form.title.html_name }}" value="{{ object.title }}" autofocus="" autocapitalize="none" maxlength="100" required="">
            </div>
            <div class="task-create-form">
                <h3>タスク詳細</h3>
                <textarea class="task-create-content" name="{{ form.memo.html_name }}" autofocus="" autocapitalize="none" maxlength="250" required="">{{ object.memo }}</textarea>
            </div>
            <div class="task-create-form">
                <h3>タスク優先度</h3>
                <select class="task-create-content" name="{{ form.priority.html_name }}" required="">
                    {% for value, label in form.fields.priority.choices %}
                        <option value="{{ value }}" {% if value == object.priority %}selected{% endif %}>{{ label }}</option>
                    {% endfor %}
                </select>
            </div>
            <div class="task-create-form">
                <h3>タスク完了期日</h3>
                <input class="task-create-content" type="date" placeholder="Deadline"
                       name="{{ form.deadline.html_name }}" value="{{ object.deadline|date:'Y-m-d' }}" autofocus="" autocapitalize="none" maxlength="250" required="">
            </div>

            <div id="submit-form">
                <button id="task-create-button" type="submit">task更新</button>
                <button type="button" class="btn" onclick="window.location.href='{% url 'todoApp:todoListPage' %}'">リストに戻る</button>
            </div>
        </form>
    </div>
</body>

</html>
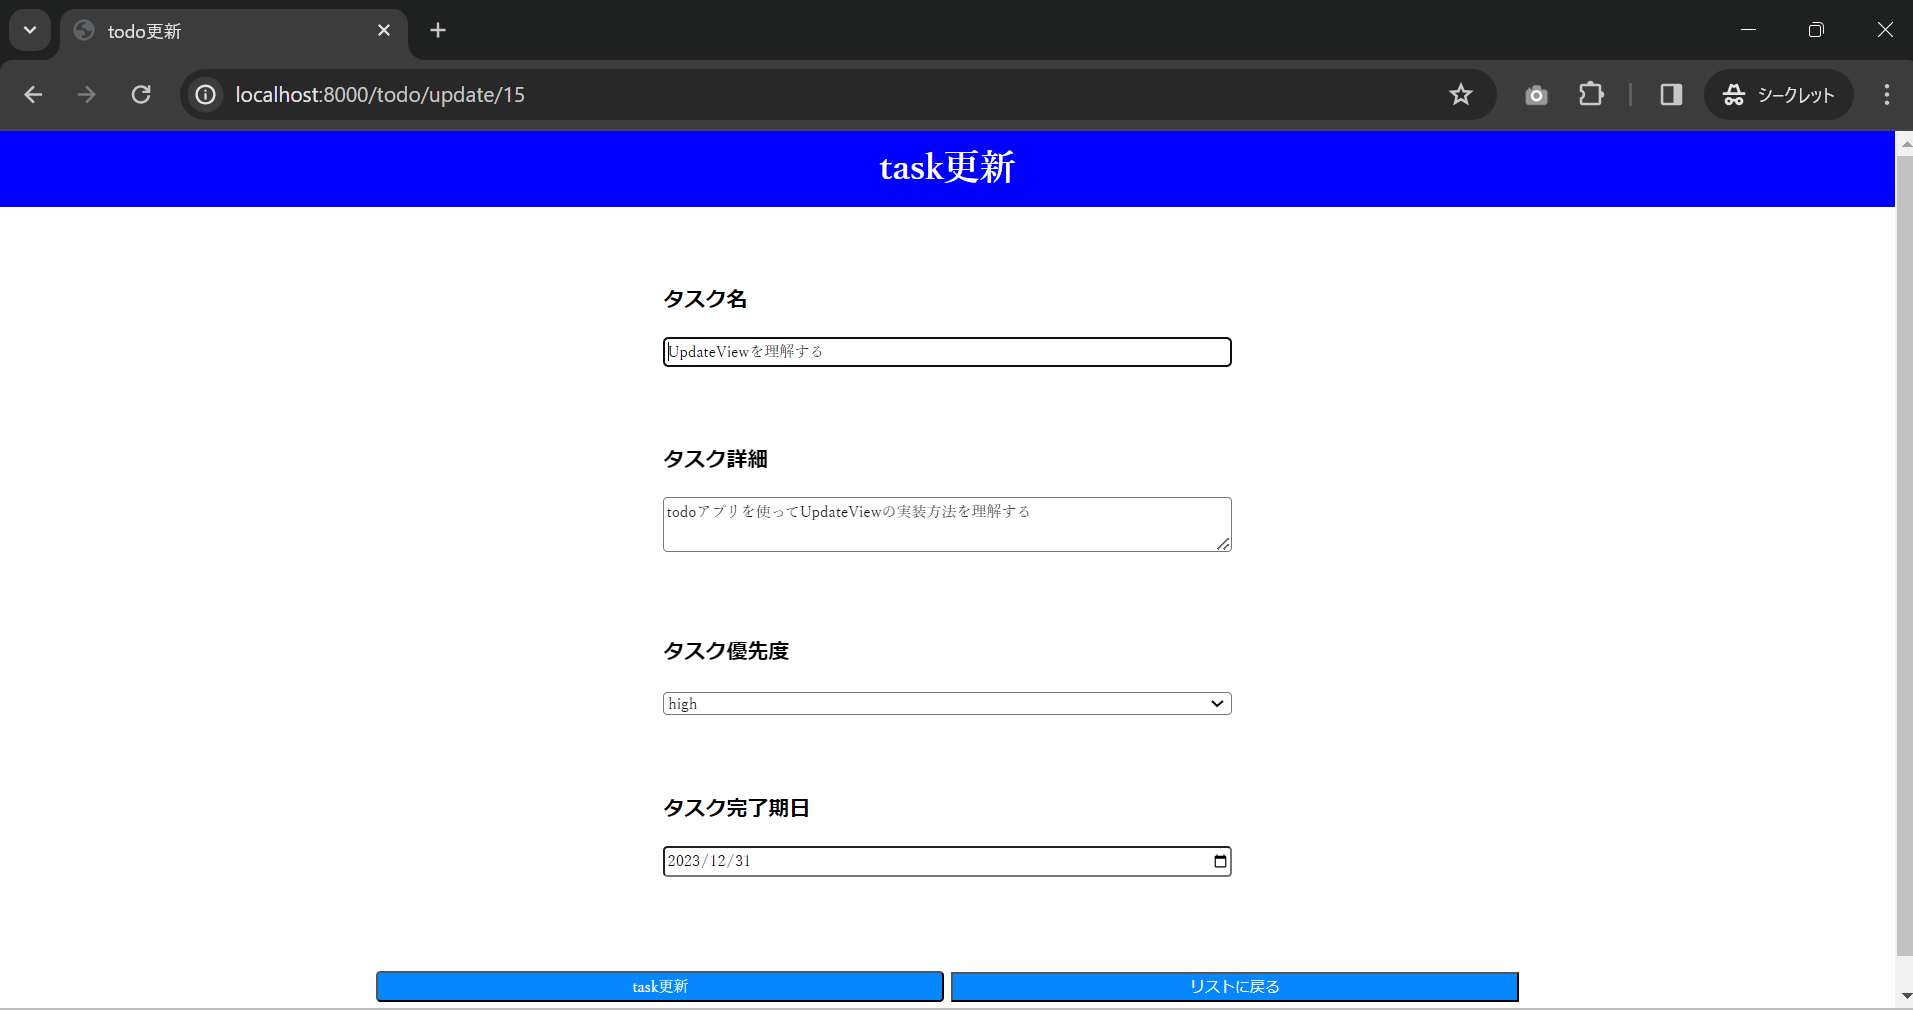
- もともと記入していたものをフォームに表示させるために、各フォームのvalue属性に対して{{ object.field_name }}を記載しています。
実行結果
まずListViewを実装しているページの出力結果です。各ToDoに対して更新ページに遷移するためのボタンを追加しています。

今回は以下のタスクを更新してみたいと思います。このページはDetailViewを実装しているページとなります。todo更新を押下します。

DetailViewを実装していたページで見えていた内容が更新画面でも最初から表示されていますね。これはUpdateViewを実装しているhtmlのvalueにもろもろの設定を入れているからですね。

内容を以下の様に変えてみます。task更新を押下します。

更新が上手くいくと、DetailViewを実装したページにリダイレクトされます。

ListViewを実装しているページでも更新されていることが確認できますね。
