はじめに
Node.jsアプリケーションを開発する際、ロギングは非常に重要な要素です。適切なロギングを行うことで、アプリケーションの動作を追跡し、エラーを迅速に発見し、デバッグが容易になります。この記事では、Node.jsで広く使用されているロギングライブラリ「Winston」を使って、カスタムのLoggerクラスを作成する方法を詳しく解説します。
Winstonとは?
Winstonは、Node.js向けの強力なロギングライブラリで、さまざまな「トランスポート」と呼ばれる出力先にログを記録できます。これには、コンソールやファイル、HTTPリクエスト、さらにはカスタムのトランスポートも含まれます。また、Winstonは、ログレベルやフォーマットのカスタマイズが非常に簡単で、開発者にとって非常に柔軟な設定が可能です。公式ドキュメントは以下のリンクから確認できます。
実装手順
1. Winstonのセットアップ
まず、Winstonをインストールしましょう。Node.jsプロジェクトのルートディレクトリで以下のコマンドを実行します。
npm install winston
2. プロジェクト構成のセットアップ
TypeScriptの設定はこちら
プロジェクトの構成は以下のように設定します。この構成は、ログファイルを適切に管理し、クラスやスクリプトの配置を整理するための一例です。
winston-example/
├── class/
│   └── Logger.ts
├── constants/
│   └── globals.ts
├── logs/
│   ├── combined.log
│   └── error.log
├── node_modules/
├── scripts/
│   └── example.ts
├── package-lock.json
├── package.json
└── tsconfig.json
3. Loggerクラスの作成
次に、Winstonを利用してカスタムLoggerクラスを作成します。このクラスは、異なるログレベル(info、warn、errorなど)を処理し、適切なフォーマットでコンソールとファイルに出力します。
import winston from "winston";
import globals from "../constants/globals";

class Logger {
  private logger: winston.Logger;

  constructor() {
    this.logger = winston.createLogger({
      level: "info",
      format: winston.format.combine(
        winston.format.timestamp(),
        winston.format.json()
      ),
      transports: [
        new winston.transports.File({
          filename: globals.ERROR_LOG_PATH,
          level: "error",
        }),
        new winston.transports.File({ filename: globals.COMBINED_LOG_PATH }),
      ],
    });
  }

  public info(msg: string) {
    if (!msg) return;
    const lines = msg.split("\n").filter(Boolean);
    for (const line of lines) {
      this.logger.info(`INFO: ${line}`);
      console.log("\x1b[34m%s \x1b[0m", `INFO: ${line}`);
    }
  }

  public warn(msg: string) {
    this.logger.warn(msg);
    console.log("\x1b[33m%s \x1b[0m", `WARNING: ${msg}`);
  }

  public error(msg: string) {
    this.logger.error(msg);
    console.log("\x1b[31m%s \x1b[0m", `ERROR: ${msg}`);
  }

  public task(msg: string) {
    this.logger.info(msg);
    console.log("\x1b[35m%s \x1b[0m", `TASK: ${msg}`);
  }

  public success(msg: string) {
    this.logger.info(msg);
    console.log("\x1b[32m%s \x1b[0m", `SUCCESS: ${msg}`);
  }
}

export default new Logger();
このLoggerクラスは、異なるログレベルに応じて色付きのコンソール出力と、適切なファイルへのログ保存を行います。
4. その他のファイル設定
globals.ts には、ログファイルのパスを定義します。
globals.ts
const globals = {
    ERROR_LOG_PATH: "logs/error.log",
    COMBINED_LOG_PATH: "logs/combined.log"
}

export default globals;
また、package.json と tsconfig.json の設定も重要です。package.json ではスクリプトの実行方法を指定し、tsconfig.json ではTypeScriptのコンパイラオプションを設定します。
package.json
{
  "name": "winston",
  "version": "1.0.0",
  "main": "index.js",
  "scripts": {
    "example": "ts-node scripts/example.ts"
  },
  "keywords": [],
  "author": "",
  "license": "ISC",
  "description": "",
  "devDependencies": {
    "@types/node": "^22.3.0",
    "ts-node": "^10.9.2",
    "typescript": "^5.5.4"
  },
  "dependencies": {
    "winston": "^3.14.2"
  }
}
tsconfig.json
{
  "compilerOptions": {
    "target": "es6",
    "module": "commonjs",
    "rootDir": "./",
    "outDir": "./dist",
    "esModuleInterop": true,
    "strict": true
  },
  "include": ["**/*.ts"],
  "exclude": ["node_modules"]
}
利用方法と効果
1. 実行スクリプト
Loggerクラスを利用するには、scripts/example.ts 内で以下のようにログを出力します。
import Logger from "../class/Logger";

Logger.success("success");
Logger.info("info");
Logger.task("task");
Logger.warn("warn");
Logger.error("error");
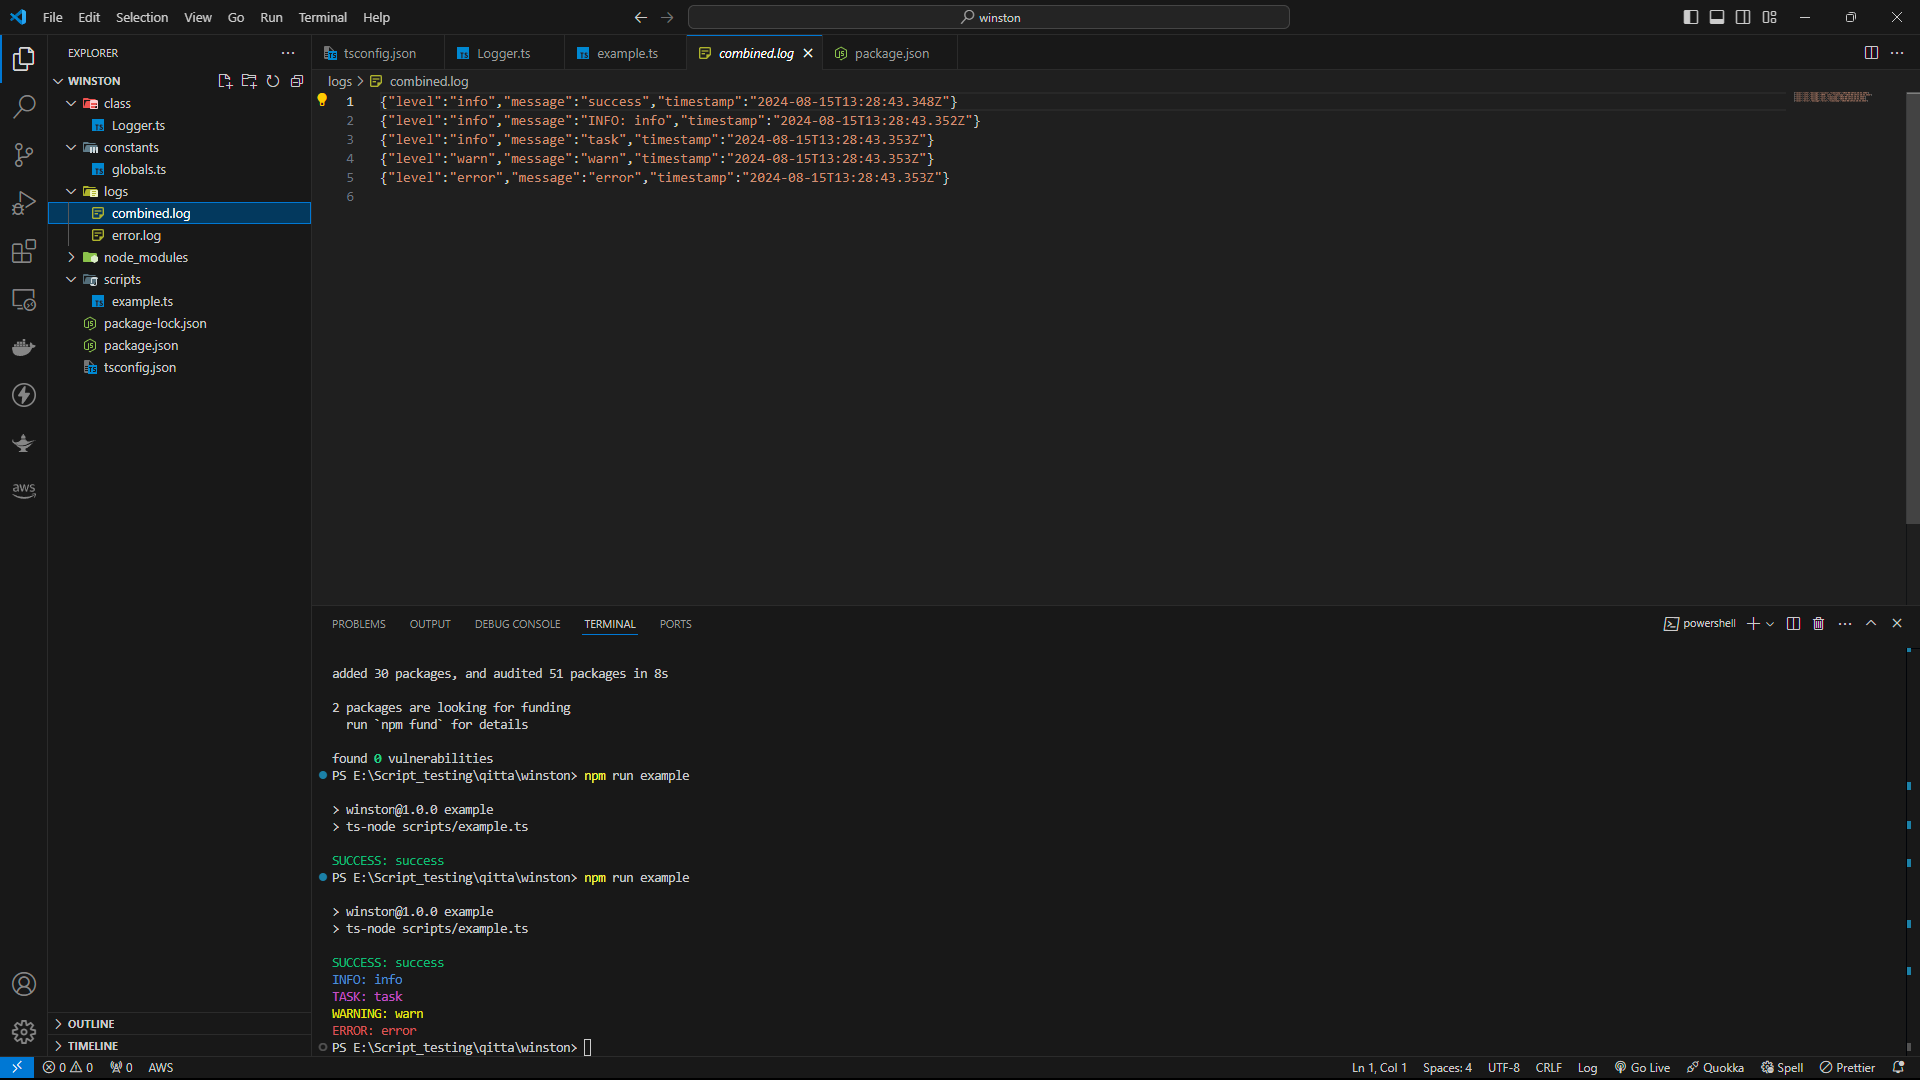
2. ターミナルの表示
実行すると、以下のようにターミナルに色付きでログが表示され、エラーと全体のログがそれぞれのファイルに記録されます。
ターミナルに以下のようにログが出力されます。

3. エラーログファイル
error.log には、エラーレベルのログのみが記録されます。

4. 統合ログファイル
combined.log には、全てのログが記録されます。
結論
ロギングはアプリケーションの健全な運用を支える重要な要素です。Winstonを利用することで、カスタムロガーを簡単に実装でき、必要に応じて柔軟にカスタマイズすることが可能です。この記事で紹介したLoggerクラスをベースに、自身のプロジェクトに最適なロギングシステムを構築してみてください。